How to Make Beach Waves with a Flat Iron: 8 Simple Techniques for Perfect Waves
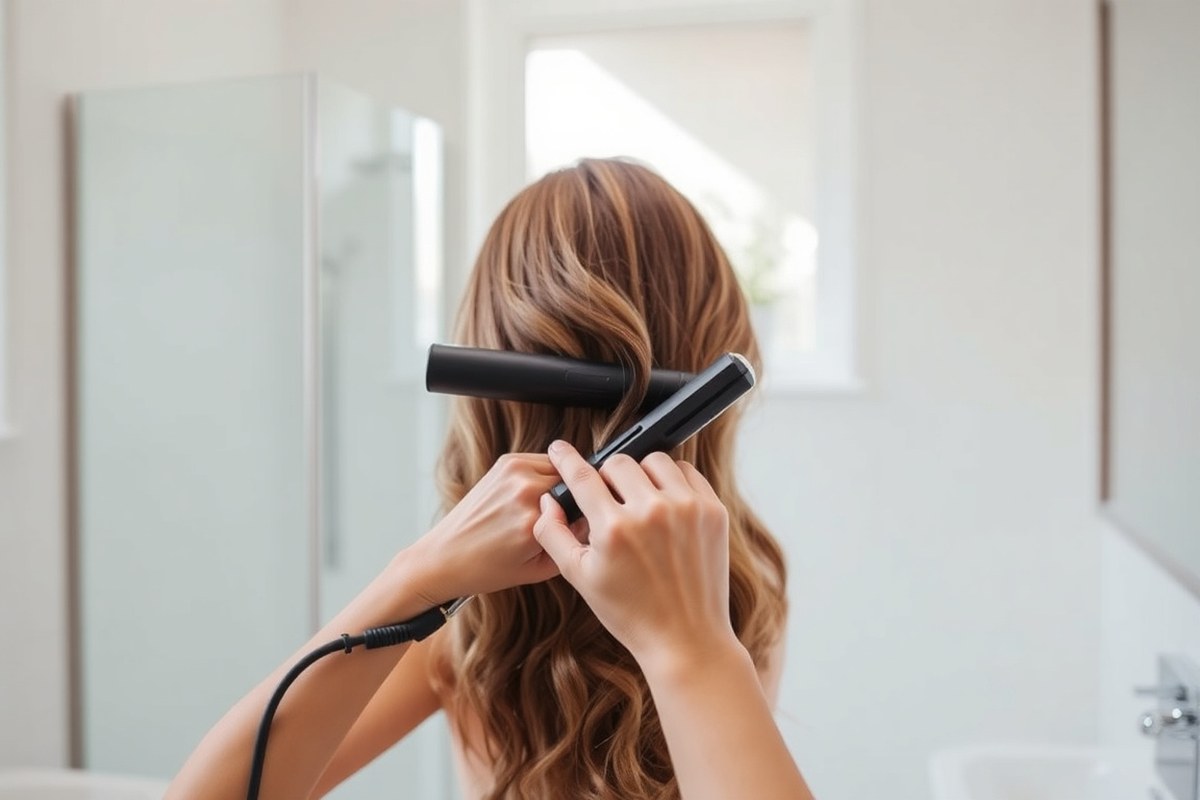
How to make beach waves with a flat iron is easier than you think. Use a small, 1-inch flat iron with rounded edges for smooth waves. Start by clamping a 1.Take a 5-inch section of hair in the middle.
Twist the iron 180 degrees away from your face. This creates natural bends that look like easy beach waves.
Make sure your hair is completely dry before styling to avoid damage. Adjust your flat iron temperature based on your hair type, medium heat usually works best. Hold the iron at your roots.
Move it slowly down the hair. This creates chunky waves without too much heat.
Key Takeaways
- Choose a 1-inch rounded flat iron for smooth, defined beach waves.
- Clamp 1.5-inch hair sections near the middle to start your waves.
- Twist the iron 180 degrees away from your face while styling.
- Always ensure your hair is 100% dry before using any heat tool.
- Set medium heat on the flat iron to prevent overheating and damage.
- Move slowly from roots to ends for natural, chunky waves.
How to Create Beach Waves Using a Flat Iron

Making beach waves with a flat iron works best with small sections for defined, long-lasting waves. Grab about one inch of hair at a time. The key is to bend your hair into an S shape.
Use a twisting motion with the flat iron. This starts the wave. This technique creates natural, beachy waves without the perfect curl look of a curling wand.
Use a flat iron about one inch wide with rounded edges. This helps your hair glide smoothly. It also forms soft bends.
Hold the iron at an angle. Twist it partially to curve your hair.
This creates the S wave look. Keep the heat medium to avoid damage, especially if your hair is fine or treated.
- Section your hair into small, one-inch strands for more control.
- Clamp the flat iron about halfway down the hair section to start the first bend.
- Twist the flat iron away from your face, wrapping the hair around the edge.
- Slowly glide the flat iron down the hair while maintaining the twist.
- Release the flat iron at the end to let the wave form naturally.
- Repeat on all hair sections, alternating twist directions if you want more texture.
- Run your fingers through your hair to loosen waves for a relaxed look.
Choosing the Best Flat Iron and Temperature Settings

A 1-inch flat iron works best for making beach waves. It lets you take 1-inch sections of hair and twist easily, creating natural bends. Wider irons are harder to curl and smaller irons take longer.
Flat irons heat from about 250°F to 450°F. Use lower heat for fine or thin hair, around 300°F to 350°F. Thick or coarse hair needs 350°F to 400°F to hold the wave without extra passes. High heat risks frying your hair, so avoid the highest settings.
The flat iron’s shape changes how your waves look. Flat irons bend hair vertically (up and down), giving textured, loose waves.
Curling irons bend hair horizontally (side to side), creating tighter curls. A straight iron’s more textured waves suit casual beach looks.
| Flat Iron Size | Ideal Section Width | Wave Type Created |
|---|---|---|
| 1 inch | 1 inch | Natural, loose waves with texture |
| 1.25 inch | 1 inch | Looser waves but harder to control |
| <1 inch | Less than 1 inch | Tighter waves, longer styling time |
To set your temperature, start low and add heat only if waves don’t hold. Use 300°F for fine hair. Use 350°F for normal hair.
Use up to 400°F for thick hair. Keep your iron moving and avoid high heat for long.
Press the flat iron gently but firmly to avoid extra passes and heat damage.
Preparing Hair Properly Before Heat Styling
Start with clean, dry hair before you use a flat iron for beach waves. Apply the right products to help waves hold and protect your hair. Make sure your hair is fully dry to avoid damage and get the best shape.
Heat Protectants to Use
Spray a heat protectant evenly over your hair before styling. Look for products labeled to protect up to 450°F, since flat irons often reach that temperature. Protectants prevent heat damage and keep hair feeling soft and smooth.
Don’t skimp on this step because heat can cause drying and breakage. Mist twice when your hair is thick or very long. Focus on the strands you plan to curl first.
Give the spray time to settle on the hair. Let the spray dry on its own.
Or blow-dry gently for 1 to 2 minutes. Avoid using high heat during blow-drying.
Styling Products for Texture and Hold
Apply a texturizing spray or light mousse before heat styling. This helps waves stay longer. Use just a small amount to avoid weighing hair down.
You can spritz dry shampoo to add grip if your hair feels oily or slippery. These products help waves keep a natural, tousled look.
Applying a styling cream after the protectant gives more definition without stiffness. The cream also smooths frizz, making waves look polished. Avoid heavy gels or serums that weigh hair down and flatten waves.
- Heat protectant spray with up to 450°F protection
- Light mousse or texturizing spray for hold and texture
- Dry shampoo to absorb oil and add grip
- Styling cream for extra wave definition
- Avoid heavy oils or gels that cause limp hair
Try applying mousse first for volume and then a light spray for texture. Customize based on your hair’s thickness and how firm you want your waves.
Drying Hair for Best Heat Styling Results
Make sure your hair is totally dry before using a flat iron. Wet hair can steam and get damaged. Use a blow-dryer if needed before styling.
Use a blow dryer or air dry until there is no dampness inside strands. Damp hair causes waves to fall flat or look limp.
Use a round brush to smooth your hair during blow drying. Aim for a sleek finish with the blow dryer. This helps create a smoother base for curling.
Rough drying with hands or towels can create frizz and uneven waves. Drying time varies but usually takes 10 to 20 minutes for medium-length hair.
8 Techniques to Customize Your Flat Iron Beach Waves
Different methods can give your beach waves unique shapes and textures. You control curl size by changing how you hold the flat iron. Changing the direction you twist also changes the wave’s look.
Try both to find your style. These eight techniques help you find the exact beach wave look you want.
Twist and Pull Method
Start with a small section of hair about 1 inch wide. Place the flat iron near the middle of the hair strand. Twist the iron while slowly pulling it down toward the ends.
Keep your grip steady as you do this. This creates loose, natural-looking waves with gentle curves.
Move the flat iron slowly and smoothly to set the wave. Moving it too fast means the wave won’t hold well.
Take your time for best results. This works great for medium to long hair and gives a relaxed, undone vibe.
Bend Your Wrist Technique
Bending your wrist while sliding the flat iron down shapes the wave’s pattern. You curve your wrist inward or outward to make soft bends rather than tight curls. It looks like a gentle S or slight ripple along the hair strand.
A small wrist bend every few seconds changes the angle. This works best on shoulder-length hair and adds some texture without too much volume.
Starting with Braids or Pin Curls
Before using the flat iron, braid your damp hair or twist it into pin curls. Wait for your hair to dry completely, then release the braids or curls. Run your flat iron over sections to soften and reshape your waves with heat.
This method helps set waves without direct, constant heat on the entire hair. It’s great for thick hair or when you want loose, tousled waves that last all day.
Crafting S-Shaped Waves
S-shaped waves look like gentle waves rolling through your hair. To make them, clamp a small hair section with your flat iron. Slide the iron down the strand in a zigzag pattern.
Bend your wrist slightly with each turn for a natural wave. This creates a loose wave shape.
This keeps the hair from curling too tight. You get natural beach waves that look easy and lived-in, perfect for casual days.
Twisting Away from Your Face
Always twist the flat iron outward, away from your face. Rotate the iron slowly as you pull the hair down. This makes your face look open and the waves flattering.
Use your wrist and fingers facing you for a clockwise motion while styling one side. This tip helps every wave flow naturally and frames your face soft and pretty.
- Use 1-inch hair sections for best results
- Keep flat iron heat between 300°F and 350°F for safe styling
- Move slowly when twisting or bending the iron
- Start at least 2 inches from roots to avoid heat damage
- Try braids or pin curls for gentler wave sets
- Twist the iron outward to frame your face
- Use wrist bending for subtle waves and texture
How to Protect Hair from Heat Damage While Styling
Heat damage happens when your hair gets too hot and dries out. Using a flat iron without protection can make hair brittle and cause breakage. To stop this, always use a heat protectant spray or serum before you start styling.
Choose products with ingredients like silicones or natural oils. These coat the hair and create a barrier from heat. Some heat protectant sprays cost between $10 and $20.
These sprays can last a few months. How long depends on how often you style.
The right temperature depends on your hair type. Fine or damaged hair should stay below 300°F. Normal hair can handle 300°F to 350°F. Thick or curly hair needs 350°F to 400°F. Using the lowest effective heat reduces damage risk.
- Apply heat protectant evenly on dry hair before flat ironing
- Don’t clamp the flat iron on the same spot for over 5 seconds
- Keep your hair sections thin for even heat distribution
- Open and close the flat iron smoothly, don’t drag it roughly
- Avoid overlapping sections to prevent double exposure to heat
- Let your hair cool down naturally after styling before touching it
Cover the whole plate with your hair during each pass to avoid hot spots. Moving the iron too slowly or redoing the same section again can cause extra damage. Using a wide-tooth comb before styling helps you avoid tangles and uneven heating.
Always check your flat iron’s temperature setting before use. Don’t guess or rely on the default.
Some people apply serums after styling for extra shine. But skip if your hair feels heavy.
Also, deep condition once a week if you heat style regularly. It adds back moisture and keeps strands stronger.
Common Mistakes and How to Fix Them Quickly
Uneven waves or frizz happen when hair prep is missing. The flat iron temperature may also be wrong. Both can cause problems for your style.
The iron being too hot can burn the hair’s surface. This causes frizz. Too low heat means waves may not form or hold well.
Holding the flat iron too long on one part is bad. It makes tight, uneven sections. That ruins the loose beach wave look.
Tight waves happen from using small hair sections or twisting much. This creates a less natural wave. Loose waves happen if you move the iron too fast.
Or if the hair section is too thick. Fix tight waves by releasing the curl with fingers or a wide-tooth comb after cooling. For loose waves, try smaller sections and slower iron movement the next time.
Waves that don’t hold often lack proper cooling or product support. Hair should cool completely before touching it to lock in the shape. Without a hold spray or light styling cream, waves fall flat after a few hours.
Using the right product helps your waves last. Let your hair cool for about five minutes after styling.
- Use 1-inch sections for loose, natural waves.
- Set flat iron between 300°F and 350°F for most hair types.
- Apply heat protectant to prevent frizz and damage.
- Hold the flat iron on hair for 5 to 7 seconds max.
- Let hair cool completely before running fingers through waves.
- Use a light hairspray or sea salt spray to hold waves.
- Comb through waves gently with fingers, not a brush.
Fix frizz by adding a small drop of smoothing serum or oil after styling. Touch up waves that break fast with a quick flat iron pass. Focus on loose strands only.
Watch your technique during practice to avoid burning your fingers or overheating thin hair sections. With trial and error, you’ll find what suits your hair and style better.
How to Maintain and Refresh Your Beach Waves
Protect your waves by letting them cool completely before touching them. Heat forms a cast from your styling products, locking the waves in place. After cooling, gently comb through your hair to soften the waves and avoid stiffness.
Using light finishing products helps keep waves looking fresh without weighing them down. A sea salt spray adds texture and hold while keeping hair soft. A lightweight hairspray stops waves from falling but won’t make them crunchy or sticky.
- Spray a light mist of sea salt spray for texture and hold
- Apply a small amount of flexible hold hairspray to lock waves
- Secure waves with bobby pins for longer-lasting shape
- Sleep on a silk pillowcase to reduce frizz overnight
- Refresh waves by scrunching dry hair with a little water or sea salt spray
- Use your fingers or a wide-tooth comb to gently reshape waves
- Avoid reheating hair too often to prevent damage
To refresh waves without heat, spray a little water on hair. You can also use sea salt spray. These help bring waves back gently.
Then squeeze and scrunch your waves by hand. This brings back the shape and texture without needing the flat iron again.
Waves can lose bounce overnight. Sleeping on a silk pillowcase helps keep waves. Wearing a loose bun also preserves them.
Avoid rough cotton pillowcases that cause frizz. When you wake up, finger-comb your hair or spray a bit of product to tame flyaways.
Which Hair Types and Lengths Work Best with Flat Iron Waves?
You can create beach waves with a flat iron on almost any hair type or length. Your hair’s texture affects heat settings and how you twist the iron. Adjusting your approach helps you get soft, natural-looking waves that last.
Fine or Thin Hair Considerations
Fine hair is more delicate and heats up quickly. Use a lower temperature, around 300°F, to avoid damage or unwanted straightening. Take smaller sections to hold the wave shape easily without weighing hair down.
Work quickly but gently. Clamp the flat iron on your hair, then slowly glide it down following your finger’s curve. Stop a few inches from the ends to keep them soft and avoid breakage.
Use a heat protectant spray to guard your thin hair against heat damage.
Thick or Coarse Hair Tips
Thick or coarse hair needs more heat to hold waves well. Temperatures between 350°F and 400°F work best. Larger sections help you style faster, but slower glides ensure the wave sets deeply.
Clamp the iron firmly on your hair. Angle it under first. Then angle it over as you slide down the length.
This motion creates loose, tousled waves instead of tight curls. You might need to go over some sections twice.
Don’t rush; thick hair takes longer to style but holds waves longer.
Long vs Short Hair Techniques
Long hair lets you create full beach waves but needs more time and patience. Use the flat iron in small sections and glide slowly from mid-shaft to near the ends. Avoid clamping too close to the scalp for safety.
Short or medium hair requires less time and smaller waves for a natural look. Messy waves work well here.
Slightly angle the iron under and over as you move down each section. This adds texture without looking overdone.
Professionals can help if your hair is very short or very thick. They have the right tools and know how to tailor waves to your hair’s unique needs.
Step-by-Step Action Plan for Beach Waves with a Flat Iron
Use this plan to get natural-looking waves while keeping your hair safe and healthy. Follow each step closely to see the best results.
- Before You Start: Wash and dry your hair completely. Your hair should be free of moisture for even heat styling and better wave hold.
- Right Before Styling: Apply a heat protectant spray thoroughly on dry hair. It shields your hair from damage and keeps it smooth.
- During Styling: Set your flat iron to 300°F for fine hair. Use 350°F to 400°F if your hair is thick. Adjust the temperature to avoid burns and maintain health.
- While You Work: Divide your hair into small sections of about 1-inch wide. This helps create consistent waves throughout your hair.
- Styling Waves: Clamp the iron near your roots. Twist it away from your face. Slowly glide down the hair section. Repeat until all sections are wavy.
- Right After Styling: Let your waves cool for 5 minutes without touching them. Cool waves set better and last longer.
- Finishing Touches: Run your fingers through your hair gently to loosen the waves. Avoid brushing to keep waves intact and natural.
- Later in the Day: Spray a bit of water or sea salt spray. Then scrunch your hair lightly to refresh waves. This brings back the beachy texture without restyling.
Frequently Asked Questions
Can You Make Beach Waves with Any Flat Iron?
Most flat irons can create beach waves. But a small, rounded edge flat iron works best. A 1-inch flat iron with beveled edges helps you get smooth, natural waves.
How Long Does It Take to Make Beach Waves with a Flat Iron?
It usually takes about 15 to 20 minutes, depending on your hair length. Using smaller sections speeds up the process while giving you more defined waves.
Do You Need to Use a Heat Protectant Every Time?
Yes, always apply a heat protectant to shield your hair from damage. This helps keep your hair healthy and makes the waves last longer.
Can You Use a Flat Iron on Wet or Damp Hair?
No, using a flat iron on wet or damp hair can cause damage. Make sure your hair is completely dry before styling for safe, effective waves.
What Parts of the Hair Should You Wave for a Natural Look?
Focus on mid-lengths to ends for the best beach wave appearance. Avoid curling the roots for a more easy, lived-in style.
Is It Better to Comb or Brush Hair Before Styling with a Flat Iron?
You should comb hair gently to remove tangles before styling. Use a brush after curling to loosen the waves for a natural finish.
Final Thoughts
Making beach waves with a flat iron can give you that easy look at home. Take care with heat and follow simple steps for natural waves. Try the plan today for waves you’ll enjoy all day.