How to Make Homemade Shampoo: Simple Steps and Expert Tips That Work
How to make homemade shampoo is easier than you might think. You just need a few simple ingredients and a clean container. Start with a gentle base, like castile soap.
Use liquid soap with no palm oil. This keeps your shampoo natural.
Mix oils, herbs, or essential oils to match your hair type or scalp needs. Keep your batches small and store them in the fridge to keep the shampoo fresh. That way, you avoid waste and can test how your scalp responds.
Watch out for preservatives, homemade shampoo usually won’t last long without them. Refrigerate what you make and use it within 4 to 6 weeks. Testing one ingredient at a time helps you spot any irritation early.
Key Takeaways
- Use castile soap or glycerine as a gentle shampoo base.
- Add essential oils like tea tree oil for dandruff control.
- Make small batches to keep your shampoo fresh and safe.
- Store homemade shampoo in the refrigerator between uses.
- Test new ingredients on skin for 24 hours before use.
- Choose ingredients based on your hair type and scalp condition.
How to Make Homemade Shampoo Step by Step
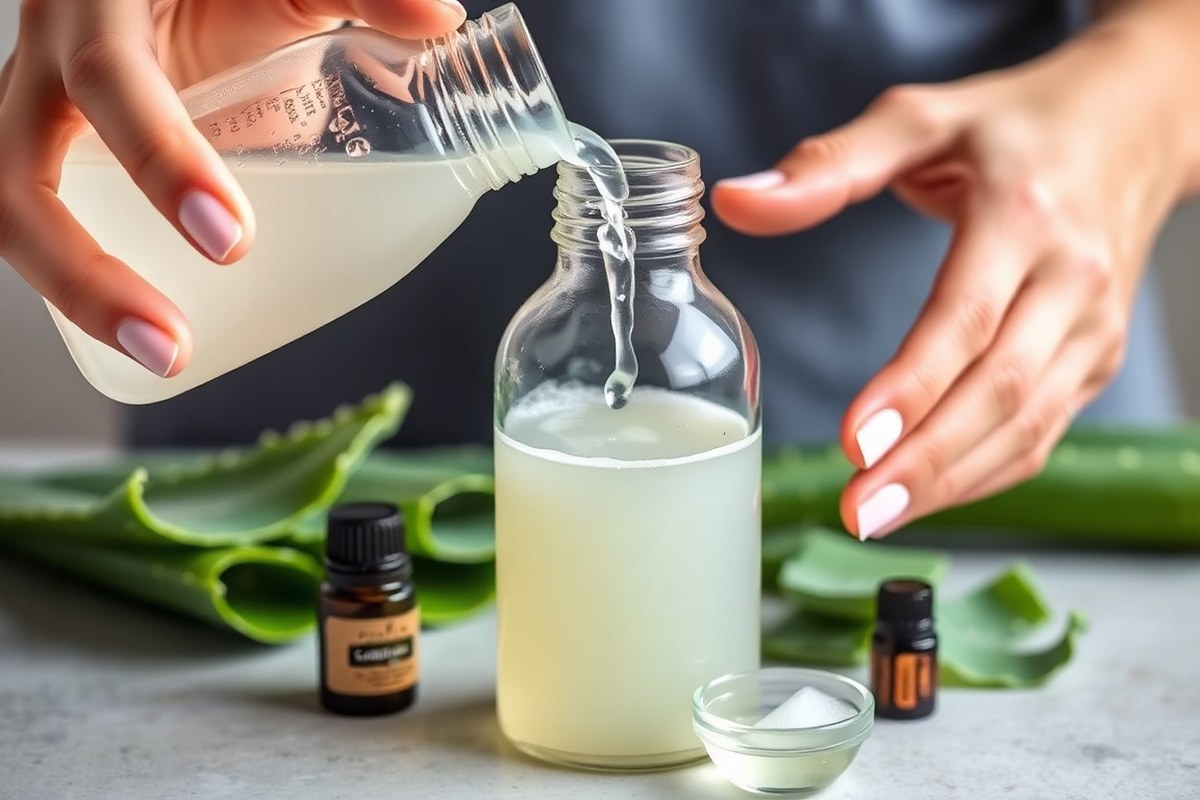
You need just a few tools and simple ingredients to make homemade shampoo. Use a digital scale for precise measuring and a glass bottle to store your shampoo safely. Mixing bowls and a whisk or spatula work well to blend ingredients evenly.
Follow these steps to make a natural shampoo. Use castile soap, carrier oil, and essential oils. It will be gentle on your hair and scalp.
Adding glycerine helps thicken the mix while essential oils add benefits and scent. Measure carefully and mix in the right order for best results.
- Weigh 1 cup of liquid castile soap. Use a digital scale or measuring cup. This forms the cleansing base of your shampoo.
- Measure 1 tablespoon of carrier oil. Choose coconut, argan, or olive oil for moisturizing. Add it to the soap for smoothness and nourishment.
- Add 1 teaspoon of vegetable glycerine. This keeps your shampoo from being too runny and adds moisture.
- Mix the ingredients gently but thoroughly. Use a whisk or spatula, stirring just enough to combine without creating bubbles.
- Add 10 to 15 drops of essential oil. Use lavender, rosemary, or tea tree oil. Be cautious with amounts to avoid irritation. These oils add fragrance and special hair benefits.
- Pour your shampoo into a clean glass bottle. Use a funnel to avoid spills. Make sure the bottle seals tightly to keep the shampoo fresh.
- Store your shampoo in a cool, dry place. Keeping it away from heat and light helps preserve its ingredients and extends shelf life.
You can adjust the oil amount if your hair feels too greasy or dry. Try less oil for fine hair or a bit more for thick hair.
Avoid adding too many essential oils. 10 to 15 drops per cup works well and keeps your scalp safe.
Check your shampoo before each use. Separation or smell changes mean it might need to be remixed or replaced. Your homemade shampoo cleans without harsh chemicals.
It needs just simple care to work well. This helps keep your hair healthy over time.
Which Ingredients Work Best for Homemade Shampoo?
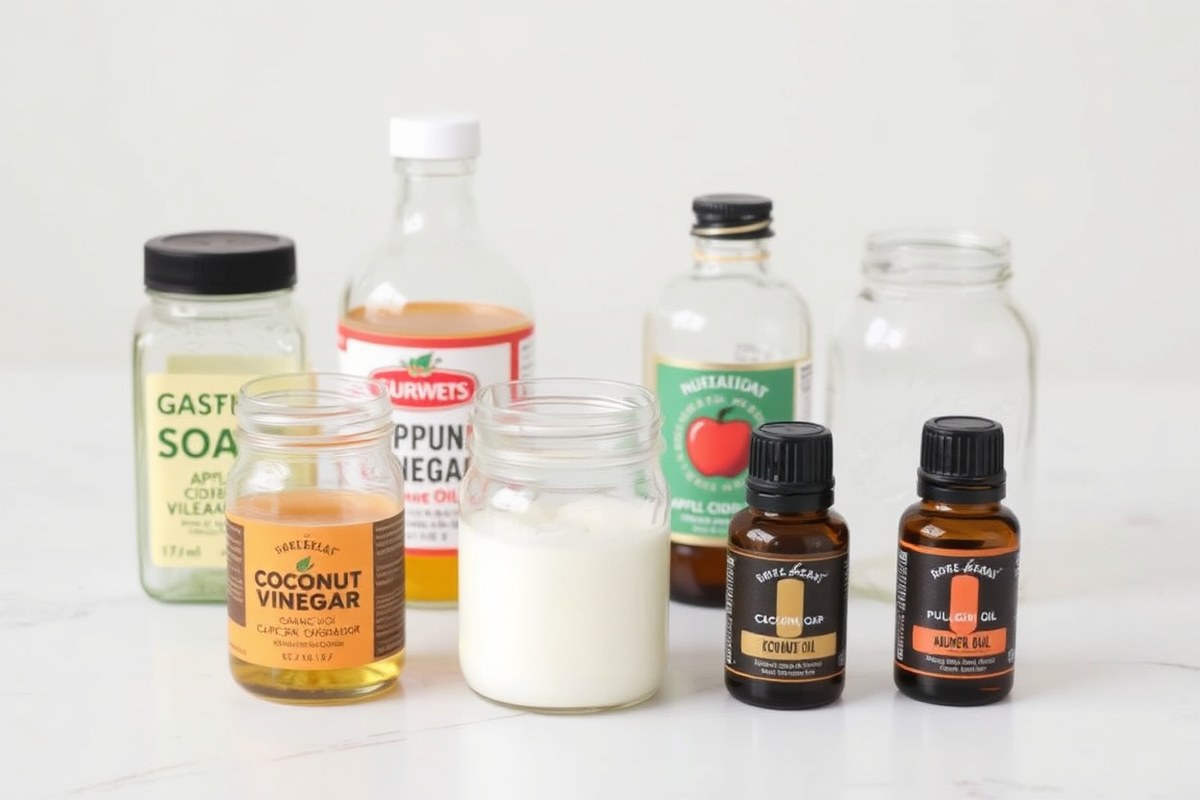
Liquid castile soap is the main cleansing agent in most homemade shampoos. It’s gentle, plant-based, and soap-like but made without harsh chemicals. Castile soap cleans hair well without stripping natural oils, making it popular for all hair types.
Oils like coconut and argan improve shampoo by adding moisture and softness. Coconut oil penetrates hair to reduce breakage and frizz.
Argan oil is rich in antioxidants and vitamin E, helping protect and shine color-treated hair. Use just one to two teaspoons per 8-ounce shampoo batch to avoid greasiness.
Apple cider vinegar softens hair and balances scalp pH, which can control dandruff and itchy scalp. Aloe vera soothes and hydrates, ideal for dry or sensitive scalps. Add one to two tablespoons of apple cider vinegar to rinse your hair.
Or mix a tablespoon of aloe vera gel directly into your shampoo. These methods help balance hair naturally.
Essential oils can support scalp health and add fragrance. Rosemary and peppermint brighten thinning hair and freshen the scalp. Tea tree oil is great for oily or dandruff-prone scalps due to its antifungal action.
Use 10 to 15 drops of essential oils per 8-ounce batch. Always dilute them in your shampoo first. This prevents irritation on your scalp.
Choose ingredients based on your hair’s specific needs. Curly hair benefits from coconut milk and aloe for hydration and frizz control. Hair that is fine or thinning needs a gentle shampoo base.
Use castile soap plus apple cider vinegar for cleaning. Add rosemary oil to boost volume.
For sensitive scalps, oat milk and calendula with aloe vera make a gentle shampoo. Color-treated hair needs chamomile tea base with argan oil and vitamin E for gentle care.
Start with small shampoo batches to see how your hair reacts. This helps avoid wasting ingredients or causing damage. Make bigger batches once you know it works.
Homemade Shampoo Variations for Different Hair Types
Adjusting homemade shampoo recipes is easy once you know your hair type. Dry hair needs moisture and gentle cleansing. Oily hair requires balancing oil while keeping it fresh.
Sensitive scalps benefit from soothing and mild ingredients. You can swap or add ingredients to match these needs.
Recipes for Dry and Damaged Hair
Dry hair needs extra hydration to avoid breakage and frizz. Use gentle, moisturizing ingredients like aloe vera juice or coconut milk instead of plain water. Add oils like argan or jojoba to help seal moisture into the strands.
Castile soap is a good base but choose a mild version to avoid stripping oils. Add 1 tablespoon of honey or glycerin per cup of shampoo for added softness. Use essential oils like lavender or chamomile, which calm dryness and support scalp health.
Formulas for Oily and Acne-Prone Scalps
Oily hair requires a lighter shampoo that doesn’t weigh hair down. Cut back on oils for natural cleansing and pH balance. Use apple cider vinegar diluted in water.
It helps keep your scalp healthy. Lemon juice also helps reduce excess oil and leaves hair feeling fresh.
Add a few drops of tea tree or rosemary oil. These fight bacteria on your scalp. They also help control oil build-up.
Keep your shampoo formula thin by using more liquid like herbal water or green tea. This helps rinse oil away without drying your scalp.
- Use 1 part castile soap to 3 parts water or herbal infusion
- Add 1 teaspoon apple cider vinegar for scalp balance
- Use tea tree oil sparingly, limit to 3 to 5 drops per cup
- Skip heavy oils like coconut or olive oil
- Try aloe vera gel to soothe without excess moisture
Keep the pH around 4.5 to 5.5 to avoid scalp irritation. Overuse of oils or essential oils can cause buildup or sensitivity. Adjust amounts based on how your scalp reacts over two weeks.
Blends for Sensitive or Itchy Scalps
Use very gentle liquid bases like chamomile or calendula tea instead of plain water. These help soothe itching and reduce inflammation. Avoid harsh surfactants, sticking to castile soap or mild soaps without fragrance.
Essential oils are helpful but use very small amounts. Lavender, tea tree, or peppermint oils are common choices but test for sensitivity first. Add 1 to 3 drops per cup of shampoo and discontinue use if irritation appears.
- Soak herbs like chamomile before adding to shampoo
- Use glycerin or honey sparingly for moisture without stickiness
- Choose unscented castile soap to reduce chemical irritants
- Limit essential oils to 1-3 drops per cup maximum
- Consider oat straw or aloe vera gel for extra soothing
Let the shampoo rest for 24 hours after mixing to blend ingredients well. Store in a cool, dark place to keep the natural extracts fresh. Using a patch test on your skin before full use helps avoid unwanted reactions.
What to Expect When Switching to Homemade Shampoo
Your hair might feel greasy or heavy when you start using homemade shampoo. This happens because your scalp needs time to adjust. Commercial products have chemicals.
Natural ingredients are gentler but require patience. Your scalp’s oil production could change during this time. So expect some difference in hair texture.
The adjustment phase usually lasts about two to four weeks. This timeline depends on your hair type and how long you used commercial shampoo before switching.
During this period, you might notice your hair feels oilier or drier than usual. But that’s part of the process.
To make the shift smoother, try alternating between homemade and commercial shampoo. Use homemade shampoo one day, then your usual shampoo the next. Your scalp and hair slowly adapt this way.
This helps avoid extreme oiliness. It also prevents dryness right away.
Your hair may feel too greasy during the transition. Using a bit of cornstarch works well as dry shampoo. This can help.
Cornstarch absorbs excess oil and refreshes your hair without washing it. Apply a small amount to your scalp and brush it out after a few minutes.
Homemade shampoos without preservatives must be refrigerated. Use them within 4 to 6 weeks to keep fresh. Keep this in mind.
Using fresh shampoo supports scalp health during this adjustment. Store your shampoo in a clean, airtight container to keep it in the best condition.
Patience is key when changing your hair care routine. Your scalp may produce more oil at first.
But it usually stabilizes with regular use of homemade shampoo. Give your scalp time to balance itself without switching back and forth too often.
For extra scalp care, you can include DIY hair masks made with natural ingredients. These masks add moisture or target specific hair concerns and pair well with homemade shampoo. Doing one or two masks a week can improve scalp comfort during the change.
How to Safely Test and Preserve Homemade Shampoo
Always test your homemade shampoo on a small skin patch first. Store it in a cool, dark place like a pantry or fridge. Expect a shelf life of about 2 to 3 weeks without preservatives.
Performing an Allergy Patch Test
Testing for allergies helps avoid irritation and rash after shampoo use. This is especially important for kids or sensitive scalps. Doing the patch test is quick and easy at home.
Follow these steps before using your shampoo widely:
- Choose a small skin area, like behind your ear or on your inner forearm.
- Apply a small amount of the shampoo and gently rub it in.
- Cover the spot with a bandage and wait 24 hours.
- Remove the bandage and check for redness, itchiness, or swelling.
- At the first sign of irritation, wash the area and skip that batch.
- Test a more sensitive spot, like your scalp, when no reaction appears.
- Wait another 24 hours to confirm safety before regular use.
Always do a patch test before trying new ingredients, especially cinnamon or essential oils.
Best Storage Methods for Fresh Shampoo
Store homemade shampoo in glass or BPA-free plastic containers for safety. Use clean, sealable bottles to limit air and bacteria exposure. Keep the bottle in a cool, dark place to slow down spoilage.
Refrigeration is a good idea, especially for water-based shampoos without preservatives. The fridge temperature preserves freshness up to two months. Let the shampoo warm to room temperature before use to avoid cold shock to your scalp.
Shelf Life and When to Discard
Without preservatives, homemade shampoo lasts about 2 to 3 weeks at room temperature. Refrigerating can extend life up to 8 weeks in some cases. Check for signs of spoilage like bad odor, color change, or separation before each use.
Make small batches to avoid waste and ensure freshness. Toss the shampoo right away if you spot mold, odd smell, or texture. Keep track of the date you made it by writing on the container with a marker.
Comparing Shampoo Bars and Liquid Homemade Shampoos
You can choose homemade shampoo bars or liquid shampoos depending on your needs. Bars are solid, alkaline, and often need an acidic rinse.
Liquids usually stay within a hair-friendly pH range. The difference affects cleaning and how your hair feels after washing.
Making shampoo bars can take more time and specific ingredients like lye. Liquid shampoos are often simpler to prepare and store in bottles.
Bars last longer but get slippery and need dry storage. Liquids can spill but mix easily with other ingredients like gels or herbs.
| Feature | Shampoo Bars | Liquid Homemade Shampoos |
|---|---|---|
| Form | Solid, firm soap-like | Pourable liquid |
| PH Level | Alkaline; needs acidic rinse | Hair-friendly pH; no rinse needed |
| Ingredients | Often include lye, oils | Use mild surfactants, gels, herbs |
| Preparation Difficulty | More complex; cold process or melt and pour | Easier; mix and dilute liquid ingredients |
| Storage | Dry storage; lasts months | Use sealed bottle; 1, 2 weeks shelf life |
| Hair Feel | May feel rough until rinsed with acid | Smoother, conditioned due to gels and pH |
| Customization | Add herbs before curing | Add essential oils, gels, fresh herbs easily |
Shampoo bars can be great if you want a plastic-free option that lasts long. You need to remember the acidic rinse though, or hair might feel rough. The bars need careful drying after use to avoid slipping or dissolving.
Liquid homemade shampoos suit easy mixing and quick use. They stay close to your hair’s natural pH so no extra rinse is required. Store them in clean bottles.
Use within two weeks. They contain water, so spoilage can happen.
Common Homemade Shampoo Problems and How to Fix Them
Residue in homemade shampoo usually comes from oils or too much conditioner. Oils like coconut or olive can build up if you don’t rinse well. Make sure to rinse your hair thoroughly with warm water after shampooing to avoid leftover residue.
Greasy hair often happens when the shampoo doesn’t cleanse enough or you add too much oil. Dry hair can result if you skip moisturizing ingredients or wash too often.
Use a light oil like jojoba for dry hair. Massage it into your scalp 20 minutes before washing.
Irritation might come from harsh ingredients. Acids like lemon juice can dry your scalp.
Choosing gentle, natural ingredients without citrus helps prevent irritation. Always do a patch test with your shampoo before full use.
- Use warm water and rinse hair for at least 30 seconds after shampooing
- Adjust oil amount: start with 1 teaspoon per batch, add more only if needed
- Try gentle surfactants like castile soap instead of harsh detergents
- Skip lemon juice if your scalp feels tight or itchy
- Apply oil pre-wash treatment, leave for 20 minutes, then shampoo
- Mix shampoo before use to prevent oil and water separation
- Do a patch test on your skin 24 hours before full hair use
Lather can be weak because homemade recipes often avoid strong detergents like SLS. This is normal and okay since less lather means less drying.
You can add a small amount of gentle foaming agents like decyl glucoside. But avoid overdoing it to keep hair healthy.
Fixing shampoo problems takes patience. Try small batches first and adjust ingredients bit by bit.
Your shampoo needs may change based on your hair type. Use different formulas if your hair gets greasy or dry.
How to Customize Homemade Shampoo with Essential Oils and Additives
Adding essential oils and natural boosters makes homemade shampoo work better for your hair and scalp. Choose oils that fit your needs for growth, dandruff relief, or fragrance. Then add moisturizing or soothing additives to support scalp health and hair shine.
Top Essential Oils for Hair and Scalp
Tea tree oil is great for dandruff relief because it has natural antifungal powers. Studies show it can reduce dandruff severity by about 40% compared to a placebo. Carrot seed oil also promotes hair growth and helps fight scalp fungi.
Lavender and rosemary oils support hair growth and soothe the scalp. Add about 10 to 15 drops of essential oil to 8 ounces shampoo. This amount gives the best effect.
You can adjust slightly based on preference. Too much oil can irritate your skin, so stick to these safe limits.
For a gentle natural scent, you can use sweet orange or peppermint oils. These oils add fragrance and help stimulate your scalp. They improve blood flow, which may keep hair follicles healthy.
Adding Herbal and Moisturizing Boosters
Amla powder is rich in antioxidants and works well to boost shine and scalp health. Mix a teaspoon of amla powder into your shampoo for extra nourishment. Egg yolk boosts vitamin A, which helps your scalp produce natural moisture to control dandruff.
Use mild natural soap diluted with extra water. This lets you add gentle herbs like chamomile or nettle. These herbs provide calming effects.
These herbs reduce scalp irritation and soothe flakes. Castile soap is a popular base that lets you add these boosters without stripping oils.
Foods rich in vitamins and natural oils improve follicle productivity. This helps hair look healthier and feel softer.
You can add small amounts of honey or aloe vera gel. These ingredients boost moisture and add shine to hair.
Safety Tips for Essential Oil Use
Essential oils are powerful and can cause irritation if overused. Keep the total amount below 2% of your shampoo’s volume. For an 8-ounce shampoo batch, this equals about 48 drops.
Always mix essential oils well into the shampoo before use. Test a small amount on your skin first. This lets you check for reactions early.
Use a glass or BPA-free bottle to avoid chemical reactions. Avoid applying undiluted oils directly to your scalp.
Start with a small amount of essential oil in your shampoo. Wait 24 hours after use to watch for skin reactions.
Step-by-Step Action Plan to Start Using Homemade Shampoo
Follow these steps to switch safely and get the best results with your homemade shampoo. Check for changes to know if it’s working well for you.
- Before You Start: Gather your ingredients and tools. Make sure you have gentle surfactants and proper containers to avoid contamination.
- Day 1: Make a small batch of shampoo using the recipe for your hair type. Use it once to see how your scalp reacts and rinse well.
- Week 1: Wash your hair with homemade shampoo two to three times. Notice if your scalp feels clean without irritation or buildup.
- Week 2: Assess your hair’s condition. Add extra moisturizing oils next time when it feels dry. Reduce oil or add astringent additives when it feels greasy.
- Week 3: Adjust your recipe based on the previous week’s results. Test the new batch and compare how your hair responds.
- Week 4: Try adding a few drops of essential oils to improve scent and scalp health. Check for any allergic reactions.
- After 1 Month: Decide if homemade shampoo works for you. Look for clean hair, healthy scalp, and no unusual buildup or dryness.
Frequently Asked Questions
Can I Use Homemade Shampoo Every Day?
You can use homemade shampoo daily but watch for buildup. Some recipes are gentler, but others may dry your scalp if overused.
How Do I Know If a Homemade Shampoo Suits My Scalp?
Test a small scalp patch first to check for any reaction. Redness or itching means you should try a different formula or ingredient.
Should I Use Filtered Water When Making Homemade Shampoo?
Yes, filtered water prevents impurities that affect shampoo quality. Tap water minerals can change texture and shelf life.
Is It Necessary to Add Preservatives in Homemade Shampoo?
Not always necessary if you refrigerate it. Without preservatives, expect a 4-6 week shelf life with proper care.
How Do I Clean Containers for Storing Homemade Shampoo?
Rinse old shampoo bottles or mason jars thoroughly with hot water. This prevents contamination and keeps your homemade shampoo fresh.
Can Homemade Shampoo Make My Hair Greasy?
Yes, some recipes or oils might cause greasiness if not balanced. Adjust oils or rinse twice to find what works best.
Wrapping Up
Making your own shampoo can clear up scalp issues and reduce chemicals. Start with simple recipes and learn what your hair likes. Try a batch today and feel the difference.