How to Blow Dry Curly Hair Safely: 8 Steps for Defined Curls & Less Frizz
Dry your curly hair partially with air first, then use low heat. This way, your curls face less heat and stay healthier and bouncier. Air drying also cuts down your overall styling time while protecting strands from damage.
Pat your hair gently with a microfiber towel to remove excess water. Avoid rough drying or using cotton towels that cause frizz and breakage. This step reduces drying time and protects your curl pattern by minimizing friction.
Remove the nozzle from your blow dryer and flip the head upside down. Rough dry your hair without a brush until it reaches about 80% dry. This technique keeps curls from stretching and losing shape and helps maintain volume.
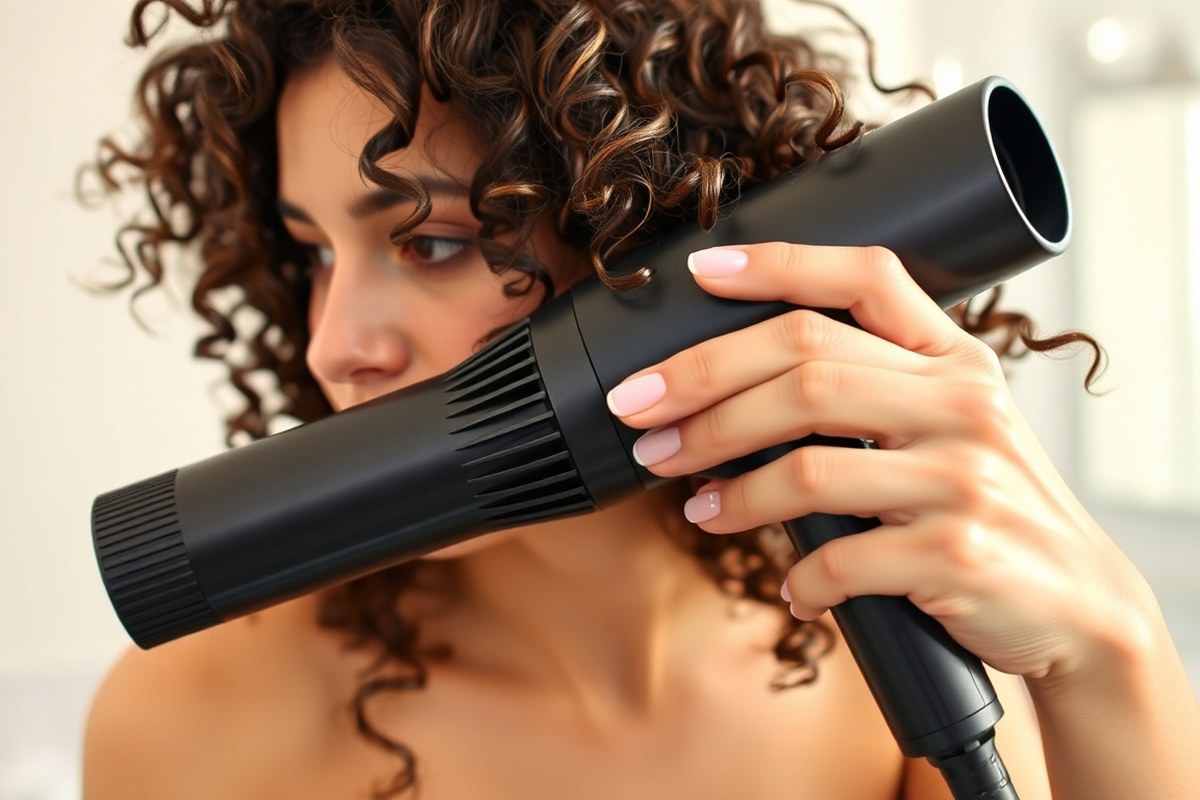
Once mostly dry, switch to a diffuser attachment and use low heat and airflow. Cup sections of your curls with the diffuser, holding it close but not pressing too hard. This method encourages curl definition without disturbing the natural bounce or causing frizz.
Key Takeaways
- Pat curls dry with a soft microfiber towel to reduce frizz.
- Let hair air dry at least 50% before blow drying.
- Use a blow dryer without the nozzle to rough dry curls.
- Flip the dryer upside down while drying to maintain curl shape.
- Stop blow drying when hair is 80% dry to avoid over-drying.
- Avoid brushing wet curls to prevent breakage and stretch.
1. How to Blow Dry Curly Hair Without Causing Damage

Start by letting your curly hair air dry until it’s about 50 to 70% dry. Blow drying soaking wet curls means they face heat damage and lose moisture. This slow drying avoids protein breakdown and helps keep your curl pattern intact.
Apply a heat protectant spray evenly through your damp curls before you turn on the dryer. This step shields your hair from damage and breakage caused by heat.
A blow dry primer made for curly hair helps keep strands hydrated. It also protects your hair during drying.
Use your blow dryer on the lowest heat setting. Or use medium heat up to 130°F (55°C).
High heat dries curls too quickly, leading to frizz and breakage. Keep the dryer about 6 inches (15 cm) away to avoid overheating your strands.
Attach a diffuser to your dryer to spread out the airflow gently. Diffusing curls on low heat helps keep curls defined and reduces frizz.
Move the diffuser slowly around your head. Start at the roots to lift and add volume.
Avoid using brushes or combs while you dry your curls. Rough drying hands-off until 80% dry is better.
Flip the dryer upside down without a nozzle to dry your hair roughly. This way you don’t disturb the curl shape.
For thick curls, you can also use the blow dryer without a diffuser to dry faster. But keep the temperature low to protect the hair.
Switch to a blow dryer with a comb attachment to straighten curls. It helps stretch curls while drying.
Always pay attention to how your curls feel and look during blow drying. Lower heat or air dry longer if hair feels brittle or looks frizzy.
This helps prevent dryness. Curls look best when they keep their bounce and shine, not when they’re crispy or dull.
2. Preparing Curly Hair Before Blow Drying

Start by gently squeezing out excess water with a soft microfiber towel. Let your hair air dry until it’s about 50% dry before using a blow dryer. This helps reduce heat damage and keeps your curls defined.
Using Microfiber Towels and Plopping
Microfiber towels absorb three times more water than cotton without roughing up your curls. Avoid rubbing your hair because cotton towels create friction, which causes frizz and breakage. Instead, pat or gently squeeze your hair with a microfiber towel to soak up moisture.
Plopping involves wrapping your curls in a microfiber towel or T-shirt. This helps keep your curls’ shape while drying. It is a popular method for curly hair drying.
It reduces drying time and cuts frizz. Your curls dry naturally on top of your head. This protects their shape and texture.
Let your hair air dry about halfway after towel drying. This reduces blow dry time and protects your curls from excess heat.
Detangling Techniques for Curly Hair
Always detangle curly hair when it’s wet or damp to avoid breakage. Work through your curls with your fingers or a wide-tooth comb to minimize damage. Start detangling from the ends and slowly work your way up to the roots.
Avoid using fine-toothed combs or brushes that can snap fragile curls. Use products that add slip, like a leave-in conditioner, to make detangling easier.
Be gentle and patient. Rough detangling can cause headaches, split ends, and frizz, defeating your blow dry efforts.
Product Application Order and Timing
Apply your styling products when your hair is still damp, right after towel drying and detangling. This locks in moisture and helps curls hold their shape. Use a leave-in conditioner first, then add curl cream or gel to define curls.
Distribute products evenly with your fingers or a wide-tooth comb, avoiding heavy layering. Don’t apply products when your hair is mostly dry.
This can make your curls look stiff or crunchy. Apply products earlier for better curl results.
Let your hair air dry partway after applying products before blow drying. This cuts the time your hair spends exposed to heat, preserving curl moisture and bounce.
- Use a soft microfiber towel to gently squeeze excess water from your hair.
- Apply leave-in conditioner to damp hair for moisture and slip.
- Detangle gently using fingers or a wide-tooth comb, starting from ends.
- Distribute curl cream or gel evenly to define your curls.
- Wrap hair with a microfiber towel or T-shirt to plop for 10-15 minutes.
- Let hair air dry until it’s about 50% dry before using a blow dryer.
Pat your curls dry instead of rubbing. Never detangle dry hair to avoid breakage.
3. Choosing the Right Tools for Blow Drying Curly Hair
Choosing the right tools helps you protect and define your curls when blow drying. A diffuser is the most common attachment for curly hair as it spreads heat evenly. It helps preserve curl shape and reduces frizz by drying curls gently.
Regular blow dryer nozzles concentrate heat and airflow to one spot. They suit curls that need more smoothing.
They straighten by directing airflow one way. You can use a nozzle with a round brush to straighten curls or create volume.
Some curly hair benefits from different tools. Pick blow dryers with many heat settings. Some have ionic technology too.
Ion dryers cut frizz and dry hair faster. This works well for thick curly hair.
It saves time and keeps curls neat. A cool shot button locks in your style after blow drying at warm or low heat.
| Tool | Best For | How to Use | Typical Cost |
|---|---|---|---|
| Diffuser attachment | Loose to tight curls (Type 2, 4) | Dry on low heat, move in circular motions | $15, $30 |
| Nozzle (concentrator) | Straightening or smoothing curls | Use with brush, blow dry in hair growth direction | Included with most dryers |
| Ionic hair dryer | Thick, frizz-prone curls | Use low to medium heat, finish with cool shot | $40, $150 |
For loose curls, use a diffuser on low heat. This stops frizz and defines curls better. It keeps your curls soft and bouncy.
Thicker or coarser curls dry faster and need gentler airflow to avoid breakage. Using a high-quality hair dryer with adjustable heat settings lets you adapt as you dry.
Use a concentrator nozzle with a round brush. This helps straighten curls for a sleek look. The heat focuses on sections for smoothness.
Blow dry small sections at a time from roots to ends. Keep the dryer moving, and use the lowest heat that works to reduce damage.
Try a diffuser first if you want curls with natural bounce and shape. Switch to a nozzle if you want smoother or straighter styles. A dryer with ionic technology can speed drying and cut frizz but costs more upfront.
4. Step-by-Step Guide to Diffusing Curly Hair for Volume and Definition
Using a diffuser correctly on curly hair helps keep your curls defined and frizz-free. It spreads the heat gently, drying your curls evenly without roughing them up. Proper technique and sectioning make a big difference in how your curls turn out.
Sectioning Hair for Even Drying
Divide your hair into small sections before using a diffuser. This helps dry each part fully. It also stops you from drying the same spot twice.
Repeated drying can cause frizz and damage. Use clips to separate your curls neatly.
Clip your hair into about four to six sections, depending on thickness. Start with the bottom sections and work your way up. Always keep the hair moist, not dripping wet, to avoid heat damage.
Diffusing Technique and Best Practices
Use a diffuser attachment on your blow dryer to spread air over a wider area. This prevents the heat from blasting your curls in one spot, which causes frizz. Hold the diffuser close to your scalp.
Avoid touching it directly on hair. This gives the best results.
Place small sections of curls into the diffuser bowl and lift the hair toward your scalp. Hold it there for about 10 to 15 seconds to let the heat set the curls. Move the diffuser around to cover your head evenly.
This method helps curls keep their shape and bounce. Don’t stir your curls with fingers while drying.
This can break curls apart. It also causes more frizz.
Timing and Heat Settings for Diffusing
Use low or medium heat and speed on your dryer. This protects your curls. It helps prevent heat damage.
Using higher heat or too much speed can dry curls unevenly and cause frizz. Dry each section slowly for the best results.
Diffuser blow drying usually takes 30 to 45 minutes. Time depends on your hair thickness.
It also depends on hair length. Stop drying when your hair is about 80 percent dry to avoid over-drying and dullness.
Finish drying by air drying the rest. Or use a cool shot on your hair. This locks in your curl pattern and adds shine.
- Towel-dry hair gently until slightly damp, not dripping.
- Apply your favorite lightweight curl-improving product or serum.
- Divide hair into 4 to 6 sections and secure each with clips.
- Attach diffuser to blow dryer, set heat and speed to low or medium.
- Place diffuser under one section of curls, lift curls into bowl.
- Hold for 10-15 seconds, then move to another part of the section.
- Repeat for each section until hair is about 80 percent dry.
- Let hair air dry the rest or use a cool shot for shine.
5. Blow Drying Curly Hair to Straighten: Techniques and Tools
You can blow dry curly hair to straighten it. But you need the right tools.
A blow dryer comb or a straightening brush works well. These tools combine heat and tension to smooth curls as you dry.
Start with hair that is about 50% dry to avoid extra heat damage. Use a heat protectant spray before drying on all hair sections. Set your dryer to low or medium heat.
Use medium airflow to reduce frizz. This helps protect your curls.
Divide your hair into sections about 2 to 3 inches wide. Clip up the top sections to work on the lower layers first.
Slowly run the blow dryer comb from roots to ends, pulling the hair taut. Keep the dryer moving to prevent overheating any spot.
The best temperature for curly hair is 250 to 300 degrees Fahrenheit. Adjust your dryer settings to match this. Use a medium speed setting on your dryer.
This stops too much wind that roughens cuticles. Rough cuticles cause frizz.
Use a BaBylissPRO Nano Titanium dryer if you have thick curls. It offers up to 2000 watts power and ionic features that speed drying time. Ionic settings help cut drying time roughly in half, saving about 30 minutes on thicker hair.
Choose a lighter dryer if you have finer curls. Look for one with adjustable heat, like the Tymo Beauty Airhype Lite. Put on the adjustable diffuser to keep your curl shape.
This is useful if you want curly styles later. Combining products like a leave-in treatment also helps smooth and protect hair during heat styling.
Practice makes perfect. Avoid blasting hair with the hottest, fastest air. This overheats curls, causes breakage, and worsens frizz.
Instead, be patient and gentle with slow, steady pulls using your dryer comb. The result is straighter hair with less damage and more shine.
Always keep your blow dryer moving and don’t hold it too close. This prevents heat damage and keeps hair smooth.
6. Finishing Touches: Products and Techniques to Lock in Your Style
Your curls need products that lock in moisture and reduce frizz after blow drying. Apply a lightweight curl cream or gel to keep the spiral shape intact. These products add hold without weighing hair down or making it crunchy.
To prevent frizz, use a serum or oil with ingredients like argan or jojoba oil. They smooth down the hair cuticle and add shine. Pick a serum for fine curls.
Use a richer oil for thick curls. Choose based on your hair type.
Wait until your hair dries completely. Use a small amount of product. For medium curls, a dime size is enough.
Rub the product evenly between your palms first. Then scrunch it into the ends and mid-lengths of your hair to maintain softness and control.
- Light curl cream for soft hold and moisture
- Gel for extra definition and frizz control
- Serum for fine hair to add shine and smoothness
- Oil for thick, coarse curls needing more hydration
- Apply products sparingly to avoid greasiness
- Scrunch or smooth in with fingertips for best results
- Avoid touching curls too much after styling to reduce frizz
Tap a little serum near dry roots. Avoid applying oil all over. This helps fight frizz without weighing down curls.
Refresh curls with a light mist the next day. Use water mixed with leave-in conditioner.
This keeps curls soft and bouncy. This wakes curls up without the heat.
Good results show curls with bounce and defined coils that don’t look crunchy or weighed down. Overloading hair with oil or gel can make curls greasy or limp.
Apply in layers, starting with less product, then add as needed. This way, your curls stay healthy, shiny, and frizz-free after blow drying.
7. Common Mistakes When Blow Drying Curly Hair and How to Fix Them
Blow drying soaking wet curly hair can cause damage and frizz. Using high heat longer happens because hair takes more time to dry. First, gently squeeze water out using a microfiber towel or cotton t-shirt.
Over-drying is another common mistake that wrecks curl definition. Curly hair needs a bit of moisture to hold its shape and maintain bounce. Stop drying once your curls feel dry but still soft, not brittle or rough.
Puffiness often happens when curls are blasted with heat or dried without proper product use. Puffiness reduces curl shape and makes hair look frizzy.
Use a diffuser on low or medium heat to spread the air evenly. Apply a curl cream or leave-in conditioner that adds moisture and cuts frizz.
- Don’t blow dry soaking wet hair; remove excess water first
- Avoid using high heat or over-drying your curls
- Use a diffuser attachment on low or medium heat
- Apply curl cream or leave-in conditioner before drying
- Finish by gently shaking curls with your fingertips or a volumizing pick
- Dry roots separately to add volume but avoid flattening curls
- Remove clips or pins carefully after curls set
Applying products before drying helps lock in moisture and reduce puffiness. You’ll notice curls look shiny and well-defined instead of frizzy or flat. Once your hair is dry, lift roots gently to boost volume without causing frizz.
Don’t touch your hair too much while drying it. This can roughen the cuticle and cause flyaways. Keep your hands off to avoid frizz.
8. Adjusting Blow Drying Techniques by Curl Type and Hair Thickness
Adjust blow drying methods based on your curl type and hair thickness. Different curls need different heat and airflow levels to avoid frizz and damage.
Thicker hair takes longer to dry. So adjust your approach to keep curls defined and healthy.
Drying Tips for Loose, Wavy Curls (Type 2)
Loose, wavy curls dry faster and tend to frizz more if dried too roughly. Use a diffuser on low heat to keep the wave pattern soft and natural. Move the diffuser slowly and avoid high heat to protect fine, delicate curls.
You can roughly rough-dry Type 2 hair with your hands first, then finish with the diffuser. Using a lightweight curl cream or mousse helps control frizz without weighing waves down. Curl products with moisture add shine and hold for these looser curls.
Drying Tips for Medium to Tight Curls (Type 3, 4)
Tighter curls need gentle but thorough drying to keep shape and prevent shrinkage. Use a diffuser on medium heat and slow airflow, focusing on drying the roots first. This approach helps your curls stay springy without puffing out into frizz.
Work from roots to ends with the diffuser, using a scrunching motion to encourage curl formation. Allow curls to dry mostly before touching to reduce breakage. Apply leave-in or curl milk with shea butter or oils.
These ingredients keep your curls soft. They also keep curls moisturized all day.
Handling Thick vs. Fine Curly Hair
Thick curly hair takes longer to dry and needs more heat but spread out over time. Use a diffuser with medium heat and section hair to dry evenly. Thick hair needs smoothing oil or cream on ends.
This helps fight dryness. It also keeps curls nicely defined.
Fine curly hair dries quickly but is fragile. Use low heat and gentle airflow to avoid breakage. Lightweight mousses or curl-improving sprays work well without weighing curls down or making hair greasy.
Check how your curls respond to your method. Look for curls with clear shape and no crunch.
Also, watch for very little frizz. Adjust heat and product amounts if curls feel stiff or look flat.
Avoid direct heat without a diffuser. It can cause frizz and disrupt your natural curl pattern.
Step-by-Step Action Plan to Blow Dry Curly Hair Safely
Follow this plan to dry your curls without damage and get the style you want. Each step shows what to do and how to tell if it worked.
- Before you start: Apply a heat protectant and a leave-in conditioner to damp hair. Your hair should feel moisturized, not crunchy.
- After washing: Gently scrunch your curls with a microfiber towel to remove excess water. Hair should be damp, not dripping.
- Right after: Attach a diffuser to your blow dryer. Set it to low heat. Use low airflow for best results. You’ll notice less frizz and defined curls forming.
- During drying: Cup sections of hair in the diffuser and lift toward your scalp. The curls should hold their shape without being blown out.
- Halfway through: Switch to a styling nozzle for straighter hair. Use a wide-tooth comb while drying. Set your blow dryer to medium heat. Hair should smooth out gradually.
- After drying: Apply a curl cream or light serum. This locks in moisture. It also reduces flyaways. Your hair should feel soft and look shiny.
- Daily: Avoid touching your hair too often to keep curls intact and prevent frizz. Your curls will stay defined longer.
Frequently Asked Questions
Can I Blow Dry Curly Hair Without Using Any Heat?
Yes, you can air dry or use a cool air setting. This avoids heat damage and keeps curls healthy longer.
How Often Should I Deep Condition Before Blow Drying Curly Hair?
Deep condition once a week for best moisture and strength. This helps curls hold up better to heat styling.
What’s the Best Way to Prevent Frizz When Blow Drying Curly Hair?
Use a diffuser and a heat protectant spray before drying. This controls frizz and keeps curls defined.
Can I Blow Dry Curly Hair When It’s Soaking Wet?
No, it’s better to let hair air dry to about 50% first. Starting wet causes more damage and frizz.
How Do I Refresh My Curls Between Blow Drying Sessions?
Lightly mist your hair with water or curl refresher spray. Then scrunch curls to reactivate their shape.
Is It Okay to Use a Regular Brush While Blow Drying Curly Hair?
Avoid regular brushes; use wide-tooth combs or your fingers instead. This prevents breakage and curl disruption.
Final Thoughts
Blow drying curly hair carefully helps keep your curls healthy and looking great. Pick the right tools and avoid high heat to prevent damage. Try these steps on your next wash day and notice the difference in your curls.