How Do You Clean Cosmetic Brushes: 8 Essential Steps for Safe, Fast Results
How do you clean cosmetic brushes so they stay safe and work well? The best way is to wash them gently with a mild cleanser. Use warm water to clean them thoroughly.
This method keeps your brushes safe and fresh. Doing this kills bacteria and removes old makeup that could irritate your skin.
Begin by rinsing the brush under warm water, pointing the bristles downward. Avoid soaking the handle to keep glue from loosening. Then, apply a brush cleaner or gentle soap and swirl the bristles to clean.
Rinse until the water runs clear, making sure no soap remains. Finally, squeeze out extra water and reshape the bristles before drying. This method keeps your brushes fresh and helps protect your skin from breakouts.
Key Takeaways
- Wash your makeup brushes every 7 to 10 days to avoid bacteria buildup.
- Use lukewarm water and hold brushes pointing downward to protect the handle.
- Choose mild soap or a brush cleaner made for cosmetic tools.
- Rinse brushes thoroughly to remove both makeup and soap residue.
- Gently squeeze bristles to remove water without pulling them out.
- Reshape brush heads after cleaning to maintain their original form.
1. How to Clean Cosmetic Brushes Properly Step by Step

Cleaning your makeup brushes properly keeps them working well and protects your skin. Dirty brushes collect oils and bacteria that can cause breakouts and irritation. Use a gentle cleanser and avoid soaking the handles to keep brushes in good shape.
- Rinse the bristles with lukewarm water. Hold the brush with bristles pointing down to avoid water running into the handle. This prevents loosening the glue that holds the bristles.
- Apply a gentle cleanser. Use a small amount of brush cleanser or mild soap like baby shampoo. Avoid products with high alcohol or harsh solvents that can damage bristles.
- Work up a lather. Swirl the brush gently on your palm or a silicone brush cleaning mat. Focus on the tips where makeup builds up. This breaks up oils and pigment without rough scrubbing.
- Rinse thoroughly under lukewarm water. Keep bristles pointing down and rinse until the water runs clear. Residue can irritate your skin and damage the brush over time.
- Gently squeeze out extra water. Use a clean towel or paper towel. Avoid twisting or pulling the bristles, which can deform them.
- Reshape the brush head. Arrange bristles back to their natural shape while still damp. This helps brushes dry evenly and keeps them soft.
You don’t want to get the handle wet, especially if it’s wooden or glued. Water can cause swelling or loosen bristles from the ferrule (the metal part). Cleaners specifically made for brushes cost around $5 to $15 and often make the process easier.
Not every brush needs deep cleaning every day. Foundation or concealer brushes require washing more often than powder brushes. When you’re sick, wash immediately after recovery to stop germs spreading.
This easy six-step routine only takes a few minutes total. It keeps your brushes fresh. It also helps keep skin healthier.
2. What Cleaning Products Work Best for Makeup Brushes?
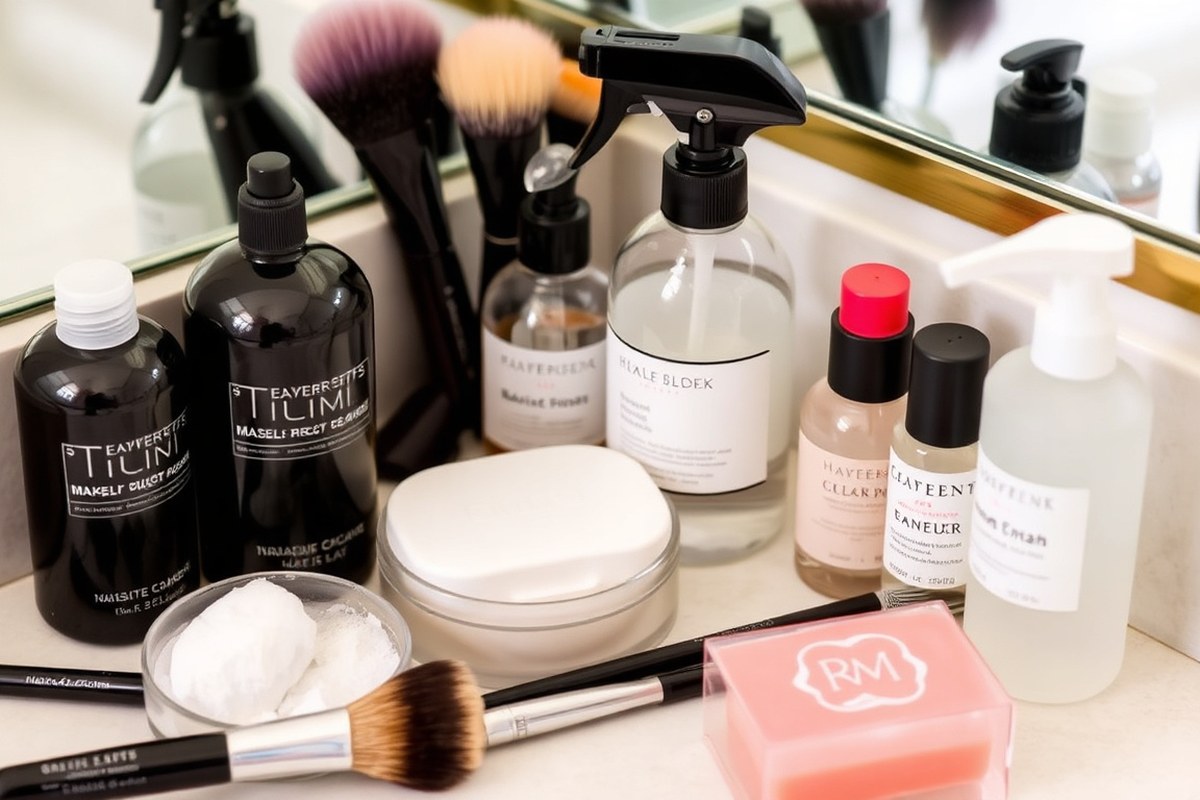
Baby shampoo is a gentle cleanser many makeup artists prefer for natural hair brushes. It cleans well without drying out the bristles and works great on liquid or cream products. Be sure to rinse out all suds completely to avoid residue.
Dish soap like Dawn is excellent at removing oily buildup on brushes. It handles tough grease better than most products.
But it can dry out or damage delicate brushes if used too often. Reserve it for deep cleaning or heavily soiled brushes only.
Solid soap bars designed for makeup tools let you swirl brushes in the lather easily. They are mild and help keep brushes in good shape. Prices are about $20, which is reasonable if you wash brushes weekly or biweekly.
Special liquid cleansers made for makeup brushes are simple to use. They clean without stripping natural oils and usually rinse out quickly. These tend to cost more but cut down on washing time and skin irritation risks.
Quick spray cleansers are handy for in-between washes. They don’t replace a full wash but remove surface makeup and freshen up brushes fast. Perfect for daily maintenance when time is tight.
| Cleaning Product | Best For | Effect on Brushes | Cost & Use |
|---|---|---|---|
| Baby Shampoo | Natural bristles, gentle cleaning | Preserves softness; avoid residue | Low cost; rinse well each time |
| Dish Soap (e.g., Dawn) | Heavy oil, deep cleans | Can dry/damage; use sparingly | Inexpensive; use occasionally |
| Solid Brush Soap Bars | Regular weekly/biweekly cleaning | Mild; easy lather, prolongs life | About $20; lasts a long time |
| Liquid Brush Cleansers | Frequent use; quick cleaning | Gentle, less residue, fast rinse | Moderate cost; saves time |
| Quick Spray Cleansers | Between washes; surface cleaning | Refreshes brush; not deep clean | Low to moderate cost; daily use |
Using baby shampoo or a mild cleanser regularly helps you avoid allergic reactions. Harsh soaps can irritate sensitive skin and wear down brush fibers fast. Test new products on one brush before full use.
Rinse makeup brushes thoroughly after cleaning to remove soap residue and prevent skin irritation.
For tough, oily stains, a mix of gentle soap with water works well. Avoid household hand soaps as they may dry brushes. Stick to brushes with sturdy bristles when using dish soap.
Quick spray cleansers work well if you use many brushes daily. You might not want to deep clean often. These sprays help keep brushes clean between washes.
For full sanitation, wash brushes fully once a week. Use baby shampoo or brush soap bars. This ensures your brushes get really clean.
3. How Often Should You Clean and Replace Makeup Brushes?
Clean your makeup brushes regularly to keep your skin healthy and your makeup flawless. How often depends on the brush use and type. Replace brushes when they show clear signs of wear or damage.
Cleaning Frequency for Face and Eye Brushes
Face brushes like foundation, concealer, and powder need cleaning once a week. These brushes pick up lots of oils and product, so weekly cleaning prevents buildup. Eye brushes require cleaning more often if you use different shades or share them.
Cleaning between uses can help prevent color mixing and bacteria buildup on eye brushes. Keep in mind that overcleaning may damage delicate bristles.
So use gentle cleanser and avoid hot water. Most deep cleans take just a few minutes with the right products.
Signs a Brush Needs Replacement
You should replace your brushes if they shed a lot or lose their shape. Worn bristles won’t apply makeup evenly. A rough texture or stiff feeling also means the brush may be beyond repair.
Here’s a quick checklist to decide when to replace a makeup brush:
- Bristles fall out during or after cleaning
- Brush shape changes or bristles bend permanently
- Brush feels rough or scratchy on your skin
- Brush has a foul smell even after washing
- Colors bleed and don’t apply smoothly
Experts suggest replacing porous eye brushes every three months minimum due to deep cleaning challenges. Higher-quality brushes last longer with proper care, sometimes years or even decades.
How to Maintain Brushes for Longer Life
Gentle regular cleaning and proper drying help extend your brushes’ life. Avoid hot water because it can melt synthetic bristles. Use mild brush cleansers and rinse with cool water to protect the fibers.
Dry brushes flat or with bristles pointing down to stop water seeping into the handle. Dense face brushes usually take six to eight hours to dry fully. Keeping brushes dry prevents bacteria growth and damage, helping you avoid frequent replacements.
4. How to Dry Makeup Brushes to Prevent Damage
Dry makeup brushes by laying them flat and tilting their tips slightly downward. This keeps water away from the handle and ferrule, preventing glue loosening. Avoid drying them upright to protect their shape and lifespan.
Position Brushes Flat and Angled Downward
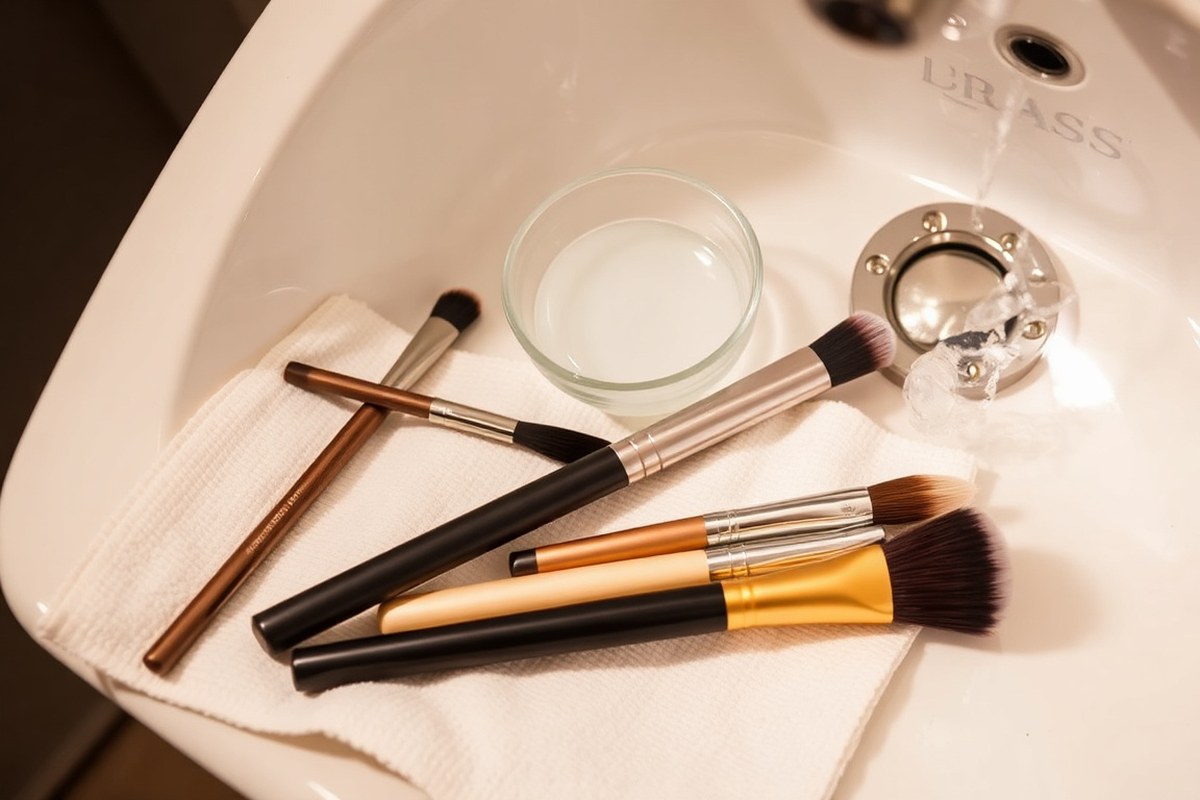
Put your brushes on a clean towel. Make sure the bristles point down a bit. This helps keep them dry and clean.
This angle stops water from running into the part that holds bristles. It helps keep the glue tight and prevents shedding.
Rolling a towel and resting brushes on it at a 45-degree angle works well. This setup helps the water drain away from the brush ferrule gently. Let the brush heads keep their shape during drying for longer use.
Avoid Drying Brushes Upright
Never stand brushes up while drying, either bristles or handle side down. Water tends to drip down into the ferrule when upright. This damages the glue holding bristles and causes them to fall out.
Upright drying also changes brush shape and reduces their life. Always choose a flat or hanging position with bristles pointing down. This approach limits water damage over time.
Allow Adequate Drying Time Based on Brush Density
Thicker brushes take longer to dry, usually 6 to 12 hours or overnight. Thin brushes dry faster but still need about 3 to 4 hours minimum. Wait fully until brushes feel dry to touch before next use.
Check brushes by squeezing gently to ensure no moisture stays inside. Using damp brushes can cause makeup errors and skin irritation. Make drying part of your routine after each deep clean.
Use Drying Racks or Towels Appropriately
Brush drying racks let you hang brushes with bristles pointing down. These racks help keep brush shape and speed up drying. They’re handy when you clean many brushes at once.
Don’t have a rack? Lay brushes flat on a dry towel. Arrange them so nothing touches.
Use a lint-free towel and reshape brush heads first. Replace towels regularly to avoid germs and dust on your clean brushes.
Follow these steps to dry your brushes properly:
- After washing, squeeze excess water gently from bristles using a clean towel.
- Reshape the brush head to its original form with fingers.
- Lay the brush flat on a clean towel or hang it on a drying rack.
- Angle brushes slightly downward to keep moisture away from ferrule.
- Keep the brush handle and ferrule dry during washing and drying.
- Leave brushes to air dry for 6 to 12 hours depending on thickness.
- Check brushes for dryness before storing or using again.
5. How Different Brush Types Affect Cleaning Method
You should clean synthetic and natural brushes in different ways. Their fibers react differently to water and soap. This means they need special care.
Synthetic fibers handle water and soap easily and dry quickly. Natural brushes come from animal hair.
They need gentle soap and cool water. This keeps them from drying out or getting damaged.
Oily makeup stays more in synthetic brushes. Clean these with a gentle brush cleanser or mild soap that removes oil well. Brushes used for powder need less frequent deep washing because powder is dry and less sticky.
| Brush Type | Recommended Soap | Water Temperature | Cleaning Frequency | Common Use |
|---|---|---|---|---|
| Synthetic | Gentle brush cleanser or mild soap | Lukewarm | Monthly deep clean; spot clean often if oily | Foundation, lip, cream products |
| Natural | Special gentle soap (avoid regular soap/rubbing alcohol) | Cool to lukewarm | Monthly deep clean; less frequent spot clean | Powders, blush, eyeshadow |
| Both Types | Brush cleanser without oily residue | Use as recommended based on brush type | Deep clean at least once a month | Any makeup product |
Using hot water or harsh soap on natural hair degrades bristles. This causes shedding and stiff textures.
Synthetic ones dry fast but still avoid soaking them for hours. After washes, reshape bristles gently to keep the brush effective for blending.
Brushes for oily products need thorough cleaning each use. They collect oils that can clog clean brushes and harm skin.
Powder brushes soak less and dry faster, so one monthly wash is usually enough. Regular cleanings stop bacteria and fungi from building up inside brush fibers.
Only use soaps made for makeup brushes to avoid damage or leftover oils on bristles.
6. Common Mistakes When Cleaning Makeup Brushes
Many people soak the whole brush in water. This can loosen the glue inside the ferrule, causing bristles to fall out. Wood handles can crack or split when over-wet, so avoid submerging them fully.
Using hot water is another mistake. High temperatures damage the brush hairs and loosen glue. Always use lukewarm or cool water when rinsing your brushes to protect them.
Harsh soaps or cleaners can dry out bristles or leave residue. Choose gentle, brush-specific cleansers or mild baby shampoo. They remove makeup and oil without harming the hairs.
- Wet bristles only, not the handle or ferrule
- Use lukewarm water, not hot water
- Pick gentle, makeup-safe cleanser or mild shampoo
- Do not share brushes to avoid bacteria transfer
- Dry brushes laying flat, not standing upright
- Clean sponges weekly, same way as brushes
- Rinse thoroughly to remove all soap and makeup
Drying makeup brushes improperly causes damage too. Standing them up in a cup lets water gather in the ferrule.
This breaks down the glue and causes shedding. Always dry brushes flat on a towel with bristles over the edge to air out.
Makeup sponges need cleaning like brushes, at least weekly. They trap skin cells and bacteria faster. Use the same gentle cleansers and cold or lukewarm water to avoid breaking down the sponge.
Following these steps helps your brushes last longer and keeps skin healthy. Gently cleaning, rinsing, and drying the right way prevents problems. Avoid cheap shortcuts and your tools will stay fresh for flawless makeup every time.
7. Quick Cleaning Tips for Daily Makeup Brush Maintenance
You can keep your makeup brushes clean daily without a full wash. Using spray cleaners and wiping methods removes buildup and bacteria fast. These options save time and money while protecting your skin.
Using Spray Brush Cleansers Correctly
Spray brush cleansers dissolve makeup and kill germs without water. They dry almost instantly, so your brush is ready to use in seconds. For example, Cinema Secrets Original Makeup Brush Cleaner removes waterproof makeup without rinsing.
Use a spray cleanser when you switch colors or want quick freshening. Spray the bristles lightly, avoiding the handle to protect glue. Sprays usually cost around $10 to $20 and last for months with regular use.
- Hold the brush bristles facing down over a clean surface.
- Spray the brush cleanser directly onto the bristles.
- Gently swirl or tap the brush on a clean, dry cloth.
- Allow 10 to 15 seconds for the spray to dry completely.
- Repeat if makeup residue remains, then use the brush as needed.
Wiping Brushes on Clean Microfiber Cloths
A simple, cheap way to keep brushes clean is wiping them on microfiber cloths. These cloths catch makeup without damaging bristles. You can wash them with hot water after each use to keep them hygienic.
Wipe your brush on the cloth between makeup applications. This prevents buildup and keeps colors pure. The cloths cost about $5 to $15 and last through many washes.
Press your brush lightly. Drag it across the cloth in one direction to lift makeup. Avoid scrubbing hard or pulling bristles too much.
When to Do a Full Deep Clean Anyway
Quick cleans help. But you still need a full deep clean every 7 to 10 days.
Deep cleaning stops bacteria and grime that spray or wipes can’t remove. Signs you need a deep clean include uneven makeup application or a smell from brushes.
If your brushes look stiff, frayed, or lose hairs during quick cleans, it’s time for a full wash. Regular deep cleaning saves your skin from irritation and breakouts.
8. How to Store Makeup Brushes to Keep Them Fresh and Safe
Keep your cleaned brushes in a clean, airy spot with good light. This helps stop mold, mildew, and bacteria from building up on the bristles between uses. Avoid storing brushes in closed, damp places like bathroom drawers or cabinets where moisture collects.
Letting your brushes sit out invites dust and germs to collect on them. Pick a holder with a cover or use a brush case to protect them. When traveling, store brushes in a fresh makeup bag or a UV sterilizer to cut down on bacteria.
- Store brushes upright to keep bristles in shape
- Use a dry, ventilated container, not airtight ones
- Let brushes dry fully before putting them away
- Use a UV sterilizer case during travel for extra hygiene
- Clean sponges and beauty blenders daily or after every use
- Wipe handles and ferrules regularly to remove residue
- Store away from humidity, especially in bathrooms
Brushes often stay damp after cleaning. Let them dry fully on a flat surface, bristles hanging off edges if possible.
Don’t store damp brushes in closed containers. Moisture trapped this way promotes bacteria and mold growth.
Cleaning sponges need more attention. They stay wet longer and hold more bacteria.
Wash them every day to reduce risks like yeast or fungal growth on your skin. People with acne should clean their brushes and sponges more frequently to stop bacteria from spreading and causing breakouts.
Never store brushes away before they’re completely dry. Trapped moisture breeds mold and bacteria fast.
Your Quick-Start Plan for Cleaning Cosmetic Brushes
Follow these simple steps to get your brushes clean and safe to use. You’ll see and feel the difference fast.
- Before you start: Gather gentle soap or brush cleaner, a clean towel, and lukewarm water. Clear water runs clean when you rinse your brush.
- Day 1: Deep clean all brushes with soap and water. Squeeze out colored residue until water is clear.
- After washing: Dry brushes flat on a towel with bristles over the edge. Brushes feel soft and dry to touch next day.
- Daily: Use a quick-dry spray or brush cleaner before makeup. Your brush surface should feel fresh and free from buildup.
- Weekly: Do a full wash to keep oils and dirt from building up. Brushes look clean and apply makeup smoothly.
- Monthly check: Inspect brushes for shedding or hard bristles. Replace any brush that’s losing shape or tugging skin.
- Ongoing: Store brushes upright in a clean holder, away from dust and moisture. Dry, upright brushes last longer.
Frequently Asked Questions
How Do You Know When a Cosmetic Brush Needs Cleaning?
Makeup goes on uneven or patchy when your brush needs cleaning. This often means build-up inside the bristles is interfering with smooth application.
Can You Clean Makeup Brushes in the Dishwasher Safely?
It is not recommended to clean brushes in a dishwasher. Hot water and detergent can damage bristles and loosen glue holding them.
Is It Okay to Use Regular Soap to Clean Makeup Brushes?
Regular soap can work but may dry brushes and weaken bristles. Gentle baby shampoo is better for natural fibers and daily use.
How Long Does It Usually Take for Makeup Brushes to Dry?
Most brushes dry in 2 to 6 hours. Lay them flat with bristles hanging off an edge. Patting off water speeds this up.
Can You Speed Up Drying of Makeup Brushes with a Hairdryer?
Using a hairdryer can dry brushes too fast and damage bristles. Air drying is safer and preserves brush shape longer.
Are Makeup Brush Cleaners Better Than Household Products?
Specialty brush cleaners work well and dry fast but cost more. Household items like baby shampoo clean just as effectively for most brushes.
Final Thoughts
Keeping your brushes clean helps your skin stay healthy and makeup look better. Start with a deep clean today and use quick cleaning for daily touch-ups. Your brushes will feel fresh and last much longer with this routine.