How to Make Curls with Hair Straightener: Complete Step-by-Step Guide
Wondering how to make curls with hair straightener? You can curl your hair with a flat iron. Take small sections and clamp them.
Then rotate the tool to create curls. Twist the straightener 180 degrees first.
Slowly glide it down each hair section. This makes smooth curls easily.
Start with dry, clean hair and use heat protectant spray to prevent damage. Pick a plate size near 1 inch wide. Adjust heat according to how thick your hair is.
This helps protect your hair. Fine hair needs lower heat under 300°F. Thicker hair can go up to 400°F.
Hold the straightener a little away from your face. Twist it while pulling the hair down. This shapes the best curls.
This simple technique lets you curl hair fast. One pass of the straightener often works well. You don’t need many passes.
Key Takeaways
- Choose a straightener with 1-inch-wide plates and rounded edges for best curls.
- Use lower heat settings below 300°F for fine or damaged hair to avoid breakage.
- Clamp small 1- to 2-inch hair sections near the roots before curling.
- Turn the straightener 180 degrees away from your face. This helps shape each curl nicely. The curl forms as you move down.
- Glide the twisted straightener slowly down the hair shaft for smooth curls.
- Always apply heat protectant spray before styling to protect your hair.
How to Curl Hair with a Straightener Step-by-Step

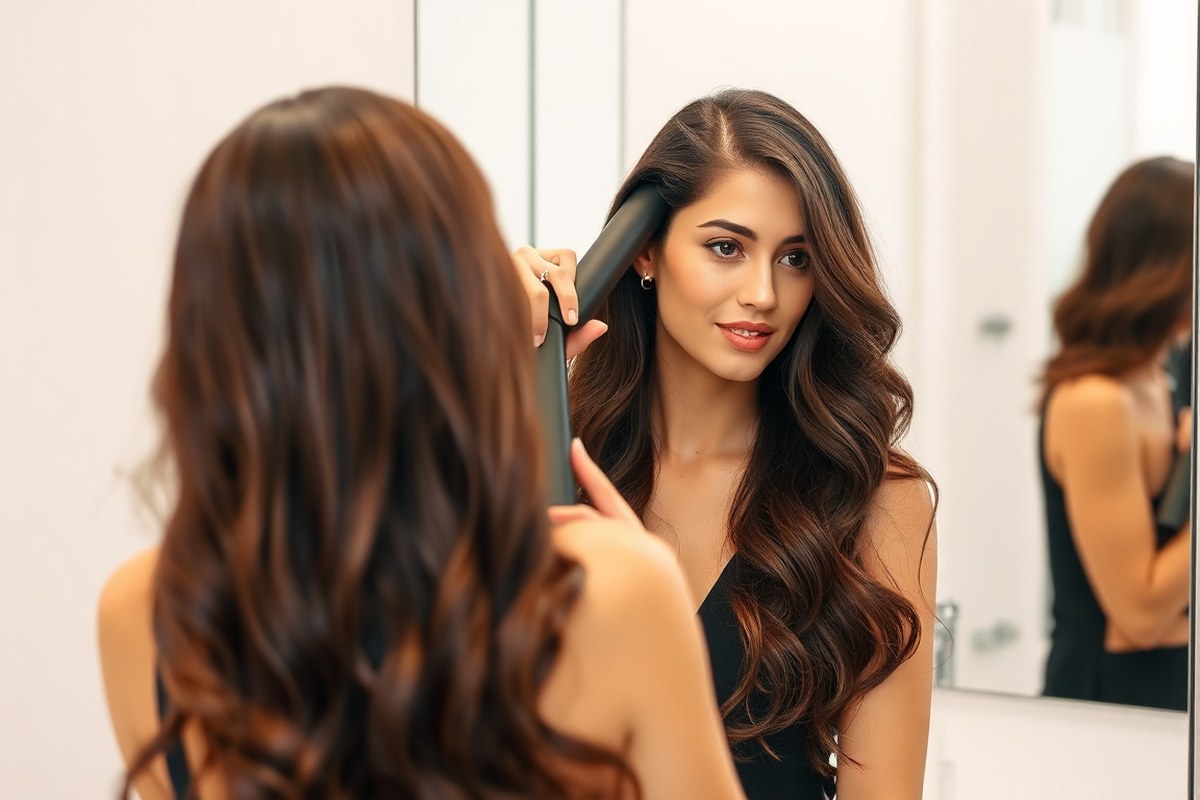
Curl your hair with a flat iron by twisting and sliding it down. Separate your hair into small sections for the best results. Clamp the iron near the roots, rotate it 180 degrees outward, then gently slide down.
Preparing Hair Sections for Curling
Divide your hair into vertical sections about 1 to 2 inches wide. Thicker hair needs smaller sections for better curl control.
Smaller sections make curls tighter and neater. Larger sections give looser, more relaxed curls.
This step helps you work methodically without missing any hair. Manageable sections mean faster, more consistent results. Avoid grabbing too much hair at once or the curls won’t shape well.
Clamping and Rotating Technique
Clamp the straightener about 1 to 2 inches from the roots. Hold the flat iron at a slight angle away from your face.
Twist it 180 degrees, turning it so you face the back of your hair. This pivot shapes the curl direction.
The rotation is key for curling with a flat iron. It lets the straightener create a loop as you glide down. Make sure your grip is firm but gentle to avoid creases in the hair.
Glide and Release for Smooth Curls
Keep sliding the straightener downward at an even, steady pace. Don’t stop or hold it in place or the heat can damage hair. When you reach the ends, gently open the clamp and release the curl softly.
Continuous motion protects hair health and gives a smooth curve. You can run the iron over curls lightly again to shape them better. Holding the ends softly avoids flattening or damaging the curl shape.
Here’s a simple step-by-step to curl your hair with a straightener:
- Divide hair into 1-2 inch vertical sections to manage curls better.
- Pick up a small section near the roots, about 1-2 inches wide.
- Clamp the straightener around the section 1-2 inches from your scalp.
- Rotate the flat iron 180 degrees away from your face to start the curl.
- Glide the straightener down the hair shaft without stopping or pulling.
- Release the clamp gently when you reach the hair ends.
- Repeat on all sections, alternating curl directions for natural waves.
Choosing the Right Straightener Plates and Heat Settings

The size and shape of your straightener plates decide the type of curls you get. A 1-inch plate width works best for defined curls on most hair lengths. Plates wider than 1.5 inches suit loose waves on long hair but make tight curls tricky.
Rounded edges on plates help you glide the tool smoothly, preventing kinks and uneven curl shape. Straight edges can pinch the hair and cause rough bends. Look for a straightener clearly made with rounded corners for a smoother curl experience.
| Plate Size | Best For | Notes |
|---|---|---|
| 1 inch (2.5 cm) | Defined curls and waves | Most versatile, good for short to mid-length hair |
| 1.5 inches (3.8 cm) or more | Loose waves on long hair | Harder to form tight curls, feels bulky on short hair |
| Rounded edges | All curl types | Prevents kinks, helps smooth curl formation |
Adjust heat settings based on hair type to protect your strands. Fine hair needs 250°F to 300°F, while thick hair tolerates 350°F to 400°F safely. Start low and increase only if curls don’t hold well or hair feels unaffected.
Choose a straightener with adjustable temperature controls to match your hair’s needs. Avoid a model that only offers one heat level.
It might damage fine hair or fail to style coarse hair effectively. Clean your plates before curling to keep heat steady and avoid hair damage from residue.
Use a flat iron with rounded plates and glide hair steadily to avoid pinched, uneven curls.
Preparing Your Hair Properly Before Curling
Preparing your hair before curling with a straightener makes your curls last longer and stay healthy. Always start with clean, dry hair and add a heat protectant spray before styling. Then detangle and apply styling products designed to hold curls without weighing hair down.
Wash and Dry for Best Results
Wash your hair with a gentle shampoo and conditioner that suits your hair type. Avoid heavy conditioners that can weigh curls down or leave residue.
Dry your hair completely before styling. Using heat on damp hair can cause damage and uneven curls.
Blow-dry your hair or air-dry until fully dry. This step takes at least 20 to 30 minutes depending on hair thickness. Make sure no moisture remains to prevent breakage and preserve the curl shape.
Apply Heat Protectant Spray
Spray a heat protectant evenly over dry hair before using your straightener. This product forms a shield to reduce heat damage. It also helps curls look smoother and prevents frizz.
Comb your hair after spraying to spread the protectant well. Pick a spray made for heat styling, costing about $10 to $20. Using a protectant is a must for healthy curls that last.
Detangle Hair Gently Before Styling
Use a wide-tooth comb or detangling brush on dry hair. This removes knots and prevents snagging as you curl. Tangled hair can create uneven curls and cause breakage.
Start detangling from the ends and work your way up to the roots. Take your time to avoid pulling or damaging your hair strands.
Use Styling Products to Boost Curl Hold
Before curling, apply a lightweight mousse or curl-improving cream to add texture. These products help curls hold their shape longer by offering light grip. Avoid heavy creams or oils, as they can weigh your hair down.
Finish your styling with a flexible hold hairspray. This helps your curls stay in place without feeling stiff. Let your curls cool completely before spraying for the best hold.
Checklist for Prepping Hair Before Curling
- Wash hair with gentle shampoo and conditioner
- Dry hair fully using a blow dryer or air dry
- Apply a heat protectant spray evenly on dry hair
- Detangle hair gently with a wide-tooth comb or brush
- Use a lightweight mousse or curl cream for texture
- Finish styling with a flexible hold hairspray after curling
These steps take about 30 to 45 minutes to complete. They help protect your hair.
They also make your curls last longer and look better. Skipping drying or heat protection can lead to damage and curls that don’t last.
Curling Techniques to Achieve Different Styles
You can create many curl styles with a flat iron by using different techniques. Adjusting your wrist angles and how fast you glide the iron changes curl shapes. You’ll get anything from tight spirals to soft, loose waves this way.
Classic Twist & Glide for Soft Curls
This method gives you natural-looking curls with gentle body and bounce. You clamp the hair near the roots and slowly rotate the iron away from your face. Moving slow sets the curl deeply while keeping the shape soft and smooth.
- Section your hair and clamp the flat iron about one inch from the roots.
- Rotate your wrist 180 degrees, turning the iron away from your face.
- Slowly glide the flat iron down the hair strand to the tips.
- Release the hair carefully once you reach the ends.
- Continue this process section by section for a full head of curls.
Going slowly helps heat both sides evenly and locks the curl shape. You want to avoid quick pulls that cause waves to look messy or uneven. The curls come out smooth and natural with enough volume but no harsh bends.
Wrap & Pull for Bouncy Curls
This method is great for defined, springy curls that hold shape well. You wrap each hair section one time around the straightener barrel and clamp it gently. Pulling the iron down slowly creates tight, bouncy curls that last.
- Divide your hair into sections about one inch wide.
- Place the flat iron near the hair roots and wrap the hair fully around the barrel.
- Clamp the straightener lightly to hold the wrap in place.
- Slowly pull the flat iron downward, maintaining the wrap around the barrel.
- Unclamp and let the curl cool before touching it to hold shape.
Narrower plates work better for this method since they help create smaller curls. Pull too fast, curls won’t hold or may loosen instead. This technique gives noticeable volume and spring that can last all day.
Creating ‘S’ Waves
‘S’ waves produce a tousled, beachy look with lots of visual movement. You use small turns in opposite directions as you glide the iron down the strand. Alternating left and right half turns help shape a wave pattern rather than ringlets.
- Start by sectioning your hair, about 1-2 inches wide for loose waves.
- Clamp the iron near the root. Turn your wrist half a turn away from your face.
- Glide the flat iron down 1-2 inches.
- Rotate your wrist half a turn back towards your face.
- Continue gliding the iron slowly down to the ends, alternating turns.
Faster glides with less rotation create looser, more undone waves. Slower glides with distinct turns make more noticeable waves. Wider iron plates help make softer waves while thinner plates create sharper bends.
Maintaining and Setting Your Curls to Last Longer
Let your curls cool completely before touching them. Cooling hair for about 10 minutes helps the curls set firmly, locking in their shape. Avoid brushing your hair before it cools.
Don’t run fingers through it, either. This helps keep curls longer.
Use finishing sprays designed to hold curls without stiffness. Spray light-hold hairspray evenly from 8 to 12 inches. This keeps curls soft.
It also makes them stay. Look for curl hold sprays or volumizing mists for extra body and lasting bounce.
After your curls cool, add a little serum or oil. Apply it to the ends only. This lowers frizz.
This adds shine and smooths flyaways without weighing down your hair. Use just one drop of product on fine hair. This keeps hair from looking greasy.
For fine or limp hair, try applying volumizing mousse before blow-drying. This boosts body and helps curls keep their shape through the day. Choose a mousse suited for your hair’s texture to avoid crunchy or sticky curls.
Don’t keep the iron clamped on your hair. Holding too long can burn strands. It will also spoil your curl.
Move the tool smoothly and steadily to create smooth curls that last longer. Practice makes it easier to balance speed and heat control when curling.
Try a root lift spray if you want your curls to look fuller from the scalp. Spray it onto dry roots before curling, then style as usual. This method adds volume at the crown.
It lifts curls naturally. The curls hold longer, too.
Always let your curls cool completely before styling further, that step locks your shape in place.
Adjusting Curling Methods for Different Hair Lengths and Types
Short hair needs smaller sections to curl well with a straightener. Take ½-inch strands to avoid bulky curls that don’t hold shape. Use medium heat around 300, 350°F for fine hair, or up to 400°F for thick types.
Clamp near the roots. Slowly rotate the tool to shape the curl. Work from root to tip.
Medium-length hair calls for slightly larger sections, about 1-inch wide. This size balances control and volume without too much bulk. Adjust heat by hair type: fine hair curls best at 300, 350°F. Thicker strands need 375, 425°F. Try curling away from your face and slower passes to create more defined waves or ringlets.
Long hair benefits from working in sections clipped away to reduce thickness. Start with 1- to 2-inch pieces depending on hair density. Use higher temperatures for coarse hair, up to 450°F if needed.
But keep fine hair on lower settings to avoid damage. For beachy waves, leave ends out of the clamp.
This creates a relaxed look. Focus on mid-length texture.
Fine or damaged hair requires the lowest heat to protect strands. Use 250, 350°F and smaller hair sections to curl evenly. Handle your straightener gently and avoid going over the same section multiple times.
Thick, coarse hair usually needs 375 to 450°F to hold curls. It resists heat naturally.
Technique changes with hair type too. For fine hair, slow and steady twists help curls hold longer. Thick hair curls better with faster rotations.
Use larger sections to keep shape. This helps prevent frizz.
Try tilting the straightener at 45 or 90 degrees. Find the angle that makes your best curls.
Adjusting speed also matters. Slower passes allow curls to set deeper, especially on thick hair. On fine hair, extra slow can cause damage, so choose a medium speed.
Use heat protectants to guard fragile strands. Never curl more than once a day to keep hair strong.
Common Mistakes When Curling with a Straightener and How to Fix Them
One common mistake is overheating your hair. Using a very high heat setting can burn hair or cause frizz. Use 300°F to 350°F for fine or damaged hair.
Choose 350°F to 400°F for thick hair. These ranges protect your hair while styling. Always use a heat protectant spray before styling.
Uneven sections cause uneven curls that don’t hold well. Take sections of similar size and thickness.
Smaller sections create tighter curls, while bigger ones give loose waves. For longer hair, use larger sections near the bottom to avoid overly tight curls.
Improper rotations around the straightener lead to inconsistent curls. Wrap your hair around the plates carefully, holding the iron at a diagonal angle. Rotate your wrist steadily and pull the straightener down smoothly to create a defined curl.
Frizz is often the result of skipping finishing steps. Spray a lightweight hair spray about 12 inches from your head. This keeps curls soft and firm.
Avoid spraying too close to hair. Avoid heavy sprays that make hair stiff or crunchy.
- Use the right heat setting for your hair type
- Take even, consistent sections of hair
- Hold the straightener at a diagonal when wrapping hair
- Rotate wrist smoothly while pulling straightener down
- Spritz heat protectant spray on all sections first
- Finish with misting hairspray held 12 inches away
- Try titanium plates for thick or coarse hair
To fix curls that don’t hold, try smaller sections and firmer wraps. Pull the straightener down a little slower to let heat set the curl. Choose a straightener with titanium plates for coarse hair.
Titanium holds heat better and keeps curls longer. This helps style coarse hair well.
Prevent heat damage by never skipping a heat protectant spray. Avoid holding the straightener in one spot too long. Move the straightener gently through your hair.
Hold each section for 2 to 4 seconds. This is usually enough time to create curls.
Safety Tips and Best Practices for Heat Styling
Heat styling your hair needs some care to avoid damage. Start by always applying a heat protectant spray before using your straightener. These sprays form a barrier on your hair strands.
They help reduce damage from high heat. This protects your hair when you use a straightener.
Choose a straightener built with heat-safe technology or adjustable temperature settings. Having control allows you to use just enough heat to curl without frying your hair. Avoid using the highest heat settings unless your hair is very thick or coarse.
- Apply heat protectant spray evenly to dry hair first
- Set your straightener temperature between 300, 350°F for fine to medium hair
- Use 350, 400°F only for thick or coarse hair types
- Curl small sections for quicker, even heat exposure
- Take breaks every 15 to 20 minutes to avoid overheating
- Keep your straightener clean and free of product buildup
- Unplug the device immediately after use and place on a heat-resistant surface
Handling your straightener safely means gripping it firmly but not too tightly. Keep your fingers away from hot plates to prevent burns.
Also, don’t leave your tool unattended when it’s on. Avoid styling your hair when tired to reduce accidents.
Stop styling and get professional help if you notice increased hair breakage or scalp irritation. Persistent dryness or scalp burns require advice from a haircare expert or dermatologist. Using damaged tools or ignoring hair’s reaction to heat can cause long-term injury.
Never skip heat protection spray; it’s your hair’s best defense against damage.
Step-by-Step Action Plan to Curl Hair with a Straightener Today
Follow this quick plan now to get your first curls with a straightener. Each step shows how to check your progress.
- Before you start: Wash and dry your hair completely. Your hair should feel clean and dry, with no damp spots.
- 10 minutes before curling: Apply a heat protectant spray evenly. Your hair will feel light but coated, not sticky.
- Start curling: Heat your straightener to a moderate setting (300, 350°F). The plates should warm but not burn your fingers when tested carefully.
- First curl attempt: Clamp a 1-inch section near the roots. Twist the straightener slowly down the strand. You see a loose curl forming before the strand passes through the plates.
- Midway check: Finish a few curls, then lightly finger comb your hair. Curls hold shape but separate softly without frizz.
- After all curls: Spray a light-hold hairspray evenly. Your curls should stay bouncy without feeling stiff.
- End of styling: Wait 10 minutes, then gently run fingers through your curls. They stay curled, move naturally, and feel soft to touch.
Frequently Asked Questions
Can I Use a Regular Hair Straightener for Curling?
Yes, a regular straightener works if it has rounded edges. Rounded edges help create smooth, defined curls without kinks or breaks.
How Do I Make My Curls Last All Day with a Straightener?
Use a light hairspray before curling and cool the curls after. This helps set the shape and keeps curls from falling out quickly.
Does Hair Type Affect How I Curl with a Straightener?
Yes, thicker or coarser hair may need higher heat and smaller sections. Fine hair curls faster but needs lower heat to avoid damage.
Can I Curl My Hair While It’s Still Damp?
No, curling damp hair can cause damage and frizz. Always dry your hair fully before using a straightener to curl.
How Many Sections Should I Divide My Hair into for Curling?
About 8 to 10 sections work best for an even look and efficient curling. Smaller sections give tighter curls; larger sections create loose waves.
What Temperature Should I Set My Straightener to for Curls?
Set between 300°F and 375°F based on your hair type and thickness. Lower heat protects fine hair, while thicker hair requires higher heat for hold.
Key Points to Remember
Curling your hair with a straightener takes some practice but is doable at home. Start small and adjust your heat and technique. Try your first set of curls now, and you’ll get better with each try.