How to Curl Hair with Curling Tongs: A Complete Guide for Perfect Curls
Knowing how to curl hair with curling tongs can change your hair game fast. Pick the right heat setting for your hair type first. Wrap small sections of hair evenly around the barrel.
This helps create better curls that last longer. Curl away from your face to keep the look fresh and natural every time.
Start by prepping your hair with a setting spray or light oil. This protects your hair and helps curls last longer. Open the tongs about 2 inches from your roots.
This avoids damage to your scalp. It also helps build strong curls that hold well.
An old curling iron might not heat evenly. It could also fail to get very hot.
Consider upgrading to one with adjustable temperature controls for better results. This helps avoid over-burning fine hair or under-curling thick textures.
Key Takeaways
- Use adjustable temperature curling tongs to match your hair texture perfectly.
- Wrap 1-2 inch hair sections evenly around the barrel curling away from your face.
- Leave 2-3 inches of hair ends uncurled for natural-looking finishes.
- Position curling tongs about 2 inches from roots to protect hair and build curls.
- Use a setting spray before curling to prolong curl hold and reduce damage.
- Curl thick hair at a temperature about 10°C higher than medium hair.
Step-By-Step Guide to Curling Hair with Curling Tongs

Curling your hair with curling tongs takes some practice but follows simple steps. You want to work with dry hair that’s already protected with heat spray. Using sections of about 1 to 2 inches thick helps curls form evenly without overheating.
Hold the tongs away from your scalp to avoid burns. Wrap the hair around the barrel smoothly and hold it for up to 10 seconds.
Less time can result in looser curls. More than 20 seconds risks hair damage, so timing matters a lot.
- Divide your hair into manageable sections, each about 1 to 2 inches thick. Smaller sections give tighter curls, while larger ones create looser waves.
- Clamp your curling tongs near the root of a hair section. Leave about one inch free at the end. Hold this free part with your fingers. This avoids burning your scalp or hands.
- Wrap the hair evenly around the barrel, curling it away from your face. Wrap all the way to the tip for the best shape.
- Hold the hair on the tongs for about 8 to 10 seconds. Avoid keeping it longer than 20 seconds to prevent heat damage.
- Release the hair gently from the tongs and cradle the curl in your hand. Let it cool in your palm to help the curl set well.
- Spray the curled section lightly with a setting spray to help its hold last longer. Avoid soaking the curls to prevent frizz.
- Repeat the process around your head, working from the bottom layers up. Leave the last 2 or 3 inches of hair uncurled. This keeps the curls looking natural. Avoid curling the very ends of each section.
Use steady, even pressure when wrapping hair around the barrel to avoid kinks or uneven curls. Curling away from your face gives a flattering and modern look.
Choosing the Right Temperature and Barrel Size for Your Hair
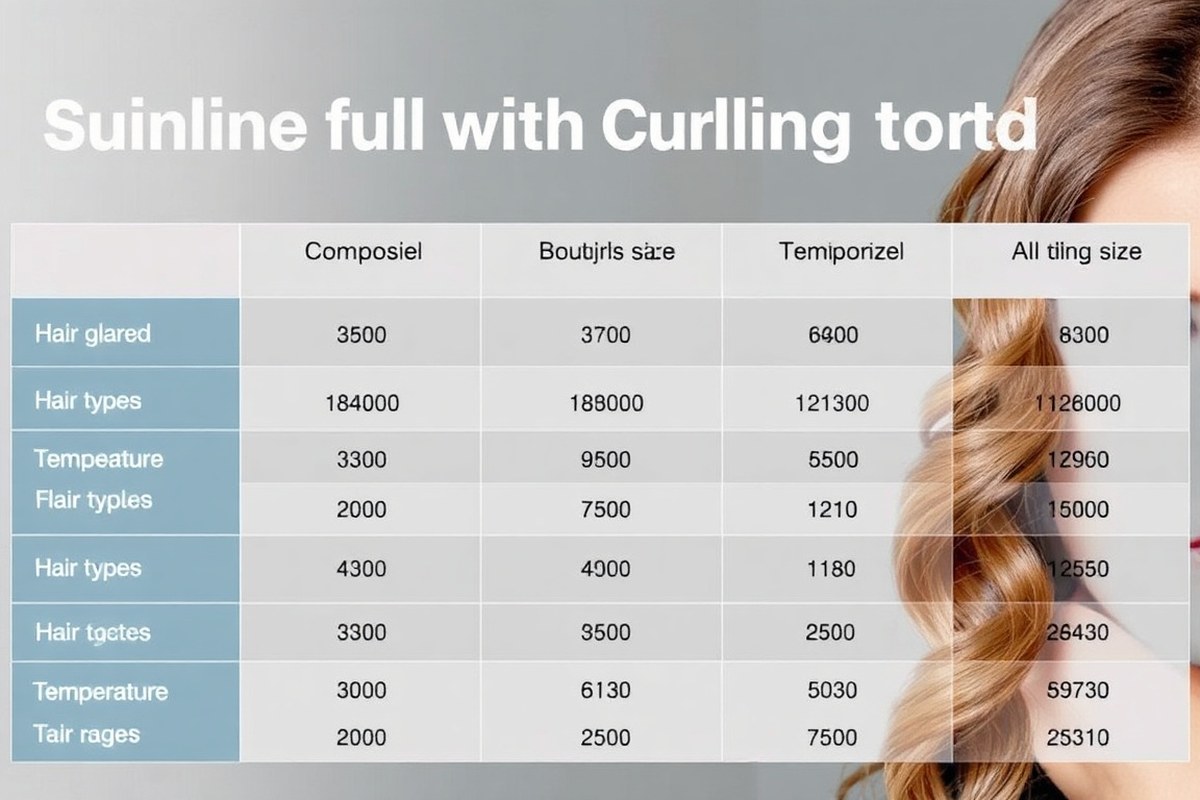
Pick the temperature and barrel size based on your hair type. Think about texture, thickness, and length before choosing. Also, match the barrel size to the curl style you want.
Fine hair needs lower heat and smaller barrels for tight curls. Thick hair requires higher heat and bigger barrels for loose waves.
Temperature Ranges by Hair Type
Fine hair needs gentle heat to avoid damage and hold curls well. Start at 250°F (120°C) and increase slowly if needed. Medium hair can handle 300°F to 350°F (150°C to 175°C) for better curl hold without breakage.
Thick or coarse hair needs higher temperatures, around 375°F to 400°F (190°C to 205°C). Damaged or chemically treated hair requires the lowest heat setting and shorter hold times. Always use adjustable temperature curling tools for safest results.
| Hair Type | Recommended Temperature (°F) | Hold Time (Seconds) |
|---|---|---|
| Fine Hair | 250 – 300 | 15 – 20 |
| Medium Hair | 300 – 350 | 10 – 15 |
| Thick Hair | 375 – 400 | 8 – 12 |
| Damaged Hair | 230 – 250 | 6 – 10 |
Start low and test your heat on small sections. Raise temperature only if curls don’t hold well. Use heat protectant spray no matter what.
Check your curling tong’s temperature before you start to avoid overheating fine or damaged hair.
Barrel Sizes and Curl Outcomes
Smaller barrels, like 19mm, make tight spiral curls that last. These work best on fine to medium hair. Larger barrels, around 32mm, create loose waves and softer curls.
A 25mm barrel works well for hair longer than your shoulders. It creates curls that aren’t too tight or too loose. This size fits most medium to long hair types.
Thick hair holds curls better with larger barrels. Use small barrels for short hair or defined spirals.
| Barrel Diameter | Curl Type |
|---|---|
| 19mm | Tight spirals |
| 25mm | Medium curls and waves |
| 32mm | Loose waves |
Hold hair wrapped around the barrel for 10 to 15 seconds at normal temperature. Reduce hold time for thick hair to avoid tight, unnatural curls.
Barrel Shapes and Their Curl Effects
Round barrels make classic curls and waves that look natural and bouncy. Tapered barrels give curls that start small and loosen toward the ends for a wild look. Clip barrels hold hair in place for controlled curls and easy use.
Clip tongs can double for straightening hair by clamping down fully. Using a clip can help you make more uniform curls. Wrapping hair without clips on a wand produces softer, looser waves.
Curl hair vertically with the barrel for curls that frame your face well. Try spiral wrapping for defined spiral curls instead of simple curls around the barrel.
Preparing and Protecting Hair Before Curling
Curling your hair starts with good preparation. Protecting hair before heat styling keeps curls healthy and long-lasting. Use the right products on damp hair and avoid curling when hair is wet.
Hair Washing and Drying Tips
Wash your hair the day you plan to curl for best results. Clean hair holds curls better and looks fresh longer. After washing, towel dry gently to remove excess water.
Hair should be damp, not dripping wet, before curling. Damp hair (cool and slightly moist, not soaking) curls best. Dry hair can also be curled but may need extra product for grip.
- Use a gentle shampoo and conditioner suited for your hair type
- Towel dry hair by pressing, not rubbing, to prevent frizz
- Comb through with a wide-tooth comb to detangle
- Let hair air dry or blow dry until just damp, around 10-15 minutes
- Avoid curling hair that has visible water droplets to prevent steam damage
Completely dry hair works well if you add styling products for hold. Always check hair feels cool to the touch to avoid heat damage.
Heat Protectants and Styling Products
Apply a heat protectant spray or serum on damp hair before curling. These products shield hair from high temperatures and reduce breakage. Setting lotions with polymers can boost curl strength and lifespan.
Light mousse or curl definition cream also helps curls hold shape. Apply sparingly to avoid weighing hair down or making it crunchy. After curling, finish with a flexible hold spray for natural bounce.
- Heat protectant spray (£5-9) on damp hair before styling
- Setting lotion for better hold and curl definition
- Light mousse to add body and spring
- Curl definition cream for softer curls
- Flexible hold hairspray after curling to set the style
Use a deep moisturizing mask once a week to replenish hair. Frequent heat styling without treatments can cause dryness and damage.
Avoiding Damage on Wet or Damp Hair
Never use curling tongs on soaking wet hair. The steam created can damage the hair shaft by weakening it. Your hair should feel dry to the touch.
Run your fingers through it. Make sure no water drops fall off.
Damp hair is best for curling because heat shapes the hair effectively without causing steam damage. Thick or coarse hair dries better if it’s just damp.
This helps heat reach all strands. For fine hair, avoid too much moisture to prevent limp curls.
- Do not curl hair with visible water droplets
- Ensure hair is cool and slightly moist before applying heat
- Use medium temperature settings for damp hair (around 300°F to 350°F)
- Allow curls to cool in your hand before releasing for longer hold
- Dry hair fully before curling if using higher temperatures
Using tongs on completely dry hair requires a heat protectant to avoid dryness. Keep your curling sessions brief to reduce heat stress, about 5-10 seconds per section.
Techniques for Different Hair Lengths and Textures
Short hair calls for smaller barrel curling tongs, about ¾ inch wide. Wrap small sections quickly around the tong to create tight, defined curls. Avoid holding the tong too long to prevent heat damage on the short strands.
Medium-length hair suits barrels around 1 inch wide. Use more hair in each section for soft curls or waves. Hold the tong for 8 to 10 seconds.
Then release gently. This helps the curl keep its shape.
Long hair benefits from larger barrels, 1¼ to 1½ inches wide. Wrap longer sections for loose, flowing curls. It can take 10 to 15 seconds for each section.
The heat needs to reach deeply inside. This makes the curl last longer.
Curling tongs usually have a clamp that holds your hair. This works well on straight or wavy hair. It keeps hair secure while curling.
Curling wands lack a clamp and rely on hand wrapping. Wands create looser, beachy waves and suit medium or longer hair lengths better.
Wands are ideal if you want to add subtle texture rather than tight curls. Tongs give more defined curls because they apply even tension and allow twisting. Remember that each tool requires different hand positioning for the best curls.
Frizz often happens if your hair is dry or has product buildup. Wash and dry your hair well to remove oily residues before curling. Use a light heat protectant spray to lock in moisture and smooth the cuticle during curling.
In humid weather, curls can fall apart or become frizzy faster. You might want to apply an anti-frizz serum after curling.
Wind and dryness can also affect your hair. So a good finishing spray helps hold curls longer.
Very curly or textured hair can resist curling with tongs. The natural curl pattern is usually stronger. This can make the tongs less effective.
Try a curling wand to improve or touch up your curls instead of changing them. This avoids fighting your natural texture and saves time.
Maintaining Curls: Setting and Finishing Techniques
To keep your curls lasting longer, start by using a light heat protectant spray before curling. Applying too many products before curling can weigh hair down and reduce curl hold. After curling, run your fingers through the curls.
Use a wide-tooth comb to loosen them. This helps create a natural look.
Using the right finishing products helps hold your style without stiffness. Spray curls lightly with a setting spray designed for long hold. Add a little hair oil or shine spray next.
This smooths any frizz you see. It also gives your hair a glossy finish. This combination helps curls stay bouncy and soft, especially in dry or mildly humid environments.
- Use humidity-resistant products overnight for curls that last 24 hours or more.
- For tighter curls on short hair, choose smaller barrel curling tongs.
- A larger barrel gives looser, more natural waves on longer hair.
- Avoid piling on products before curling to keep curls light and flexible.
- When releasing curls, wait until they cool completely for better hold.
- When outside in humid weather, use a spray that absorbs humidity. This helps to fight frizz.
- Finish with a shine spray or light hair oil for a polished look.
Environmental factors like humidity cause curls to loosen or frizz faster. Use anti-humidity sprays to protect curls during wet or muggy days.
After curling, avoid touching your hair too much; this breaks the curl pattern. Let curls cool down fully to set the shape before styling or spraying.
Let curls cool completely before touching them. This keeps their shape longer. Wait patiently to style them gently.
Common Mistakes When Curling Hair and How to Fix Them
One common mistake is using curling tongs on wet or damp hair. It causes uneven curls and frizz, as the heat steams the water. Always dry your hair fully before curling to get tight, lasting curls.
Another mistake is holding hair on the tong too long. This can burn or damage your hair.
Keep each section wrapped for about 8 to 12 seconds only. This gives curls time to set without frying your strands.
Many people curl very thick or long hair in large chunks. This leads to loose, uneven waves instead of defined curls. Work with smaller sections, about one inch wide, to get even curls all over.
- Use a heat protectant spray to avoid damage and frizz.
- Let curls cool while pinned or clipped to keep their shape.
- Don’t brush curls immediately, gently finger comb instead.
- Choose the right heat setting for your hair type to prevent damage.
- Alternate curling direction for a natural, voluminous look.
- Apply light hairspray after styling to help curls last longer.
- For low-porosity hair, curls hold better; try slightly higher heat.
Frizz often happens when hair lacks moisture or heat protection. Adding a leave-in conditioner or smoothing serum before curling helps. Also, avoid using too high heat, or hair will become dry and rough.
Curls can fall out quickly when they never cooled properly. Oily hair may also cause curls to slip.
Let curls cool pinned up for 10 minutes before touching them. Using a dry shampoo on roots can also help curls hold by reducing excess oil.
Alternating Curling Directions and Styling Variations
Curling your hair in different directions adds volume and makes styles look more natural. Curling away from your face creates a flattering frame. Alternating directions adds texture and fullness for tousled, lively hair.
Curling Away from the Face
Curling your hair away from your face helps open your features. It creates curls that sweep outward, giving your hair a bouncy, voluminous look. This direction is flattering and works well near the hairline for a polished style.
For example, curl the right side clockwise and the left side counterclockwise. This makes the curls flare away symmetrically. You can brush these curls out for soft waves or leave them tight for classic volume.
Curling Towards the Face
Curling towards your face softens your hairstyle and frames your features closely. These curls sweep inward, creating a gentle shape around your cheeks and jawline. This style suits loose, romantic curls that feel more relaxed and less formal.
To curl towards your face, twist the right side counterclockwise and the left side clockwise. These inward curls blend best with tousled hairstyles or casual, natural looks. Avoid curling all sections inward to keep volume from falling flat.
Mixing Curl Directions
Alternating curl directions builds fullness and makes curls look easy. Curl one section away from your face, then curl the next towards your face. This switch-up breaks up uniformity and adds movement to your hair.
This technique prevents your hair from looking like classic, one-direction curls. Instead, it creates a natural texture similar to beach waves. Alternating directions works with any curl size and creates a stylish, lived-in feel.
Try following these steps to alternate curl directions for all-over volume:
- Divide your hair into manageable sections, usually 1-inch wide.
- Start curling the first section away from your face.
- Move to the next section and curl towards your face.
- Repeat this alternating pattern throughout your hair.
- Leave the ends out slightly if you want a relaxed wave.
- Let curls cool completely before touching them.
- Use fingers or a wide-tooth comb to style and separate curls.
When to Seek Professional Help for Curling Hair
You should see a professional stylist if your curls don’t hold despite proper technique. It’s common to struggle with curling thin or damaged hair at home. A stylist can adjust heat and products to fit your hair.
They know your hair’s condition better than trial and error. This saves your hair from damage.
Using curling tongs on color-treated or very damaged hair calls for caution. Heat can worsen dryness and breakage, especially if you’ve bleached or chemically treated your hair. A pro checks your hair’s health before using heat.
They apply heat carefully and may suggest deep conditioning. Sometimes, they recommend easier styles to protect your hair.
Notice signs like excessive hair breakage, split ends, or new frizziness after curling. These signals mean your hair needs specialized care. Ask a stylist to check your hair health first.
They can give you custom treatments to add moisture. This helps your hair stay strong before you curl it again.
Use this checklist before booking a pro for curling. Do your curls fall flat in just a few hours? If yes, you might need professional care.
Your hair feels dry or straw-like after curling. Or breaking strands increase after heat styling. These issues mean a stylist’s expertise can help you avoid permanent damage.
Besides styling, professionals can recommend heat protectants suited for sensitive hair or low-heat methods. This can save you money in the long run by preventing costly hair damage or regrowth.
Salon prices for consultation and treatment usually cost $50 to $150. The price depends on where you live and the salon you choose.
Try curling a small hidden hair piece first. Watch for any damage or if the curl holds well. This simple test can save you trouble later.
Stop curling if you see smoke or smell burning. Also stop if your hair breaks easily.
Then get advice from a professional. This step prevents making damage worse from using the wrong temperature or technique.
Let your curling tongs cool completely between curls on fragile hair. This reduces heat stress and helps your curls last longer.
Step-by-Step Action Plan to Curl Your Hair with Tongs Today
Follow this simple plan to get well-defined curls safely. Each step helps you check your progress.
- Before you start: Wash and dry your hair completely. Your hair should feel clean and dry for the curls to hold better.
- 15 minutes before curling: Apply a heat protectant spray evenly. Your hair feels soft and protected, so you’re ready to go.
- Start curling: Use curling tongs at the right temperature for your hair type. Your hair should wrap smoothly around the barrel without burning.
- After curling each section: Hold the curl for about 10 seconds then gently release. The curl should spring back without stretching out.
- Once all hair is curled: Let the curls cool completely without touching. Your curls stay tight, proving your technique worked well.
- 10 minutes after curling: Lightly spray with hairspray to set curls. Your curls should feel secure but still move naturally.
- End of the day: Avoid touching curls too much. They remain bouncy and styled, meaning you nailed it.
Frequently Asked Questions
How Long Should I Hold My Hair on the Curling Tongs?
Hold your hair wrapped around the tongs for about 8 to 10 seconds. This sets the curl without heat damage.
Use the right temperature. Match it to your hair type.
Can I Curl My Hair When It’s Still Damp?
It’s best to curl hair when it’s dry or only slightly damp. Curling wet hair often causes frizz and uneven curls.
The tongs can’t heat hair evenly. This uneven heat creates problems.
What’s the Best Way to Prevent Curls from Falling Out Quickly?
After curling, let your hair cool completely before touching it. Apply a light setting spray or lotion to help hold the curl for longer.
How Close Should I Place Curling Tongs to My Scalp?
Position your tongs about 2 inches (5cm) from the roots to avoid heat damage. Closer heat can burn your scalp or hair roots; farther away means weaker curls.
How Often Should I Clean My Curling Tongs?
Clean your tongs at least once a month. Old styling products can make curling less effective.
They might burn on your hair. This causes damage or uneven heat.
Can I Use Curling Tongs on Colored or Chemically Treated Hair?
Yes, but choose lower heat settings to protect your hair. Using too much heat can weaken treated hair and cause it to break.
Final Thoughts
Curling your hair with tongs is simple once you know the right steps. Start by protecting your hair and picking the correct temperature. Now grab your curling tongs and try curling a small section to see the difference.