How to Curl with a Flat Iron: Simple Steps and Expert Tips for Perfect Curls
How to curl with a flat iron is easier than you think. Just clamp a small hair section near the roots.
Next, turn the iron 180 degrees. Slowly pull it down your hair to create a curl.
Start with dry, detangled hair and pick the right heat setting for your hair type. Too hot can damage fine hair.
So use lower settings for thin hair and higher for thick strands. Also, use a one-inch flat iron for the best curling control and shape.
Tight curls start near the scalp, rotating the iron fully before pulling away. For loose waves, start a bit lower and turn less. This simple trick helps you get bouncy curls that last longer.
Key Takeaways
- Choose ceramic plates for fine or color-treated hair to protect strands.
- Use titanium plates for thicker or coarse hair for better heat efficiency.
- Set your flat iron between 250°F and 300°F for fine hair to avoid damage.
- Use 375°F to 410°F for thick hair to shape curls effectively.
- Section hair into 2, 3 cm pieces for even curls and easier styling.
- Clamp flat iron about an inch from the roots to maximize volume.
Step-By-Step Guide to Curling Hair with a Flat Iron
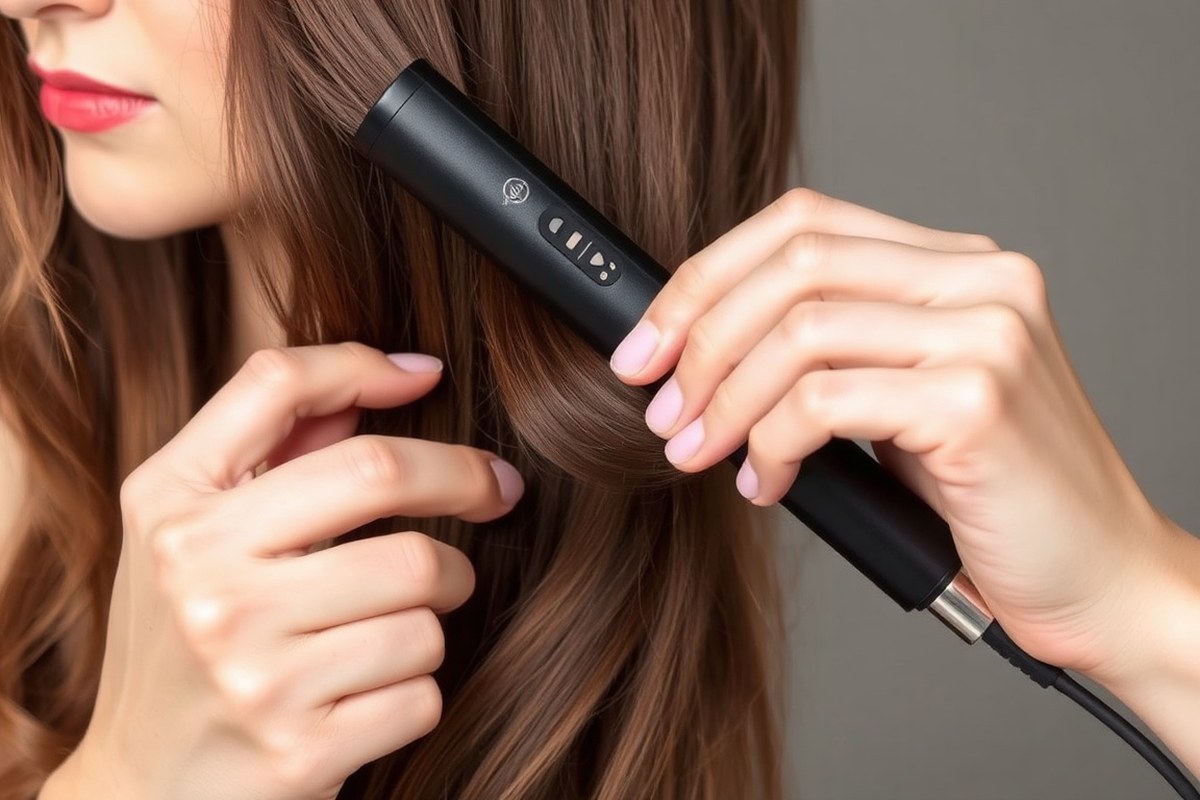
To curl hair with a flat iron, use a smooth, steady method. Clamp a small section near the roots. Twist the iron as you pull it down.
The hair wraps inside the plates for soft curls. These curls look more natural than those from a curling iron.
How you twist the flat iron changes the curl shape and direction. For face-framing volume, twist the iron 360 degrees outward as you glide down the strand. You can curl hair inward or outward depending on the style you want.
For loose, beachy waves, hold the iron straight up and down. Pull the iron down the hair in one direction. Change directions between sections for a varied, layered look.
- Clamp a 1-2 inch section of dry, brushed hair near the roots with your flat iron.
- Slowly move the flat iron down your hair. As you do, twist it 180 to 360 degrees outward. This motion helps create natural curls.
- Keep the clamp closed while you pull the iron down. Pull steadily to smooth the hair and form curls. This technique combines straightening and curling at once.
- Release the hair gently at the ends when you reach the bottom to set the curl.
- Repeat this process section by section, starting from the nape and moving upward.
- Alternate curl directions between sections to prevent curls from blending and to add volume.
- Let curls cool completely before touching to help them last longer.
Twisting your wrist to rotate the flat iron can feel awkward at first. Practice on one small piece to get the motion right. Curling inward frames the face soft and smooth.
Curling outward gives a playful, voluminous look. Both work well, so pick what matches your style that day.
Choosing the Right Flat Iron and Heat Setting for Your Hair Type

Choose your flat iron and heat setting based on hair type. Think about the style you want. Different types need different temperatures.
Select a flat iron size and plate material that match your hair thickness and texture. Set the temperature to avoid damage and get smooth, lasting curls.
Plate Size and Shape Recommendations
Use a narrow flat iron, around 1 inch wide, for defined curls or spiral shapes. Wider plates, 1.5 to 2 inches, work better for loose waves and thicker hair. Curved edges on plates make curling easier by allowing smooth twists and turns.
Fine or short hair curls best with smaller plates for better control. Thick or long hair needs larger plates to cover more strands at once. Avoid using large plates on very fine hair to prevent uneven curls.
Ceramic vs Titanium Plates Explained
Ceramic plates heat evenly, holding a steady temperature within ±10°F, which helps create smooth curls. Titanium plates heat faster but can fluctuate about ±20°F, causing inconsistent results. Ceramic also reduces the risk of hot spots that burn hair.
Titanium flat irons get very hot and work great on thick hair. They keep heat steady for smooth styling. Coarse hair responds well to titanium.
Ceramic suits fine or color-treated hair better, as it gently spreads heat. Using ceramic plates can reduce the chance of heat damage compared to titanium.
Heat Settings Matched to Hair Types
Set your flat iron between 250°F and 375°F to avoid heat damage. Fine hair curls well at 350°F to 360°F without over-drying. Medium hair needs 360°F to 380°F for firm curls.
Thick or textured hair may require 380°F to 400°F to hold curls longer. Never exceed 400°F, as styles with higher heat can leave hair stringy or damaged. Adjust heat in small 10°F steps to find the best setting for your hair.
Use this quick guide for heat settings and plate types. Match them to your hair type. It helps avoid heat damage.
| Hair Type | Plate Material | Plate Size | Temperature (°F) |
|---|---|---|---|
| Fine | Ceramic | 1 inch | 350 – 360 |
| Medium | Ceramic | 1 – 1.5 inches | 360 – 380 |
| Thick / Textured | Titanium or Ceramic | 1.5 – 2 inches | 380 – 400 |
Choosing the proper combination helps you curl smoothly and avoid uneven or frizzy results. Use clips to section hair into 1-inch pieces for more consistent curls with your flat iron.
Begin with the lowest heat on your flat iron. Raise the heat in small steps only if needed. This helps prevent hair damage.
How to Section and Prepare Hair for Flawless Curls
Preparing your hair before curling it with a flat iron makes curls smoother and longer-lasting. Sectioning helps manage hair better and protect strands from extra heat damage. Detangling and using heat protectants also keep hair healthy while styling.
Sectioning Hair by Length and Thickness
Divide your hair into sections that match its length and thickness. For short hair, create smaller sections about 1 inch wide. Longer or thicker hair needs wider sections, around 1.5 to 2 inches.
Start by parting your hair in the middle or on the side you prefer. Then clip the top half away and curl the bottom sections first. After finishing the lower layers, release the top layers and curl them.
Try this sectioning routine:
- Part hair down the middle or side
- Separate hair into top and bottom halves
- Divide bottom half into 2-3 horizontal rows
- Clip top half away during bottom curling
- Repeat for top half sections
This approach keeps sections manageable and ensures even heat distribution. Avoid very large sections to help curls hold better and reduce extra flat iron passes.
Detangling for Smooth Curling
Start detangling with a wide-tooth comb on damp hair before styling. Carefully remove knots without pulling hard to prevent breakage. Smooth hair prevents uneven heat and frizz during curling.
Before curling, you can also use a boar-bristle brush to smooth each section. This brush helps spread natural oils, adds shine, and controls flyaways. Detangled strands also wrap around your flat iron easier for neat curls.
Try these detangling tips:
- Use a wide-tooth comb on damp hair first
- Work from ends up to roots gently
- Use a boar-bristle brush on dry hair
- Apply smoothing serum for extra control
- Avoid tugging to limit breakage
Using Heat Protectants Prior to Styling
Applying a heat protectant is essential before using a flat iron. It reduces breakage by about 38% at 392°F, according to studies. Spray or cream protectants form a barrier that shields hair from high heat damage.
Spray your hair evenly before you start curling. Focus on mid-lengths and ends where damage shows up first. Wait a few minutes after applying the product so it sets before using heat.
Good habits include:
- Choose a copolymer-based heat protectant
- Apply to damp or dry hair evenly
- Let protectant dry or absorb completely
- Reapply lightly before curling each new section
- Avoid products with heavy oils that weigh hair down
Proper heat protection helps keep your curls shiny and your hair strong over time.
Curling Techniques for Different Hair Lengths and Curl Styles
You can curl both short and long hair with a flat iron. Adjust the size of hair sections for best results. Change your twisting technique based on hair length.
Using the right speed and angle helps you create loose waves, tight ringlets, or beachy curls. Different hair lengths and curl styles need small changes in your method.
Curling Short Hair: Tips and Tricks
Short hair needs smaller sections to curl well, usually about 1/2 inch wide. Use a flat iron with rounded edges to reduce kinks and get smooth curls.
Choose a lower heat setting like 300-350°F (150-175°C) if your hair is fine or damaged. This prevents heat damage while still shaping curls.
- Start with dry, heat-protected hair and comb through gently.
- Pick a 1/2 inch piece of hair near the roots. Clamp the flat iron close to the base. Make sure the hair is secure in the iron.
- Rotate the flat iron away from your face slowly. Glide down the hair at about 5-8 seconds per section. Take your time to avoid burns.
- Release the curl carefully and let it cool in your hand for a few seconds.
- Repeat for all sections, alternating curl direction for volume.
Curling Long Hair Without Tangling
Long hair is easier to curl with larger plates like 1.25 to 2 inches wide. It lets you cover bigger sections for waves or curls.
Divide hair into layers and work from the bottom up to avoid tangling. Use a heat setting between 350-410°F (175-210°C), depending on hair texture.
- Apply heat protectant and comb out knots before starting.
- Take a 1-inch section from the bottom layer and clamp at the root.
- Twist the flat iron and pull down slowly for 7-10 seconds.
- Let the curl cool before moving to the next section.
- Finish each upper layer in the same way, alternating curl directions.
Adjusting Technique for Waves, Curls, or Ringlets
Slow gliding at 5-8 seconds per section creates defined curls or ringlets. Keep your twist tight to get a stronger curl.
Hold the iron loosely for loose beachy waves. Move the iron faster through the hair, 3-5 seconds per section.
This gives you softer, relaxed curls. Leave some slack in the wrap to get that soft wave.
Curl each strand in a different direction to add volume. This adds about 40% more volume to your hair.
It makes curls look fuller and natural. You can change how much hair you wrap around the iron for different curl sizes.
Making Flat Iron Curls Last Longer and Stay Bouncy
Start by letting your curls cool in place to lock their shape. Pin each curl with a clip and leave them for about 10 to 15 minutes. This way, curls hold 85% to 95% of their bounce.
It works better than letting them cool while falling freely. This method keeps curls looking fresh longer.
After cooling, take the clips out carefully. Use your fingers or a wide-tooth comb. Gently separate the curls to keep their shape.
This helps keep the curls bouncy without breaking them up too much. Avoid brushing, which can make curls fall flat quickly.
Applying the right products makes a big difference. Before curling, lightly mist hair with a heat protectant spray that doubles as a curl hold. Check the bottle for the right amount, it’s usually a light spray.
- Use a lightweight mousse or curl-improving cream before drying your hair.
- Set curls with a flexible hold hairspray after styling.
- For extra volume, tease roots gently before spraying.
- Refresh curls mid-day with a curl revive spray or light water mist.
- Don’t overload on products; too much weight can flatten curls.
- Sleep on a silk pillowcase to reduce friction and frizz.
- Use dry shampoo at roots to keep curls lively and fresh.
Keeping curls bouncy means not skipping the cool down phase. When time is tight, use a blow dryer’s cool shot instead. Cool for 6 to 9 minutes.
This still holds 85% to 90% of the curl shape. Avoid touching or brushing curls before they fully set; touching makes curls drop sooner.
To refresh curls without heat, scrunch them lightly. Use a bit of water or curl spray. Let curls air dry for a few minutes.
This wakes up the curl pattern without risking heat damage. You can also lightly mist curls and finger-roll them for new bounce.
Don’t keep the flat iron on one strand longer than 10 seconds. Heat damage weakens curl hold.
Avoiding Heat Damage When Curling with a Flat Iron
Use a heat protectant spray before you start curling. It shields your hair from damage caused by high temperatures. Spraying evenly on dry hair costs around $5 to $15 and helps your curls stay healthy.
Set your flat iron to the correct temperature. For fine or damaged hair, use 250°F to 300°F. Thick or coarse hair can handle 350°F to 400°F. Higher heat can cause burns and breakage. So pick the lowest setting that works.
Only glide the flat iron over each hair section once or twice. Keep the iron on the hair for about 5 to 10 seconds max. Holding it longer dries out the strands and leads to split ends.
Work with small to medium sections of hair, about 1-inch wide. Smaller sections curl more evenly and reduce repeated passes. Wide sections might need more heat, which risks more damage.
Choose a flat iron with rounded edges. Rounded edges help create smooth curls without leaving crease marks. A flat iron with sharp edges can pinch the hair and cause breakage.
Don’t curl the same section multiple times in a row. Give your hair a break between passes if needed. This keeps your hair from overheating and losing moisture.
After curling, avoid touching or brushing your hair immediately. Let the curls cool down and set for about 5 minutes. This step helps curls last longer and prevents frizz from heat stress.
You can pick heat protectants with added smoothing or shine ingredients. These products often cost $8 to $20 and improve curl appearance. Avoid sprays with alcohol, as they dry out hair faster.
Troubleshooting Common Flat Iron Curling Mistakes
Uneven heat is a top reason curls fall flat or look patchy. Flat irons need a steady glide to spread warmth evenly. Hold the hair firmly.
Move the iron slowly to avoid hot spots. Don’t let parts stay cold or burn.
Some strands might not curl well. Check for buildup or wet spots blocking heat.
Using too large or too small hair sections can mess up your curls. Big sections might not curl through and come out limp. Small sections take longer and risk overheating.
Aim for 1-inch-wide sections for best control and even curling. Divide your hair neatly to prevent tangles and missed strands.
Twisting your hair wrong will give lopsided curls or mixed directions that look messy. Flat irons let you pick the curl’s curve by the way you twist the iron.
Twist the iron away from your face for cleaner, directional curls. Switch directions between sections only if you want a natural, tousled look.
- Keep flat iron temperature consistent, between 300°F and 350°F for most types
- Section hair into 1-inch-wide pieces, no bigger or smaller
- Twist the iron away from your face for even curls
- Use a smooth, steady glide, no stopping or dragging
- Apply heat protectant to avoid frizz and heat damage
- Comb or brush hair before curling to prevent tangles
- Finish curls with a light hold spray to keep shape longer
Tangled or frizzy curls often show when hair isn’t prepped or protected. Dry, unbrushed strands create snags and uneven heat travel. Wet hair or no heat protectant invites frizz fast.
Run a fine-tooth comb through your hair before curling. Then spray a heat protectant evenly to lock in moisture and smooth cuticles.
Curls that don’t hold tend to be from rushing or rushing with the wrong iron temperature. Flat iron curls need time under heat. Usually hold for about 5 seconds each.
This helps the curl settle its shape. Too fast means the curl slackens soon after. Use a gentle hold hairspray after curling and avoid touching curls until fully cool.
When to Choose Flat Iron Versus Curling Iron for Your Curls
Choosing between a flat iron and a curling iron depends on your hair. Think about the curl style you want. Also, consider your hair texture.
Flat irons create more natural, tousled waves. Curling irons produce defined or bouncy curls fast. Your hair type also affects which tool works best and how quickly you finish styling.
For soft beach waves or a lived-in look, flat irons work better. They allow you to twist hair around the plates, giving a relaxed curl pattern. Curling irons suit tighter, round curls because their barrel shape helps shape curls evenly and quickly.
Hair length matters too. Hair stylist Steven Waldman says pick a curling iron barrel to wrap short hair once. This helps create curls more easily.
It fits short hair best. Flat irons can struggle with short hair unless the plates are narrow.
| Feature | Flat Iron | Curling Iron |
|---|---|---|
| Curl Style | Natural, tousled, beach waves | Defined, bouncy, spiral curls |
| Speed | Slower, requires twisting technique | Faster, curls form quickly |
| Hair Texture | Works well on straight to wavy hair | Good for all textures, especially thick/coarse |
| Hair Length | Best for medium to long hair | Good for all lengths, choose barrel size carefully |
| Ease of Use | More technique needed to curl well | More beginner-friendly for curls |
Flat irons usually cost between $20 and $100. Prices depend on the brand and features. Curling irons cost about the same.
They take longer to master for curls, so allow extra time when styling. Curling irons let you finish quicker and create classic curls easier.
Match your curling iron barrel to your hair’s length. This helps curls form properly. It also reduces the chance of damage.
Flat irons create looser curls by sliding hair through straight plates and twisting. You get a softer, messier look that suits casual or beach styles. Curling irons heat a round barrel, which shapes hair evenly for polished curls.
Try flat irons if you want a relaxed curl and have medium to long hair. Pick a curling iron for tight, bouncy curls or shorter hair. Both tools need heat protection and proper technique to avoid damage.
Step-by-Step Action Plan
Follow these steps to curl your hair with a flat iron today. You’ll see how to get lasting curls without damage.
- Before you start: Wash and dry your hair completely. Your hair should feel smooth and dry, not damp or sticky.
- 0, 5 minutes: Apply a heat protectant spray evenly. You should feel your hair is lightly coated but not greasy.
- 5, 10 minutes: Section your hair into manageable parts using clips. Small sections help the iron curl hair evenly.
- 10, 30 minutes: Heat your flat iron to the right setting for your hair type. When the iron glides smoothly on hair, it’s ready.
- 30, 50 minutes: Curl each section by clamping, twisting, and pulling the flat iron through slowly. You’ll see curls form instantly.
- After curling: Let curls cool before touching them. Hair feels cooler and curls hold shape better.
- After 60 minutes: Spray a light hold hairspray to lock curls in place. Curls should stay bouncy and soft for hours.
Frequently Asked Questions
How to Curl with a Flat Iron?
Clamp a 1-2 inch hair section near the scalp. Pull the flat iron down while twisting it outward to form curls. Practice helps you get smoother, longer-lasting curls with less effort.
Why Can’t I Curl My Hair with a Flat Iron?
You might be twisting your wrist or moving the flat iron wrong. Squeezing the iron too tightly can also cause creases and loose curls. Keep your grip light and your motion smooth for better results.
What Is the Easiest Way to Curl Hair for Beginners?
Start by taking small sections about 1 inch wide. Clamp near the root, then pull and twist the flat iron away from your face. Using one-inch plates on a low heat setting helps you control the curls.
What Is the Girly Curl Method?
It’s a curling style that creates soft, bouncy curls using a flat iron. You twist the iron gently and pull the hair through slowly for delicate waves. This method looks natural and works well for casual styles.
Should You Curl Hair Inwards or Outwards?
It depends on your face shape and style goal. Curling outward adds volume around the face.
Inward curls create a rounded, classic look. Try both directions on different sides to see what suits you best.
How Do I Prevent Flat Iron Curls from Falling Out Quickly?
Use a light hairspray or styling product to hold curls in place. Also, avoid touching your hair too much after curling. Cooling curls completely before styling helps them last much longer.
Key Points to Remember
Using a flat iron to curl hair lets you create touchable, lasting waves. Start with small sections and the right heat to protect your hair. Try the technique today, and you’ll see the difference in your curls.