How to Clean a Wet Brush: A Complete Guide with Proven Methods
Cleaning your Wet Brush is simple and keeps it working well. First, remove any hair stuck between the bristles. It helps to use your fingers or a comb to avoid pulling the bristles.
Then soak the brush in a mild cleaning solution to loosen dirt and buildup. Warm water mixed with a little shampoo or vinegar works well. Soak it for 10 to 15 minutes to break down oils and residue.
After soaking, hold the brush under running water to rinse all cleaner and loosened dirt. Shake the brush to get rid of extra water and set it bristle-side down on a clean towel. Allow the brush to dry fully in open air before you use it again.
Avoid soaking Wet Brushes with wooden handles, since water can weaken them over time. Regular cleaning keeps your brush fresh, helps prevent scalp buildup, and extends its life. Try to clean your brush at least once a month for best results.
Key Takeaways
- Remove hair from your Wet Brush before soaking it.
- Soak your brush in a solution of warm water and vinegar for 15 minutes.
- Avoid soaking wooden Wet Brushes to prevent damage.
- Rinse the brush well after soaking to remove cleaning solution.
- Let the brush dry fully in the air before using it again.
- Regular cleaning prevents buildup and keeps your brush gentle on hair.
How to Clean a Wet Brush Step by Step
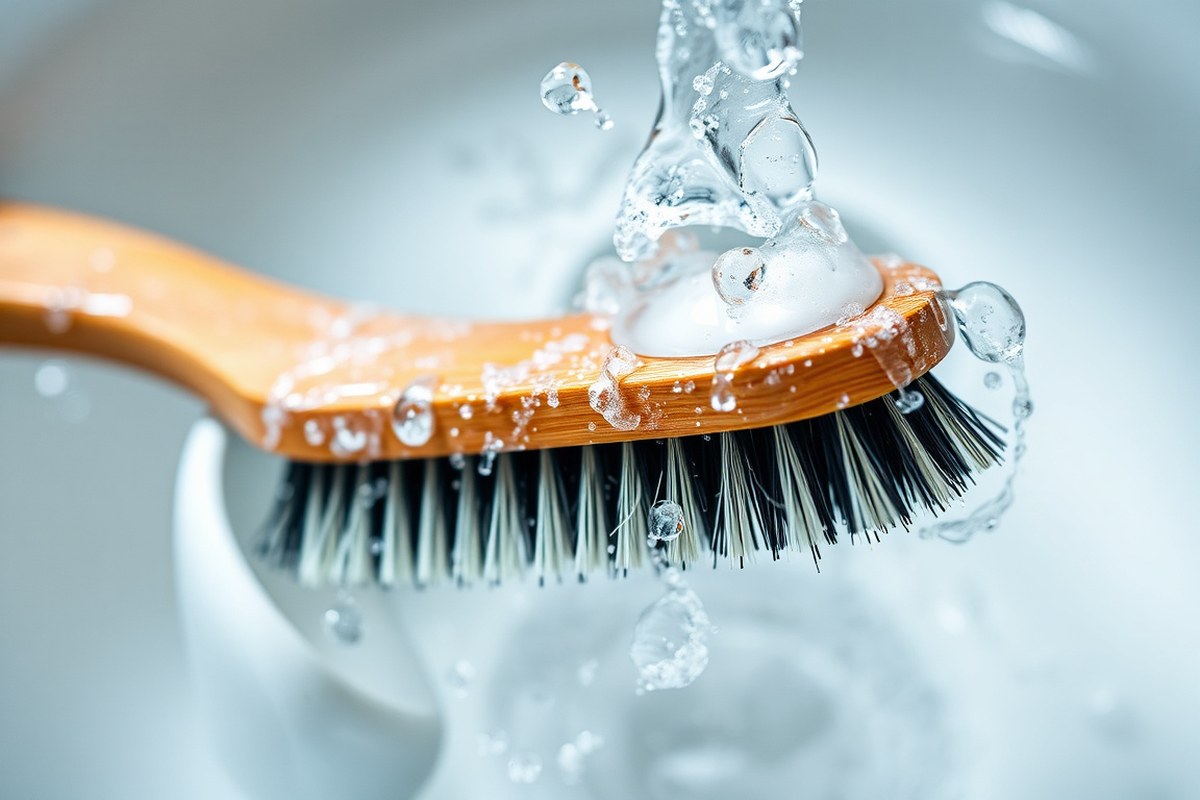
Cleaning your Wet Brush is simple if you follow the right steps. Begin by removing hair and debris, then wash the bristles gently. Finish by drying it properly to keep your brush in good shape.
Removing Hair and Debris Effectively
Start by picking out all hair tangled in the brush bristles with care. Use your fingers or a comb to gently remove the strands. This step keeps the brush safe from harm when you clean it.
Be gentle when lifting hair strands to prevent bending or breaking the bristles. Removing debris means better hygiene and smoother brushing.
Washing Bristles with Mild Shampoo
After clearing hair, wash the bristles using warm water and a mild shampoo. Harsh soaps can hurt the brush and your scalp, so choose a gentle option.
Use just a small drop of shampoo to avoid build-up. Rub the bristles softly with your fingers in a circular motion to clean thoroughly.
Proper Drying Techniques
Shake off excess water from the brush after washing. Place it bristle-side down on a towel to dry.
Keep the brush away from direct sunlight. Also avoid using blow dryers on the brush.
Heat can change the shape of the handle and bristles. Air drying keeps your brush working well longer.
- Use a comb or fingers to gently remove hair caught in the bristles.
- Check for any stubborn debris and lift it out carefully without force.
- Fill a bowl with warm water and add a small amount of mild shampoo.
- Dip the brush bristles into the soapy water without soaking the handle.
- Rub bristles gently with your fingers in small circles to clean.
- Wash the brush well under warm running water. Make sure to rinse out every bit of soap. This prevents residue buildup on your Wet Brush.
- Shake off excess water and pat dry with a towel.
- Lay the brush bristle-side down on a towel, letting it air dry fully.
Essential Tools and Cleaning Solutions for Wet Brushes
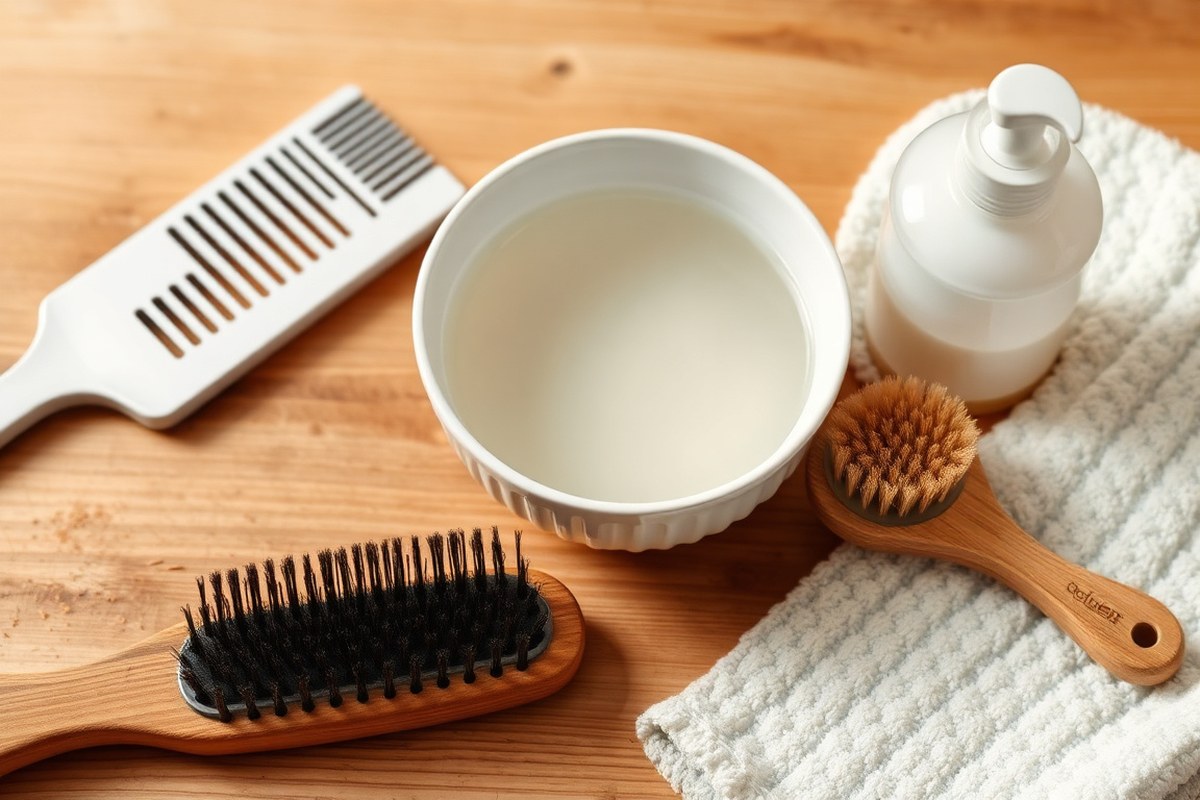
You need a few simple tools and solutions to clean your Wet Brush safely. Using the right products keeps the brush effective and protects its materials. Household items often work well alongside mild shampoos.
Tools Needed: Combs, Towels and Brushes
Gather a fine-tooth comb to remove hair strands caught in the brush. A clean towel helps dry your Wet Brush after cleaning. A small bowl or sink works great for soaking the brush during cleaning.
You can also use an old toothbrush to scrub gently around the bristles. These tools let you clean without damaging the bristles or the brush base.
- Fine-tooth comb for hair removal
- Old toothbrush for scrubbing
- Soft towel for drying
- Small bowl or sink for soaking
- Warm water
Keep your cleaning area organized so you avoid losing small tools. Having everything ready makes cleaning quicker and easier.
Safe Cleaning Solutions: Shampoo, Vinegar, and More
Mild shampoo is the safest and easiest cleaning solution for a Wet Brush. Use about a tablespoon of shampoo mixed in a bowl of warm water. Let the brush soak for 10 to 15 minutes to loosen buildup.
Vinegar diluted in water also works well. Mix one part vinegar with two parts warm water for a gentle soaking solution. This breaks down oils and leftover product safely without harming plastic parts.
Other household items like baking soda can clean stubborn residue. Combine two tablespoons of baking soda with warm water to create a paste. Apply the paste gently to the brush bristles with your old toothbrush.
- Mild shampoo diluted in warm water
- Vinegar mixed with warm water (1:2 ratio)
- Baking soda paste for tough buildup
- Warm water for soaking
- Avoid hot water to protect glue and plastic
Rinse the brush well with clean water after soaking or scrubbing. This removes residue and stops any cleaning agents from weakening the bristles over time.
Products to Avoid When Cleaning
Harsh chemicals such as bleach or alcohol-based cleaners can damage your Wet Brush. These break down the bristle material and the base. Avoid using boiling water because it can melt or warp the brush.
Oil-based or heavy silicone products should not be used for cleaning. They leave a greasy film, reducing how well your brush detangles hair. Stick with water-based and mild household products to keep your brush in good shape.
Don’t soak wooden parts in vinegar or water. It can cause warping. Glued parts may loosen if soaked too long.
Steer clear of abrasive scrubbing tools like steel brushes or sharp combs. These can scratch or crack the surface of your Wet Brush and shorten its life.
How Often to Clean Your Wet Brush for Best Results
Cleaning your Wet Brush once a week usually works fine. It stops oils and product from building on the bristles. Use more often if you apply lots of hair products or oils.
Hair type affects cleaning too. People with fine or oily hair usually need to clean their brush more often. People with thick or dry hair may clean their brush less.
Less oil transfers from thick or dry hair to the brush. That means less frequent cleaning is often okay. Still, wiping off hair strands and debris after each use helps keep things fresh.
Quick cleaning removes loose hair and surface residue. It’s okay to do this after every brushing session. Deep cleaning removes tough product buildup from your brush.
Do it weekly or when the brush feels sticky or smells. This keeps your brush fresh and working well. Deep cleaning means soaking in warm, soapy water.
Then gently scrub the bristles with a soft brush or cloth. This helps remove buildup without damaging the brush.
When shopping for cleaning supplies, use mild shampoo or dish soap at home. Avoid harsh chemicals that can damage the brush. Regular cleaning stops bacteria and mold from growing on the brush.
That keeps your scalp healthy and your hair cleaner. It’s a good habit for hair care. Paying attention here can keep your Wet Brush working smoothly and your hair looking great.
Deep Cleaning Techniques to Remove Product Buildup
To deep clean your Wet Brush, soak its bristles in a cleaning solution. This helps remove stubborn product buildup effectively. Use a gentle solution for this task.
Avoid submerging the entire brush for too long to protect the handle and base. Soaking loosens dirt and oils, making scrubbing more effective and safe for your brush.
Preparing a Soaking Solution
Mix warm water with mild shampoo or gentle soap. Use this for soaking your brush. It helps clean the bristles well.
This combination helps break down grease and product buildup without damaging the bristles. Avoid harsh chemicals or very hot water that may warp or weaken the brush parts.
A good recipe is one cup of warm water with two teaspoons of shampoo. Stir to combine until the soap dissolves completely. This mix cleans well without leaving residue behind.
Soaking Duration and Method
Place the brush bristle side down in the cleaning solution. Let the bristles soak for 10 to 15 minutes to soften any buildup. Avoid soaking the entire brush or leaving it submerged longer than 15 minutes.
After soaking, gently scrub the bristles with your fingers or a soft toothbrush. This step removes remaining dirt and product residue. While the bristles soak, wipe the handle with a damp cloth to remove sticky buildup.
Rinsing and Removing Residue
Rinse the brush thoroughly under clean, warm running water. Make sure all soap and loosened debris wash away from the bristles. Residue left behind can attract dirt and reduce your brush’s effectiveness.
Shake off extra water from the brush gently. Lay it bristle side down on a clean towel. Let it dry completely this way.
Do not dry the brush standing up. Water can get inside the handle this way.
It may loosen glue or damage parts. Drying this way also prevents mildew buildup.
- Mix one cup of warm water with two teaspoons of gentle shampoo in a bowl.
- Place the Wet Brush bristles face down into the solution, keeping the handle out.
- Let it soak for 10 to 15 minutes to loosen product buildup and dirt.
- Gently scrub the bristles with your fingers or a soft toothbrush.
- Wipe the handle with a damp cloth to clear away any sticky residue.
- Rinse the brush under warm running water to remove all soap and build-up.
- Shake off water after rinsing. Place the brush on a towel bristle side down. Let it air dry fully before use.
Avoiding Common Cleaning Mistakes That Damage Wet Brushes
Soaking your Wet Brush fully damages its cushion and base quickly. The sponge-like cushion that holds the bristles can warp or pull away from its backing.
Avoid soaking more than 5 minutes and keep water off the handle if it’s wooden. This prevents swelling, warping, and bristle loosening.
Many people scrub their brush too hard or use harsh cleaners. That wears down bristles and breaks them off.
Use gentle shampoo and softly work with your fingers or a soft toothbrush. Rinse well with lukewarm water to keep the bristles flexible and intact.
Letting your Wet Brush stay wet allows mold and mildew to form, which can harm the brush and irritate your scalp. Place your brush on a clean towel with the bristles pointed down to air dry. Avoid drying it standing up, in sunlight, or near heaters, as these spots can dry out bristles and damage the handle.
- Do not fully soak the brush; limit to 3-5 minutes max.
- Use gentle shampoo, avoid harsh chemicals or alcohol-based cleaners.
- Gently remove tangles, do not yank or pull hard on bristles.
- Rinse with warm water, never hot, to protect the cushion.
- Dry brush bristle side down on a towel; avoid direct sun.
- Avoid placing near radiators or vents as heat damages bristles.
- For wood handles, wipe clean instead of soaking to avoid warping.
Too much soaking and harsh scrubbing break bristles and ruin the brush’s cushion. Be gentle and quick when cleaning.
Small bristle loss can happen with overpulling or harsh cleaning. Don’t yank on tangles; loosen gently with your fingers before brushing. Bristle loss from rough cleaning shortens the brush’s life and reduces its detangling performance.
Following these steps takes only minutes but greatly extends your Wet Brush’s life. You’ll keep the soft glide that helps reduce hair breakage and maintain clean, healthy hair. A well-cared-for Wet Brush lasts months, saving money and improving hair care.
Disinfecting Your Wet Brush Safely and Effectively
Disinfecting your Wet Brush kills bacteria without harming its bristles or material. Use rubbing alcohol and a clean cloth for safe and effective disinfection. Avoid harsh household disinfectants as they might damage the brush’s plastic or silicone parts.
First, remove loose hair from your brush. Next, dampen the cloth with rubbing alcohol.
Gently wipe the bristles and the base, covering all contact areas without soaking the brush. The alcohol kills germs quickly and dries fast, preventing water damage.
Disinfection is necessary after illness or scalp infections. It also helps if you share your brush or use it on damp hair often.
Regular cleaning removes buildup. But disinfection goes further by killing lingering bacteria or fungi that cause odors or irritation.
After cleaning with alcohol, set your Wet Brush bristles-facing-down on a towel. Let it dry fully without covering. This stops damage to the cushion and bristles like warping or mold.
Disinfecting your brush only takes a few minutes to finish. It needs just a small bottle of rubbing alcohol. This makes it an easy step to keep your brush clean.
This routine keeps your brush hygienic and can add months to its life. Don’t soak your Wet Brush or use bleach on it.
These can damage the brush’s parts over time. That damage lowers how well your brush works.
Maintaining Your Wet Brush Between Cleanings
Cleaning your wet brush regularly helps keep it working well and your hair healthy. Remove hair strands from the brush after each use to prevent buildup. This simple step saves you from frequent deep cleanings.
Store your brush in a dry, ventilated spot to avoid mold and mildew growth. Avoid leaving it in a damp sink or shower area. Keeping it dry keeps the bristles firm and prevents odors.
- Remove hair from the brush daily using your fingers or a comb
- Rinse the brush briefly with warm water after use to clear product residue
- Dry the brush with a clean towel to remove excess moisture
- Store the brush upright in an open holder or jar to air dry fully
- Avoid storing the brush in enclosed, damp spaces like shower shelves
- Keep a small container near your sink with cleaning tools for easy access
- Adjust cleaning frequency based on your scalp health and hygiene needs
These simple habits can keep your wet brush fresh and ready. Quick rinses and daily hair removal cost no time yet improve hygiene greatly. You’ll notice your brush stays softer and lasts longer without product gunk buildup.
Also, proper storage stops moisture damage that can ruin the bristles. Following these tips means fewer headaches during deep cleans and a smoother brushing experience every day.
When to Replace Your Wet Brush for Hair Health
Replace your Wet Brush if you notice broken or bent bristles. These damaged bristles won’t glide through your hair smoothly. They can snag or pull, causing hair breakage and irritation on your scalp.
Also, check if the cushion base is cracked or loose. A soft base helps protect your hair and scalp while brushing.
A hard or broken brush won’t absorb impact well. It might hurt your scalp when you use it.
Look at the brush handle and overall condition too. A brush that feels weak or has cracks might break in your hand. This also reduces control, making detangling harder and risking more hair damage.
Keep track of how long you’ve had the brush. Consider replacing your brush if it’s older than five years.
Over time, wear and dirt buildup make cleaning less effective. Old brushes can spread oils and dirt to your hair again.
Dirty or worn brushes can leave your hair greasy and weighed down. They also struggle to detangle hair gently, leading to more splits and breakage. A fresh brush glides better and keeps your hair healthier.
Look for bent bristles, cracked base, or a weak handle. Also, replace if the brush is over five years old. Cleaning won’t fix these issues, so replacing the brush protects your hair health better.
Buying a new Wet Brush costs about $10 to $20, depending on the model. Replacing the brush early keeps your hair safe from damage.
It also makes your hair routine smoother. Regularly inspect your brush after each cleaning for these signs.
Inspect your brush monthly for damaged bristles or cracks to catch problems early.
Step-by-Step Action Plan for Cleaning Your Wet Brush
Follow these easy steps to clean your Wet Brush correctly and keep it working well. This plan shows when and how to clean for the best results.
- Before You Start: Gather mild shampoo, warm water, and a small bowl. You’ll need these to loosen dirt and build-up.
- Day 1: Remove hair from your brush by hand or with a comb. Your brush should feel easier to work with once clear of hair.
- Week 1: Soak the brush in warm, soapy water for 10 minutes. The bristles should look visibly cleaner after soaking.
- After Soaking: Gently rub bristles with your fingers or a soft toothbrush. You’ll remove stubborn product and grime.
- Weekly: Rinse the brush under cool water to wash away soap and debris. It should have no slippery residue left.
- Monthly: Disinfect the brush with a 70% isopropyl alcohol spray. Let it air dry completely before the next use for safety.
- Between Uses: Wipe the handle and base with a dry cloth. This removes hair oil and dirt well. Keep your brush clean this way every time. This keeps your brush fresh longer.
- Every 6 Months: Consider replacing the brush if bristles bend or break. Your hair won’t get the smooth detangling it needs otherwise.
Frequently Asked Questions
Can I Use Vinegar to Clean a Wet Brush Safely?
Yes, diluted vinegar can clean your Wet Brush without damage. Use a mix of one part vinegar to two parts water and soak the bristles briefly. Rinse well to remove any smell and avoid vinegar buildup that might harm hairs.
Is It Okay to Put a Wet Brush in the Dishwasher?
No, putting a Wet Brush in the dishwasher can damage it. Heat and harsh detergents may weaken the bristles or plastic parts. Stick to hand washing for gentle and effective cleaning that keeps your brush intact.
Should I Remove Hair from a Wet Brush Before Washing?
Absolutely, removing hair before washing helps clean your brush better. Use your fingers or a comb to get out tangled strands. This step prevents clogging and lets cleaning products reach all bristles properly.
Can I Use Shampoo to Clean a Wet Brush?
Yes, mild shampoo works well to clean a Wet Brush. It breaks down oils and product buildup on the bristles. Make sure to rinse thoroughly to avoid residue that can cause buildup later.
Is Drying a Wet Brush in Sunlight a Good Idea?
Avoid drying your Wet Brush directly in sunlight. Sunlight can dry out and warp the plastic or bristles. Instead, air dry it at room temperature away from direct heat.
How Long Does It Take for a Wet Brush to Dry After Cleaning?
A Wet Brush usually takes about 2 to 3 hours to dry completely. Drying time depends on airflow and humidity. Leave the brush bristle-side down to speed drying and keep it clean.
Before You Go
Cleaning your Wet Brush regularly keeps it working at its best and protects your hair. Start today by removing hair and rinsing it. This small effort saves you from tangled bristles and bad build-up later on.