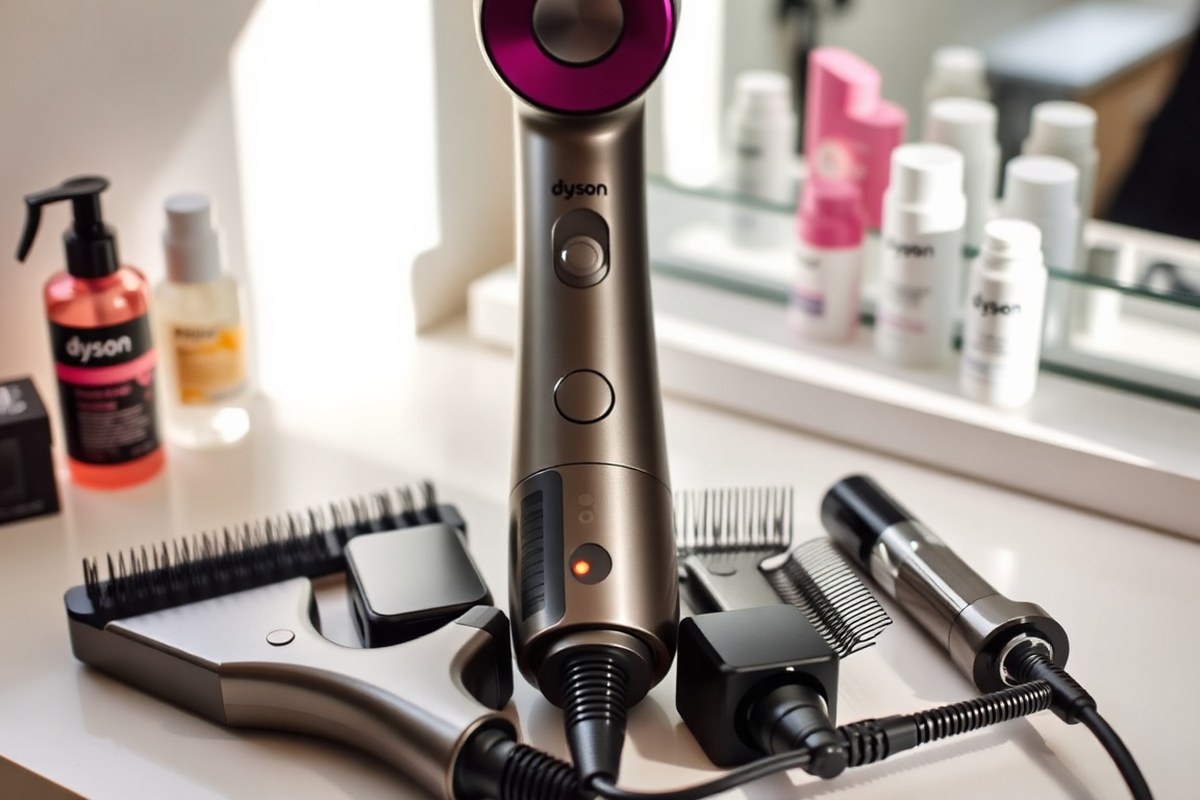
How to Use Dyson Airwrap Attachments: A Complete Guide for Beginners
Learning how to use Dyson Airwrap attachments can change how you style your hair. The key is to match each tool to your wet hair. Choose based on the style you want.
This helps get the best results. Start with your hair about 80% dry for the best results using barrels or brushes.
The Airwrap barrels curl hair by using airflow instead of extreme heat. Choose smaller barrels for tighter curls and larger ones for loose waves.
All attachments click easily onto the main unit. So switching between brushes and barrels is quick.
Begin by using the Coanda smoothing dryer or pre-styling attachment to get your hair damp. This helps the Airwrap style better and reduces heat damage. Avoid using the barrels on soaking wet hair because the curls won’t hold well.
Key Takeaways
- Dry hair to about 80% before using curling barrels for best hold.
- Attach the right barrel size: 1.2-inch for small curls, 1.6-inch for bigger waves.
- Use brushes on towel-dried hair to smooth or add volume without curls.
- Click attachments firmly onto the Airwrap to avoid interruptions while styling.
- Start styling with the pre-styling dryer to set a damp base for airflow curling.
- Brush through curls gently with a wide-tooth comb for volume without frizz.
How to Use Dyson Airwrap Attachments for Different Styles

The Dyson Airwrap attachments each serve a clear styling purpose. Use curl barrels to create shaped curls or waves. Use brushes for smooth hair and extra volume.
Finish with the Coanda smoothing dryer to dry and polish. Follow the right steps, and your hair will look sharp with less effort.
Using Curling Barrels for Defined Curls
The curling barrels come in different sizes, usually 30mm and 40mm. The smaller barrel creates tighter curls, while the larger one gives soft waves. Start with damp hair that’s almost dry, about 80 to 90 percent.
This gives the best grip. It helps shape your style better.
Section your hair to control the curl direction and size. Wrap each section around the barrel, holding it in place for about 10 to 12 seconds. Use the cool shot button to set the curl and help it last longer.
- Attach the 30mm or 40mm curling barrel to the Airwrap handle.
- Divide hair into small sections, about 1 inch wide for defined curls.
- Wrap each section around the barrel, letting the airflow do the work.
- Hold the hair on the barrel for up to 12 seconds, then release gently.
- Press the cool shot button to set the curl in place.
- Repeat until all curls are done, alternating barrel directions for natural waves.
- Brush out curls with a wide-tooth comb if you want softer waves.
Styling with Smoothing and Round Brushes
The soft and firm smoothing brushes help tame frizz and smooth hair while drying. Use the round volumizing brush to lift hair roots up. Shape the ends with a slight curl.
This adds body and bounce. These brushes work best on damp hair that’s 80 percent dry.
Press the brush attachment into the Airwrap handle, then twist it slightly to lock. Slowly glide the brush through hair sections, rolling the round brush under the ends for volume. The smoothing brushes give a sleeker, straighter finish with less flyaways.
- Attach your chosen brush (round volumizing, soft or firm smoothing) to the Airwrap handle.
- Pull a 1 to 2-inch section of damp hair taut with the brush.
- Slowly move the brush downward while letting the airflow dry the hair.
- For volume, roll the round brush slightly at the roots and ends.
- Use the firm smoothing brush for stubborn frizz and a straighter look.
- Repeat on all sections until hair is mostly dry and styled.
When and How to Use the Coanda Smoothing Dryer
The Coanda smoothing dryer replaces the older flyaway dryer and has two modes: drying and smoothing. Use it first to get your hair to a damp state before styling. The smoothing mode tames flyaways on dry hair, giving a polished finish.
Start by attaching the Coanda smoothing dryer to the Airwrap handle. Use the drying mode to reduce excess moisture until hair is about 80 percent dry. Switch to smoothing mode to smooth the surface and prep for other styles.
- Attach the Coanda smoothing dryer to the Airwrap handle.
- Switch to drying mode and run over wet hair to make it damp (80% dry).
- Switch to smoothing mode to reduce flyaways and smooth hair surface.
- Focus on the crown and any areas with frizz or stray hairs.
- Once hair is prepped, swap to curling barrels or brushes for styling.
How to Prepare Your Hair Before Styling with the Airwrap

The Dyson Airwrap works best when your hair is damp, about 75% dry. Start with towel-dried hair, not dripping wet or fully dry. Styling from damp hair helps the tool shape your hair without needing extreme heat.
Completely dry hair can be styled with the Airwrap. But the curls and volume won’t hold as well. Damp hair lowers damage risk.
The Airwrap uses airflow, not high heat. This makes styling safer for your hair. Let your roots get totally dry first to avoid flat styles and quicker falling curls.
Before styling, gently detangle your hair to avoid snags and breakage. Use a wide-tooth comb or detangling brush. Start smoothing knots at the ends.
Work your way up to the roots. This step makes the Airwrap sections easier and faster to style.
- Towel-dry hair until it’s roughly 75% dry
- Use a detangling brush or wide-tooth comb
- Apply heat protectant spray evenly through your hair
- Let roots dry fully before styling the lengths
- Part hair into sections for better airflow and styling
Using the right product protects hair from heat and helps your style last longer. Look for lightweight heat protectants that won’t weigh hair down or make it sticky. Skip heavy oils or creams before Airwrap styling.
They can cause buildup. Buildup may reduce tool performance.
Don’t style hair that’s soaking wet. Starting too damp keeps curls from setting and stresses hair.
Choosing the Right Dyson Airwrap Attachments for Your Hair
Choosing the right Dyson Airwrap attachments depends on your hair length, type, and style goals. The 30mm and 40mm barrels give different curl sizes and work best with certain hair lengths.
You can use the Airwrap on fine, thick, curly, or frizzy hair. But you’ll want to pick attachments designed for your hair’s texture and thickness.
Attachment Options by Hair Length
Short hair styles look best with the smaller 30mm barrels for tighter curls or waves. Medium-length hair, from above the shoulders to collarbone, can use both 30mm and 40mm barrels. Long hair, it’s above collarbone, works better with the 40mm barrels to create bigger, softer curls.
The small 30mm barrels let you curl shorter strands easily. The bigger 40mm barrels hold longer hair more effectively, making curls last longer. You can change barrels based on your hair length.
Use different barrels for various curl sizes. Swap them easily for new looks.
| Hair Length | Recommended Barrel | Style Result |
|---|---|---|
| Short (ear to shoulder) | 30mm barrels | Tighter curls and defined waves |
| Medium (shoulder to collarbone) | 30mm or 40mm barrels | Mix of defined and loose curls |
| Long (above collarbone) | 40mm barrels | Soft, voluminous curls and waves |
This table helps you pick the barrel size that suits your hair length. Using the right barrel reduces styling time and improves curl hold.
Best Attachments for Hair Types
Fine hair needs gentle barrels to avoid damage. The smoothing brush helps prevent breakage. Use both for soft, smooth hair.
Thick hair needs the stronger airflow and larger barrels to get curls that last. Curly hair looks great with new Airwrap tools.
These style without causing frizz or flattening curls. They keep natural shape intact.
The Flyaway Smoother attachment smooths frizzy or flyaway hair on any texture. It’s great for finishing your style and adding polish. Use special airflow settings for thick, curly hair.
This helps avoid overheating your hair. Choose settings made for dense hair types.
Compatibility Between Airwrap Versions
Older Dyson Airwrap models accept most new attachments. But some new accessories require the 2022 re-engineered version. The main difference lies in the airflow control and styling settings.
For example, newer models have combined barrels that curl in both directions. Older ones have separate barrels for each curl direction.
Older Airwrap users can use the Flyaway Smoother. Just switch the hair dryer to the right setting.
It works with older models. Double-check your model’s compatibility before buying new attachments to avoid extra costs or poor results.
Heat and Airflow Settings Explained for Optimal Styling
You change heat and airflow using the buttons on the Airwrap handle. There are three heat settings: low, medium, and high.
You also get three airflow speeds, from gentle to strong. The device automatically adjusts heat to avoid damage by measuring temperature over 40 times a second.
Thicker hair usually needs higher heat and strong airflow to dry and style well. Set the Airwrap to high heat and high airflow for curls or waves.
Use smaller sections for best results. Larger sections take longer and may dry unevenly.
For fine or damaged hair, choose low to medium heat and gentle airflow. This protects your hair while styling. When curling, wrap a small section around the barrel.
Let the airflow pull your hair in. Hold the cold shot button. Keep it pressed for 5 to 10 seconds to set the curl.
It takes about 20 to 30 minutes to style medium-length hair with the Airwrap. Using the cold shot to lock curls helps them last longer.
For smoothing brushes, pick medium heat and airflow, then run the brush slowly through your hair. Finish with a low heat pass for a polished look.
Use the 1.2-inch barrel for tighter curls and the 1.6-inch barrel for looser waves. Your hair length and desired curl tightness guides this choice.
Adjust heat and airflow as you go. Try longer cooling times or lower heat next time for better curls.
Step-by-Step Styling Timeline Using Dyson Airwrap Attachments
Start with damp hair when using the Dyson Airwrap. The key is drying your hair to about 75% to 85% before styling. This stage makes curling easier and helps curls hold longer.
Follow a precise order to get the best results. First, use the pre-styling dryer to make hair damp.
Then switch to the styling attachment for curling or waving. Finish by setting your style with a cold shot to lock curls in place.
- Attach the pre-styling dryer to your Airwrap and dry your wet hair. Aim to reduce moisture so your hair feels damp, not wet. This usually takes around 3 to 5 minutes depending on hair thickness and length.
- Switch to the desired styling attachment, like the barrel or brush, and start shaping your hair. Work on one section of hair at a time. Wrap hair around the barrel or run the brush through strands. This step usually takes 5 to 10 minutes for a full head.
- Hold each curl or wrapped section on the barrel. Keep it there for 10 to 15 seconds to set. Don’t rush this, as too brief can cause loose curls that fall quickly.
- Use the Airwrap’s cold shot button while your hair is still wrapped around the attachment. Hold the cool air for around 5 to 7 seconds per curl. This helps the curl cool and lock in place without frizz.
- Release the curl gently and let it cool off completely before touching or styling further. This usually takes a couple of minutes per curl if left to air dry.
- Repeat for all sections until your whole head is styled. Smaller sections work better for tighter curls, bigger for loose waves.
- Blow dry any damp spots on cool or low. Then style hair with fingers or light hairspray.
Hold each curl on the barrel for at least 10 seconds. Then use the cold shot to set it. This keeps curls tight and long-lasting.
Tips to Make Dyson Airwrap Curls and Styles Last Longer
To make curls last longer, work in smaller sections with the Airwrap barrels. Smaller sections let the heat reach every strand, locking in shape better.
Make sure your hair is about 80% dry before curling. So curls set without heavy dampness.
Applying a light styling product before curling helps hold your style. Use a curl cream or mousse that suits your hair type. For example, a frizz serum can smooth strands and reduce flyaways during styling.
Once your curls cool down, spray a flexible hairspray for extra hold without stiffness. Avoid heavy sprays that weigh curls down and cause limp hair. Holding curls gently in place after styling helps maintain volume.
For flyaway control and glossy hair, try Color Wow Dream Coat Supernatural Spray. It prevents frizz and seals the hair cuticle for a shiny finish. Spray lightly after styling to extend smoothness all day.
The Airwrap also can refresh second-day styles. Run a smoothing brush gently over flyaways or add a bit more serum. The tool’s airflow helps tame frizz without adding heat damage.
Keep your hair healthy by using bond-building treatments like Olaplex No 6 Bond Smoother before styling. These reduce breakage and support hair strength. Styling damaged hair with heat tools needs cautious product use and low heat settings.
Choose lower heat or airflow settings on damaged hair to avoid extra stress. The Airwrap works differently than typical curling irons, so start with milder settings. This approach helps keep hair smooth without drying it out.
Common Dyson Airwrap Mistakes and How to Fix Them
Loose or uneven curls often happen because hair isn’t sectioned right. Grab small to medium sections, about one inch wide, to get curls that hold nicely. Hold your hair steady on the barrel.
Let it cool for about 10 seconds. This helps the curl set better.
Hair stuck in brushes can feel frustrating and slow you down. Always check you’re using the correct brush size for your hair type.
Turn the device off before untangling. Try gently pulling hair free with your fingers or a wide-tooth comb to avoid breakage.
Over-drying is another common slip-up that leads to hair damage. Keep your hair damp, not soaking, before styling with the Airwrap. Use the medium heat for fine hair.
Choose higher heat only for thick or coarse hair. This protects your hair from damage.
- Don’t overload the hair section; two inches can tangle easily.
- Use the cool shot button after each curl to set it.
- Check attachments are fully clicked in before starting.
- Apply a light mousse or styling product to damp hair first.
- Clean brushes after each use to prevent buildup.
- Keep airflow settings moderate to avoid too much heat.
- Dry hair 80% before using attachments to reduce damage.
Using too big sections or rushing curls creates loose waves. Styling with wet or dripping hair can cause uneven curls or damage, so towel-dry until damp. Change barrels while styling for tight curls or more volume.
Don’t hold one style for too long. This keeps your hair from overheating.
Watch for signs of heat damage, like frizz or brittleness. Reduce the heat setting.
Style your hair less often to help it recover. Proper prep and gentle use save you time and protect your hair’s shine and health.
How to Clean, Store, and Maintain Dyson Airwrap Attachments
Cleaning and storing your Dyson Airwrap attachments helps them last longer. You should clean the filter once a month or when the light flashes. Keep the attachments in the original case or a safe place to avoid damage.
Cleaning Each Attachment Safely
Cleaning keeps your Airwrap working well and protects your hair. Use the brush Dyson provides to remove hair strands and dust. Wipe barrels and brushes gently with a damp cloth but never soak them.
Follow these steps to clean your attachments:
- Detach the attachment from the base before cleaning.
- Use the cleaning brush to remove hair from barrels and brushes.
- Wipe surfaces with a damp cloth to remove product buildup.
- Dry the attachment completely before storing it.
- Check the dryer nozzle for lint and clear it with the brush.
- Store attachments only after they are fully dry.
Never submerge attachments in water; moisture can damage the motor parts.
Storing Attachments to Protect Them
Store your attachments where they won’t get crushed or dirty. The official Dyson case is perfect because it holds everything neatly in place. Store it in a clean, dry box or drawer with dividers.
Arrange each piece separated from others to avoid scratches. Keep the attachments away from heat and moisture to prevent warping or rust. Taking these small steps helps keep your Airwrap ready to use anytime.
Avoid tossing accessories loosely in a bag; tangled parts can break or bend.
Maintaining the Airwrap Filter
The filter ensures strong airflow and protects the motor from dust. Clean the device about once a month.
Do it sooner if the light flashes or it shuts off. Dyson’s brush helps clear the filter cage every few weeks.
Here’s how to clean the filter:
- Turn off and unplug the Airwrap.
- Twist the filter cage at the base to remove it.
- Use the cleaning brush to gently sweep away dust and debris.
- Rinse the filter cage under lukewarm water if needed.
- Dry it completely before reattaching the cage.
- Put the cage back on and twist it to lock.
- Repeat monthly for best airflow and performance.
Clean the filter immediately if the Airwrap stops suddenly to avoid damage.
Step-by-Step Action Plan for Using Dyson Airwrap Attachments
Follow this plan to get comfortable with your Dyson Airwrap and create great styles fast.
- Day 1: Clean and dry your hair to about 80% damp. This helps the Airwrap work best and your style lasts longer.
- Day 2: Pick the curling barrels that match your hair length and style goals. Curl a small section to check if the barrel size creates your desired curl.
- Day 3: Practice the airflow and heat settings. Start low and increase slightly until your hair curls without feeling too hot or dry.
- Day 4: Try styling your whole head with the chosen attachment. Use clips to section hair evenly for consistent curls or volume.
- Day 5: Finish with a cool shot to lock curls. Check if curls feel set and springy after cooling.
- Week 2: Use the smoothing brush attachment on dry hair to create a sleek finish. It should reduce frizz and add shine without flattening your style.
- Week 3: Clean the attachments carefully by wiping off product build-up. This keeps airflow strong and protects your hair.
- Week 4: Store the Airwrap and attachments in a dry place, ideally their case. Check if everything fits well and stays clean.
Frequently Asked Questions
Can I Use Dyson Airwrap Attachments on Wet Hair?
Yes, the Dyson Airwrap works best on damp hair. It dries and styles hair simultaneously using airflow without extreme heat. Make sure hair is towel-dried but still slightly damp for best results.
How Do I Switch Between Dyson Airwrap Attachments?
You simply push the attachment onto the Airwrap’s barrel until it clicks. To remove, press the release button and pull it off gently. This click system ensures a secure fit while making swaps quick and easy.
Are Dyson Airwrap Attachments Compatible with Older Airwrap Models?
Yes, all Dyson Airwrap attachments fit every Dyson Airwrap multi-styler. You don’t need to buy new parts if you upgrade to a newer model. Compatibility covers original, long, curly, and updated attachments alike.
Can I Use the Dyson Airwrap Attachments to Dry My Hair?
Yes, some attachments help dry hair while styling, like the pre-styling dryer. It removes excess moisture before curling or smoothing. Using this attachment speeds up the styling process without added heat damage.
Should I Use the Same Attachment for All Hair Lengths?
No, different hair lengths need specific attachments for best results. Shorter hair may need smaller barrels, while long hair suits larger attachments. Choosing the right size helps create the style you want without tangling.
Why Does My Hair Sometimes Get Stuck in Dyson Airwrap Attachments?
Hair can catch if it’s too long or tangled before styling. Always start with clean, detangled hair and use the airflow direction to your advantage. Avoid forcing hair into the barrels to prevent snags and damage.
The Bottom Line
The Dyson Airwrap attachments can help you create many styles with less damage. Start with small steps and get to know each tool’s feel and effect. Try your first style today to see how easy and fun it is.