

How to Cut Layers in Your Own Hair: Simple Steps for Fast, Even Results
How to cut layers in your own hair can seem tricky at first. The secret is to take your time and work with small sections. Cutting layers by lifting hair to 90 degrees and trimming evenly creates soft, natural-looking results.
Start by detangling thoroughly and using sharp scissors meant for hair. Take vertical slices, lift each section straight up, and cut carefully along your guide. This method works well on straight, wavy, or even curly hair when done right.
Keep your cuts gentle and avoid cutting too much at once. It’s easier to trim more later than fix uneven layers. With practice, you’ll see how fast and balanced layered haircuts can be at home.
Key Takeaways
- Use sharp, hair-cutting scissors for cleaner, safer cuts.
- Detangle hair completely before starting each section.
- Lift vertical slices of hair to 90 degrees from the head.
- Cut small sections step by step to maintain control.
- Trim less than you think; you can always cut more later.
- Choose a cutting method based on your hair’s length and texture.
How to Cut Layers in Your Own Hair Step by Step
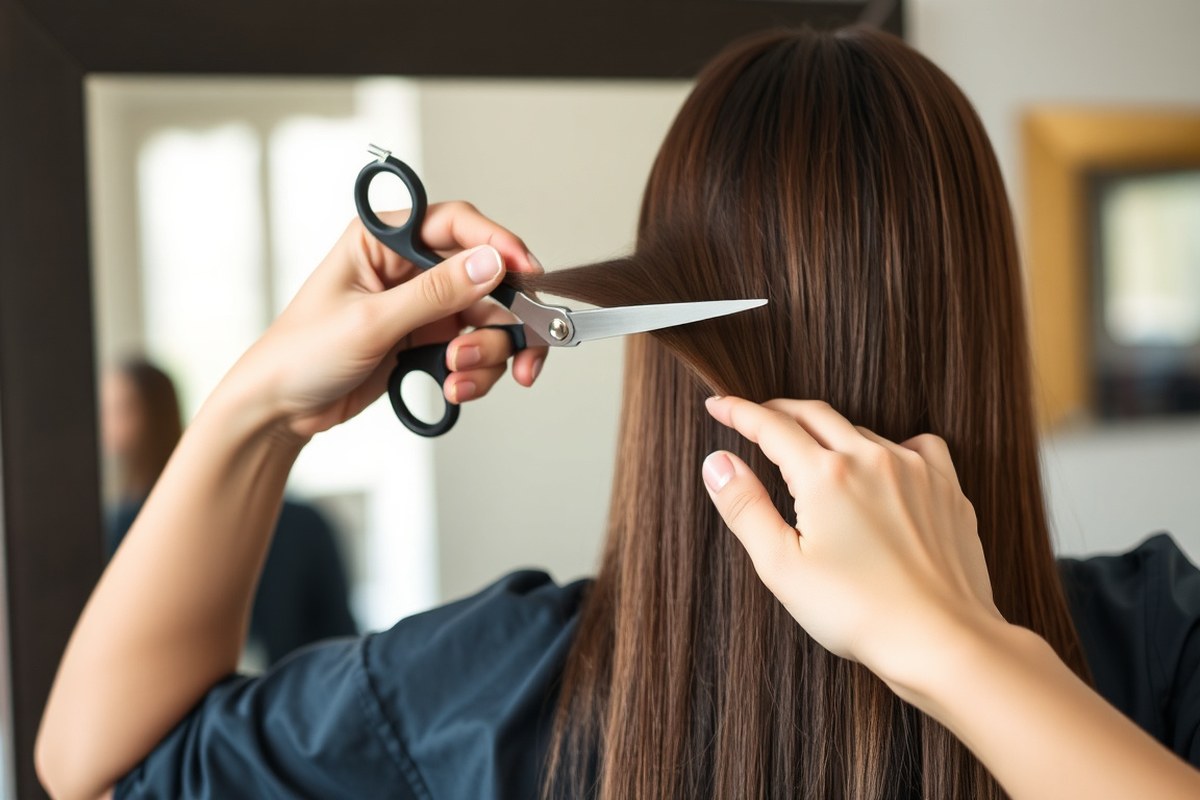
Cutting layers in your own hair works best using a clear, step-by-step approach. The ponytail method is great for beginners. It creates soft, even layers.
Best for long or medium straight hair. You’ll use elevation and point cutting to shape the layers and avoid harsh lines.
Before you start, gather professional hair cutting shears, a fine-tooth comb, hair ties, and sectioning clips. Work with clean, dry hair brushed smooth to get even results. This method starts with a guide cut on a lifted ponytail.
You repeat this on sections of hair. It helps create even layers.
- Section your hair and tie a ponytail at forehead level. Make a 1 cm-wide ponytail in front, near the hairline. This ponytail will be your cutting guide and create layers that frame your face.
- Pull the ponytail straight up from your head. Hold it firmly between your fingers to create tension. The angle you lift the ponytail controls layer length. Usually, this is a 90-degree vertical pull. Adjust the angle for shorter or longer layers.
- Cut straight across the ponytail ends. Use sharp hair shears and cut evenly to your desired length. This first cut shapes your shortest layer at the front.
- Release the ponytail and comb down the hair below. Section 1 cm-wide strips on either side of your head with clips.
- Take the next section, lift it at the same angle, and cut to match the guide. Use the ponytail cut as your guide for length and shape. Repeat this on all sections evenly for balance.
- Point cut the edges by snipping vertically into the ends. This softens the line you just cut, adding texture and feathered layers.
- Double-check your layers with your fingers combed through. Look for evenness; trim any longer pieces slightly to blend well.
The ponytail method works because lifting hair pulls the longest layers over the shortest. Cutting straight across creates the stepped effect that we call layers. Point cutting breaks up harsh lines and adds softness.
Hold your scissors perpendicular to the ponytail for a clean cut. Avoid cutting hair too short on the first try, you can always trim more. This approach takes about 10 to 15 minutes once you get the hang of it.
Tools and Preparation for Cutting Layers at Home
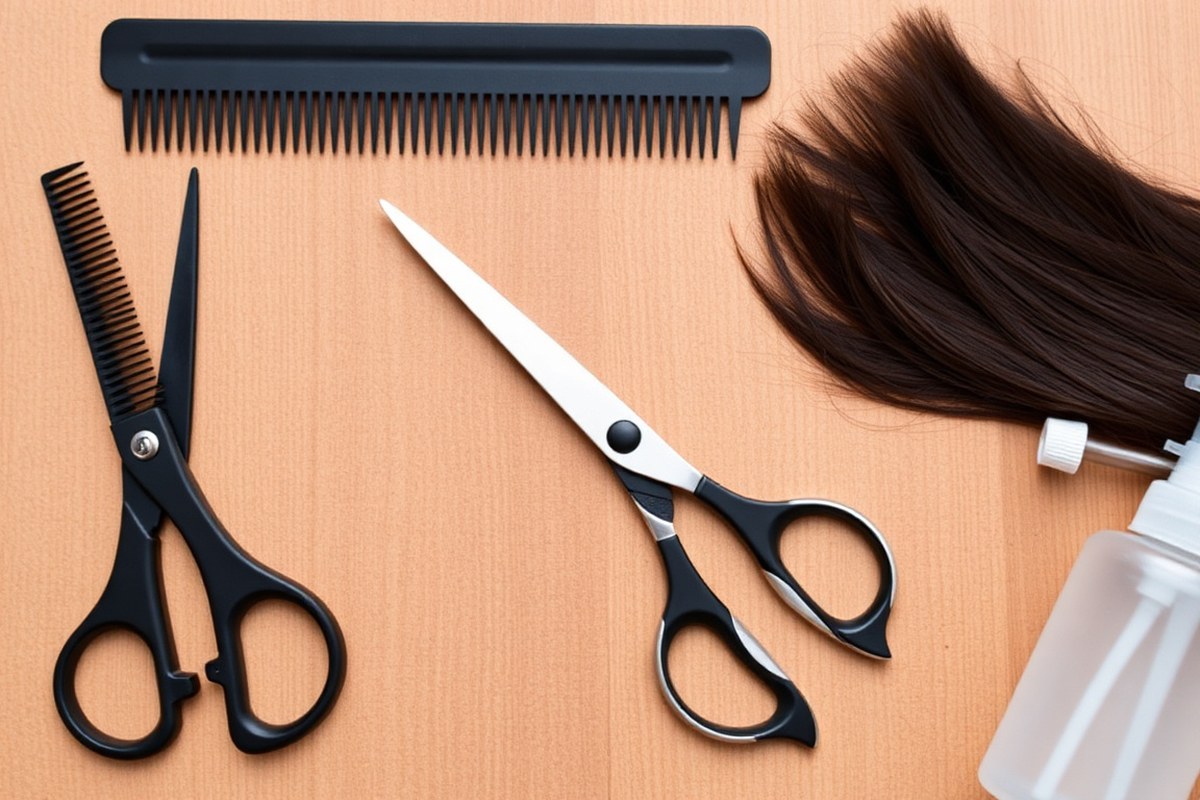
Sharp hair scissors are essential for cutting your own layers at home. Avoid using craft or regular household scissors because they cause uneven cuts and split ends. You can find a good pair between $15 and $30 at beauty supply stores or online.
Decide if you want to cut your hair wet or dry first. Think about your hair type and style goals. This choice affects your results.
Dry cutting works well for most hair types. It’s great for curly or wavy hair. You can see the natural shape and length better.
Straight hair or shaggy layers like a wolf cut often work better when damp. Wet hair is easier to comb and control for precise lines.
Gather other tools to keep the process smooth and safe. Use a fine-tooth comb for detangling and a wide-tooth comb for sectioning. Hair clips or small clamps help hold layers apart for better control.
A handheld mirror combined with your bathroom mirror lets you check the back while cutting. Choose a bright spot with good lighting to cut your hair.
Use a flat, clean surface for your tools. Catch your hair clippings there.
- Sharp hair-cutting scissors
- Fine-tooth and wide-tooth combs
- Hair clips or clamps to section hair
- Handheld mirror for back view
- Good lighting near a flat surface
Before you start, wash and dry your hair as needed. For dry cutting, hair should be clean and completely dry to avoid accidentally cutting too short. Wet hair shrinks as it dries.
So cut less than you think if you choose a damp method. Keep your workspace free of distractions and sit down while cutting to avoid uneven angles.
Never rush your first DIY layer cut. Take small sections and cut conservatively to avoid mistakes.
Choosing the Right Layer Cutting Method for Your Hair Type and Length
Choose your layered cutting method based on your hair’s length, texture, and your skill level. Long, straight or wavy hair works well with the ponytail method.
Short hair needs a section-by-section approach. Curly or textured hair requires dry cutting and finger-cutting to preserve its natural shape.
Ponytail Method for Long, Straight, or Wavy Hair
The ponytail technique works well for medium to long hair beginners. Pull your hair into a tight ponytail at the crown and smooth it. Cut straight across where you want the layers to begin.
It works best on dry hair, especially if your hair is straight or wavy. This method treats the whole head as one section, making the cut quicker and easier. Avoid the ponytail method if your hair is very uneven or fragile.
It can cause uneven layers that look messy. Try a different method instead.
Pull the ponytail straight up to check for evenness after cutting. Cutting straight across a ponytail creates short layers on top.
The longer parts stay underneath for a stacked look. This gives a shape with layers.
Section-by-Section Method for Medium to Short Hair
Short or medium hair needs more control, so cut in small sections. Use 45-degree or 90-degree elevation by lifting hair halfway to straight out from the head. This creates stacked or even layered shapes for a neatly blended cut.
Comb each section straight down or pull it to the sides. This helps you see the length clearly before cutting. Check your cuts carefully as you go.
Cut using small, precise snips to avoid choppy or uneven layers. Keep your cuts gradual and avoid cutting too much on your first pass.
This approach takes more time but suits thick, curly, or damaged hair. It lets you cut slowly and carefully for better results. Be patient with this method.
Spot uneven parts or trouble following the steps? It’s wise to get a stylist’s help. They can fix issues and work safely on your hair.
Dry Cutting and Finger-Cutting for Curly Hair
Dry cutting is best for curly or textured hair. Cut curl by curl to keep the natural bounce.
This method protects the hair’s shape and texture. Moisturize your hair before cutting to help control frizz and see how curls fall naturally.
Do not use the ponytail method on curly hair because curls shrink a lot when dry. Separate curls and trim small sections little by little.
This avoids removing too much length at once. Cut carefully to keep the curls looking good.
Finger-cutting allows you to shape curls without creating sharp, choppy lines. This method needs patience but avoids uneven layers and leaves curls looking soft and natural.
| Elevation | How You Hold the Hair | What You Get | Use It For |
|---|---|---|---|
| 0 degrees | Combed straight down, flat against the head | One length, a blunt line, no layers | Trimming the perimeter only |
| 45 degrees | Lifted halfway up | Weight built up at the bottom, stacked shape | Bobs and lobs with a fuller hemline |
| 90 degrees | Straight out from the head | Even layers all over, round shape | Medium hair, thick hair, curly hair |
| 180 degrees | Pulled straight up to the crown | Short on top, long under | Long layered hair cutting with dimension |
Use these elevation angles to pick the right cut style for your hair length and texture. The ponytail method uses the 180-degree angle by pulling hair up to the crown.
Short and medium hair benefit from 45- and 90-degree lifts. Curly hair curls react best to 90-degree cuts done section by section on dry hair.
How to Cut Layers in Curly or Textured Hair Correctly
Cut curly or textured hair dry to see its true length and shape. Wet curls stretch a lot and shrink when dry, which can make layers uneven. Use small sections and snip curls carefully to keep the natural bounce and avoid choppy cuts.
Assessing Curl Pattern and Length
Curl types vary, so adjust your cutting approach based on your curl pattern. Loose curls need softer layers, while tight coils require careful shaping to prevent bulk. Knowing your curl length helps decide where to place layers for the best look.
Shorter curls tend to spring up more after cutting. Longer curls show layer differences easily, so aim to blend slowly. This understanding helps prevent uneven shrinkage or patchy layers as your hair dries.
Sectioning Curly Hair for Layer Cuts
Separate curls with clips and combs designed for textured hair to reduce frizz. Dry hair is easier to section because curls hold their form well. Use clips to divide hair into top, middle, and bottom parts for controlled cutting.
Lift curls gently when sectioning to avoid distorting their shape. Work on small sections at a time so you can cut each curl accurately. Larger or denser curls might require more sections to manage properly.
Cutting Techniques to Preserve Curl Shape
Cut curls dry, one curl at a time, to avoid surprises with shrinkage. Hold a curl up from its middle point. Cut it at a slant.
The front should be shorter and the back longer. This angle shapes the layers naturally with the curl movement.
Use point cutting to soften the edges and blend layers smoothly after the main cuts. Point cutting means snipping the ends vertically into the hair, avoiding blunt edges. Check your ponytail placement and angle often to keep layers even.
Clip away the bottom back pieces before cutting to prevent accidental length loss. Bring hair forward before cutting. Cut at an angle for rounded layers.
Cut straight for a blunt look. This control helps you tailor the style to your preferences.
- Start with dry, detangled hair to see each curl pattern clearly.
- Divide hair into three sections: top, middle, and bottom, using clips.
- Take small strands from the middle section and stretch them gently upward.
- Cut the lifted curls at a slant for natural-looking shorter front layers.
- Move section by section, following the initial cut line for consistency.
- Trim the bottom back hair separately to avoid cutting more than intended.
- Bring curls to the front and cut at your preferred angle for shape.
- After cutting, lightly point cut each curl’s ends to blend and soften layers.
Common Layer Cutting Mistakes and How to Fix Them
Uneven or choppy layers happen when one section is cut too short. Check other sections before cutting more. This stops uneven layers from forming.
Cutting a little at a time helps avoid this. After trimming one part, compare it with the next section to keep lengths balanced all over.
Face-framing layers often look blunt because they are cut straight across at the front. Cut layers at an angle for a softer look. Start shorter near the cheekbone.
Let layers get longer toward the rest of the hair. After you cut, soften the ends by point-cutting with sharp hair-cutting shears. This breaks up harsh lines and stops layers from stacking.
You can fix very short layers by adding bangs. Bangs help balance the look and blend layers better. Cutting bangs into hair that didn’t have them creates a fresh shape upfront.
Use pinking shears, which have teeth, to add texture. They prevent blunt, harsh edges on bangs. Regular scissors create straight, heavy edges instead.
- Cut dry or slightly damp hair that is clean and hydrated for better control.
- Use hair-cutting shears designed for precision, not kitchen scissors.
- Trim hair in small sections, regularly comparing lengths between sides.
- Angle the scissors slightly rather than cutting straight lines.
- Point cut the ends to soften any harsh edges after cutting.
- Consider cutting bangs to fix uneven front layers or fix mistakes.
- Take breaks and check your progress in a mirror with good lighting.
Cutting slowly and checking each section before continuing can save your hair from major mistakes.
Uneven layers can also happen if hair is wet and then dries differently. So cutting hair slightly damp helps. A blunt, stacked cut looks heavier and less natural.
Lightly point cut the ends to soften the look. This adds texture and lightness to the hair.
Keep scissors sharp and practice small trims. This helps you avoid cutting off too much.
Watch your angles carefully around the face for nice frame shapes. Avoid cutting bangs straight across if you want softer layers.
Use pinking shears to stop harsh lines. They create natural breaks and add softness, especially for uneven or choppy sections.
How to Blend and Soften Your Layered Haircuts
Point cutting and texturizing help your layered haircut look soft and natural. These techniques remove harsh edges and add movement without shrinking length. Doing them yourself takes patience and sharp shears made for hair cutting.
Basics of Point Cutting
Hold your scissors pointed outward, not straight across the hair ends. This creates a jagged edge that blends layers softly. Hold small hair sections between your fingers.
Cut the ends. Do this at a 45-degree angle.
Use sharp styling shears for the best cut quality. ARC Professional Scissors usually cost $30 to $50. They help keep hair healthy.
This stops split ends. Avoid dull scissors that crush or tear hair.
Blending Front and Back Layers
After your main cuts, comb hair back to see if layers blend smoothly. Check for any blunt, harsh lines in both front and back sections. Use very light point cuts on shorter layers to blend down into longer ones.
Pick the shortest section that looks too dry or blunt. Blend surrounding layers by snipping vertically into the ends about ¼ inch deep. Work slowly to keep the overall length consistent and natural looking.
Adding Texture Without Losing Bulk
Texturizing removes weight without changing length much. Use point cutting in random spots on top layers to add soft movement. Avoid heavy slicing or razor work which can make hair too thin.
For subtle texturizing, hold scissors vertically and cut small bits at a shallow angle. Keep ponytail position in mind, if layers are subtle, position ponytail slightly back. This helps cut longer, gentle layers underneath.
Here’s a step-by-step guide to point cutting your layers for a natural finish:
- Start with clean, damp hair combed straight down.
- Section hair into manageable parts using clips or ties.
- Take a small horizontal section and hold it between index and middle fingers.
- With scissors angled at 45 degrees, snip vertically about ¼ inch into hair ends.
- Work around the head, repeating lightly on all layers needing softening.
- Comb hair back into natural position to check for smooth blending.
- Make minor point cuts on uneven spots, especially shorter sections.
- Avoid cutting too deep to keep length and volume intact.
When to Call a Professional Hair Stylist Instead
You should consider a professional if your layers look patchy or lopsided beyond minor fixes. Uneven cuts often mean you need trained eyes to blend lengths smoothly. This happens when your layers don’t fall naturally.
They may look uneven from different angles. That can be tricky to fix yourself.
Some hair types or conditions can make DIY cutting risky. Very thick, coarse, or tightly curled hair might require special techniques pros know well. Hair that is damaged, brittle, or chemically treated needs care.
A stylist can cut without making it worse. This keeps your hair healthier.
Dramatic style changes are hard to do at home. Very short layers or bold angled cuts need skill. Heavy texturing also requires a pro’s touch.
The precision and correct use of tools matter here. These styles often need skill and experience you might not get from video tutorials or practice.
- Layers look uneven or choppy after several tries to fix
- Your hair is very thick, coarse, curly, or chemically treated
- You want a style with steep angles or heavy texturing
- Dramatic length changes, such as cutting off most of your hair
- You feel unsure or nervous about cutting certain sections
- Your previous haircut is very uneven or damaged
- Time or patience to fix mistakes is limited
Calling a stylist depends on how confident you feel. It also depends on what your hair needs. Sometimes you just need expert help.
Your layers don’t blend well and have uneven lengths over ½ inch. Getting professional help can save your style and make it even. Stylists fix uneven cuts smoothly in about one or two hours.
The cost usually ranges from $40 to $100 depending on the salon. This is good value for a clean look.
Also, a stylist can assess your hair’s health and suggest treatments or cuts that protect it. You should get a pro for complex layering angles or dramatic effects. These styles show easily and need careful cutting.
A stylist gets better results. Pros can handle tricky sections well to avoid split ends.
They prevent uneven fall that’s tough to fix alone. This protects your hair’s health.
Practical Tips for Maintaining and Styling Your DIY Layers
Trimming your layers every 6 to 8 weeks helps keep them sharp and healthy. This timing prevents split ends from traveling up the hair shaft. If your hair grows slower, you can stretch trims to 10 weeks but watch for rough ends.
Styling layers right after cutting shows off their shape and volume. Use a lightweight mousse or curl cream if your hair has texture.
For straight hair, a smoothing serum can reduce frizz without weighing layers down. Blow-drying with a round brush lifts the roots and defines your layers.
Handling layered hair during growth phases means patience and care. Layers tend to lose shape as they grow uneven. When this happens, trim just the split ends bit by bit.
Use Tweezerman’s 2000 Styling Shears or similar sharp scissors for precision. Overcutting risks ruining your layered shape.
- Use sulfate-free shampoo to protect hair layers from drying out
- Apply heat protectant spray before blow-drying or styling
- Use a wide-tooth comb to detangle wet layered hair gently
- Sleep on a silk pillowcase to reduce friction and frizz
- Refresh layers between washes with a dry shampoo or texturizer
- Trim split ends yourself carefully every few weeks
- Check layers in natural light for even length and blend
The right products keep layers looking fresh longer. Choose a light conditioner for layered hair, especially if you have fine strands.
Heavy products can drag down your volume and flatten your layers. Experiment with small amounts first to find your hair’s sweet spot.
Don’t rush into reshaping your layers if they grow uneven. Small trims and patience work best.
Water temperature matters for layered hair care. Wash hair with lukewarm water to avoid drying out strands.
Finish with a cool rinse to seal the cuticle and boost shine. Keep in mind, layered hair shows damage easily, so treat it gently.
Step-by-Step Action Plan for Cutting Layers at Home
This quick plan helps you cut layers safely and check your progress. Follow these steps to get the look you want without stress.
- Before you start: Gather your tools like sharp scissors, clips, and a comb. Having them ready means you won’t rush or make mistakes.
- Day 1: Wash and dry your hair as usual. Cutting clean, dry hair helps you see the natural fall and prevents uneven layers.
- Day 1: Section your hair into three parts: top, middle, and bottom. This makes it easier to cut consistent layers and keep track of progress.
- Day 1: Start cutting small sections from the back first. Check each cut by letting the hair fall naturally before moving on.
- Day 2: Review your work with a mirror or ask a friend to check. Fix any uneven spots with tiny trims to ensure smooth layers.
- Week 1: Style your hair daily and pay attention to how layers fall. This shows how well you cut and where you might need small adjustments.
- After 2 weeks: Trim any stray ends that stick out. Regular small trims keep your layers looking fresh without messing up your shape.
Frequently Asked Questions
Can I Cut Layers in My Hair Without Wetting It First?
Yes, dry cutting works well, especially on curly or textured hair. It lets you see the natural shape and bounce before cutting.
Does Trimming Split Ends Affect How Layers Look?
Trimming split ends keeps layers neat and fresh looking. It prevents uneven frizz that hides your layered style.
Can I Use Regular Scissors Instead of Hair Cutting Shears?
You can, but hair shears give a cleaner cut and reduce damage. Using blunt scissors often causes split ends.
How Often Should I Trim My Layers at Home?
Every 6 to 8 weeks helps keep layers sharp and avoids overgrowth. Longer intervals risk losing the layered shape.
Is It Better to Cut Layers When Hair Is Dry or Wet?
Cutting wet hair suits straight or wavy textures for smoother precision. Dry cutting works better for curly hair to shape curls.
How Do I Avoid Uneven Layers When Cutting by Myself?
Section your hair evenly and cut small amounts at a time. Check your cuts in various lights and angles to spot flaws.
Key Points to Remember
Cutting layers at home takes patience and good tools, but it’s doable. Start with small cuts and check frequently to avoid mistakes. Keep practicing and caring for your layers to enjoy your DIY style confidently.


