How to Layer Your Own Hair: Complete DIY Guide with Proven Methods
Knowing how to layer your own hair saves money and keeps your style fresh. You get control over your look by trimming the right layers yourself. Choose a simple, step-by-step method that fits your hair type and length.
Straight and curly hair need different layering techniques to look natural. Always use sharp hair scissors and work with clean, dry hair for best results. Cutting dry hair helps you see the exact shape and length before you finish.
Take your time to avoid uneven cuts and create natural-looking layers. Test on small sections before cutting large amounts to prevent mistakes. You can always trim more later, but you can’t add hair back once cut.
Layering adds movement and volume, updating your hairstyle instantly. A gentle touch shapes your hair without losing thickness or texture. Patience helps you get the best look from your trimming.
Key Takeaways
- Use sharp scissors designed for hair to get clean cuts every time.
- Work on dry hair to see natural length and how layers fall.
- Part small sections to cut gradually and avoid removing too much.
- Start layering from the top back section to guide shape and length.
- Keep your hands steady and trim little by little for better control.
- Blend layers by carefully trimming transition areas between lengths.
What Is Hair Layering and How It Transforms Your Look

Layering means cutting your hair at different lengths to create dimension and shape. It breaks up solid mass, adding volume and movement to flat hair. Unlike blunt cuts, layers don’t leave hair all one length.
They make your hair look lighter. Layers also reduce blocky shapes in your style.
Layers change how your hair falls and stacks. Shorter pieces on top lift your hair and add bounce.
Longer pieces underneath keep length but avoid heaviness. This mix makes styling easier since hair won’t weigh down in one heavy curtain.
To layer your hair, you cut in stages, trimming thin sections starting from the top back. Each section uses the previous cut as a guide. This method keeps good shape and volume between washes.
Washes usually last 6 to 8 weeks. It helps your hair look fresh longer.
Curly hair needs extra care when layering. It stretches when wet and shrinks as it dries, sometimes by several inches.
Cutting curls when dry or slightly damp keeps layers even and prevents uneven, stacked shapes. Moisturized hair also holds its natural curl pattern better after a cut.
Point cutting the ends softens blunt edges and avoids a harsh, chunky look. This technique creates a feathered, natural finish that blends layers gently. Using special pinking shears can help, especially if you want to avoid a blunt bangs line.
Keep in mind, layering is best for small updates rather than big hair transformations. Cutting less hair on the first try helps avoid mistakes. Notice uneven hair, especially at the back?
Stop cutting. Ask a stylist to fix the shape safely.
Essential Tools and Preparation for DIY Hair Layers
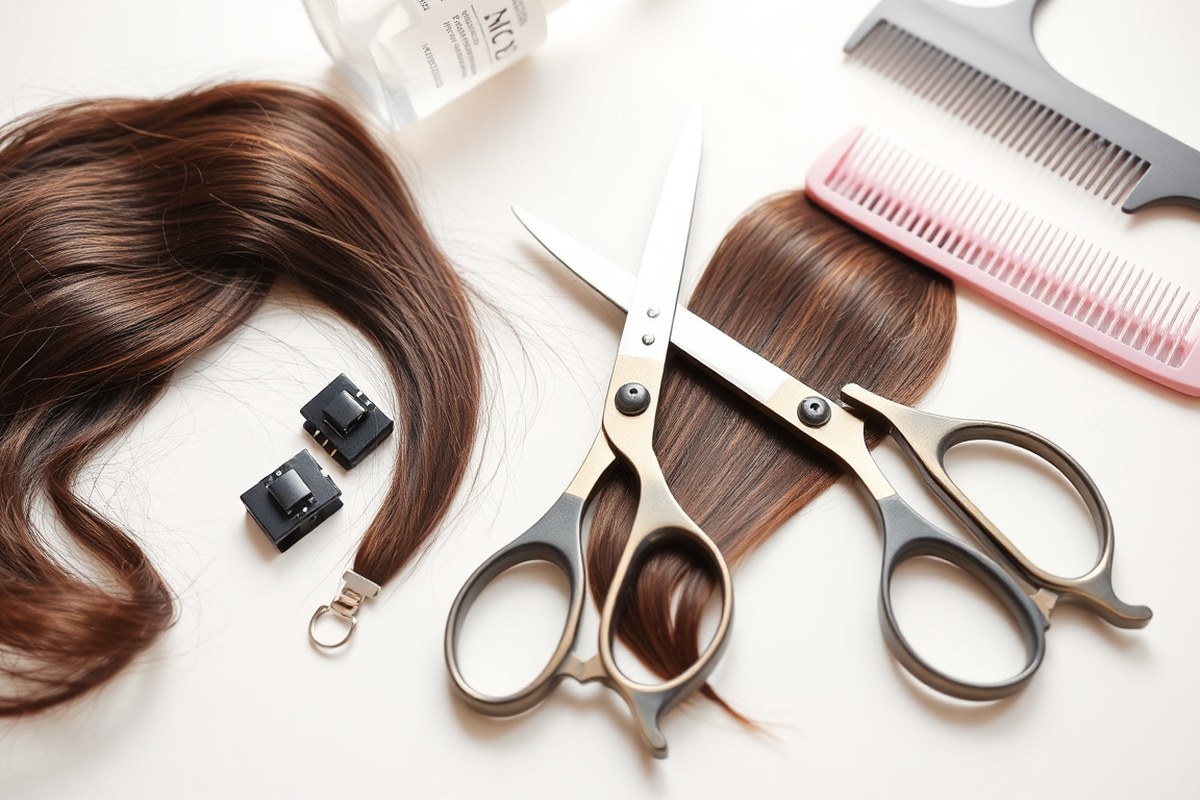
You need a few key tools to create clean layers at home. Sharp hair-cutting shears are essential for precise cuts and to prevent split ends. Avoid kitchen scissors, they can damage hair and ruin your style.
Besides shears, gather a fine-tooth comb to section hair evenly. Use hair clips or ties to hold sections separate while you work. A spray bottle filled with water helps if you prefer to cut damp hair.
- Sharp hair-cutting shears, typically $15 to $40
- Fine-tooth comb for neat sections
- Hair clips or elastics to manage sections
- Spray bottle for dampening hair
- Optional: mirror to see the back
Cutting hair dry or wet depends on your hair type and goal. Dry cutting works well on curly and coily hair. It shows the natural shape, so you cut curls according to their pattern.
Straight or wavy hair usually cuts better when wet. Wet strands lie smoother and reveal sharp lines easier.
Watch out: wet hair stretches about 20 percent longer than dry hair. Keep this in mind to prevent cutting layers too short.
Cut less than you expect. Wet hair looks longer but shrinks later. It shortens as it dries.
To prep hair, wash it first and let it dry until damp but not dripping. Comb out any tangles gently for even sections. Clean, slightly damp hair provides the best grip and cutting control.
Fine or thin hair cuts well dry or with slight dampness. For thick or curly hair, dry cutting helps you see how the layers fall naturally. Always cut conservatively with small snips, less risk of mistakes this way.
Choosing the Right Layering Method for Your Hair Type
Different layering methods work better for certain hair types and lengths. For long, straight hair, the ponytail method is simple and creates soft, blended layers.
It involves pulling hair into a tight ponytail at the front and cutting the ends evenly. This method needs moderate skill to avoid cutting too much.
Short or medium hair often requires sectioning and cutting layers horizontally or vertically. Vertical layering makes layers more dramatic and textured by cutting strands held straight up.
Horizontal cuts add softer volume. These techniques demand some practice and steady hands.
Curly or textured hair needs layering on dry hair to preserve its natural shape. Using wide-tooth combs or fingers to section keeps curls intact. Cutting hair when damp and combed thin increases the chance of mistakes.
Damp curls stretch and lead to uneven layers. This makes the overall cut look off.
| Layering Method | Hair Length | Hair Texture | Skill Level | Outcome |
|---|---|---|---|---|
| Ponytail Method | Long | Straight, Wavy | Moderate | Soft, blended layers with volume near face |
| Vertical Section Cutting | Short, Medium | Straight, Wavy | Advanced | Defined, textured layers with more body |
| Horizontal Section Cutting | Short, Medium | Straight, Wavy | Moderate to advanced | Soft volume and subtle layers |
| Dry Cutting for Curly Hair | All lengths | Curly, Coily, Textured | Moderate | Preserves curl shape and natural bounce |
| Face-Framing Layers | All lengths | All | Moderate | Softens facial features, adds movement |
Face-framing layers suit almost everyone and add softness near your face. You make layers by dividing front hair into sections. Cut each section at an angle that matches your face shape.
This helps the layers fit your style well. This technique works on all textures and lengths.
Pick a layering method that fits your hair’s length and natural texture. Straight hair suits ponytail or vertical cuts, while curly hair cuts best dry. You need sharp, proper scissors and good lighting to avoid uneven lines or split ends.
Step-by-Step Guide to Cutting Layers Using the Ponytail Method
The ponytail method makes it easy to cut hair layers at home. It works best on long to medium straight or wavy hair. You just need a simple ponytail to start.
This method uses your hair as one section. You make a single straight cut.
That simple cut creates the layered look. After that, you can add detail with point cutting for a natural finish.
Sectioning Hair and Creating the Ponytail
Start with clean, damp hair to get a smoother cut. Use a fine-tooth comb to remove all knots and tangles. Gather your hair into a high ponytail at the crown, securing it tightly with a band.
Make sure the ponytail sits straight and smooth. Leaving out any loose strands makes the cut uneven. The ponytail collects most hair, which helps you cut all layers evenly at once.
Making the Guide Cut and Following Through
Use your comb to measure how much length to cut off at the ponytail’s end. Hold the ponytail firmly between your fingers. Cut straight across in a blunt line at the length you want your shortest layers.
This first cut is your guide. Let down your hair to see the new length and layers. For soft layers, part your hair in the middle.
Pull this section forward and over the top. Cut at a slight slant, shorter in front and longer at the back.
Point Cutting to Blend the Layers
Point cutting adds softness to blunt edges and helps blend layers naturally. Hold small sections of hair between your fingers and snip vertically into the ends. Avoid cutting straight across here to prevent harsh lines.
Use the length of the initial cut as a guide. Work slowly, cutting small amounts at a time. This technique creates natural movement and keeps layers from looking choppy.
Final Checks for Evenness
Brush your hair dry and check for uneven spots or thick ends. Comb each section straight down before cutting. Hold strands with your fingers to keep them steady.
Trim any hairs that are longer or uneven. Use vertical snips to match lengths.
Dry hair will show you the real shape better than wet hair. Adjust layers as needed to create balance around your face and back.
Make small cuts; you can always take off more. But you can’t add hair back.
- Comb damp hair thoroughly, removing all tangles.
- Gather hair into a high, smooth ponytail and secure it.
- Measure and decide how much to cut off from the ponytail’s end.
- Cut straight across the ponytail to create your guide length.
- Release hair and section the middle, pulling it forward for a slant cut.
- Point cut small vertical snips into the ends of all layers for blending.
- Dry hair, check for unevenness, and trim stray long strands.
Techniques for Layering Short and Medium-Length Hair at Home
Cutting layered hair requires clear sections. Be careful with length control. This works well on short or shoulder-length hair.
You work from the crown down, cutting each upper section slightly shorter than the one below. Using already-cut hair as a guide helps keep the layers even.
Sectioning Short Hair for Accurate Cuts
Start with clean, detangled hair. Divide it into small, manageable sections for precision.
Use a comb to part hair from one ear to the other. This creates top and bottom sections.
Make the part as straight as possible. Clip the top section out of the way.
Creating a Guide Layer
Cut a guide layer at the back first for reference. This layer sets the length for the rest.
Pull the bottom section straight down from the crown and trim to the desired length. Use your fingers to hold hair and cut straight across.
- Comb hair straight down and detangle it thoroughly.
- Create a horizontal part from ear to ear.
- Clip the top hair out of the way.
- Take a one-inch subsection at the center back.
- Pull this subsection down tightly with fingers.
- Cut straight across to set your guide length.
- Let down other sections next. Use the guide section to match lengths. Keep checking against the guide as you cut.
Blending Layers with Point Cutting
Point cutting softens blunt edges and blends layers naturally. Use scissors vertically, snipping into the hair ends.
Trim each part a bit shorter than the section beneath it. After trimming, brush the hair back into its usual place.
This step lets you see the layers developing properly. Point cut to soften any harsh edges.
Too much point cutting can thin hair or create uneven texture, so proceed cautiously.
Maintaining Balance on Both Sides
Always cut one side, then mirror the steps on the other. Keep checking lengths by comparing sides regularly.
Use your guide layer and fingers to check shape. Make sure length stays even across your head. This helps keep your cut balanced and neat.
Layering Curly and Textured Hair Without Losing Its Shape
Layering curly and textured hair needs care to keep each curl’s natural form intact. Cutting dry, curl-by-curl, stops curls from shrinking unevenly. Using your fingers to shape curls helps control the cut and protects the pattern.
Why Cut Curly Hair Dry or Damp, Not Wet
Curls stretch out when wet, hiding their real length and bounce. Cutting hair wet risks taking off too much because curls shrink a lot once dry. Dry cutting shows exactly how each curl falls naturally, making length decisions clearer.
Damp hair is easier to shape and less frizzy than dry hair. Lightly misting curls with a spray bottle keeps them moisturized and easier to handle. Avoid soaking your curls; just enough water to soften them works best.
Finger Cutting Technique for Curl Shaping
Use your fingers to pick up small curl sections before snipping. This method helps keep each curl’s shape and prevents blunt cuts. Snip only the visible ends, trimming tiny amounts to avoid changing your curl pattern drastically.
Hold curls in your fingers gently, following their natural spring. Avoid pulling or stretching curls tight while cutting. Trim a little at a time to maintain control and adjust accuracy as you go.
Sectioning to Work Curl by Curl
Divide your hair into sections to handle each curl group carefully. Use clips to secure sections and avoid mixing curls or textures during cutting. Even parting helps you see where the shortest layers sit and keeps the cut balanced.
Work from the bottom layers upward. Focus on the spots where you want volume or shape change. Don’t cut all curls at the same length.
Instead, trim curls to create natural shape and volume. Curl mixing needs special attention; trim curls gently and individually to match lengths gradually.
Moisture and Aftercare Tips
After cutting, hydrate your curls well to keep them soft and defined. Use curl-friendly leave-in conditioners or light oils to reduce frizz and improve shape. Avoid heavy products that weigh curls down and hide your fresh layers.
Keep curls moisturized between washes to preserve layer shape. Sleep on a satin pillowcase to reduce friction and frizz overnight. Regular trims every 6 to 8 weeks help maintain layers without losing curl definition or length.
Common DIY Layering Mistakes and How to Fix Them
Cutting too much hair is a common mistake when layering at home. Start by trimming small amounts, like half an inch, and check your work often. Uneven layers usually happen due to poor sectioning or sloppy cutting angles.
Poor sectioning makes it hard to see what you’re cutting. Use clips to divide your hair into clean sections before trimming. This helps keep everything balanced and prevents uneven layering.
Here are some tips to fix and avoid common layering errors:
- Double-check ponytail placement and cutting angle before snipping.
- Clip off bottom pieces in the back to avoid accidental cuts there.
- For uneven front layers, try cutting bangs to even out the look.
- Improve hair sections for more dramatic and even layers.
- Trim a tiny amount, then step back to assess before cutting more.
- Use sharp hair cutting shears to prevent jagged edges and damage.
Choppy layers are trendy, but uneven choppiness feels accidental. Check your combing and sectioning again if your layers look uneven. If damage has already happened, the best fix is a trim by a pro using proper shears.
Layering done incorrectly can cause split ends and dryness. But small trimming errors don’t usually cause real damage.
Avoid forcing the scissors or cutting wet hair too short. Save styling products for after you finish cutting your layers.
When to Stop and Call a Professional Hairstylist
Cutting your own layers is possible but carries risks. You should stop and see a professional if mistakes pile up or you struggle with symmetry.
Uneven length, jagged edges, or too much hair gone too fast are clear signs to quit. A bad cut might take weeks or months to grow out, wasting time and money.
Cutting someone else’s hair lets you see the back better. It also shows both sides clearly. This helps you cut more evenly.
This access helps you cut more evenly and avoid mistakes you usually make on yourself. Keep your cuts small and steady.
Stop often to check with a mirror. Also, feel the hair to check your progress.
Avoid cutting face-framing layers yourself; hairstylists often advise against it. The small sections need precision hard to do blind.
Instead, get help for this part or skip it. Remember that chopping hair off quickly or in large chunks causes the biggest problems.
Before you start, check your scissors. Make sure they are sharp and clean. This prevents pulling or uneven cuts.
Work in a bright room with a good mirror that shows your whole head. Comb your hair thoroughly and section it well to avoid cutting pieces you don’t want to.
Keep the cuts tiny, about a quarter inch at a time, to avoid mistakes. Stop if you feel unsure or can’t see the sections well.
Mistakes happen fast if you rush or work on wet, tangled hair. Dry hair shows the true length better, which helps prevent surprises.
Honestly, a sharp error means it’s time to visit a stylist sooner rather than later. Professional hairstylists have the tools and experience to fix uneven layers or reshape your style safely. A layered haircut costs about $50 to $100.
This price might be less than fixing a bad DIY cut. Think about saving money and effort.
Don’t try complicated layers or big changes alone. Bad cuts are tough to fix. They often look uneven fast.
Step-by-Step Action Plan
Follow these steps to start layering your hair confidently at home. Each phase helps you check your progress and avoid common mistakes.
- Before You Start: Gather scissors, comb, clips, and a mirror. Make sure your hair is clean and dry for better control.
- First Layer: Use the ponytail method to cut your first layer. When the layer looks even and blends smoothly, you’re doing well.
- Adjust Length: Trim small amounts from longer layers for balance. Check in the mirror: layers should flow naturally without sharp lines.
- After 1 Week: Observe how your hair falls in daily styling. When layers feel bulky or uneven, trim lightly to soften edges.
- Two Weeks In: Experiment with styling to see your layers’ effect. Well-layered hair adds volume and moves freely.
- Ongoing Maintenance: Every 4 to 6 weeks, trim split ends and reshape layers carefully. Keeping the shape fresh avoids awkward growth stages.
- When Unsure: If layers grow uneven or curls lose shape, book a professional cut. It prevents damage and restores your style.
Frequently Asked Questions
How Often Should I Trim My Layers to Keep Them Looking Fresh?
Aim to trim your layers every 6 to 8 weeks for the best upkeep. Regular trims prevent split ends and keep your hair shape tidy and appealing.
Can I Layer My Hair If It’s Already Very Curly and Shrinks a Lot?
It’s tricky to layer very curly hair with major shrinkage on your own. Curly hair changes length when dry, so uneven cuts can easily happen. See a stylist for the best results.
What Is a Common Beginner Mistake When Layering at Home?
Cutting too much on the first try is a frequent error. Always trim less than planned and use a consistent guide to avoid uneven shapes.
How Do I Know Where to Place the Shortest Layer on My Head?
Position the shortest layer where the style needs volume and shape, often around the crown. This helps layers frame your face better and add movement.
Is It Better to Cut My Hair Dry or Wet When Layering?
Wet hair is easier to section and cut precisely for layering. But be aware curly hair can shorten when dry, so plan for some shrinkage.
Can I Layer Hair at Home If It’s Uneven or Fragile?
It’s best to avoid DIY layering on very uneven or fragile hair. Cutting uneven hair can make layers look unbalanced or damage fragile strands.
Before You Go
Layering your own hair can refresh your look and save trips to the salon. Start small and take your time with each step. Try the ponytail method first to see how layering feels on your hair.