How to Use a Straight Razor: Complete Step-by-Step Guide for Beginners
Using a straight razor gives you a close, smooth shave when done right. Hold the razor at a 30-degree angle against your skin for the safest cut. This angle lets the blade cut hair without scraping your skin, which reduces irritation and nicks.
Open the razor fully, about 270 degrees, so it forms an L shape. The blade should point straight out. Use slow, small strokes and stretch your skin tight with your free hand to keep the blade steady.
Choose a quality straight razor that costs between $30 and $200 for sharp steel that lasts. Shaving with a straight razor takes about 15 to 20 minutes at first. Practicing often will help speed up your shave and build your confidence.
Key Takeaways
- Hold the straight razor at a 30-degree angle against your skin.
- Fully open the razor blade 270 degrees before shaving.
- Use slow, short strokes following your hair growth.
- Stretch skin tight with your free hand for a smooth glide.
- Choose a razor priced $30 to $200 for quality and durability.
- Practice regularly to reduce your shaving time to under 15 minutes.
What Is a Straight Razor and How Does It Work?
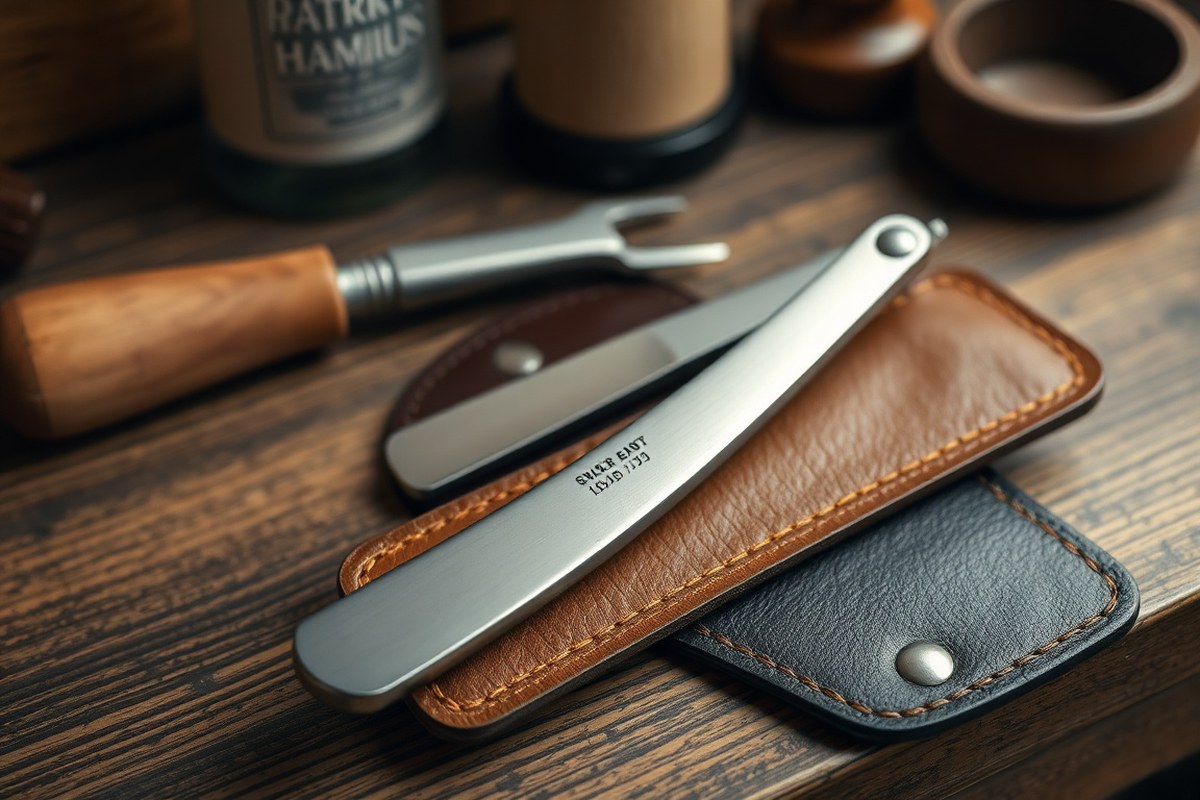
A straight razor is a single, sharp blade attached to a handle. Unlike cartridge or safety razors, it has no plastic guard or multiple blades.
This design cuts hair clean at the skin’s surface. It avoids pulling or tugging.
The razor has a blade often 5/8 inch wide for beginners. It also has a handle or scales. These protect the blade when closed.
The blade pivots open about 270 degrees. It forms an L shape with the handle.
This exposes the cutting edge. This setup delivers precise control but demands careful handling.
Straight razors cut by slicing hair directly. They don’t use multiple blades or guards like safety razors. Press the blade lightly against your skin.
Hold it at a 30-degree angle. This helps it glide smoothly. Using force usually causes nicks or irritation because the blade is sharp enough without extra pressure.
Many models feature different blade points. Rounded tips are safer and easier for beginners. Square points allow more precision but require mastery to avoid cuts.
Some straight razors use replaceable blades called shavettes. These are easier to maintain. They feel different than traditional carbon steel blades.
Choosing a straight razor over other types means committing to learning stropping and honing. Cheap versions often lose sharpness quickly and need more frequent sharpening. Spending about $100 or more on a quality razor is smart.
Better steel cuts hair more cleanly. It also lasts longer.
Straight razors give a smooth, close shave with less skin irritation when used right. They create less waste than disposable options because the same blade sharpens repeatedly. The technique takes time to learn.
Still, many like the classic feel and control. It beats cartridge razors for some.
Essential Tools and Preparation Before Shaving

You need the right tools and proper skin prep for a safe straight razor shave. Preparing your face also helps soften the hair and protect your skin. Using good shaving cream or soap helps the razor glide smoothly.
Build a proper lather before shaving. It makes the shave easier and safer.
Essential Shaving Tools
The basic tools you need are a straight razor and leather strop. You also need a shaving brush and shaving cream or soap. These items make shaving effective.
A shaving bowl or scuttle helps build warm lather. The brush can be badger hair or good quality synthetic. Both work well for lifting hair and exfoliating the face.
Beginners can find kits that include everything needed, often costing about $100 to $150. These kits contain a shave-ready razor, strop, shaving soap, a brush, and sometimes sharpening paste.
You don’t need many extras to get started. But choose quality over quantity to avoid skin issues.
Preparing Skin and Facial Hair
Start by washing your face with warm water to soften beard hair and open pores. Put a hot towel on your face for 2 to 3 minutes. It relaxes your skin and softens your hair.
This step helps reduce cuts. This step reduces razor drag and helps prevent cuts or irritation during the shave.
Applying a pre-shave oil or cream is optional but recommended for added glide and skin protection. Pre-shave products make a thin barrier on your skin. They help avoid razor burn, especially with sensitive skin.
Thick beards benefit the most from these products. Afterward, rinse your hands before moving on to lathering.
Building the Perfect Lather
A slick, dense lather is key to a smooth straight razor shave. Use a high-quality shaving cream or soap, not gels or foams, for best results. Use your brush to whip the cream into a thick lather.
You can lather on your face or in a bowl. This keeps the moisturizing oils in the cream.
Work the brush in small circular motions to lift the hairs and exfoliate the skin. This creates a cushioned layer that protects your face from razor cuts. Re-lather your face if you take breaks to ensure the skin stays well-covered throughout shaving.
- Wash your face with warm water to soften hair.
- Apply a hot towel for 2 to 3 minutes to open pores.
- Apply pre-shave oil or cream for extra glide if desired.
- Apply shaving cream or soap with a shaving brush.
- Work the brush in circular motions to build a thick lather.
- Keep the skin covered with lather before shaving each section.
Never shave on dry skin; always apply a rich lather to prevent cuts.
How to Hold and Angle the Razor for a Safe Shave
Hold the straight razor with a firm but relaxed grip. Keep the blade at about a 20 to 30-degree angle. This angle helps you shave safely.
It reduces skin cuts and irritation. This balance stops nicks while letting the blade cut efficiently.
Grip Styles for Stability and Control
Place your index, middle, and ring fingers on top of the blade for steady control. The thumb goes on the opposite edge, near the spine.
The pinky rests on the tang. This classic grip offers solid stability and better blade guidance.
Your free hand stretches the skin tight to prevent cuts and help the razor glide. Tension keeps the skin firm, reducing blade skips and pressure spots. This makes shaving smoother and safer.
- Hold the blade lightly to avoid strained hands
- Keep wrist and forearm aligned with your stroke
- Rest pinky on the tang for extra control
- Use your free hand to pull skin taut steadily
- Maintain slow, short strokes to stay in control
Combining these grip tips with steady strokes gives you comfort and safety. Avoid gripping too tight, which causes muscle fatigue and shaky lines.
Finding the Perfect 20-30 Degree Angle
The razor’s edge should touch the skin at a shallow angle around 20 to 30 degrees. Too steep, and the blade cuts aggressively, increasing the risk of nicks. Too flat, and it won’t cut well, causing tugging and irritation.
Hold the blade with the spine close to your skin, slightly lifted so it isn’t flat. You can check angle by ensuring the blade just shaves hair without scraping the skin. This angle also lets the blade slide smoothly across your face.
Use your free hand to keep skin tight and move slowly. Change the angle on straighter or curved hair areas.
This keeps steady contact with your skin. It helps you get a clean shave.
Common Grip Pitfalls and Fixes
Many beginners grip the razor too tightly, which leads to less control and quick fatigue. Loosen your fingers slightly; you want a firm but relaxed hold. Tension in your hand will cause jerks or slips.
Another mistake is holding the blade too upright, around 45 degrees or more. This angle increases cut risk and tugging. Bringing the angle down to 20 or 30 degrees prevents skin scraping and smooths the stroke.
Lastly, avoid pushing too hard. Let the blade do the work. Use light pressure when shaving.
Stretch your skin to follow your beard’s shape. This makes shaving safer and easier.
Step-by-Step Shaving Technique by Face Zone
Shaving your face with a straight razor works best when you divide it into zones. Each area needs a different stroke direction, skin pull, and attention to your grain pattern. You’ll use short, careful strokes and stretch the skin tight to avoid cuts.
Shaving the Cheeks and Jawline
Cheeks and jawline usually have horizontal grain patterns on most men. Hold your razor at a 30-degree angle with light pressure. Use your free hand to pull the skin upward and outward to keep it taut.
Short, controlled strokes work best on these areas. Move the razor across the grain with lateral strokes along the jawline. This helps cut the hair cleanly without irritation.
- Start at your right sideburn and shave downward along your jawline.
- Pull the skin upward with your free hand to stretch it tight.
- Use short horizontal strokes across the cheek, moving from back to front.
- Repeat on the left side in the same way, mirroring the right.
Handling the Upper Lip and Chin
The upper lip needs care because of sensitive skin and tricky hair direction. Pull the skin downward with your opposite hand to stretch tight. Shave from the center outward using small, quick strokes.
For the chin, use short strokes with minimal pressure. Pull your skin away from the blade to avoid nicks. Adjust your razor angle slightly to fit the curves around these areas.
- Place your free hand below your lower lip to stretch the skin downward.
- Use small strokes from the nose moving outward on the upper lip.
- For the chin, pull skin sideways and shave with short, precise strokes.
- Keep the razor angle at about 30 degrees but adjust slightly around curves.
Approaching the Neck and Jaw Underneath
Skin on the neck is softer and hair often grows in varied directions. Pull your skin taut downward or sideways to keep it firm. Shave across the grain using lateral strokes for better control.
Tighten your neck by tilting your head up and making a slight chin tuck. This makes the skin firmer and easier to shave. Use slow, steady strokes to prevent irritation.
- Tilt your head slightly back and tuck your chin to stretch the neck skin.
- Pull skin taut with your free hand in the opposite direction of your strokes.
- Shave with lateral strokes going sideways across the neck.
- Watch your angle to avoid pressure that could cause cuts or irritation.
When and How to Do Multiple Passes
Most men find shaving twice gives the smoothest result. The first pass goes with the grain to remove bulk hair. After rinsing, re-lather and shave across or against the grain for a closer cut.
Only use multiple passes if your skin tolerates it well. Avoid pressing too hard; light pressure is key on each pass. Take extra care on sensitive zones like under your nose or neck.
- Start with strokes going with your hair’s grain direction on all zones.
- Rinse your face and apply fresh shaving cream or soap.
- Make a second pass, shaving across the grain on cheeks and neck.
- Use very light pressure to minimize irritation and avoid nicks.
How to Strop and Hone Your Straight Razor
Keeping your straight razor sharp and smooth requires regular stropping and occasional honing. Stropping realigns the blade edge, which softens after each shave. You should strop your razor before every shave to get that fresh, clean cut.
Honing sharpens the blade by removing tiny amounts of metal, restoring its sharp edge. This takes more skill than stropping. It should happen every 6 to 12 months.
How often you shave affects this timing. You can hone your blade at home using a whetstone. But many beginners find sending it to a professional safer and more effective.
The tools you need are a leather strop for stropping. A honing stone for honing. A good strop is at least 8 inches wide and made of quality leather.
Honing stones come in different grits. A medium grit stone around 1000 is typical for sharpening. Higher grit stones (3000, 8000) for polishing the edge.
You’ll know your razor needs honing when stropping no longer works. The shave won’t feel smooth. The blade may pull or tug at your hair.
A simple hair test helps, try gently dragging the blade on a hanging hair. The blade needs honing when it pulls or cuts unevenly.
Follow these steps to strop your straight razor effectively before each shave:
- Lay the leather strop flat on a firm surface or hang it securely.
- Hold the razor by the handle with the blade flat on the leather.
- Pull the blade spine-first along the strop, away from the edge.
- Flip the razor over carefully, keeping the blade flat.
- Pull the blade in the opposite direction, spine-first again.
- Repeat this process 20 to 30 times each side with steady pressure.
- Check for smoothness by testing with a gentle hair drag.
Don’t press too hard while stropping; it can damage the leather or blade edge.
Honing at home needs care. Keep the stone wet throughout and hold the blade at about a 15 to 20-degree angle. Pass the razor gently across the stone.
Move edge-first. Do 10 to 20 strokes per side.
This evens out dull spots. After honing, strop again to polish and refine the edge before shaving.
Professional honing can cost $15 to $30 but saves you from damaging the blade. Some razors, like Parker from the US, have durable blades.
Models made in Solingen, Germany, do too. They still need careful upkeep.
Take care of your razor by stropping it often. Hone it periodically too. This keeps the blade sharp and safe.
It helps your razor last for years. Without it, the blade dulls quickly and causes pulling or cuts in your shave.
Avoiding Nicks, Cuts, and Irritation While Shaving
Nicks and cuts often result from holding the blade at the wrong angle or rushing your strokes. Choosing a 5/8 inch blade with a rounded tip reduces these risks. Skin irritation may occur when shaving without enough cushion or over dry skin.
Stretching your skin helps the razor glide smoothly. Pull skin tight with your free hand, especially on tricky spots like the neck or jawline. This reduces the chance the blade catches and cuts your skin.
- Prep with warm water and a good cleanser
- Apply plenty of thick shaving cream, not just a thin layer
- Use slow, short strokes and avoid pressing too hard
- Keep the razor at about a 30-degree angle to your skin
- Stretch your skin gently with your free hand while shaving
- Avoid shaving over broken or irritated skin
- Rinse razor often to clear hair and cream buildup
Should you nick your skin, rinse the area with cold water and softly press a clean cloth to help stop bleeding. Avoid rubbing or applying alcohol, which can irritate the cut. Use an antiseptic or styptic solution to help close the wound if needed.
For sensitive skin, shave less often or skip against-the-grain passes. Use extra moisturizer after shaving to calm irritation.
Tough beard areas sometimes need multiple light passes instead of one heavy stroke. Patience helps you avoid razor burn and razor bumps.
Post-Shave Care and Razor Cleaning Routine
Right after shaving, rinse your face with cool water to close the pores. Pat your skin dry gently with a clean towel; never rub. This step helps avoid irritation and keeps your face from feeling tight or dry.
Apply a soothing balm or aftershave lotion without alcohol. These products reduce redness and keep your skin hydrated. Look for balms with ingredients like aloe vera or shea butter to calm your skin.
Your straight razor needs cleaning and drying before storing it. Moisture can cause rust and dull the blade faster. Keeping the blade dry preserves its sharpness and extends its life.
Here’s a step-by-step routine to care for your skin and razor after every shave:
- Rinse your face with cool water to close pores briefly.
- Pat your face dry softly with a clean towel or cloth.
- Apply an alcohol-free aftershave balm to soothe the skin.
- Rinse the razor blade under warm water to remove residue.
- Dry the blade carefully with a soft towel or cloth by patting.
- Oil the blade lightly with a drop of mineral or camellia oil.
- Store the razor in a dry place, avoiding the bathroom’s humidity.
- Keep the razor in a protective case or sleeve to prevent damage.
Cleaning the razor means rinsing to flush out hairs and shaving cream. Use only water, no soap or harsh chemicals, which can damage the blade. Dry it by patting, not wiping, to avoid dulling the edge.
Adding a small amount of blade oil after drying stops rust. You only need a thin, even coat. Storing the razor in a dry spot, away from steam or water, keeps the metal safe.
Good aftershave care prevents dryness and irritation from the close shave. Proper razor maintenance keeps the blade sharp and ready next time. Both steps make your shaving routine smoother and more comfortable.
Choosing the Right Straight Razor and Beginner Tips
Straight razors come in two main types: traditional fixed blades and shavettes. Fixed blades have one blade that you sharpen and strop yourself. Shavettes use disposable blades, which makes them easier to maintain and safer for beginners.
For size, 5/8 inch and 6/8 inch blades are common. Beginners often find a 5/8 inch size easiest to control.
The 6/8 inch blade usually comes razor-sharp straight from the maker. So you can start shaving right away without honing.
Choosing between a shavette and a traditional straight razor depends on your goals. A shavette needs little upkeep. It’s great for trying straight razor shaving.
You don’t have to strop or hone the blade. A traditional razor fits those wanting a classic shave.
It takes learning maintenance skills. You keep the blade sharp and ready.
| Razor Type | Blade Size | Maintenance | Suitability for Beginners | Typical Cost |
|---|---|---|---|---|
| Shavette | Any | Low; uses disposable blades | Best for easy start, low upkeep | $30 – $70 |
| Traditional Straight Razor | 5/8 inch | High; needs stropping and honing | Good for mastering traditional shaving | $50 – $200 |
| Traditional Straight Razor | 6/8 inch | High; sharp out of the box | Preferred by experienced shavers | $70 – $200 |
Many beginners press too hard or hold the razor wrong. Use light pressure and hold the blade near 30 degrees to your skin. Take your time, about 2 minutes, to avoid cuts.
Another slip-up is skipping stropping, which dulls your blade fast. Stropping before every shave keeps the edge sharp.
Replace the blade often when using a shavette. This helps keep you safe while shaving.
Press the blade lightly and let its weight do the work to avoid cuts.
Expect to invest around $30 for a basic shavette. A solid entry-level traditional razor costs about $50 to $70. Buying stropping tools costs more at first.
These tools help keep your fixed blade sharp. Over time, they make your razor last longer.
Step-by-Step Action Plan for Using a Straight Razor
Follow this plan to start shaving confidently with a straight razor. Each step builds your skill safely and helps you get smoother shaves.
- Day 1: Prepare your shaving area with warm water and clean your razor and face. Your skin should feel soft and clean before you begin.
- Day 2: Practice holding your straight razor at a 30-degree angle without shaving. You’ll feel steady when your wrist and arm relax.
- Day 3: Apply shaving cream and shave your cheeks using short, light strokes. You should notice your razor gliding smoothly without pressure.
- Week 1: Strop your razor before shaving. The blade will feel sharper and cut hairs easily without tugging.
- Week 2: Hone your razor carefully if it pulls or feels dull. A sharp edge means fewer nicks and a closer shave.
- After 2 Weeks: Add post-shave care like applying an alcohol-free balm to reduce irritation. Your skin should feel soothed and hydrated.
- Monthly: Inspect your razor for rust or damage and clean it thoroughly. A well-kept razor lasts longer and stays safe.
Frequently Asked Questions
How Do I Know When to Replace My Straight Razor Blade?
Replace the blade when it feels dull or tugging on hairs. Sharp edges give a clean shave and reduce skin irritation.
Is It Safe to Use a Straight Razor Without Shaving Cream?
Shaving without cream can cause burns and cuts. Always use a good lather or oil for smooth gliding and skin protection.
How Often Should I Strop My Straight Razor?
Strop before every shave to realign the blade edge. Stropping keeps the razor sharp and smooth on your skin.
Can I Use a Straight Razor on Sensitive Skin?
Yes, but use lighter pressure and sharp blades. A slower, careful shave helps prevent irritation and cuts on sensitive skin.
What Should I Do If I Nick Myself While Shaving?
Apply gentle pressure with a clean cloth to stop bleeding. Use alum block or styptic pencil if bleeding won’t stop quickly.
Is It Better to Shave with or Against the Grain Using a Straight Razor?
Shave with the grain first to avoid irritation and cuts. You can do a second pass across or against the grain if your skin allows.
Final Thoughts
Shaving with a straight razor takes practice but gets easier each time. Keep your blade sharp and your technique steady. Start your next shave by checking your razor’s angle and enjoy a close, clean shave.