
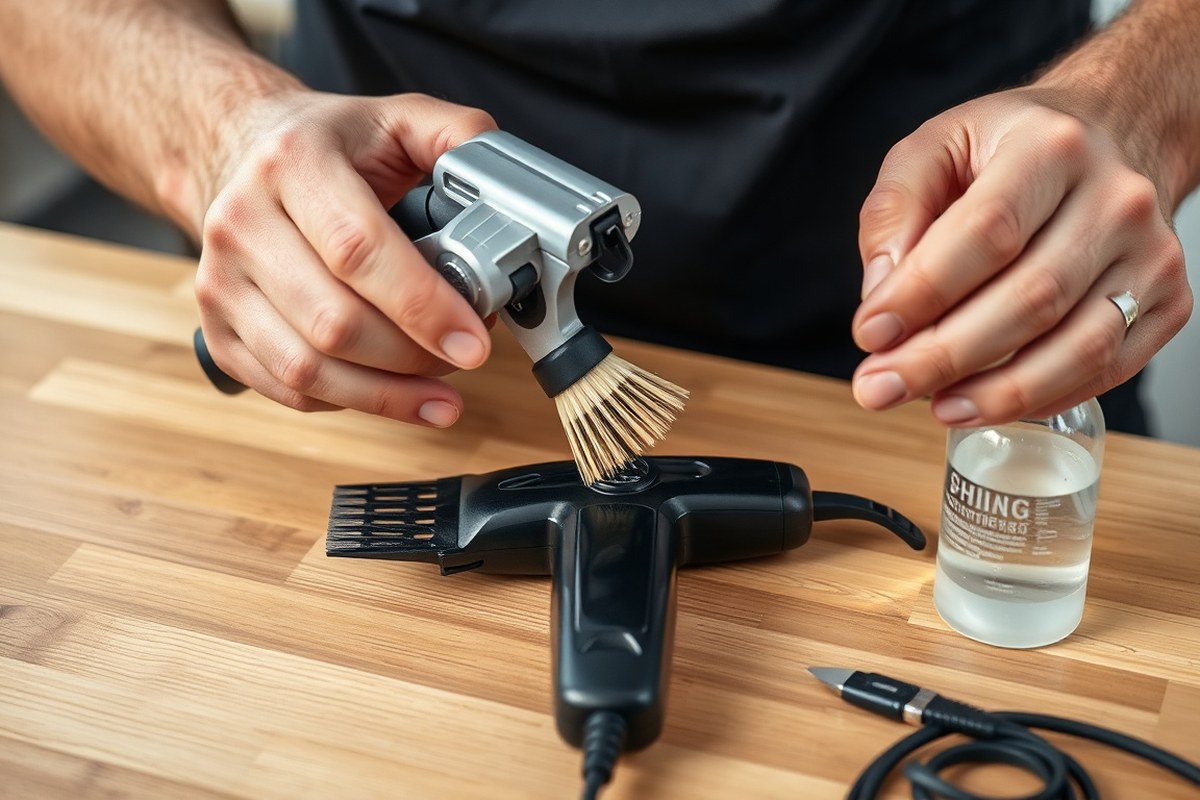
How to Clean Clippers: A Complete Guide for Safe, Long-Lasting Use
Learning how to clean clippers is easier than you think. Start by removing stuck hair from the blades to prevent rust and dullness. Then use rubbing alcohol or a disinfectant spray to kill germs and bacteria effectively.
Cleaning your clipper blades properly keeps cuts smooth and safe. You want to avoid water damage.
So plan to clean and dry the clippers carefully. Oiling the blades right after cleaning stops friction and helps them last longer.
Regular maintenance means knowing if a quick clean will do. Sometimes you need a deep clean instead. Knowing the difference saves you time and keeps clippers sharp.
Always follow the disinfectant’s contact time for full effectiveness. This practice helps prevent skin irritation and keeps your clippers sharp.
Key Takeaways
- Remove hair from clipper blades after every use to avoid buildup.
- Spray or dip blades in 70% isopropyl alcohol for at least 1 minute.
- Use Barbicide soak for 10 minutes if sharing clippers with others.
- Pat blades dry with a lint-free cloth and air dry 60 to 90 minutes.
- Apply a drop of clipper oil every 15 to 20 minutes during long cuts.
- For personal use, clean and oil clippers every 2 to 4 weeks.
How to Clean Hair Clippers Step-by-Step

Cleaning your hair clippers right after every haircut keeps them sharp. It stops hair from clogging and helps your clippers last longer. Follow these steps to clean, oil, and test your clippers safely and properly.
- Unplug the clippers. Always disconnect the power before cleaning to avoid accidents.
- Brush off loose hair. Use a small brush or clean toothbrush to clear hair from the blades and body.
- Remove clipper blades. Unscrew or get the blades gently, depending on your clipper model.
- Wash removable blades and combs. Rinse washable parts under warm water with mild soap. Dry them completely.
- Sanitize the blades.Soak blades in Barbicide for about 10 minutes to disinfect them. This is good if you share clippers or want extra cleaning.
- Oil the blades. Apply a few drops of clipper oil along the blade edges. Turn the clippers on for a few seconds to spread the oil.
- Reassemble clippers. Put back the blades and combs carefully, tightening screws or snapping parts in place.
- Test the clippers. Turn them on to check smooth operation and cool running. Wipe off excess oil with a clean cloth.
Using this routine after every haircut takes just a few minutes but prevents hair buildup. Washing removable parts helps keep your clippers free from dirt and germs.
Oiling reduces heat and friction, so your blades stay sharp and cut smoothly. Skipping oiling can cause pulling or noisy clippers.
Fully waterproof clippers let you carefully rinse the whole head. Otherwise, only clean detachable parts with water.
Avoid soaking non-washable clippers to protect the motor. Taking these steps regularly keeps your clippers ready for clean, safe haircuts every time.
Essential Tools and Products for Cleaning Clippers

You need a few key supplies to clean clippers properly at home. Grab 70% or higher isopropyl alcohol, a small cleaning brush, clipper oil, and clean cloths. These items help remove hair, disinfect blades, and keep them running smooth.
Rubbing alcohol works well to disinfect clipper blades. You can soak blades in alcohol for 10 to 30 seconds. After brushing, you can also wipe them down.
Both methods help clean the blades well. Specialized clipper sprays offer extra benefits like cooling and light lubrication. But rubbing alcohol remains a solid choice and costs about $3 to $5 for a bottle.
Use clipper oil made for blades, which keeps them sharp and reduces friction. Avoid kitchen oils or WD-40, as they won’t protect blades well. Add a few drops of clipper oil on the blades after cleaning.
This stops wear and cuts down on noise while using. Keep your clippers running smoothly this way.
- 70% or higher isopropyl (rubbing) alcohol for disinfecting
- Small brush, like the one that comes with clippers
- Soft, lint-free cloth for wiping blades and bodies
- Clipper oil formulated for blade lubrication
- Optional: clipper spray cleaner for combined cleaning and cooling
Soft cloths protect blades and clipper bodies without scratching. Avoid wet cloths on non-waterproof clippers.
Dry cloths and brushes work best to prevent moisture damage. For other clipper types, check your manufacturer’s recommendations before applying any liquids.
Never use household oils or water on blades. They cause rust or damage the mechanism.
Regular cleaning by brushing out cut hair, wiping blades, and applying oil takes a few minutes. Take apart blades every few haircuts for a deep clean. This helps you get dirt between the teeth.
It keeps the blades sharp and hygienic. This method keeps clippers cutting evenly and lasting longer.
Quick Clean vs. Deep Clean: When and How to Do Each
Quick cleaning means brushing off hair and wiping your clipper after each use. Use a small brush to clear debris and apply clipper oil lightly. This keeps blades smooth and prevents rust between sessions.
Deep cleaning happens less often, about once a month or more for frequent users. It involves taking the blades apart, soaking them in soapy water, and scrubbing to remove buildup. Disassemble carefully and dry all parts completely before reassembling.
Quick cleaning won’t replace deep cleaning. It helps maintain your clippers daily but can’t remove grime that builds inside. Deep cleaning stops dull blades, overheating, and reduces the chance of skin irritation.
Professional barbers should deep clean after every workweek and disinfect after each client. Hobbyists trimming only themselves can stretch deep cleaning to every one or two months. Adjust based on use and if you notice performance slipping.
For quick cleaning, use a clipper brush and lubricating oil. A can of compressed air also helps blow out trapped hair. Deep cleaning needs soap or clipper blade wash and sometimes a small screwdriver to remove blades.
Skipping deep cleaning often leads to hair pulling and uneven cuts. A hobbyist who cuts hair once a month may get poor results. Simply brushing off the blades isn’t enough to keep them sharp.
Regular, thorough cleaning is necessary to maintain good performance. Deep cleaning clears residue that dulls edges over time.
Quick cleaning takes just a few minutes after each use. Deep cleaning can take 20 to 30 minutes, depending on your model. It costs minimal money, just clipper oil, cleaner, and basic tools you likely have.
How to Disinfect Clipper Blades for Maximum Hygiene
Disinfecting clipper blades kills harmful bacteria and prevents infections. Use safe disinfectants like 70% isopropyl alcohol or Barbicide. Fully soak the blades for the right amount of time.
Dry them well after soaking. Apply oil to stop rust and keep blades sharp.
Using 70% Isopropyl Alcohol Correctly
70% isopropyl alcohol is a cheap, effective disinfectant you can find at most stores. It kills bacteria by keeping blades wet for minutes. Make sure to cover the metal completely.
This helps clean the blades well. Never soak the entire clipper; protect the motor and electrical parts from damage.
For fast disinfection, soak blades in alcohol from 1 to 10 minutes. Follow the time on the product label. Use enough alcohol to cover the blades.
Keep the blades submerged without drying out to ensure the alcohol works. After soaking, dry blades thoroughly to avoid rust and follow up with oiling.
Barbicide Soak Procedures and Mixture Ratios
Barbicide is a blue disinfectant used widely in barbershops. Mix the disinfectant with water using bottle directions. Usually, add about 2 ounces of Barbicide to one gallon of water.
Stir well to blend. This solution is strong enough to kill germs but safe for clipper blades if used correctly.
Soak your clipper blades fully in the Barbicide solution for exactly 10 minutes. Over-soaking can damage blades, so time it carefully. Rinse or wipe blades clean if your label suggests, then dry well before oiling.
Drying and Oiling Post-Disinfection
Dry clipper blades completely after disinfecting to stop rust from forming. Use a clean towel or air dry in a warm spot. Avoid leaving blades wet or dripping to protect the metal and sharpness.
Put a few drops of clipper oil on dry blades. Oil cuts friction and keeps blades running smooth. Turn clippers on briefly to spread oil evenly.
- Remove blades from the clipper carefully to avoid injury.
- Choose a disinfectant: 70% isopropyl alcohol or a mixed Barbicide solution.
- Submerge blades fully in the disinfectant for 1 to 10 minutes, per instructions.
- Take out blades and dry them completely with a clean cloth or air dry.
- Apply clipper oil to all blade surfaces evenly.
- Run the clipper briefly to distribute oil and check for smooth motion.
- Reassemble the clipper and store in a dry place to prevent moisture build-up.
Cleaning Different Clippers: Corded, Cordless, and Waterproof
Cleaning clippers varies by type because their designs handle water and movement differently. You can’t treat corded, cordless, and waterproof clippers the same way without risking damage. Knowing the right steps stops rust, breaks, and other issues.
Cleaning Corded Clippers
Corded clippers need extra care around the cord to avoid frays or electric shorts. Always unplug them before cleaning to prevent accidents. Use a brush to clean hair from blades and crevices.
Avoid touching the cord. Don’t touch the motor while cleaning.
Avoid rinsing the blade heads with water unless your model specifically says it’s waterproof. Use clipper oil on the blades after cleaning to keep them sharp and smooth. Regular cord checks help catch damage early to avoid dangerous use.
Cleaning Cordless Clippers
Cordless clippers let you clean blades more freely but still require being switched off first. Brush out loose hair gently, just like with corded clippers.
Most cordless models are not fully waterproof. So avoid rinsing blades unless the manual allows it.
After brushing, oil the blades lightly with a product made for clippers. Charging ports and batteries can get damaged by water, so keep those parts dry. Chargers and cords should be checked separately for damage to keep everything working well.
Handling Waterproof or Washable Clippers
Waterproof clippers often have an IPX6 or IPX7 rating. This means you can rinse the blade heads under water. It is safe to run them under tap water.
Remove the blade head if your manual shows how, then rinse it quickly with warm water. Dry the blades well with a towel before putting them back.
Even washable clippers need oiling after cleaning to avoid rust and keep cutting smooth. Use cleaning solutions like Barbicide only on dry blades. These solutions disinfect the blades, so use them when needed.
Make sure blades dry before applying disinfectant. Do not soak the whole clipper body unless the manual says it’s fine.
Here is a table showing key cleaning do’s and don’ts by clipper type:
| Clipper Type | Can Rinse Blades? | Must Oil Blades? | Check Cords/Battery? |
|---|---|---|---|
| Corded | No, unless waterproof | Yes, regularly after cleaning | Yes, check for fraying/damage |
| Cordless | Usually no, manual check needed | Yes, after brushing blades clean | Yes, check battery and charger |
| Waterproof | Yes, if IPX6 or IPX7 rated | Yes, always after drying blades | No cord to check, dry body well |
Following these steps prevents damage, keeps your clippers running longer, and gives better haircuts every day. Pay attention to your clipper’s design before you clean to avoid voiding any warranties.
Always turn off and unplug clippers before cleaning, even if they’re cordless.
How and When to Oil Clipper Blades for Smooth Cuts
Clipper blades need oiling to keep cutting smoothly and avoid rust. Oil reduces friction between blades, helping them last longer and stay cool. You should oil blades every few haircuts or any time the blades feel dry or noisy.
Choosing the Right Clipper Oil
Use clipper oil made specifically for hair clippers or trimmers. These oils are light and keep blades sharp without causing buildup.
Avoid heavy oils or multipurpose sprays like WD-40. They can slow your blades and damage the motor.
Brands like Wahl and Andis sell small bottles of blade oil. These bottles usually cost between $5 and $10. This oil keeps your clippers running smoothly.
You only need a couple of drops at a time. So one bottle lasts many months. Some cleaning sprays also contain oil for quick uses.
Applying Oil Correctly
Apply a few drops of oil directly on the blade teeth and the rails. You can do this right after brushing out hair and disinfecting the blades. Oiling keeps moving parts smooth and reduces heat caused by friction.
Handle the blades gently and avoid over-oiling, which can attract hair and dirt. After application, wipe off any running oil with a clean cloth to prevent buildup. You can oil before or after reassembling the clipper.
Running Clippers to Distribute Oil Evenly
After oiling, turn on the clippers for 10 to 15 seconds. This helps spread the oil evenly across the blades. It ensures the blades stay well lubricated.
This helps the oil flow between teeth and along the rails where friction is highest. Running the clipper also prevents dry spots that wear blades faster.
After this, switch off the clippers and wipe away any extra oil. Dry and lightly lubricated blades make cleaner, cooler cuts. Proper oiling extends blade life and keeps your clipper working like new.
Follow these steps to oil clipper blades properly:
- Brush away all hair from the blades using a cleaning brush.
- Disinfect the blades with an antibacterial clipper cleaner or spray.
- Apply 2 to 3 drops of clipper oil evenly along the top blade’s teeth and rails.
- Turn on the clippers for 10 to 15 seconds to spread the oil.
- Turn off clippers and wipe off excess oil with a clean cloth.
- Reassemble the clipper if you dismantled the blades for cleaning.
- Repeat oiling every 3 to 5 haircuts or whenever blades feel dry or noisy.
Common Cleaning Mistakes and How to Avoid Them
Using WD-40 or household oils on clipper blades can cause damage. These products attract dust and can gum up the motor. Always use clipper oil made specifically for these blades to keep them smooth and rust-free.
Immersing the whole clipper in water damages the motor and electronics. Only take off the blades that detach and soak those in warm, soapy water or a disinfecting solution.
Let the blades soak fully in disinfectant for 10 minutes to kill bacteria. But don’t leave them longer to avoid rust.
Too much water on blades traps moisture and can cause rusting. After washing, wipe the blades dry using a lint-free cloth. Then, leave them out to air dry for about one hour, preferably with a fan or on a drying rack to keep moisture from staying inside.
- Use only clipper oil, never household oils or WD-40
- Soak only detachable blades, not the whole clipper
- Keep disinfectant soak time to 10 minutes to stop rust
- Dry blades thoroughly with a cloth, then air dry for 60 minutes
- Wipe off all excess oil after lubricating to avoid buildup
- Tighten screws and check blade alignment after cleaning
- Brush off all hair with a stiff brush before oiling and storing
Rust and corrosion happen when water or disinfectant stays on metal too long. Oiling blades right after drying leaves a thin protective layer that stops rust.
Rubbing oil in and running clippers briefly pushes oil deep in. Wiping off any excess keeps clips from clogging up.
Avoid common mistakes by establishing a quick drying and oiling step after every clean. Clean the clipper body often, too. This helps maintain performance and keeps blades sharp, stopping pulling and uneven cuts before they start.
Maintaining Clippers for Longevity: Cleaning Frequency and Blade Replacement
Regular cleaning keeps your clippers sharp and extends their life. You use clippers at home one to two times a week. Clean them after each use.
Replace the blades every 12 to 18 months to avoid dullness and pulling hair. Professionals cut hair every day. Clean the blades after each client.
Do a deep clean once a week. Professionals should replace blades every three to six months to maintain peak performance and hygiene.
Deep cleaning removes buildup and bacteria, preventing infections and dull blades. Use a disinfectant that’s safe for clippers and follow the label’s directions carefully. Keep the blades wet in the cleaning solution for the full time.
This usually lasts from one to 10 minutes. Skipping this step reduces the disinfectant’s effectiveness and risks spreading germs. Over time, even well-oiled blades will wear down.
So notice if your clippers feel dull, slow, or pull hair. That signals it’s time for replacement or professional maintenance.
Professional clipper service helps prevent motor wear and overheating issues. Home users who cut hair occasionally should schedule this service once a year. Busy barbershops running clippers daily need service every three to six months.
Clean and oil your tools regularly. Schedule maintenance to avoid costly repairs. This keeps cutting smooth and clean.
Watch for rough cutting, strange noises, or overheating signs. Act quickly to stop bigger problems.
Always keep blades wet in disinfectant for the full label time to kill germs effectively. Drying too soon wastes the cleaning process.
Step-by-Step Action Plan for Cleaning Your Clippers
Follow these simple steps to keep your clippers clean and sharp. Stick to this routine to avoid damage and maintain hygiene.
- Before each use: Brush off hair and wipe blades with a dry cloth. This keeps the blades ready and prevents buildup.
- After each haircut: Use a small brush to clean between the teeth. Check that no hair is stuck to avoid dulling the blades.
- Once a week: Remove the blades and deep clean with clipper wash or rubbing alcohol. Dry completely before reassembling to prevent rust.
- After deep cleaning: Apply a few drops of clipper oil on the blades. Turn on the clippers briefly to spread the oil evenly.
- Monthly check: Inspect blades for dullness or damage. Replace blades if the cut feels uneven or pulling occurs.
- After heavy use: Disinfect blades with a clipper blade spray or a 70% isopropyl alcohol wipe. Let air dry to kill germs safely.
- Every few months: Clean around the battery on cordless clippers. Also, wipe the charging port to stop debris from building up. This helps maintain battery life and performance.
Frequently Asked Questions
Can I Use Alcohol to Clean My Clipper Blades?
Yes, dipping clipper blades in 70% isopropyl alcohol helps disinfect. Use a small bowl and soak the blades briefly to kill germs effectively.
How Often Should I Change the Clipper Blades?
Change blades when they become dull or rusty to avoid pulling hair. Dull blades can cause discomfort even if your clippers are clean.
Can I Clean My Cordless Clippers the Same Way as Corded Ones?
You can clean both similarly but follow your model’s specific cleaning instructions. Cordless clippers often have detachable, washable heads which you should rinse carefully.
Is Compressed Air Useful for Cleaning Hair Clippers?
Yes, using compressed air can blow out hair stuck inside tight areas. It helps remove debris without dampening electrical parts or blades.
Should I Oil My Clipper Blades Before or After Cleaning?
Oil your blades after cleaning and drying them completely for smooth cutting. This prevents rust and keeps blades moving smoothly.
Can I Soak All Clipper Parts in Water Safely?
Only soak parts marked as washable by the manufacturer in water. Soaking the entire clipper risks damage unless it’s fully waterproof.
Wrapping Up
Keeping your clippers clean protects the blades and your skin. Start with brushing after every use to make it easy. Focus on oiling and deep cleaning to keep your clippers cutting smoothly for years.


