How to Wash a Makeup Brush Properly: 8 Essential Steps for Clean, Safe Brushes
Learning how to wash a makeup brush keeps your skin healthy and your looks fresh. Use a gentle cleanser like baby shampoo or a brush cleaner made for delicate bristles. Warm water helps break down makeup and oils without hurting the brush.
Start by swirling the brush in your chosen cleaner, working the bristles gently. Avoid scrubbing too hard to prevent shedding or damage. Rinse the brush under running warm water until the water runs clear and free of soap.
Keep the base of the brush handle dry to avoid weakening the glue that holds the bristles. After rinsing, squeeze out excess water gently with a clean towel to speed drying. Lay your brush flat on a clean towel to dry, not upright.
This keeps the bristles in shape and stops water from soaking into the handle. Let them dry completely before using again to avoid bacteria build-up and skin irritation.
Key Takeaways
- Use a gentle brush cleanser or mild soap for best results.
- Wash brushes every 7 to 10 days to avoid bacteria buildup.
- Keep the brush handle and base dry while rinsing the bristles.
- Swirl brushes on a cleansing mat to clean deep into bristles.
- Rinse until water runs clear, ensuring all makeup residue removes.
- Lay brushes flat on a towel to dry, preferably overnight.
1. How to Wash a Makeup Brush Step-by-Step
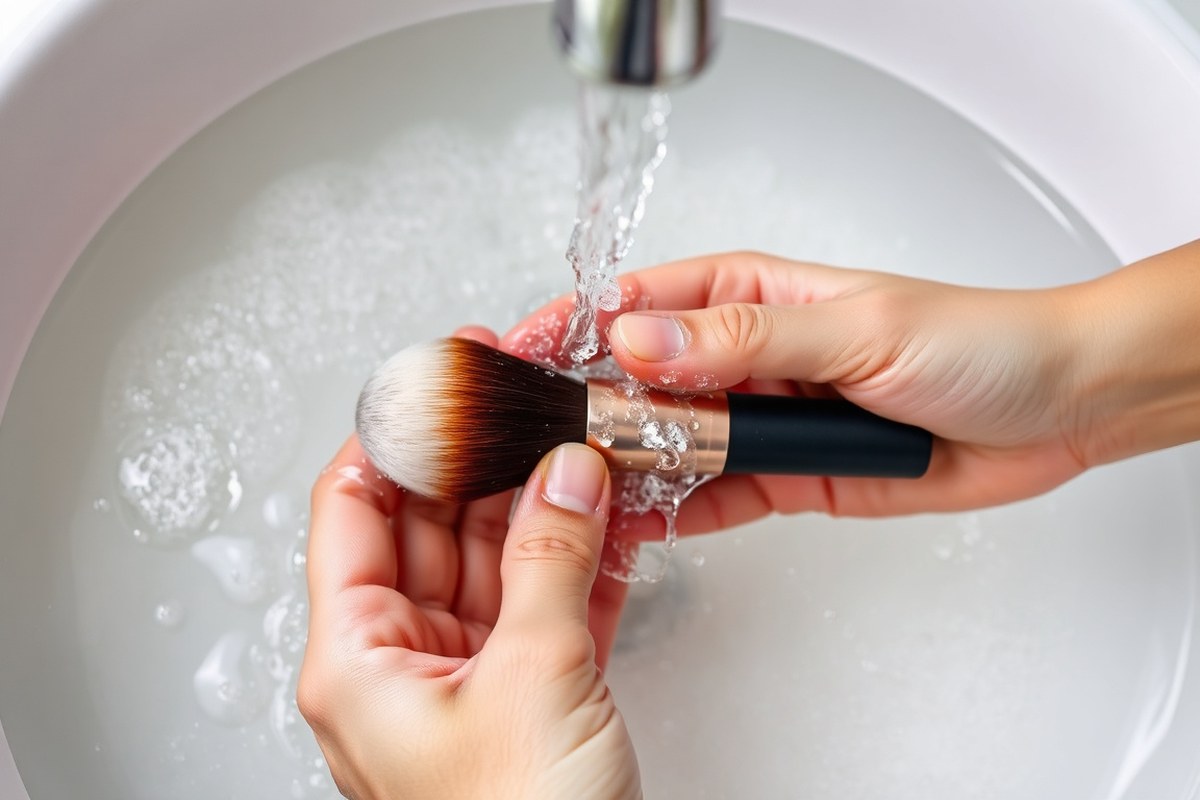
Cleaning makeup brushes right helps keep your skin clear and your makeup smooth. Dirty brushes hold oil, makeup, and bacteria. These can cause breakouts or skin infections if you don’t clean them regularly.
Use warm water and a gentle cleanser made for brushes or mild soap. Avoid hot water, which can loosen glue holding the bristles. Softly working the bristles protects them from damage and keeps them soft.
- Rinse the brush bristles under warm running water. Keep the brush head down to stop water from reaching the handle. Wet only the bristles to protect the brush glue from weakening.
- Apply a small amount of gentle cleanser to the bristles. Use your fingers or a silicone cleaning pad to work the cleanser deep into the bristles. This loosens makeup, oil, and dirt.
- Massage the bristles gently but thoroughly. Move your fingers in small circles or rub on the cleansing pad. Avoid pressing too hard. It removes buildup without breaking or pulling bristles.
- Rinse the bristles completely under warm water. Repeat the cleansing and rinsing until the water runs clear. This ensures no soap or debris remains on the brush.
- Squeeze out excess water carefully using your fingers. Avoid twisting or pulling on the bristles. This step prevents damage and helps the brush keep its shape.
- Pat the brush dry with a clean towel. This absorbs leftover moisture so drying time shortens. Don’t wring or rub the brush against the towel.
- Let your brush dry flat or at a slight angle. Place the brush with bristles facing down or sideways on a towel. This helps water drain and stops water from seeping into the handle, which causes damage.
Set aside 5 to 10 minutes for each brush to wash and rinse. Drying takes several hours, so wash the night before use.
Check that your brushes are completely dry before makeup. Damp brushes can harbor bacteria and break bristles.
2. Which Cleanser Should You Use for Makeup Brushes?
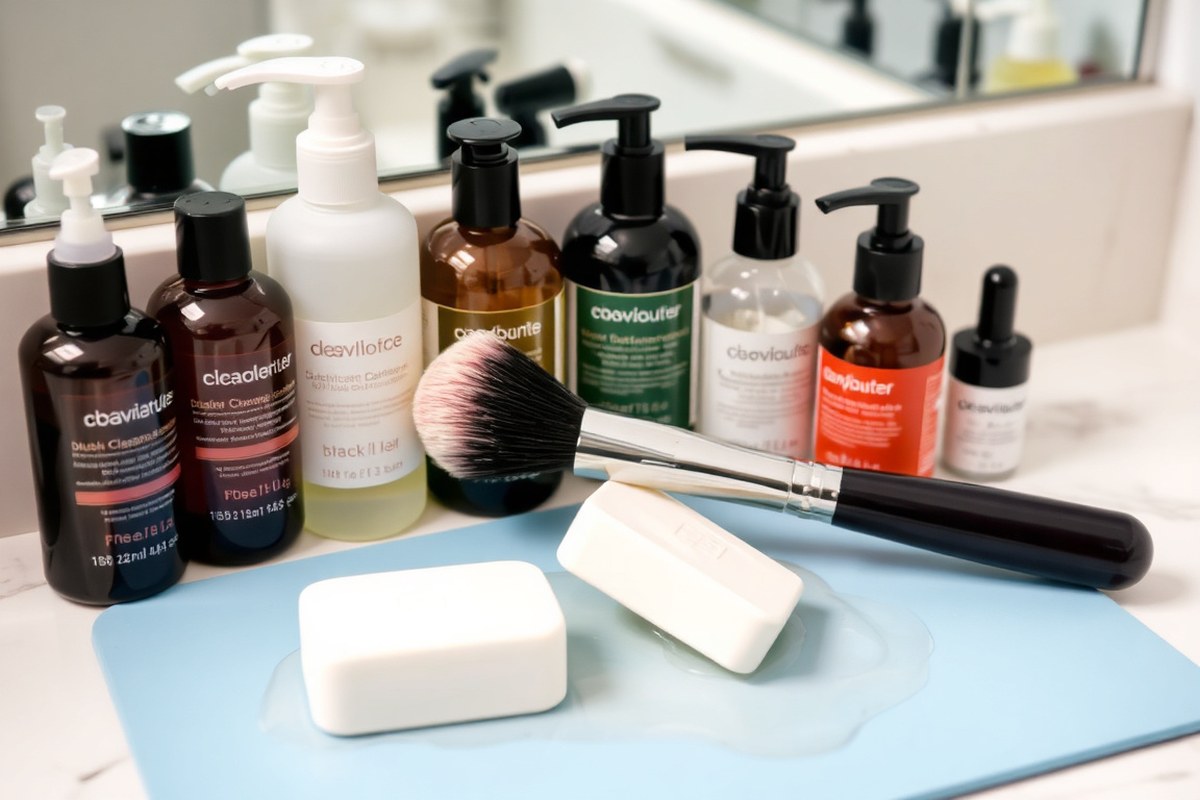
For washing makeup brushes, choose gentle soaps, brush cleansers, or alcohol-based products. The best choice depends on your brush type and how dirty it is. Avoid harsh soaps that can dry out bristles, especially natural hair.
Plant-Based and Gentle Soaps
Baby shampoo or gentle sulphate-free shampoos work great on most brushes. They clean buildup without drying out the bristles or irritating skin. Use these for routine washes, especially with natural or mixed bristles.
These gentle soaps maintain softness and flexibility in your brushes. You’ll need to rinse thoroughly to remove suds. They cost a few dollars and last a long time.
Alcohol-Based Disinfectants
Isopropyl alcohol (around 70%) is useful for removing stubborn stains and disinfecting. Spraying it on your brush briefly kills bacteria without soaking the bristles. Use alcohol if you need quick sanitizing or deep cleaning between heavier washes.
Alcohol dries quickly but can dry out natural hair if overused. Use it occasionally, not daily. Synthetic brushes tolerate it better.
DIY Homemade Solutions
Dish soap mixed with olive oil can break down cream and liquid makeup buildup. Dish soap emulsifies oils while olive oil conditions bristles. Test your brush fibers first to avoid damage.
This mix is stronger than baby shampoo but can be harsh on delicate brushes. Use it for heavy foundation or concealer residue. Rinse very well to avoid soap residue buildup.
Specialized Brush Cleaning Bars
Cleaning bars made for brushes often provide balanced cleansing without harsh chemicals. They perform well for deep weekly cleans and preserving brush quality. Bars also reduce waste compared to liquids.
Soap bars designed specifically for makeup brushes cost around $10. They lather well and rinse clean with less suds residue. They suit most bristle types, especially natural hair.
Quick-Dry Spray Cleansers
Spray-on brush cleansers are great for refreshing brushes fast between uses. They don’t replace full washing but remove surface oils and pigments. Use sprays on synthetic brushes for quick cleanups.
These sprays cost about $6 to $12 and dry within minutes. They are lightweight and easy to carry for travel. Avoid relying on sprays alone to keep brushes fully clean.
| Cleaner | Works Well On | Limit |
|---|---|---|
| Baby shampoo | Routine washes on any brush | Heavy foundation may need repeat lathers |
| Dish soap with olive oil | Cream and liquid product buildup | Check ingredients against brush material |
| Dedicated brush cleanser | Weekly washes and deep cleans | Spray versions refresh but don’t replace wash |
Never skip rinsing thoroughly; leftover soap builds up and damages brushes.
3. How Often Should You Clean Your Makeup Brushes?
How often you clean your makeup brushes depends mostly on the type of makeup you use. Brushes for liquid or cream products need cleaning weekly. This includes foundation and concealer brushes.
Clean even more often if you use them two to three times. For powder-based products, cleaning every one to two weeks is usually fine.
The frequency also depends on how often you use each brush. Daily brush users should clean more often. This helps stop product buildup.
It also reduces bacteria growth on brushes. You can do a quick rinse or spray with brush sanitizer after each use. But don’t skip the full wash regularly.
Skin concerns also matter when deciding how often to clean brushes. Acne, sensitive, or oily skin needs weekly brush cleaning. This lowers the risk of breakouts.
It keeps your skin cleaner and healthier. Healthier skin and mostly powder makeup means less cleaning. You can stretch the time between cleanings.
Still, clean brushes regularly for best results. But not less than every two weeks.
Clean brushes for liquid or cream makeup at least weekly. This simple checklist helps you know when to clean. Regular cleaning keeps brushes effective and safe.
Powder brushes can be cleaned every two weeks. Notice makeup buildup, bad smell, or skin reactions?
Clean your brushes immediately. Don’t wait until the next scheduled cleaning.
Keeping up with cleaning doesn’t take much time. A full wash might only take 5 to 10 minutes per brush, including drying time.
Skipping this step risks clogged pores and dull makeup application. Your skin and brushes will stay healthier with a regular cleaning habit.
4. Drying Makeup Brushes Without Damaging Bristles
After washing, gently press the water out of your makeup brush. Avoid twisting or pulling the bristles to prevent damage and shedding. Use your fingers to reshape the bristles before drying.
Lay your brushes flat on a clean towel to dry. Position them so the bristles hang slightly over the edge of a counter or sink. This helps the brush keep its shape and allows air to circulate around the bristles.
Never dry your brushes with bristles facing up or standing straight. Water running down the handle loosens the glue that holds bristles, causing them to shed prematurely. Always keep the brush head pointing downward or flat when drying.
The time it takes to dry depends on the brush size and bristle type. Smaller brushes usually take 3 to 6 hours to dry.
Large fluffy brushes may need 12 hours or overnight. Natural hair brushes often take longer than synthetic ones.
For a quick dry, spray synthetic brush bristles with a cleaner. Cinema Secrets works well for this. It dries fast and keeps brushes clean.
This cleaner dries instantly and doesn’t require rinsing. Avoid soaking brushes in water.
Don’t use hot air to dry them. Both can weaken the glue over time.
Try a drying rack if you can’t hold brushes flat. You can also lay them on a brush guard. This helps keep their shape.
Store your brushes bristle-up in a cup. Use a brush roll between uses too.
This stops the hairs from getting crushed. Following these steps will keep your brushes in good condition and prevent mildew buildup.
5. Differences Between Cleaning Powder and Liquid Makeup Brushes
Brushes used with powder products generally need less frequent washing. Powder products don’t clog the bristles as much. So you can wait one to four weeks between cleans.
Brushes for liquid and cream products pile on residue faster. So wash them often, around every one to two uses helps prevent buildup.
Foundation brushes need special care because liquid foundation can drip deep into the bristles. You risk streaks or patchy coverage if you don’t clean them well. Leftover product on brushes causes this.
Use a gentle cleanser on your brushes first. Rinse them well under warm water. This stops residue from building up inside.
| Source | Interval | Brushes Covered |
|---|---|---|
| American Academy of Dermatology (AAD) | Every 7 to 10 days | All makeup brushes |
| Cleveland Clinic | Weekly | Foundation and concealer brushes |
| Cleveland Clinic | Every 2 weeks | Eyeshadow and eyeliner brushes |
| Cleveland Clinic | Monthly | Powder and blush brushes |
| MasterClass | Several times a week | Brushes used with cream-based makeup |
When cleaning powder brushes, dip the bristles lightly in warm water and swirl with mild soap. Avoid soaking the handle to stop loosened glue. For liquid brushes, soak the bristles fully first.
Massage soap deep to clear leftover cream or liquid. This cleans them thoroughly.
After washing, reshape the bristles before drying them flat on a towel. Drying brushes upright allows water to drip into the handle, which can loosen bristles.
Powder brushes tend to dry faster. Liquid product brushes might take longer because they absorb more water.
Wash your foundation or cream brushes often. They hold bacteria that can cause skin issues. Don’t skip this step.
6. How to Clean Makeup Sponges Safely and Effectively
Makeup sponges need cleaning, but not quite like brushes. They soak up product and oils, so you need to be gentle when washing. Use a mild cleanser with lukewarm water to clean brushes.
Rinse them well. Let brushes air dry fully to stop mold growth. Replace them every 1 to 3 months depending on use.
Rinse Under Lukewarm Water
Start by turning the sponge under lukewarm running water. Squeeze it gently to soak it thoroughly. Avoid hot water as it can damage the sponge texture.
Cold water won’t break down makeup oils well, so lukewarm is the sweet spot. Getting the sponge wet first makes cleansing easier.
Saturate and Massage with Cleanser
Apply a few drops of a gentle cleanser designed for sponges or a mild bar soap. Massage the sponge firmly but gently with your fingers. Focus on spots with heavy product buildup.
This helps lift makeup and dirt without tearing the sponge. Using your fingers lets you access all the surface without harsh scrubbing.
Rinse Until Water Runs Clear
Rinse the sponge under lukewarm water, squeezing out the cleanser and dirt. Keep rinsing and squeezing until the water runs clear and no soap remains. This can take several cycles depending on the amount of product.
Cleaning well prevents irritation from leftover makeup or cleanser. Don’t rush; bits of residue can hide deep inside.
Squeeze Without Twisting
Gently squeeze the sponge to remove water but don’t twist or wring it. Twisting can cause tearing or damage the shape. Press softly and repeat until most water is out.
Squeezing gently keeps the sponge’s structure intact. Avoid handling it roughly to extend its life.
Air Dry Completely
Place the sponge in a well-ventilated spot to air dry. Avoid closed containers or damp areas to stop mold growth. Drying usually takes overnight or longer, so plan accordingly.
Make sure it is completely dry before the next use. A damp sponge can harbor bacteria and lead to skin issues. Here’s a quick checklist for safe and effective sponge cleaning:
- Run lukewarm water over the sponge until fully wet.
- Apply a mild cleanser or bar soap and massage gently.
- Rinse and squeeze repeatedly until water runs clear.
- Gently squeeze out excess water without wringing or twisting.
- Lay the sponge in a dry, well-ventilated place to air dry.
7. When to Replace Your Makeup Brushes and Sponges
Makeup brushes usually last about three months with regular cleaning. Beyond that, germs can build up, making them less safe for your skin. Even washing every week won’t fix damage like loose bristles or a broken handle.
Sponges are different because they stay wet and hold bacteria easier. You should clean them after each use and swap them out about every three months too. Signs a brush or sponge needs replacing include:
- Shedding bristles or splotchy patches in sponges
- Unpleasant smell that doesn’t go away after washing
- Stiff, dry, or misshapen bristles that don’t soften
- Cracked or broken handles that affect control
- Persistent stains or makeup residue after cleaning
Check your tools regularly for these signs. When bristles start falling out or the shape changes, it’s time to stop using it.
Brushes with stiff or frayed bristles won’t apply makeup evenly. You’ll waste product and risk skin irritation.
Cleaning can delay replacement but won’t fix serious wear. If your sponge keeps smelling musty even after careful washing, replacing it helps avoid breakouts.
Paying around $20 for a cleaning bar already saves you money by extending brush life. Still, spending on new brushes every few months keeps your routine fresh and hygienic.
8. Common Mistakes When Washing Makeup Brushes and How to Fix Them
Washing makeup brushes can go wrong in some common ways. These mistakes can damage brushes or leave makeup residue behind.
Fixing these mistakes helps keep your brushes soft, clean, and attached securely. Knowing the right water temperature, drying method, soap use, and rinsing habits prevents these issues.
Using Hot Water That Damages Glue
Hot water weakens the glue holding brush hairs to the handle. Temperatures above 110°F (43°C) soften this glue and cause hair fallout or loose heads.
Use lukewarm water when washing. It cleans makeup well without harming the brush’s structure. You can test the water on your wrist to keep it gentle.
Drying Brushes Upright or Standing
Drying brushes upright in a cup lets water drip down to the ferrule. This moisture weakens the glue over time and creates mold risks. The brush head can loosen from the handle.
Lay brushes flat on a clean towel when drying. Arrange the bristles hanging slightly over the edge for air circulation. This keeps water away from the ferrule and glue joints.
Using Harsh or Too Much Soap
Strong soaps dry out bristles, causing breakage and frizz. Using excessive soap also leaves residue that’s hard to rinse out. These residues irritate skin and reduce makeup application quality.
Choose a mild brush cleanser free from sulfates and silicones. Use bar soap by rubbing the bristles gently under running water. Use enough soap to remove makeup but avoid heavy lather build-up.
Skipping the Rinse-Repeat Cycle
One pass with cleanser often leaves makeup bits and dirt behind. You need to rinse brushes thoroughly and then wash again for full cleaning. This ensures deep dirt removal without harsh scrubbing.
After first washing, rinse well under lukewarm water. Then apply a second small amount of cleanser and gently work the bristles. Finish with another thorough rinse until water runs clear.
Rinsing twice removes trapped makeup that damages bristles and skin.
Storing Brushes Before Fully Dry
Putting brushes back in your makeup bag while damp encourages bacteria growth. The trapped moisture also softens glue and deforms bristle shape. Damp brushes don’t apply makeup smoothly and can cause skin issues.
Wait at least 3 to 4 hours for brushes to dry fully before storing. Avoid storing them in closed containers until dry. Use a fan or dry brushes in a well-ventilated area to speed drying without heat.
- Use lukewarm water, not hot or cold
- Wash brushes gently with mild cleanser
- Rinse brushes twice fully
- Lay flat to dry, never upright
- Wait until completely dry before storing
- Avoid harsh soaps with sulfates or mineral oil
- Keep brush heads hanging off edges to air out
These steps help keep your brushes clean, soft, and long-lasting. Avoid shortcuts that save time but cause damage or incomplete cleaning.
Step-by-Step Action Plan for Keeping Makeup Brushes Clean
Use this quick plan to keep your makeup brushes fresh and safe to use. Follow each step to see and feel your brushes stay soft and clean.
- Before You Use Your Brushes: Check if brushes look dirty or smell bad. Clean if needed to prevent skin issues.
- After Each Use: Wipe brushes on a clean cloth or tissue to remove makeup. This helps make washing easier later on.
- Once a Week: Wash brushes with a gentle cleanser or brush shampoo. Rinse until the water runs clear.
- Right After Washing: Shake brushes to remove extra water. Use your fingers to reshape the bristles. Keep their original form.
- Drying Time: Lay brushes flat on a towel. Let the bristles hang off the edge. This helps them dry fully and avoids damage.
- Once a Month: Inspect brushes closely. Replace any with frayed, shedding, or stiff bristles for safety and better makeup application.
- When Using Sponges: Wash sponges after every use with a mild cleanser. Squeeze water out gently. This stops mold and bacteria growth.
Frequently Asked Questions
How Do You Rinse Makeup Brushes Properly Before Washing?
Rinse bristles under lukewarm water gently, keeping the handle dry. This prevents loosening glue and extends brush life.
Can You Wash Makeup Brushes with Hot Water?
Avoid hot water; use lukewarm water instead. Hot water can damage bristles and glue.
Is It Okay to Air Dry Makeup Brushes Flat?
Avoid drying brushes flat as water can seep into the handle. Use a 45-degree angle to keep bristles dry and shape intact.
Can You Clean Makeup Brushes Without Water?
Yes, spray brush cleaners refresh brushes between washes. But they don’t replace thorough washing with water and soap.
What’s a Simple Tool to Make Cleaning Brushes Easier?
A silicone cleansing pad with texture helps remove makeup better. It holds steady and speeds up scrubbing.
How Do You Store Brushes After They’re Dry?
Store brushes upright or flat in a clean space. This keeps bristles safe from dust and bending.
Wrapping Up
Keeping your makeup brushes clean protects your skin and your brush’s lifespan. Start by washing one set of brushes this week. You’ll notice better makeup results and a fresher feel right away.