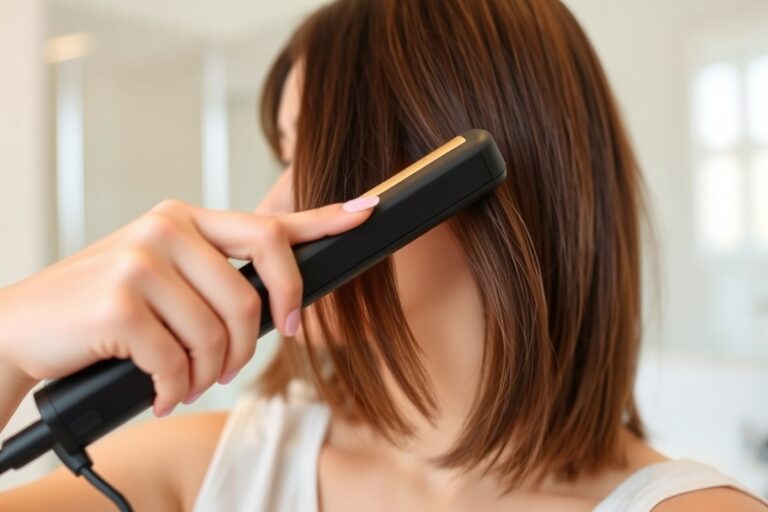
How to Use a Three Barrel Curling Iron: Simple Steps for Perfect Waves
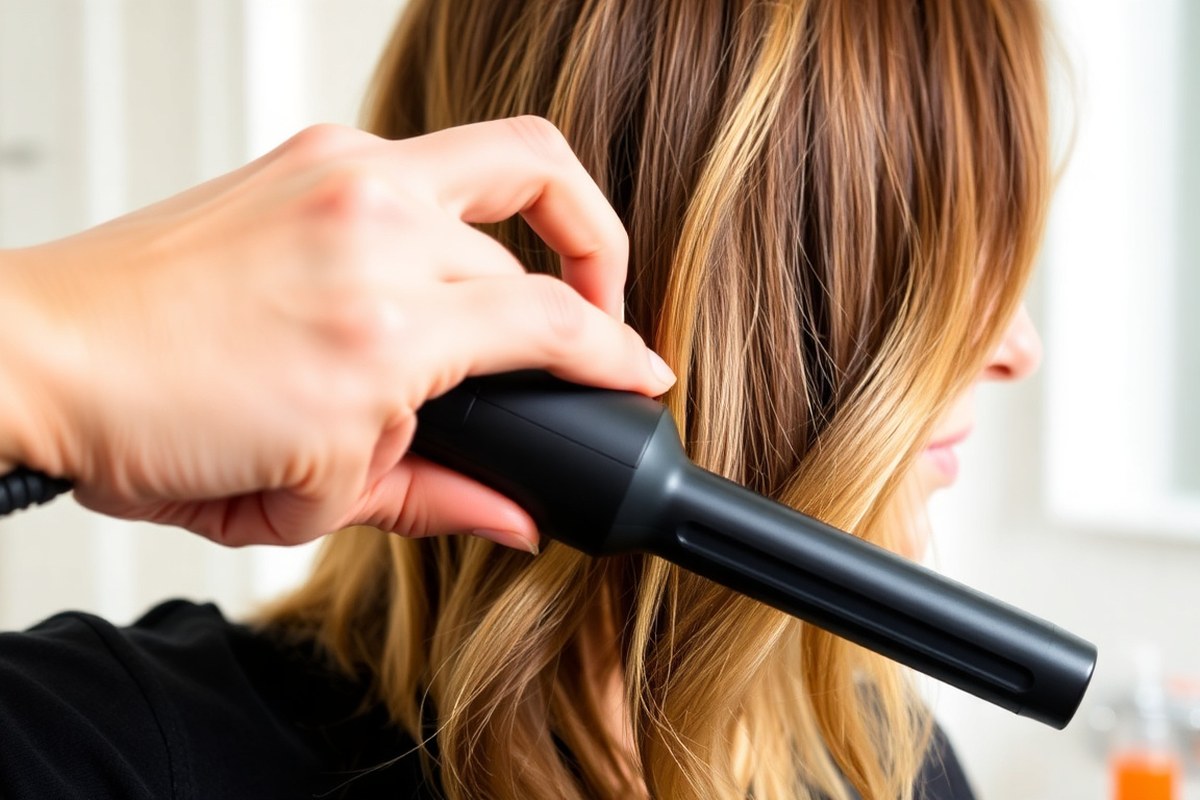
Wondering how to use a three barrel curling iron for perfect waves? It’s simple: clamp a section of hair around all three barrels and hold briefly.
This instantly shapes natural-looking waves in just one pass. For best results, use a curling iron with ceramic barrels for even heat distribution.
Start with smooth, dry hair to prevent snags or breakage. Set the iron’s heat based on your hair type. Fine hair needs lower heat settings around 250°F. Thick or coarse hair can tolerate up to 400°F. Avoid holding the iron too long to protect your strands from damage.
Work with sections about two inches wide, placing the iron midway down the hair shaft. Hold the clamp tightly for about 8 to 12 seconds.
This timing helps create lasting beachy waves without overheating your hair. After releasing, gently run your fingers through the curls to separate the waves for a natural look.
Key Takeaways
- Section hair into 2-inch wide pieces for even heat distribution.
- Choose 200°C (390°F) as your curling setting. This temperature helps create waves that last. It offers a good balance between hold and hair safety.
- Smooth, dry hair prevents tangles and protects against damage.
- Clamp the iron midway down the hair shaft for consistent waves.
- Hold each section in the iron for a few seconds before releasing.
- Use ceramic barrels to reduce heat damage and improve glide.
How to Use a Three Barrel Curling Iron Step-by-Step

Using a three barrel curling iron is simpler than it looks. It creates even waves quickly by clamping hair between three hot barrels at once. You take sections of your hair and clamp the iron.
Hold it for a few seconds. Then release to reveal smooth, consistent waves.
Before starting, heat your iron to around 390°F (200°C). This temperature works well for most hair types to hold the waves without damaging your hair. Smooth, detangled hair is easier to style and prevents snags during the process.
- Section your hair. Grab a 2-inch wide section. Smaller sections work better for tighter waves. But don’t use sections bigger than 3 inches. This size fits perfectly in the iron’s clamp.
- Open the clamp. Hold the iron with your dominant hand like a flat iron. Open it wide enough to slide your hair in without pulling or bunching.
- Clamp near the roots. Start clamping about 1 to 2 inches from the scalp. Avoid the scalp to prevent burns but close enough for lasting wave shape.
- Hold the iron steady. Keep it clamped for about 4 to 5 seconds. Holding it too long risks damage. Less time means the wave might not set fully.
- Release and slide down. Open the clamp and move the iron down the section, about 2 to 3 inches. Align the barrels parallel to hair and clamp again.
- Repeat along the section. Clamp, hold for 4 to 5 seconds, then slide down until you reach the ends. This creates a continuous wave from root to tip.
- Angle the iron slightly. For natural waves, tilt the iron a bit upward or downward instead of straight horizontal. This adds volume and avoids stiff lines.
- Finish all sections. Move section by section through your hair. Work from bottom layers upward to avoid tangling and ensure even heat distribution.
Holding the iron correctly matters too. Use a relaxed grip and keep your wrist straight. This control helps guide the iron smoothly for consistent wave patterns.
Don’t rush the process. Taking your time with each section gives waves that last longer and look more natural. In about 10 minutes, you can transform your hair into voluminous, defined waves that stand out.
Choosing the Right Heat Setting by Hair Type

Using the right heat setting for your hair type prevents damage and gives better curls. Fine or thin hair needs less heat to avoid drying out. Thick or curly hair usually requires the highest temperature for lasting waves.
Here is a heat range to follow based on hair texture. Use this to pick the best temperature on your three barrel curling iron. Adjust it slightly if your hair is damaged or very sensitive to heat.
| Hair Type | Recommended Temperature | Temperature (°F) |
|---|---|---|
| Fine or Thin Hair | Around 160°C | 320°F |
| Normal or Slightly Curly Hair | About 200°C | 390°F |
| Thick or Curly Hair | Up to 220°C | 450°F |
| Damaged Hair | Start near 150°C to 160°C | 300°F to 320°F |
Start your iron at the lowest recommended heat. Test on a small hair piece for 4 to 5 seconds before styling all hair.
Keep the setting when the curls form quickly and hold well. Raise the temperature by 10 to 20 degrees Celsius if needed.
Many irons, like the TYMO 3 barrel, have intelligent heat control that remembers your last setting. Even so, avoid holding the iron in one spot on your hair too long. Overheating causes breakage and dullness.
Always test the iron temperature on a strand first. Hold the iron on it for a few seconds to check for damage or excessive heat.
Most curling irons show the set temperature. But the real barrel heat can be slightly different. Quickly touch near the barrels to test the heat.
Avoid touching plates. Check carefully so you don’t burn your fingers. Lower the temperature if the iron feels too hot to touch.
Preparing Your Hair for Long-Lasting Waves
Start with hair that is completely dry before using your three barrel curling iron. Apply a heat protectant and some styling products to help hold your waves longer. Avoid damp hair to prevent steam damage and poor curls.
Detangle and Dry Hair Fully
Tangle-free hair styles more easily and looks smoother after curling. Use a wide-tooth comb or brush to gently remove knots before drying.
Make sure your hair is 100% dry. Styling on wet or damp hair won’t give even waves.
A good dry takes 10 to 15 minutes with a blow-dryer. It takes longer by air.
The time depends on your hair thickness. Pay attention to the roots and thick areas to avoid missed damp spots.
Apply a Heat Protectant Spray
Heat protectant spray shields your hair from temperatures up to 400°F. Spray evenly from roots to ends for full coverage. This step reduces damage and keeps your hair healthy over time.
Use a heat protectant designed for high heat styling. Popular options cost between $8 and $20 and offer added frizz control. Spray lightly so hair feels damp but not wet.
- Choose sprays with silicones or natural oils for smoothness.
- Let the spray dry for a minute before curling.
- Reapply if you style with the iron multiple times.
- Avoid heavy oils that can weigh hair down.
- Check product labels for heat resistance up to 450°F for best results.
Optional: Use a Smoothing Serum
Applying a smoothing serum helps tame frizz and flyaways before curling. Use a small amount, about a dime size, to avoid greasy hair. Distribute it evenly through the mid-lengths and ends.
This extra step helps if your hair gets frizzy. It also makes your hair shinier.
Avoid the roots to keep your hair light and bouncy. Serums with ingredients like argan oil offer natural moisture and smooth waves.
Sectioning Hair for Flawless Waves with a 3 Barrel Iron
Start by dividing your hair into sections about one inch wide. This helps each wave form evenly without overlapping or missing spots. The size and way you section depend on your hair’s length.
Sectioning Techniques for Short Hair
Use smaller sections, around ½ to 1 inch wide, for short hair. This prevents bulky clumps that won’t wave properly. Clip up hair you’re not styling to keep it out of the way.
Hold each section straight and smooth before clamping the iron. Keep the clip close to scalp but comfortable to avoid dents. You may find 2 to 3 horizontal sections enough for most short styles.
Sectioning Medium Length Hair
Divide medium length hair into wider sections, about 1 to 1.5 inches. This balances styling speed and wave definition well. Separate your hair into at least three horizontal rows from crown to nape.
Use a clip or a hair pin to hold each section firmly but gently. Make sure the hair lies flat without twists before clamping the iron. This technique helps create smooth, even waving patterns.
Handling Long Hair Sections
For long hair, section 1 to 2 inches of hair at a time. Larger sections speed up styling but can miss details on thicker hair. Divide hair into 4 to 5 horizontal layers to keep control.
Pin up uncovered hair with large clips to prevent tangling. Take time to hold each section straighter for even heat distribution. Slide the iron down each section to follow previous waves without gaps.
Follow these steps to section your hair properly before using the three barrel curling iron:
- Start with clean, dry hair, and comb through any knots.
- Create a horizontal part near the crown, clipping the top hair away.
- Take one-inch wide strands from the bottom layer at the nape.
- Hold the section straight and smooth by hand or clip.
- Clamp the curling iron on the section, starting near the roots.
- Slide the iron down the strand, following your last wave with the first barrel.
- Release the iron and move to the next section beside the last one.
- Lower another layer of hair and repeat the process until finished.
How Barrel Size Influences Your Wave Style
A small barrel on a three barrel curling iron creates tighter waves. This size usually measures around ¾ inch in diameter. It works best for a retro wave look.
The waves add texture and volume near the scalp. This style looks more defined.
Medium barrels range from 1 inch to about 1¼ inches. These produce looser, more natural waves. The shape is great for soft beach waves and casual styles that look relaxed and tousled.
Large barrels are about 1½ to 2 inches wide. They make very loose, flowing waves with less definition. Large barrels suit people looking for subtle movement and volume, often achieving a natural hair appearance.
Choosing barrel size depends on the style you want. Small barrels suit retro or crimped waves, which look structured and classic. Medium and large barrels work for natural or beachy waves that flow gently and feel casual.
| Barrel Size | Diameter (inches) | Wave Style | Example Hairstyles |
|---|---|---|---|
| Small | ~0.75 | Tight, defined waves | Retro pin curls, crimped waves |
| Medium | 1.0, 1.25 | Soft, natural waves | Beachy waves, casual tousled look |
| Large | 1.5, 2.0 | Loose, flowing waves | Boho chic, natural volume waves |
A three barrel curling iron has three barrels. You get three waves in one clamp. This saves time styling your hair.
This design speeds up your styling process compared to a single barrel iron. You can switch between barrel sizes if your model supports it, customizing the waves by look.
Use medium or large barrels for a more relaxed, natural wave that lasts several days.
Small barrels take more time and careful clamping. But they give a classic retro look. Medium and large barrels create a modern beach wave effect quickly and require less precision.
Pick a barrel size based on volume you want. Also, think about the wave pattern you like. Choose for daily wear or special occasions.
Tips to Achieve Frizz-Free, Long-Lasting Waves
To keep your waves frizz-free and lasting for days, start with the right finishing products. A lightweight, alcohol-free hairspray helps lock your style without drying hair out. Adding a few drops of a silicone-based serum tames flyaways and adds shine.
Using products that contain nourishing ingredients like argan oil can keep waves soft and touchable. Apply these serums right after curling.
Your hair cools down, to seal the shape. Avoid heavy creams that weigh hair down or cause buildup.
At night, protect your waves by loosely tying your hair in a silk or satin scrunchie. This prevents friction and breakage from cotton pillowcases, which often cause frizz. Sleeping with hair wrapped in a satin scarf also helps hold your waves better.
- Spray a heat protectant before styling to prevent damage
- Use a lightweight, alcohol-free finishing spray to hold waves
- Apply a silicone-based serum for smoothness and shine
- Sleep on a silk or satin pillowcase to reduce friction
- Wrap hair in a satin scarf or use a loose silk scrunchie overnight
- Sleep with hair tied loosely to avoid flattening waves
- Touch up with low heat and minimal passes to avoid damage
To refresh waves, use the lowest heat setting on your curling iron. This helps keep your hair from frying again. It gives you soft, safe waves.
Quickly pass the iron over problem spots, limiting contact to a few seconds. This protects hair health while reviving waves.
Remember that hair with some product hold curls better than freshly washed strands. Using a light texturizing spray during the day can add volume and definition. Keep frizz under control with regular use of tourmaline-coated irons, which cut static for smoother waves.
Common Mistakes and How to Fix Them
Overheating your hair is a common mistake with a three barrel curling iron. It can cause dryness, breakage, and frizz. To avoid this, set the iron’s temperature based on your hair type.
Use a low heat setting near 280°F for fine hair. For thick or coarse hair, keep it below 370°F. This prevents damage and gives better curls.
Working with sections that are too large can lead to uneven or messy waves. Large sections don’t heat well, making some areas curl loosely while others are tighter. Try dividing your hair into smaller sections, about 1 inch wide, to get consistent waves.
- Overheating hair: Use the lowest effective heat setting; test on one section first
- Sections too big: Cut hair into 1-inch segments before curling
- Clamp timing too short or long: Hold iron for 5-8 seconds per section
- Using wrong barrel size: Pick smaller barrel for tight waves, larger for loose
- Not protecting hair: Apply a heat protectant spray before styling
- Dragging or twisting hair in the iron: Place strands straight and steady for smooth waves
Holding the clamp too long or too briefly on each hair section affects wave shape. Clamp for 5 to 8 seconds.
Less time makes loose waves, while more time risks damage. Count silently to 5 or 8 to keep timing steady.
Choosing the wrong barrel size affects tightness. Use a ½-inch barrel for tight, defined waves.
Pick a 1¼-inch barrel when you want soft, loose waves. Changing barrels lets you style without changing your routine.
Snagging or pulling hair while styling can cause damage. Keep hair strands smooth and free of knots before curling.
Run a brush through your hair to prevent tangles. Hold the iron gently without twisting or pulling to avoid breakage.
Your waves might look messy or uneven. First check how big your hair sections are. Next, note how long you clamp each section.
Smaller sections heated evenly and timed properly produce smooth, flowing waves. Use a heat protectant to keep your hair healthy and shiny after styling.
Styling Variations for Short, Medium, and Long Hair
Adjust your technique, section sizes, and barrel choice based on hair length. Short hair needs smaller sections and usually smaller barrels. Medium and long hair allow for bigger sections and larger barrels, creating different wave effects.
Using a Three Barrel Iron on Short Hair
Short hair often measures around chin length or shorter. Pick the smallest barrel size, about 19mm to 25mm, to create defined waves without losing volume. Use smaller sections, about 1/2 inch wide, since short hair holds waves better in these sizes.
Clamp each section briefly, for 3 to 5 seconds, to avoid flattening your hair. Press the iron close to your roots.
But be careful about heat near the scalp. Curling short hair demands quick and gentle technique.
- Divide hair into small 1/2 inch sections from bottom to top.
- Heat the iron to a medium level, around 300°F for fine or damaged hair.
- Start near the roots, clamp hair in the barrels for 3 to 5 seconds.
- Release and move the iron slowly down to the ends.
- Alternate curling directions for natural waves if hair is long enough.
- Repeat until all hair is waved, then finger-comb to soften.
Hold the iron less time on short hair to avoid flattening waves and scalp burns.
Styling Medium Length Hair
Medium lengths usually span from shoulder to collarbone. You can switch to mid-sized barrels around 25mm to 32mm. The slightly larger barrels create looser waves that suit medium hair nicely.
Use section sizes about 3/4 inch to 1 inch wide here. Larger sections help you work faster and give a relaxed, beachy wave. Be sure to keep the iron moving smoothly to get even heat.
- Part hair into 3/4 to 1-inch sections all around.
- Set the iron to 320°F for typical medium or normal hair texture.
- Starting from the mid-shaft, clamp the section for 5 to 7 seconds.
- Slide the iron down to the ends while holding the hair taut.
- Alternate alternating barrel direction for more natural movement.
- Finish with a light hair spray or texturizing spray.
Try not to curl near roots on medium hair; it can reduce volume.
Approach for Long Hair
Long hair extends well past the collarbone and can be thick. Choose larger barrels, at least 32mm or more, for loose, flowing waves. Bigger barrels make long hair look soft and natural without tight curls.
Use larger 1-inch or wider sections to manage your hair faster. Sectioning thinly may take too much time and overheat your hair. Work in overlapping sections for smooth, consistent waves.
- Divide hair into 1-inch or larger sections for efficiency.
- Set the heat to 350°F for thick or coarse hair.
- Start about 2 inches from roots to keep volume at the scalp.
- Clamp each section for 7 to 10 seconds, sliding slowly to ends.
- Alternate the curl direction at the mid-length for a natural look.
- Comb gently with a wide-tooth comb to blend waves after curling.
Avoid overlap too much on long hair to reduce heat damage and frizz.
Step-by-Step Action Plan for Perfect Waves
Use this action plan to create lasting waves with your three barrel curling iron. Follow each step carefully to see clear results.
- Before you start: Wash and dry your hair completely. Your hair should feel smooth, not damp, to avoid damage.
- Day 1: Apply a heat protectant spray evenly through your hair. It protects your strands and helps waves last longer.
- Day 1: Choose the right heat setting based on your hair type. Use lower heat for fine hair and higher heat for thick hair.
- Day 1: Section your hair into manageable parts. Smaller sections lead to more defined waves.
- Day 1: Clamp the iron at the root of a section for 5 to 8 seconds. Release gently to keep the wave shape intact.
- Day 1: Repeat clamping down each section until your whole head is waved. Avoid overlapping warmed sections to prevent damage.
- Day 1: Let your hair cool completely before touching it. Cooling locks in the wave pattern for longer wear.
- After styling: Use a light, flexible hairspray for hold. Avoid heavy sprays that weigh hair down or make waves stiff.
Frequently Asked Questions
How Do You Use a Three Barrel Curling Iron for Natural-Looking Waves?
Open the clamp and grab a 2-3 inch section of smooth hair. Clamp the iron midway on the strand near your roots. Hold it there.
Then slowly slide the iron down to the ends. Repeat through all sections for quick, easy waves that last all day.
What Does a 3 Barrel Curling Iron Do Differently Than a Single Barrel?
It creates natural waves by clamping hair between three heated barrels instead of wrapping around one. This speeds up styling and creates a uniform look. The waves look beachy without twisting or spiraling each strand.
How Is a 3 Barrel Curling Iron Different from a 2 Barrel Waver?
A 3 barrel waver has three barrels that make defined waves with more volume. A 2 barrel creates softer, smaller waves closer to a crimped look. The 3 barrel is better for big, loose waves and more natural styles.
How Do You Use a 3/4 Inch Curling Iron for Tighter Curls?
Grab a 1-2 inch hair section and wrap it around the barrel from root to end. Hold for 10 seconds before releasing. Smaller barrels like 3/4 inch create tighter curls instead of loose waves.
Can You Use a Three Barrel Curling Iron on Wet Hair?
No, it’s best to use it only on dry hair. Wet hair can get damaged by the high heat of the iron and won’t style correctly. Always dry your hair fully before use to protect it.
How to Avoid Snagging Hair on a 3 Barrel Curling Iron?
Make sure your hair is smooth and tangle-free before styling. Detangle with a wide-tooth comb, and apply a heat protectant spray to reduce pulling. Snags happen if hair catches on uneven sections or damaged strands.
Final Thoughts
Using a three barrel curling iron takes patience and the right technique. Start with clean, protected hair and steady sections. Practice these steps to make waves that look great and last all day.