

How to Put in a Bobby Pin: 8 Expert Tips for Secure and Stylish Hair
How to put in a bobby pin for the best hold is simple. Slide the pin in at a 30 to 45-degree angle. This angle taps into the soft layer beneath your scalp, giving it extra grip and comfort.
Start by gathering the hair you want to hold in place. Place the bobby pin with the wavy side down toward your scalp. Press gently but firmly to secure it without pulling too hard.
Avoid pushing the pin straight in or pinning down on the hair surface only. That often leads to slipping or scalp irritation. Angling the pin lets it catch layers of hair firmly without damage.
For thick or slippery hair, use multiple bobby pins for better hold. Choose pins that match your hair color to keep them discreet.
Remember, clean pins will last longer and grip better. So replace bent or rusty ones regularly.
Key Takeaways
- Insert bobby pins at a 30-45° angle for maximum hold and less discomfort.
- Put the wavy side of the pin facing your scalp for better grip.
- Gather hair neatly before clipping to avoid loose strands slipping out.
- Don’t push the pin straight in; angle it to engage the scalp tissue.
- Press gently to avoid hair breakage or scalp irritation.
- Use a handheld mirror with good lighting to check your angles.
1. How to Insert a Bobby Pin for a Strong Hold

To get a strong hold, place the bobby pin with the ridged side down. The ridges should face your scalp. This helps it grip your hair better.
This side grips the hair better, stopping it from slipping out. Insert the pin at a 30 to 45-degree angle.
This angle anchors it firmly in your hair. It holds the layers in place securely.
Using just the right amount of hair for one pin is key. Don’t force in too many strands or pry the pin open.
It holds best when the section fits naturally between its arms. The hair itself keeps the pin stable, not just friction against your scalp.
Here are steps to insert a bobby pin securely:
- Separate a small section of hair that fits inside the pin without stretching it.
- Hold the pin with ridges facing the scalp to maximize grip.
- Place the pin at a slight diagonal angle, about 30 to 45 degrees.
- Slide it in smoothly so the pin’s ends point slightly upward or along the head curve.
- Press gently to secure the pin without bending it out of shape.
- Check if the section holds firmly; add another pin if needed for extra hold.
Avoid putting pins in wet hair to prevent dents and broken strands. For thick hair, use pins designed for more volume and avoid overloading one pin. For side-swept styles, curved pins fit better against your scalp and hold stronger.
2. Choosing the Right Bobby Pin Type for Your Hair
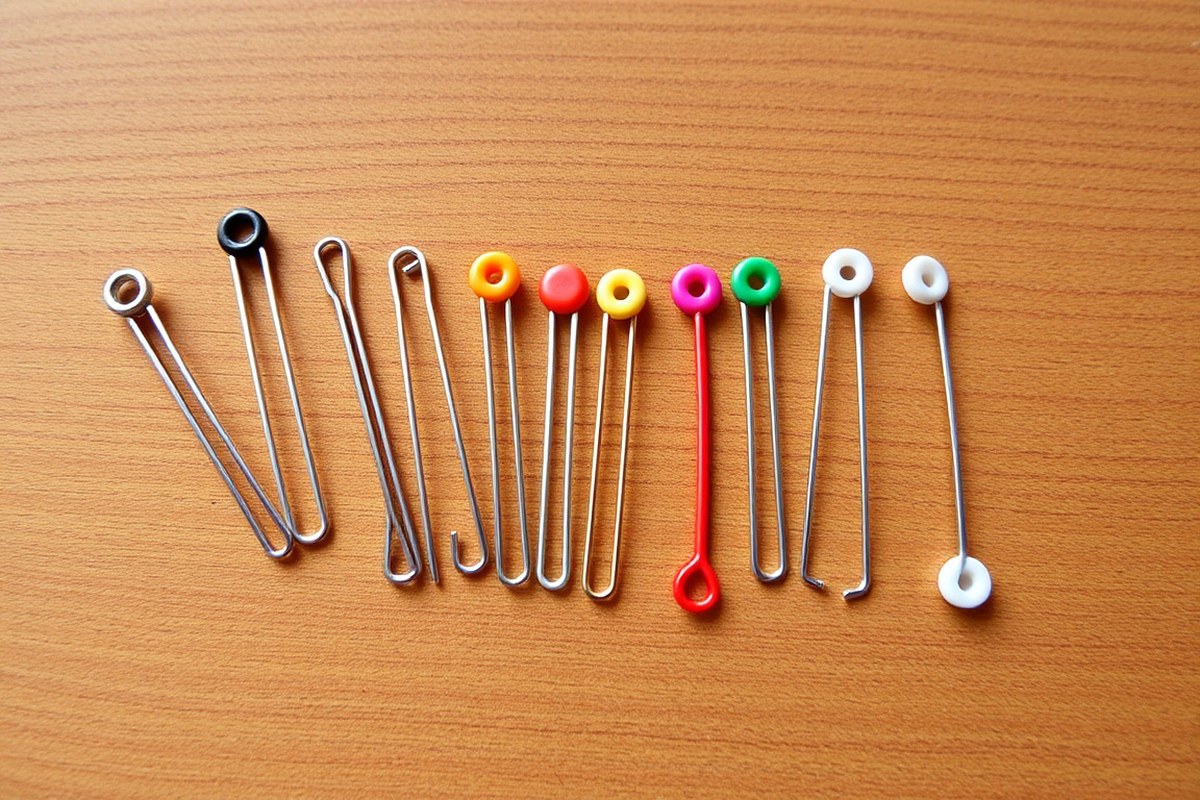
Picking the right bobby pin depends on your hair type. It also matters what style or section you want to hold. Different pins suit different needs.
Thin, straight hair works best with classic metal pins. But these can cause micro-tears on fragile edges. Thick, curly, or coarse hair calls for stronger pins, like flat-tip titanium or jumbo sizes.
Jumbo and spiral pins handle thick hair better because they cover more surface and grip stronger. Spiral pins can replace a bunch of regular pins and manage thick hair with less effort. Pins with a silicone grip stop slipping on any hair type.
They work great on silky or freshly washed hair. These pins hold hair firmly in place.
| Type | Best For | Scalp Safety Rating (1, 5★) | Hold Strength (g/cm²) | Key Warning |
|---|---|---|---|---|
| Classic Metal (Uncoated) | Thin, straight hair; light synthetic wigs (<120g) | ★☆☆☆☆ | 18.2 | High friction → micro-tears in fragile edges |
| Silicone-Grip Coated | These pins are good for all hair types. They work well with medium-weight wigs around 120 to 180 grams. They offer reliable hold for hair and wigs alike. | ★★★★☆ | 24.7 | Ensure coating is medical-grade silicone (USP Class) |
| Flat-Tip Titanium | Thick, curly, or coarse hair needs stronger pins. Heavy wigs over 180 grams call for sturdy options. Pins designed for sensitive scalps also help. | ★★★★★ | 31.5 | Usually pricier, but best for strong hold and safety |
You want bobby pins that match your hair’s weight and texture. Small classic pins hold fine, light hair well. Be careful not to pull too hard to avoid damage.
These pins are gentle but less strong. Silicone-coated pins give better grip without pulling hair. Thick and curly hair needs flat-tip titanium or jumbo pins to stay locked with less slipping.
Don’t overload a bobby pin with too much hair. This weakens its grip and causes slipping.
Before insertion, spray pins with dry shampoo or hairspray to stop slipping. Freshly washed hair is more slippery, so using textured pins or adding product helps. Jumbo or spiral pins work best for thick hair.
They cut down how many pins you need. These pins give extra hold for heavy hair. Spiral pins especially work well for quick styling that needs to last all day.
3. Techniques for Inserting Bobby Pins in Various Hair Lengths
Bobby pin techniques vary with hair length, thickness, and style needs. Short hair uses fewer pins and strategic placement for a neat look. Long and thick hair demand more pins and stronger anchoring for firm hold.
Short Hair Pinning Strategies
Use smaller sections of hair when pinning short styles for better grip. Place pins near the scalp with the wavy side down to hold fine or layered hair. Pick decorative pins to add style while keeping the look secure and fresh.
For very short cuts, angle pins slightly to catch more strands and avoid slipping. Pin back bangs or side wisps flat against your head.
Push the pin in about one inch from the hairline. Avoid using too many pins to prevent a bulky or uneven finish.
Long Hair Secure Hold Tips
Section long hair into manageable parts before pinning to avoid slippage. Use multiple pins, inserting them in opposite directions for stronger grip and balance. Anchor pins against elastics or braids to lock them in place without looseness.
When securing ponytails or updos, push pins in vertically. Do this about 1 to 2 inches above the base. For heavy hair, overlap pins to add extra hold.
Wrap elastic bands around the base first. Then clip pins on top. This offers extra hold and prevents pins from sliding down.
Adjusting for Hair Thickness
Pick jumbo or thicker bobby pins for dense or curly hair. This keeps strands from slipping out easily.
Spiral pins can also help by twisting into the hair tightly, reducing slipping. Avoid thin pins on thick hair; they bend easily and fail to hold securely.
Use more pins if your hair is thick. Space them evenly for good hold without discomfort. For fine hair, use smaller pins close together.
Avoid overlapping too much to prevent damage. Adjust the pin pressure by how far you push it in. This keeps comfort and grip in balance.
4. Common Mistakes and How to Fix Them
One common mistake is inserting the bobby pin the wrong way. The open side should face down toward the scalp. This grips the hair better and stops slipping.
Another mistake is using pins on sections that are too large. Smaller sections hold tighter and keep the style secure longer.
Pins often slip because they don’t have enough grip. Spraying dry shampoo on the pin before inserting adds texture and helps it stay put.
Press the pin in at a shallow 25° angle. This helps avoid snagging hair strands or delicate lace fibers.
Overloading bobby pins with too much hair can cause damage or breakage. Pins pull on strands when they are stretched too far or squeezed too tight.
Give your hair a break by using more pins on smaller sections. This spreads out the hold and feels gentler on your hair.
- Insert the bobby pin closed end first, open end facing down
- Use smaller hair sections per pin for a better hold
- Spray dry shampoo on pins before use to reduce slipping
- Angle pins at 25° to avoid hair damage and snagging
- Avoid using one pin to hold thick or heavy hair parts
- Replace bent or worn pins that lose their grip immediately
Pins may slide out. Try crossing two pins together for better hold. This setup locks them in place better than one pin alone.
Watch for bent pins, they slip more and can tug hard on your hair. Over time, that tugging will cause breakage or split ends.
Using the pins incorrectly can cause noticeable hair damage. Hair strands can get caught on rough edges or twist the wrong way.
Holding them at the right angle and not forcing pins into tight spots reduces damage. Your hair will feel softer and look smoother if you follow these rules.
5. Advanced Bobby Pin Methods for Layered Styles
Using multiple bobby pins can secure layered hairstyles tightly and shape them with style. Techniques like the X-cross and triangle hold combine pins for better grip. Layering pins also lifts roots, adding volume and texture.
The X-Cross Method
This method uses two bobby pins crossed diagonally to lock hair in place. It works well for slippery or thick hair needing extra hold. Placing pins this way prevents them from sliding out during the day.
- Separate the hair section you want to secure.
- Hold one bobby pin blades-down and slide it into the hair diagonally.
- Take a second pin and insert it diagonally crossing over the first one.
- Press both pins gently to ensure they lie flat against your scalp.
Make sure the ridged side of the pins faces down for better grip.
Bobby Pin Triangle Hold
This style uses three pins to create a triangle shape that provides firmer grip. It’s perfect for complex styles needing strong support, such as twists or buns. This arrangement spreads tension evenly on your hair.
- Slide the first bobby pin into your hair holding it diagonally.
- Add the second pin crossing over the first, forming an X.
- Place a third pin to connect the tips of the X and form a triangle.
- Adjust the pins so they’re secure but not pulling your scalp.
Use this for hairstyles that slip or loosen easily during activity.
Layering Pins for Volume
Stacking or arranging pins in layers near hair roots lifts hair, adding shape and bounce. This technique is useful for fine or flat hair that needs a volume boost. Root clipping with bobby pins helps sculpt your hair’s natural part.
- Lightly mist your roots with sea salt spray for extra grip.
- Place a bobby pin close to the scalp at your hair part.
- Add a second pin slightly above or alongside the first, staggered.
- Repeat with more pins to build volume while keeping pins hidden.
Use hairspray on pins first if your hair is very slippery for better hold.
6. Safety Tips to Protect Hair and Scalp
Bobby pins can cause hair breakage and scalp irritation. Use them loosely. Avoid using pins in the same spot too often.
Wrong angles or large pins cause repeated stress on hair. This can lead to traction alopecia. Traction alopecia is hair loss from tension.
Change where you place pins often to avoid damage. Pick pins that match your hair thickness. Avoid pins that pull your hair.
Removing bobby pins gently helps prevent painful pulling and snapping hairs. Slide the pin out slowly rather than yanking. Hold your hair near the pin with one hand.
Wiggle the pin open slightly to slide it out. This helps prevent hair breakage. Doing this avoids unnecessary tension on your scalp.
Wet hair is fragile and breaks easier. Avoid putting pins in wet hair. Wait until hair is dry to use pins.
Wait until your hair is mostly dry before pinning it up. Use soft, coated pins on damp hair.
These reduce snagging. Don’t grip the hair tight with pins.
Check your scalp daily for redness or bumps. These signs show pins may irritate your skin. Stop using pins if irritation appears.
Use smaller pins or softer materials if irritation appears. Also, don’t use pins as your main hold method for long styles. Mix in gentle elastics or clips.
Try loosening the pin’s grip slightly by bending it outward before use. This lowers pressure and distributes it more evenly across your hair. Avoid putting pins directly on your scalp.
Use thicker hair sections to hold pins. This cuts down scalp tension.
Choose pins with smooth coatings if your hair is fine. Rounded edges help reduce breakage. Avoid rough or sharp-edged pins.
They usually cost around $3 to $6 per pack and last for months. Investing in good-quality pins makes a difference for scalp comfort and hair health.
7. Creative Uses of Bobby Pins Beyond Basic Hold
Bobby pins can do a lot more than just hold your hair in place. You can use them as stylish accessories. They hide ponytail elastics well.
Bobby pins also make braids and buns look neat and creative. These tricks add both function and flair to your hairstyles.
Using Decorative Pins as Accessories
Decorative bobby pins work best where they show. Place them along the sides. You can also put them near partings.
Pair metallic or embellished pins with simple hairstyles. This adds a subtle sparkle.
It can also add a pop of color. Matching the pin’s color to your outfit or makeup can create a polished, intentional look.
Try arranging multiple pins in patterns, such as parallel lines or criss-crosses, for a stylish effect. Five to seven pins create noticeable style without feeling cluttered. For a bolder look, cluster pins around a bun.
Use them in half-up styles too. They help frame your face nicely.
Hiding Elastics with Bobby Pins
Use plain or pins matching your hair color to cover ponytail bands smooth. Start by securing the ponytail with a matching elastic. Then place a bobby pin at the elastic’s base.
This creates a neat hold. This conceals the band and smooths any bump the elastic might cause.
Pin the hair close to the scalp for a clean look. Avoid placing pins too far down the ponytail. This keeps it tidy.
For thick hair or tight ponytails, use two pins crossed. This gives extra hold and covers the elastic well. This method keeps the ponytail shape crisp and hides the band in plain sight.
Securing Braids and Buns
Bobby pins keep braids tight and buns stable. Criss-cross pins for a stronger grip that lasts longer.
Insert pins with the wavy side down for a better hold. This technique locks hair firmly, great for medium or thick hair textures prone to slipping.
For buns, slide pins diagonally into the hair to anchor loose ends neatly underneath. Use colored pins around a bun’s base for hold and decoration. This adds a creative touch to your style.
The key is using around 5 to 7 pins. More than that doesn’t improve hold but may add extra weight.
8. Tools and Accessories to Improve Bobby Pin Use
Magnetic pin holders help keep bobby pins organized and easy to grab. You just set your pins on the magnet. So they don’t scatter or get lost.
This saves time when you style complex looks. Usually, they cost $10 to $15. You can buy them online or at beauty stores.
A handheld LED mirror improves lighting and visibility to place pins precisely. It helps you check angles and pin placement, especially in dim rooms.
Look for a compact model with adjustable brightness for about $20 to $30. This makes sure your pins hold well and your style looks neat.
Using styling sprays, like light holding hairspray or texturizing spray, boosts pin grip. Spray a small section before inserting the pin to give the hair extra texture.
Avoid heavy or oily sprays that can make pins slip. These sprays cost $5 to $15 and offer better control, especially for fine or silky hair.
Keep a rattail comb handy to tease your hair before pinning. Teasing creates volume and roughness for the pin to grip better.
Just backcomb a small section, smooth the top layer slightly, and then add your pin. It’s an easy trick to stop pins from sliding out.
Don’t overload your hair with sprays. Too much weight makes pins slip and your style fall apart.
Step-by-Step Action Plan for Using Bobby Pins Effectively
Follow these steps to confidently use bobby pins and keep your hairstyle secure all day. Each step will guide you through proper technique and checking your hold.
- Before styling: Choose bobby pins that match your hair type and color. Test one by pinching a small hair section to see if it grips tightly without slipping.
- During styling: Insert the bobby pin with the ridged side facing down, close to your scalp. Check that it feels snug and doesn’t slide when you gently tug.
- After placement: Cross two bobby pins over each other in an “X” shape. This method gives a stronger hold. Use it for heavy or layered styles. Ensure both pins stay in place by running your fingers over the area.
- Throughout the day: Carry a few extra pins for quick fixes if any start to loosen. Replace any that bend or lose grip immediately.
- Before bed: Remove all bobby pins gently to avoid pulling or breaking hair. Use a light detangler spray if you feel resistance.
Frequently Asked Questions
What Direction Should the Ridged Side of a Bobby Pin Face When Inserted?
The ridged side should face up, away from your scalp. It grips better that way and holds your hair in place more securely.
Is It Necessary to Open a Bobby Pin Before Using It?
You don’t need to bend a bobby pin before use. Slide it directly into your hair to keep it secure.
How Many Hair Strands Should a Bobby Pin Hold at Once?
The right amount is however many strands fit without prying the pin open. This keeps the pin tight and secure.
Can Bobby Pins Be Used on All Hair Types and Textures?
Yes, but larger pins work better for coarse or thick hair. Choose the size that fits your hair texture comfortably.
What’s the Difference Between a Bobby Pin and a Hair Pin?
A hair pin is U-shaped and simpler. A bobby pin has two arms clamped together. Each holds hair differently.
How Can I Keep Bobby Pins Organized and Easy to Find?
Use a magnetic pad like the Hair Pin Pal to keep pins neat. It saves time and prevents losing them.
Key Points to Remember
Using bobby pins the right way keeps your hair secure and damage-free. Try inserting the pin with the ridged side down next time you style. You’ll notice your hair stays put longer without discomfort.


