How to Do a Layered Haircut at Home: 11 Essential Steps for Perfect Layers
Wondering how to do a layered haircut at home without messing it up? The key is starting with clean, slightly damp hair and steady hands.
Layers add shape and movement, so cutting them right makes a big difference. Using a comfortable chair and a well-lit space also helps you see every detail clearly.
Begin by sectioning your hair carefully. It helps control the length and angle of each layer. Use sharp scissors to avoid split ends and trim little by little.
Watching your angles keeps the layers even and natural-looking. You can use clips to hold sections apart and keep them neat.
Keep in mind, cut less at first. You can trim more later if needed. Patience is important because rushing can lead to uneven layers.
Small, slow snips help you see the shape as it forms. Regularly checking your work in a mirror ensures balance on both sides.
Key Takeaways
- Start haircuts on clean, 80-90% dry hair for better control.
- Use sharp hairstyling scissors to prevent split ends.
- Section hair before cutting to manage layer length accurately.
- Trim a little at a time; you can always cut more later.
- Cut with steady hands and check angles often for even layers.
- Begin with longer layers if unsure to avoid cutting too short.
1. What Is a Layered Haircut and How It Works
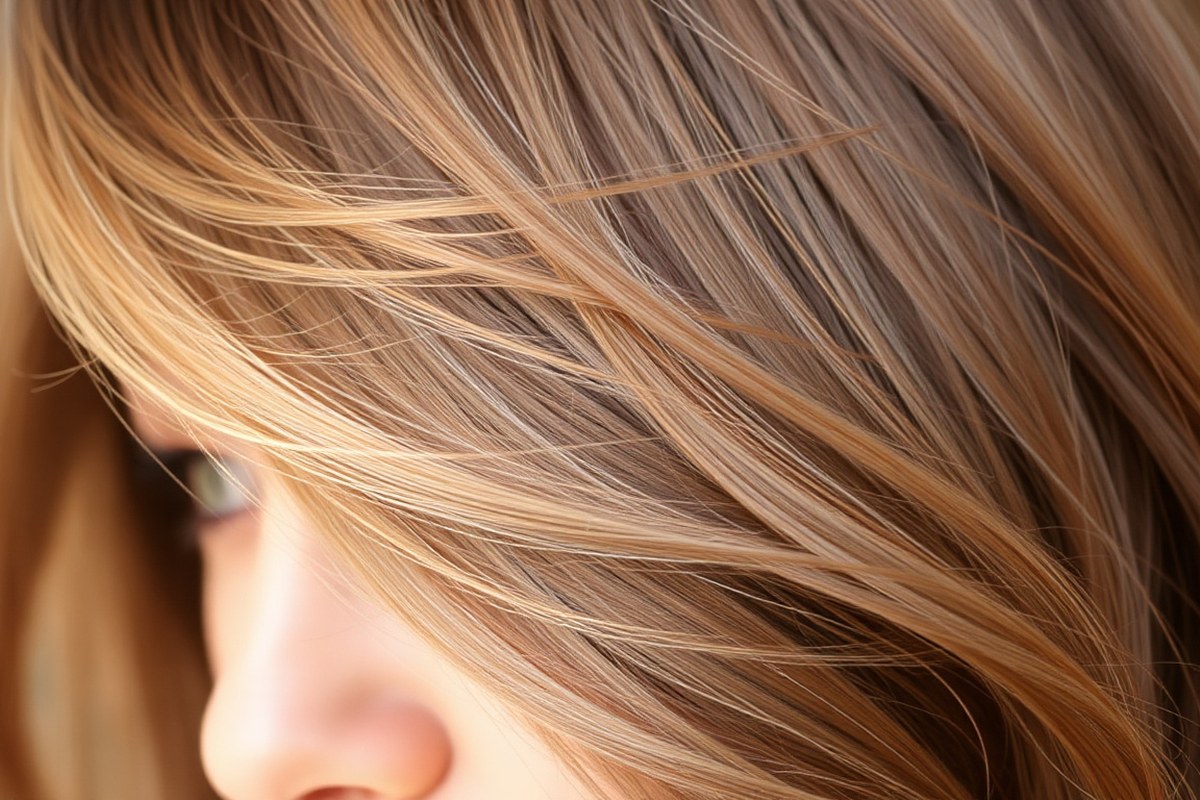
A layered haircut means cutting hair at different lengths throughout your head. These varied lengths create distinct sections or “layers” that give your hair shape and texture. This approach removes bulk and adds lightness, making hair feel less heavy.
Layers work by letting shorter strands sit above longer ones. This builds volume, since layers catch air and lift the hair away from your scalp. They also let hair move more naturally, adding flow and bounce that straight cuts often lack.
Adding layers changes your hair’s overall shape and style. Instead of a flat, uniform look, layers create dimension and interest. You’ll see soft framing around your face.
It adds extra movement in wavy or curly hair. This makes your style look fresh and lively.
Layered cuts suit all hair types, straight, wavy, or curly, and can be adapted for length. For thick or heavy hair, layers help reduce weight and improve manageability. People with fine or flat hair use layers to build volume and body, improving fullness.
A layered lob works well for fine or wavy hair. It adds bounce and texture. The layers don’t shorten your hair length much.
Long V-cut layers shape dense hair, softening bulk while keeping length. Whispering layers add subtle texture without disrupting an overall hairstyle.
Good layering means blending lengths smoothly so the hair falls naturally without uneven steps. Poor layering leaves choppy or harsh lines that look unpolished and feel rough. Regular trims keep layers looking clean and fresh as hair grows out.
2. Essential Tools and Materials You Need

You need sharp scissors meant for cutting hair. Also get a wide-tooth comb, clips, and a spray bottle filled with water.
These tools help you cut clean, even layers and keep hair neat while you work. Using ordinary scissors often leads to uneven cuts or damage.
Choosing the Right Scissors
Use hair-cutting scissors that cost around $15 to $30. These scissors have sharp, precise blades designed for clean cuts. Dull or regular scissors can fray hair ends and ruin the layered look.
Specialty scissors include thinning shears, which can soften blunt edges. These are optional but helpful for blending layers smoothly.
Comb and Sectioning Clips
A wide-tooth comb untangles hair gently without causing damage. It helps spread each section evenly before cutting. Use clips to divide hair into manageable parts that stay in place while you cut.
Sectioning clips cost about $5 to $10 and come in plastic or metal. Plastic clips avoid snagging hair, which is key when working with fine or fragile hair.
Preparation with Water and Mirrors
Wet hair is easier to manage when cutting layers. Use a spray bottle filled with water to dampen hair evenly. This reduces fuzziness and gives better control over the shape.
A handheld or wall mirror lets you see all angles clearly. Seeing the back and sides helps you cut layers evenly and spot uneven spots.
Additional Tools and Materials
Having a cape or towel to cover shoulders keeps hair off your clothes. A comb with both wide and fine teeth helps with detailed sectioning. Carry tissue or a small brush to clean up loose cut hairs during breaks.
Good lighting also matters. Bright, natural light prevents missed sections or uneven cuts. Sitting near a window or using a lamp that mimics daylight is best.
Always keep scissors clean and sharp; dull blades create split ends and uneven layers.
3. How to Section Hair for Cutting Layers
Start by dividing your hair into clear sections to cut layers evenly and accurately. The number of sections depends on your hair length and thickness. Proper sectioning helps you manage the hair better and achieve precise layers.
Dividing Hair by Length and Thickness
Short hair needs fewer sections, usually four or five. Long hair or thick hair requires more sections to keep things neat and controlled. Each section should measure 1 to 2 inches across.
Hair thickness will change this size. Thicker hair needs larger sections to cut properly.
Thicker hair benefits from more sections, allowing you to cut smaller areas at once. Fine or thin hair needs fewer sections, usually four, because it is easier to handle. Over-sectioning thin hair can cause mistakes and uneven layers.
Using Clips to Secure Sections
Choose sectioning clips that gently hold your hair without pulling or causing dents. Plastic or metal clips with smooth edges work well. Avoid clips that are too tight as they can damage hair or cause uneven sections.
Place clips to keep sections tight and flat against your head. Secure the top layers about an inch away from the scalp to avoid uneven pulls. For thick hair, you might need larger clips to hold bigger sections securely.
Preparing Sections for Cutting
Start by combing through each section to remove tangles before you cut. Pull hair out at a 90-degree angle from your head where you plan to create layers. This angle helps keep the length consistent and creates a natural layered effect.
Work on one section at a time, releasing only what you plan to cut. This prevents uneven layering and keeps the style balanced. Always make sure the section is even, flat, and free of twists before cutting.
- Comb your hair thoroughly to remove any tangles.
- Split your hair into four parts. Make two parts in front and two at back. Use these parts to work on hair evenly.
- Use clips to secure each section, ensuring they hold the hair flat.
- For longer or thicker hair, further subdivide each main section into smaller 1-2 inch sections.
- Take one small section loose at a time for cutting layers.
- Pull that section straight out from your head to about 90 degrees.
- Cut the layers as desired before releasing the next section.
4. Step-by-Step Guide to Cutting Layers at Home
Cutting layered hair at home takes some planning and the right technique. You set a guideline layer first, then cut subsequent layers at specific angles. Matching both sides needs care to keep layers even and balanced.
Setting the First Guideline Layer
Start by choosing the length where you want the shortest layer to begin. Hold a small section of hair about 1 inch wide. Pull it straight out from your head.
Keep it at a 90-degree angle. This creates a clear guide to cut your first layer evenly.
Use your fingers to hold the hair and trim straight across at your chosen length. This initial cut shapes the overall layering. It can be at the nape or near the crown, depending on your desired style.
Cutting Top Layers at 90 Degrees
Work from the guideline upward, lifting each new section at a 90-degree angle from your head. This angle helps create consistent layers that blend smoothly. Comb each section straight before cutting to avoid uneven edges.
Trim each lifted section to match the length of the guideline. Use scissors to cut straight across the hair ends. Or try point cutting by snipping at a slight angle.
This adds texture. Point cutting adds texture and softens the edges for a natural look.
Blending and Matching Layers on Both Sides
To avoid uneven layers, cut the left and right sides alternately. Grab mirror for the back or a second mirror to check your work. Compare lengths regularly by holding sections from both sides at the same time.
Keep your fingers parallel and cut small sections, making slight adjustments to balance length. Trim a bit if one side looks longer.
Cut less than you think to avoid mistakes. You can always remove more, but can’t add length back.
Creating Face-Framing Layers
To make face-framing layers, comb hair forward. Start from the crown and from your ears. Direct it toward your forehead.
Cut shorter in front to soften your face shape. Use a 45-degree angle when cutting these sections for a gradual blend.
Start trimming small amounts and check the shape often. These layers should blend easily into the longer hair at the sides. A gradual slope works well for most face shapes and adds a flattering touch.
- Start with clean, dry, combed hair.
- Section hair into manageable parts using clips.
- Hold the first section straight out at 90 degrees.
- Cut straight across for your guideline layer.
- Lift sections above the guideline at a 90-degree angle.
- Cut to match the guideline length, using point cutting for texture.
- Alternate cutting left and right sides, checking lengths often.
- Comb hair forward and cut face-framing layers at 45 degrees.
5. Choosing Layer Angles for Different Effects
Cutting angles change how layers look and feel. A 45° angle creates soft, flowing layers that add gentle volume. It’s perfect for finer hair or when you want natural movement instead of sharp lines.
A 90° angle makes choppier, more dramatic layers. This angle lifts the hair away from the head, adding thicker volume and texture. It’s a good choice for thick or curly hair because it removes bulk and defines curls.
You can use angles between these for something in the middle. For example, a 60° angle adds volume with some softness and movement. This balance works well for medium hair thickness and wavy textures.
| Cut Angle | Visual Effect | Best For Hair Type | How to Cut |
|---|---|---|---|
| 45° | Soft, flowing layers | Fine, thin hair | Hold hair away from the head at 45°, cut cleanly |
| 60° | Moderate volume with slight texture | Medium, wavy hair | Lift hair slightly more than 45°, cut with gentle angle |
| 90° | Choppy, textured layers | Curly, thick hair | Pull hair straight out, cut perpendicular to head |
Thick hair needs room to breathe. Using a 90° angle for thick hair removes bulk and defines curls.
For curly hair, cutting dry allows you to see the natural spring and shape better. Straight hair usually gets cut wet to control the cut line and reduce volume.
Soft layers blend the hair smoothly, avoiding a harsh cut line. This look is great if you want volume without a choppy finish. For fine hair, soft layers keep the whole style from looking fluffy or losing shape.
Check your angles regularly as you cut to keep layers even and balanced.
6. Adjusting Layers for Hair Length and Texture
Short hair layers need careful placement to add shape without bulk. Cut at a slight angle, lifting small sections between 30 and 45 degrees. This approach creates texture and volume without losing the short style’s neatness.
Long hair layers benefit from longer, flowing cuts that blend smoothly. Use sectioning to cut layers from 45 to 90 degrees from the scalp. Adjust the angle depending on how much movement you want.
This controls the hair’s shape and flow. Begin with longer layers near the hair ends.
Then add shorter ones gradually toward the top. This creates a more natural, blended look.
Curly hair requires curl-friendly layering to keep shape and avoid frizz. Wet your hair before cutting for even results, then cut curls individually or in small groups. Trim around each curl’s natural coil, avoiding straight cuts that can separate curls unevenly.
Thick hair gets thinner and lighter with deeper layers. Cut layers between 45 and 90 degrees, which removes bulk while keeping fullness. Use thinning shears sparingly to soften heavy ends and prevent a bulky look.
Fine or thin hair needs light, airy layers that don’t weigh it down. Cut layers at lower angles, around 20 to 30 degrees, to add texture and gentle volume. Avoid cutting the shortest layers too short to keep hair looking fuller and avoid exposing scalp.
Straight hair reveals layer cuts clearly, so blend each section carefully. Use sharp scissors for clean edges and point cutting to soften harsh lines. You want layers to look smooth and natural, not choppy or uneven.
7. Common Mistakes Cutting Layers at Home and Fixes
Uneven layers often happen when hair isn’t sectioned well or scissors are dull. Use sharp hair-cutting scissors and clip each section firmly. Double-check by pulling strands straight and cutting slowly in small amounts to avoid choppy edges.
Cutting layers too short is another common issue. Layers could grow out unevenly. You might need trims every 4 to 8 weeks.
Start by trimming less at first. Shape layers over two or three sessions, not all at once.
Blunt, harsh edges make layers look unfinished. To soften this, point-cut by snipping the ends vertically rather than cutting straight across.
This method gently removes bulk. It helps avoid a blocky look in thick or curly hair.
Over-thinning can thin out hair too much and ruin volume. Avoid thinning more than 20 percent of each section.
Use thinning shears sparingly below surface layers. Check often by releasing hair to see flow.
Fixing uneven cuts means blending layers carefully. Comb damp hair down and trim uneven spots small amounts at a time. Use your fingers to hold layers parallel for consistent length rather than eyeballing freehand.
Many mistakes happen from rushing. Take your time to cut around ¼ inch from the tips each pass. Stop and check your work from different angles in a mirror before moving on.
Make sure hair is clean and dry or slightly damp when cutting. Wet hair stretches, which can cause layers to be shorter when dry. Cutting dry hair helps you see the real length and layer shape as you trim.
8. How Often to Trim Layered Hair to Keep Shape
Trim your layered haircut every 6 to 8 weeks to keep it looking sharp. This regular timing stops split ends and keeps the shape of your layers smooth. Medium and long layered styles can stretch this to around 8 to 12 weeks between cuts.
Short layered styles need more frequent trims. Layers in short hair lose their shape faster as growth shows quickly. Trim short layers every 4 to 6 weeks.
This keeps your style neat. It also keeps the layers balanced.
Waiting too long between trims lets layers lose their definition and makes hair look uneven. Split ends also travel up the strands, causing frizz and damage. You’ll spend more time fixing your hair or need a bigger cut if you delay trims.
To trim, use sharp hair-cutting scissors and work with clean, dry hair. Start by trimming small amounts, about a quarter inch. Focus on uneven layers.
Check for split ends too. Regularly check your layers in the mirror to keep the balance.
Use a trusted pair of sharp scissors to avoid damaging your layered ends when trimming.
9. Styling Tips to improve Your Layered Haircut
Layered hair gets its lively bounce from shorter strands placed strategically. To boost volume, blow-dry your hair upside down for about five minutes. Use a round brush on roots and mid-lengths while drying to create lift and shape.
For fine hair, pick lightweight mousse or volumizing spray. Apply sparingly, focusing on the roots to avoid weighing hair down. Thick hair benefits from curl creams or smoothing serums to tame bulk without losing movement.
Maintain your layers by avoiding heavy oils that can flatten your hair. Use a heat protectant before styling tools if you blow-dry or use a curling iron. Refresh your style daily by misting a texturizing spray and finger-combing to keep volume and definition.
Work with your hair’s natural wave or curl by adding a curl-improving product. Scrunch gently while damp and air-dry or diffuse on low heat. This method helps highlight the layered texture and adds dimension without harsh styling.
Use a light styling cream or serum to thin bulky areas. This helps keep thick layers neat. Avoid letting thick parts look wild.
Use these products sparingly to avoid slickness or grease. On fine hair, avoid heavy gels, which can cause limp, flat layers instead of lift.
Set flat irons or curling wands to medium heat. That means about 300 to 350°F. This temperature works well for most hair types.
Spending five to ten minutes styling gives your layers shape without damage. Overdoing heat styling risks drying and breaking shorter sections.
Daily care includes gentle brushing with a wide-tooth comb to prevent breakage. Avoid brushing wet hair vigorously, especially in layered cuts. This keeps your hair healthier and makes layers fall smoothly into place throughout the day.
10. Safety Tips for Cutting Your Own Layers
Use sharp, professional hair-cutting scissors, not household ones. Dull scissors can cause hair to bend, leading to uneven cuts and split ends. Always hold the scissors with your thumb and ring finger for control and steady cuts.
Cut in a well-lit area with a mirror handy. Poor lighting increases the risk of cutting unevenly or accidentally nicking your scalp. A second mirror behind you helps check areas you can’t see.
It shows missed spots or uneven layers behind your head clearly. This helps you cut hair more evenly from all angles.
Keep your fingers between the hair sections while cutting. They act as a barrier to protect your scalp and help measure how much you cut. Avoid rushing; slow, small snips reduce mistakes and decrease the chance of injury.
Point cutting requires the scissors’ tips to make small snips at the hair ends. Keep your fingers steady and avoid cutting too close to the scalp. This technique softens edges, so take it slow to prevent over-thinning or uneven spots.
Stop if you feel uncomfortable, dizzy, or unsure at any point. Poor posture or tension can hurt your hands, neck, and eyes. This strain raises your chances of making mistakes or injury.
Staying relaxed and sitting right reduces these problems. Calling a professional after a bad cut is safer than fixing it yourself.
If you notice scalp irritation, seek expert help right away. This lowers the risk of worsening the problem.
Keep scissors closed and away from children or pets when not in use. Store them in a hard case to maintain sharpness and prevent accidents. Clean scissors with rubbing alcohol before and after use to avoid infections from nicks or cuts.
11. When to Seek a Professional Instead of DIY Layers
Cutting your own layers can work for simple styles and healthy hair. Avoid DIY if your hair is severely damaged, chemically treated, or very thick. These conditions cause uneven cuts or worsen damage, so a professional is safer.
Complex layered cuts with precise angles or blended textures also need expert skills. Professionals handle these styles using specialized scissors and techniques. They can create smooth transitions and volume without guesswork, which is tricky at home.
Spot split ends or breakage? Go see a stylist right away.
Professionals can safely trim damaged parts without cutting too much. They assess hair strength and suggest treatments to keep your layers looking fresh longer.
Before booking, think about your time and budget. A professional layered haircut usually costs $40 to $100 depending on the salon. Expect the appointment to take 45 minutes to an hour for best results.
This helps you avoid fixing mistakes at home. Fixes take hours and extra products.
Communicate clearly with your stylist about what you want. Show photos or say exactly how much to cut. Say “trim 2 inches off top layers.””
Tell them if you prefer soft, feathered edges or blunt layers for a sharper look. Asking questions about maintenance helps you keep your style.
Don’t try complex layered cuts on severely damaged hair at home. It often leads to uneven results and more breakage.
Step-by-Step Action Plan for Your Layered Haircut
Follow this plan to cut and maintain your layered haircut. Each step helps you stay on track and see clear results.
- Before you start: Gather all tools and section your hair as shown earlier. Check your sections for evenness before cutting.
- Day 1: Cut your first set of layers using the recommended angle. Look for smooth, clean lines without jagged edges.
- Day 2: Review and trim any uneven spots or missed strands carefully. The layers should flow naturally without bulk in one area.
- After 2 weeks: Style your hair daily and note how the layers behave. Notice if the shape holds or if edges start to grow out.
- Week 4: Trim any grown-out layers slightly to keep the shape neat. Use small snips to avoid cutting too much.
- Every 6 to 8 weeks: Maintain your layers with a light trim. This keeps your haircut fresh and controls split ends.
- Monthly: Try different styling tips to highlight your layers. Use techniques like curling or texturizing to add volume or smoothness.
- Ongoing: Watch for signs of damage or uneven growth. Fix small issues early to avoid needing major corrections later.
Frequently Asked Questions
Can I Layer Thick Hair Without It Getting Too Bulky?
Yes, layering thick hair can reduce bulk if done carefully. Use thinning shears or steep angle layers to thin heavy sections and keep the shape light.
How Do I Fix Uneven Layers After a DIY Haircut?
Trim slowly and evenly to balance uneven layers. Use a mirror to check your layers from all angles.
Trim small amounts each time. Keep going until your layers look even and uniform.
What’s the Best Way to Blend Layers for a Natural Look?
Comb hair down and trim small sections to blend layers. Point cutting at the ends softens harsh lines for a smooth transition.
Can I Layer Curly Hair at Home Without Causing Frizz?
Yes, cut curly hair dry to see natural curls. Use sharp scissors and cut one curl at a time for clean layers and less frizz.
How Long Should It Take to Cut Layers on Shoulder-Length Hair?
It usually takes 30 to 45 minutes for shoulder-length hair. Give yourself extra time if you’re new to layering for safety.
Should I Wet My Hair Before Cutting Layers to Get Better Results?
Dry cutting is better for layering to see hair’s natural fall. Wet hair shrinks as it dries and can cause uneven layers.
The Bottom Line
Cutting your layered haircut yourself can be precise and rewarding with practice. Start small and be patient as you learn. Keep your tools ready for regular trims to maintain your look consistently.