How Do You Color Hair at Home: Simple Steps for Safe, Stunning Results
How do you color hair at home? Follow clear steps to protect your hair and get great color. Start by choosing the right dye that suits your style and skin tone.
Wash your hair twice, 24 to 48 hours before you dye it. This removes dirt but keeps natural oils.
Set aside 1 to 1.5 hours on dye day for the whole process. Mix the dye carefully and follow the box instructions exactly. Hair texture affects timing: fine hair needs less time; coarse hair may need more.
Check your hair every 5 to 10 minutes while coloring. For stubborn or grey hair, leave the dye on about 10 minutes longer. After dyeing, gently rinse and care for your hair to keep it healthy and vibrant.
Key Takeaways
- Always wash your hair twice 24 to 48 hours before applying dye.
- Set aside at least 1 to 1.5 hours to color your hair properly.
- Match your dye color with your skin tone and personal style first.
- Fine hair usually needs less dyeing time than coarse or dry hair.
- Check your hair color every 5 to 10 minutes during processing.
- Leave dye in 10 extra minutes for stubborn grey coverage.
How to Color Hair at Home Step by Step
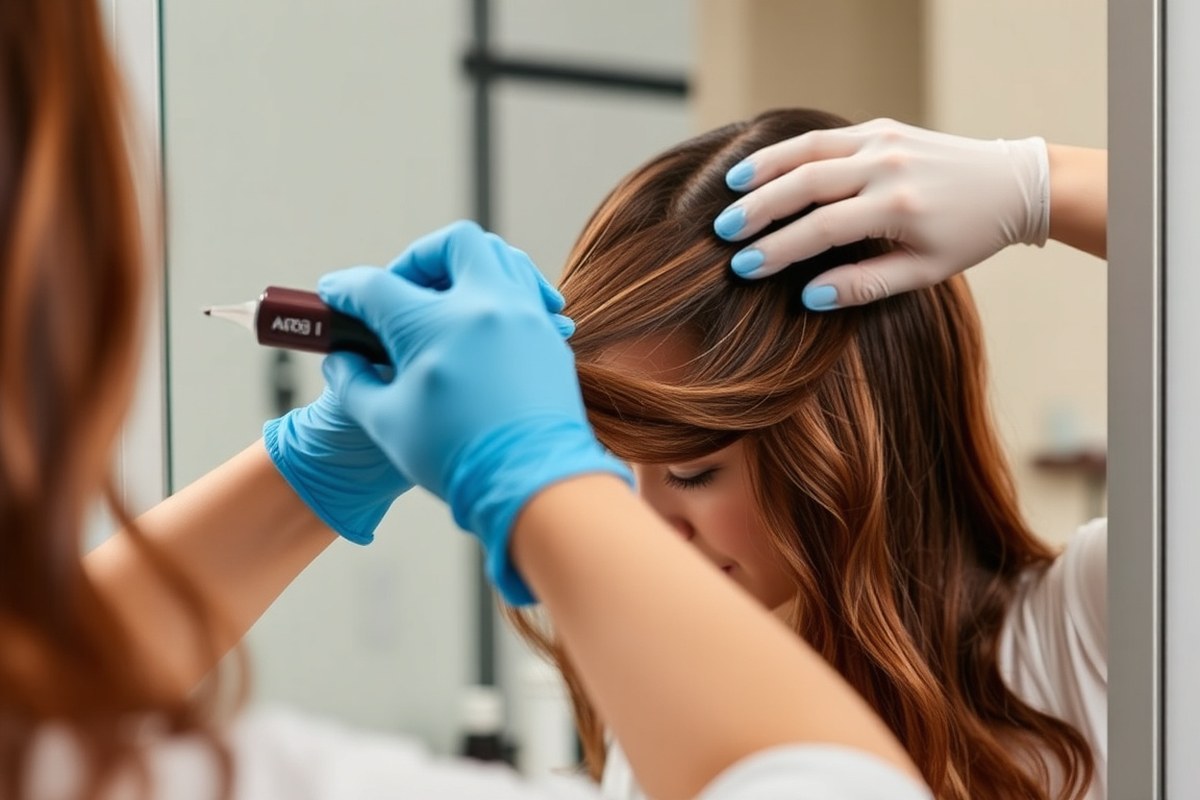
Coloring your hair at home takes about an hour to an hour and a half. Start by preparing your hair and workspace, then mix and apply the dye carefully. Finish by timing the process and rinsing out the color thoroughly for best results.
Prepare Your Hair and Workspace
Wash your hair about 24 hours before coloring to keep natural oils intact. This helps protect your scalp and lets the color stick better. Detangle your hair gently so it’s easier to section and apply dye evenly.
Protect your skin and clothes by wearing an old shirt. Apply petroleum jelly around your hairline for extra protection. Gather all your tools before you start.
You’ll need gloves and the hair dye kit ready. Also grab a bowl, an applicator brush, a comb, and clips for sectioning.
Mix and Apply Hair Dye
Follow the box instructions exactly when mixing your dye. Use the provided developer and color base, mixing them in the ratio the box recommends. Put on gloves and work in a well-lit space for clear visibility.
Divide your hair into four equal sections using clips. Start by applying dye to your roots first. Roots are least porous and need more time.
This helps your color process evenly. Use an applicator brush to carefully apply dye around your scalp. Then comb it through your hair length for even spread.
Timing and Rinsing the Color
Set a timer according to the instructions, usually between 20 and 45 minutes. Keep an eye on your hair color but don’t wash it before the timer goes off. Over-processing can damage your hair or change the color tone.
Rinse your hair with lukewarm water until the water runs clear to avoid leftover dye buildup. After rinsing, use the conditioner from the dye kit.
This will lock in moisture and keep your color fresh. Dry and style your hair as usual once done.
- Gather all necessary items: dye kit, gloves, clips, comb, applicator brush, petroleum jelly.
- Wash hair 24 hours before to protect scalp oils and ensure even color.
- Detangle and section hair into four parts for easy, even application.
- Apply petroleum jelly around your hairline to prevent skin staining.
- Mix dye and developer according to package instructions in a clean bowl.
- Apply dye to roots first using the brush, then comb dye through lengths.
- Set a timer matching the box’s recommendation, usually 20, 45 minutes.
- Rinse hair thoroughly with lukewarm water until clear; condition afterward.
Choosing the Right Hair Dye for Your Needs

Choosing the right hair dye depends on the look you want and your hair’s current condition. Permanent dyes change your color long-term, using chemicals to lift and deposit color.
Semi-permanent dyes stain the hair cuticle without lifting natural pigment and fade after several washes. Temporary dyes sit on the surface and wash out in one or two shampoos.
Demi-permanent dyes last longer than semi-permanent ones. They are also gentler than permanent dyes. These dyes offer a balance of durability and mildness.
Natural or vegan dyes often use plant-based ingredients like henna or indigo. These dyes may cause less damage.
They usually have fewer color choices. Applying them can take more time.
| Dye Type | Duration | Effect on Hair | Typical Use | Cost Range (USD) |
|---|---|---|---|---|
| Permanent | Until touch-up or root growth | Lifts and deposits color; changes natural pigment | Complete color changes, gray coverage | $10 – $30 per box |
| Demi-permanent | 24 to 28 washes | Deposits color; minimal lifting | Toning, color refresh, slight change | $15 – $25 per box |
| Semi-permanent | 6 to 12 washes | Coats hair surface; no lifting | Temporary shade changes, boosting natural color | $10 – $20 per box |
| Temporary | 1 to 2 washes | Coats hair surface; no lifting | Special occasions or a quick look | $5 – $15 per bottle |
| Natural (e.g., henna) | Varies; often several weeks | Stains hair; no chemical lifting | Healthier alternative, subtle color change | $10 – $25 per packet |
Choose permanent dye if you want a big change or gray coverage. Semi or demi-permanent dyes are better to try a new shade without long-term commitment. Temporary dyes work well for short-term use.
They are ideal for parties or special events. The color usually lasts a day or two.
For a gentle, natural option, look into plant-based dyes. But test on a small section first.
The health of your hair matters too. Avoid permanent dyes if your hair is very damaged or recently processed. Semi or demi-permanent dyes cause less stress.
Natural dyes might help maintain hair strength. Using the right amount of dye is key.
Too little dye can cause patchy color. More dye won’t increase saturation beyond a certain point.
Avoid dyeing hair that is very damaged or treated. It increases the chance of breakage. Uneven color may also happen.
Choose a shade close to your natural color. Staying within two shades lighter or darker works best.
Always follow the dye instructions carefully. Leaving dye on too long can dry out hair.
Picking the Best Hair Color for Your Skin and Style
Picking a hair color that suits you means matching your undertones. Think about how bold you want your style to be. These two parts help you choose well.
Cool skin tones tend to look best with cool shades like ash or burgundy. Warm skin tones usually shine with golden browns or strawberry blondes. Test colors on a small hair strand first.
This helps you avoid mistakes. You can see how the color really looks.
Understanding Undertones and Color Families
People have cool or warm undertones in their skin. This affects which hair colors suit them. Knowing yours makes picking easier.
Cool undertones work well with colors like icy platinum, ash brown, or dark burgundy. Warm undertones pair nicely with golden hues such as honey blondes, chestnut, or strawberry blonde shades.
You can figure out your undertone by looking at the veins on your wrist. You likely have cool undertones if your veins look blue or purple. This clue helps pick better hair colors.
Greenish veins usually show warm undertones in your skin. Warm undertones help you pick natural-looking shades. Use this to guide your choice.
Matching with Your Personal Style
Think about how subtle or bold you want your color change. Your choice should match your comfort level. This keeps your look natural.
It is easiest to improve your natural color or go one to two shades darker. These changes work better for home dyeing.
Strong lifts or bright shades like red or blue need special care. These often require professional help or some special technique.
Natural shades tend to suit everyday styles and are easier to maintain. Vibrant colors make a bold statement but may need more upkeep and touch-ups.
Your daily hair care routine affects your color choice. Think about how much time you want to spend maintaining dyed hair.
Testing Colors on Strands First
Apply color to a small hair section first. This lets you test the true result safely. It stops mistakes on the whole head.
This test shows how the shade interacts with your natural hair and skin tone. It also helps check for any adverse reactions or damage before full application.
Use a strand from a hidden area near your neck or behind your ear. Apply the dye exactly as you will for your whole head and wait the recommended time. Blow-dry and style your test section as usual.
This shows the final color effect clearly. Decide if you like the new look.
Key Safety Steps and Allergy Testing Before Dyeing
Always do a patch test before coloring to avoid allergic reactions. Protect your skin with barrier cream or petroleum jelly. Rinse immediately and seek help when a reaction occurs.
Why Patch Testing Matters
A patch test checks if your skin reacts badly to the dye. This test prevents painful rash, itching, or swelling. Some reactions can be serious, so testing is a must before full application.
How to Perform a Patch Test
Apply a small amount of dye behind your ear or on your inner elbow. Leave it on for 24 to 48 hours without washing. Watch for redness, itching, or swelling during this time.
Do not use the dye when you notice any irritation. You can proceed with dyeing your hair without a reaction.
Safety Precautions During Hair Dyeing
Use gloves every time you handle hair dye. Apply petroleum jelly or a thick cream around your hairline and ears. This keeps the dye off your skin and prevents stains.
Work in a well-ventilated area to avoid breathing in strong fumes. Keep dye away from your eyes and mouth. Stop dyeing immediately if irritation occurs.
Check This Before You Start Dyeing
- Perform a patch test 24-48 hours ahead
- Wear disposable gloves
- Apply barrier cream on skin around hairline
- Use a clean towel and keep dye away from clothes
- Work in a well-ventilated space
- Do not wash your hair right before dyeing
- Have a timer handy to follow dye time
What to Do If You Have a Reaction
Stop applying the dye right away. Rinse your skin and hair with cool water for 15 minutes. Take a cool shower and avoid scratching the affected area.
Call a healthcare provider when swelling or pain gets worse. Do not try to rinse using harsh chemicals or home remedies, as they may worsen irritation.
How Hair Condition and Texture Affect Dyeing Results
Hair texture and condition affect how hair dye works on you. Fine hair lightens faster.
So reduce the dye’s processing time by 5 to 10 minutes. Otherwise, you risk over-processing, which can make hair look fried or brassy.
Coarse or dry hair usually takes longer to absorb color. Stick closer to the box’s recommended time for these types. You might need to add a bit more dye.
Use a conditioner after to keep strands smooth. This helps your hair stay soft and healthy.
Damaged or porous hair soaks up color unevenly and may fade faster. For this, mix a lower volume developer with your dye. This gentler mix prevents extra damage while still giving good color.
Natural hair oil also plays a role. Clean hair absorbs dye better but can feel drier later.
Don’t shampoo right before dyeing if your hair feels fragile. Instead, wash a day earlier to protect your scalp and strands.
Thick, curly hair may need dye applied section by section to avoid missed spots. Work in layers, and be patient during processing. This approach helps the color reach all strands evenly.
Cut dye processing time by several minutes for fine hair. Also, reduce time if your hair was lightened before. This prevents over-processing and damage.
Using heat during dyeing can speed up processing. But this risks damaging fragile or colored hair.
So only do this with resilient hair types. Always follow the instructions on your hair dye box closely for timing and temperature advice.
Adjust your routine based on your hair’s starting condition. Healthy, thick hair tolerates full processing times.
Fragile, dry hair benefits from shorter timing and added moisture treatments. That approach helps you get the color you want without extra damage.
Common Mistakes When Dyeing Hair at Home and How to Fix Them
Changing your hair color too much at home can cause problems. Going more than a couple of shades lighter or darker often leads to patchy or brassy results.
Fixing these issues usually means paying for a salon visit. So keep your color change gentle.
Uneven color often comes from applying dye too quickly or missing spots. Slow down, section your hair well, and add color evenly. Spot uneven spots after rinsing?
Use a color-depositing conditioner to even out tones. Carefully touch up any missed areas for a smoother finish.
Other mistakes are common but easy to avoid. Using expired dye or skipping the allergy test can cause scalp irritation. Also, leaving dye on too long can damage hair and cause unexpected shades.
- Only lighten or darken hair by one or two shades to avoid splotches.
- Section hair into four or more parts for even application.
- Set a timer and do not exceed the recommended dyeing time.
- Perform an allergy patch test 48 hours before dyeing.
- Use a color-depositing conditioner to fix uneven tones.
- Choose dye fresh and properly stored; check expiration dates.
- Apply petroleum jelly along your hairline to prevent staining.
Using a warm shade or leaving dye on too long can cause brassiness. This makes your hair look yellow or orange. Avoid over-processing to keep your color natural.
Use shampoos for color-treated hair to help maintain your tone. Brassiness shows up?
Use a toner or purple shampoo to reduce yellow and orange hues fast. These products cool down unwanted warm tones soon after use.
Rushing through prep or skipping hair assessments also affect results. Dry or damaged hair absorbs dye differently, causing patchy color. Moisturize and trim before you dye to protect your strands.
Fixing mistakes depends on the problem. Use a clarifying shampoo to fade overly dark or unwanted color.
Avoid repeating a full dye session too soon, it harms hair and makes results worse. Small fixes like conditioners or gloss treatments are safer.
Maintaining and Caring for Your Colored Hair
After dyeing, limiting how often you wash helps keep color strong. Many experts suggest washing your hair about every 3 to 4 days. This slows fading and keeps your dye longer.
The dye can last 6 weeks to 3 months. How often you wash and the products you use affect this.
Using shampoo and conditioner made for color-treated hair makes a big difference. These products are gentler and often contain moisturizers to keep hair soft. Dry hair dulls color fast, so pick hydrating formulas to avoid faded, brittle strands.
Deep condition your hair at least once a week to restore moisture. Apply conditioner even to dry hair ends or highlights to protect existing color. Rinse your hair right after swimming.
This washes out chlorine or salt. These can damage your color and dry your hair.
Use heat styling tools like flat irons and curling wands less. These tools dry out hair. They also cause your color to fade faster.
When you do use them, apply a heat protectant to shield your strands. Air drying is safer but takes longer, so plan extra time after washing.
Sun exposure also fades dyed hair. So wear a hat or use hair sprays with UV filters when outside.
This protects the color and keeps hair from looking dull or brittle. Some leave-in conditioners include UV protection, adding another layer of defense.
Wash your hair 24 hours before dyeing. This cleans oils and stops skin irritation. It helps keep your scalp healthy.
Avoid overwashing afterward to preserve natural oils that protect both scalp and color. Clean scalp means color sticks evenly and looks fresh longer.
Adjust your routine based on hair type. Use rich conditioners if your hair is dry. Wash your hair less often to avoid dryness.
Oily hair may need more frequent washing but choose color-safe, mild formulas to avoid stripping dye. Tailor care to your hair’s unique needs for best results.
When to Call a Professional Instead of DIY Coloring
Choose a pro when your color change is big or tricky. Going from dark to very light hair at home is tough.
Fixing uneven color is also tricky to do well. A professional has tools and skills that reduce the risk of damage or odd results.
Color correction can cost $100 to $300 or more, depending on the fix. It takes several hours in a salon, sometimes split into sessions to protect your hair. Trying these fixes yourself often harms your hair or leaves you with patchy, muddy colors.
Experts say call a pro if your hair is damaged. Also call if you’ve done many dye jobs before.
Overlapping dye or bleach at home may cause breakage, dryness, or scalp burns. A stylist can also test your hair and scalp health before starting to avoid problems.
Highlights usually need a professional touch. Getting clean, natural-looking highlights at home is tough.
The same goes for balayage or multi-tone looks. Professionals know how to space and blend highlights for smooth, flattering effects.
Don’t risk your hair with drastic changes or corrections at home. Damaged hair is harder to fix and needs expert care.
You can do simpler all-over color changes yourself if you follow steps carefully. For example, covering gray or going one shade lighter or darker is easier. Use beginner-friendly products like non-drip foam formulas for even coloring and full coverage.
Check your hair condition before deciding. When your hair is dry or damaged, a pro can help. They add treatments during coloring to protect it.
This helps protect and restore your hair better than DIY methods. A stylist may also recommend gentler formulas or slower processes that keep hair healthier.
Step-by-Step Action Plan for Coloring Hair at Home
Follow these steps to get great results and keep your hair healthy. Each step includes how to check it worked well.
- Before you start: Do an allergy patch test 48 hours before dyeing. No itching or redness means you’re good to go.
- Day 1: Choose a dye close to your natural shade for easier results. If the color looks even and true to the box, you nailed it.
- During application: Section your hair and apply dye evenly. When all strands are covered without missed spots, you’re doing it right.
- After dyeing: Rinse hair in lukewarm water until water runs clear. No suds left means the dye is fully rinsed out.
- Next day: Use a deep conditioner to lock in moisture. Hair feels soft and not dry confirms it’s working.
- Weekly care: Wash hair 2-3 times a week with color-safe shampoo. Your color staying bright without fading shows success.
- After 4 weeks: Touch up roots only to avoid over-processing. Roots match the rest of the hair without patchiness.
- When unsure: Call a pro if your color looks uneven or damaged. They can fix it safely without making things worse.
Frequently Asked Questions
How Long Does It Take to Color Hair at Home?
You should set aside 1 to 1.5 hours to color your hair at home. This includes prepping, applying dye, waiting, and rinsing. So plan accordingly to avoid rushing the process.
Can I Dye My Hair at Home If It’s Damaged?
It’s not safe to dye hair at home if it’s very damaged or over-processed. Dyeing damaged hair can cause breakage.
You might want a professional. Fix your hair before coloring it.
Is Touching Up Gray Hair at Home a Good Idea?
Yes, touching up gray roots at home is generally safe and common. Just avoid going more than two shades darker than your natural color for best results.
Can I Try Balayage or Highlights at Home?
Major color changes like balayage or highlights are best left to professionals. DIY efforts often don’t achieve the intended look and can damage your hair.
What Should I Do If the Color Turns Out Too Dark?
Use a clarifying shampoo or color remover for hair dye that’s too dark. These help lift the color but don’t expect immediate results.
Are Temporary Color Sprays a Good Start for Beginners?
Temporary color sprays are great for trying new looks without commitment. They wash out easily and let you experiment before permanent dyeing.
Before You Go
Home hair dyeing works best when you follow safety and care steps closely. Always check your hair and skin before and after coloring. Try the allergy test today to start your safe hair coloring journey.