How to Curl Hair with Straightener for Beginners: A Complete Guide with Pro Tips
Learning how to curl hair with straightener for beginners can feel tricky at first. The key is twisting the straightener 180 degrees. Slide it down each hair section.
This technique helps you create curls easily. This motion creates curls similar to using a curling iron but with your flat iron instead.
Start with clean, dry hair to help the curls hold better and last longer. Clamp about 6 inches from the roots and angle the iron slightly away from your face. Keep the sections small, about 1 to 2 inches wide, for even curls.
Temperature matters a lot. So choose it based on your hair type to avoid damage. Thin or fine hair needs below 300 degrees.
Thick or coarse hair requires a hotter setting, around 370 to 410 degrees. Always use heat protectant to shield your strands from heat damage.
Key Takeaways
- Clamp a small, dry hair section near the roots before curling.
- Rotate the straightener 180 degrees away from your face for natural curls.
- Use low heat (below 300°F) for fine or thin hair to prevent burning.
- Set temperature between 300°F to 410°F based on hair thickness.
- Always apply heat protectant before using the straightener on hair.
- Tidy sections, about 1, 2 inches wide, help create uniform curls.
How to Curl Hair with a Straightener Step by Step

Curling your hair with a straightener takes some practice, but the steps are simple. Start by dividing your hair into sections to work easily. Small sections make tighter curls, and bigger parts give you loose waves.
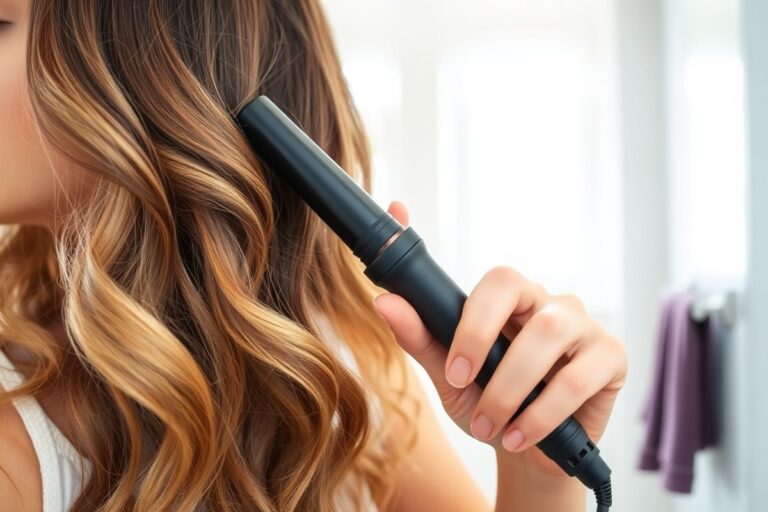
Hold the straightener near your scalp, clamp the hair, then twist the iron to curl. You rotate the straightener 180 degrees away from your face as you move it down. To get more defined curls, turn the iron fully once.
Wrap your hair all the way around the plate. This helps the curls hold their shape.
- Section your hair.Clip up the top hair layers first. Start curling a bottom section about 1 to 2 inches wide. Work from the bottom up in small sections. Use smaller sections on the middle and top layers for best results.
- Clamp near the roots. Take a dry hair section and clamp the straightener close to the scalp. Hold the iron at a slight angle, facing away from your face.
- Rotate the iron 180 degrees.Twist the straightener backward, away from your face. Wrap hair around one plate to form a curve. This helps create a natural-looking curl.
- Slide the iron down. Glide the straightener slowly down the hair’s length. Keep the iron rotated as you go for a smooth curl shape.
- Release the curl.Move the iron to your hair ends. Open the straightener carefully, then let go of the curl. This locks in the shape gently.
- Repeat on all sections. Continue curling, working from the bottom layer to the top. Curl the top sections carefully for a polished look.
- Lock in the style. Spray a little hairspray on each section before curling for longer-lasting curls. The curls will hold their shape better if you do this.
A smooth glide and even rotation avoid kinks in your curls. Using a straightener with rounded edges can help prevent sharp angles and rough bends. Take your time; quick moves can make curls look uneven or messy.
What Temperature Is Best to Curl Hair with a Straightener?

Choose your straightener’s heat based on your hair type to protect your strands. Fine or damaged hair needs lower heat to avoid breaking or drying out. Thick or coarse hair can handle higher temperatures because its cuticle is stronger and denser.
Usually, fine or bleached hair curls best between 280 and 360°F. Medium hair should be between 300 and 390°F. Coarse or virgin hair requires heat from 370 to 410°F since it resists curling more. Using these ranges helps set the curls without causing more damage.
| Hair Type | Temperature Range | Why It Works |
|---|---|---|
| Fine, bleached, or chemically processed | 280, 360°F | Cuticle is weak; lower heat sets curl gently |
| Medium thickness, color-treated | 300, 390°F | Moderate heat reshapes keratin without stripping hair |
| Coarse or virgin hair | 370, 410°F | Dense cuticle needs more heat to hold curls |
Adjust the heat if your hair is damaged or color-treated even within your type’s range. Lower it by 10 to 20 degrees for extra care. Always apply a good heat protectant before curling to block damage and breakage.
Limit straightener curling to two or three times weekly. Using heat frequently raises the chance of dryness and split ends. Protecting your hair with sprays or creams before styling reduces damage and helps curls last longer.
Don’t skip the heat protectant. It shields hair from damage up to 450°F during styling.
Curling clean, dry hair holds better because the cuticle is smooth and ready. Avoid curling your hair when it is wet or oily. Start at the low end of your temperature range and increase only if needed.
Essential Products and Prep for Curling with a Straightener
Start curling with clean, fully dry hair and always use a heat protectant spray. These steps protect your hair and help curls hold better. You’ll want some styling products ready to boost grip and volume too.
Choosing the Right Heat Protectant
Heat protectant sprays block the hair from the straightener’s heat. The straightener can get as hot as 450°F. This heat can damage your hair without protection. Your hair may dry out without any heat protection.
It can also burn easily. New learners are especially at risk when curling hair.
Look for sprays labeled for heat up to 450°F or higher. Apply them evenly throughout your hair before using any hot tools. A 6-ounce bottle usually costs around $10 to $15.
It will last through many uses. This makes it a good value over time.
Using Mousse or Texturizing Sprays
Mousse adds volume and grip so curls don’t slip out quickly. Texturizing sprays give your hair a little extra hold and definition. They both help your curls look more natural and last longer.
After applying heat protectant, use a golf-ball-sized amount of mousse on damp hair. Comb it through and then dry fully. Spray texturizer lightly on dry hair to give curls body without stiffness.
- Apply heat protectant spray on dry, detangled hair
- Use mousse on damp hair to add volume and hold
- Dry hair completely before curling; never curl damp hair
- Apply texturizing spray on dry hair for extra grip
- Finish with light hairspray for flexible hold
These steps give your curls a better shape and keep them from falling flat fast.
Washing and Drying Tips Before Curling
Clean hair holds curls better but avoid washing right before styling. Hair that’s too fresh can be slippery and hard to shape. Washing 24 hours before curling usually works best.
Make sure hair is fully dry. Curling damp hair causes damage and messes up the curl pattern. Use a blow dryer or air dry completely before you start styling.
Best Straightener Types and Plate Sizes for Curling
The best straightener for curling usually has narrow plates about 1 inch wide. Narrow plates let you twist hair easily and create tight curls. They work well for most hair lengths but especially if your hair is short or shoulder-length.
Rounded edges on the straightener plates make a big difference. They help you slide the iron smoothly while bending hair into curls.
Sharp edges tend to leave creases and block easy curling. So rounded plates are better for smooth, natural shapes.
Wide plates around 2 inches can give medium, more natural curls or waves. They cover more hair at once but don’t form super tight curls well.
If you want loose waves or soft curls, wide plates save time. For defined ringlets, stay under 1.5 inches wide.
| Plate Size | Result | Best For |
|---|---|---|
| 1 inch (thin) | Tight, defined curls | Bouncy ringlets |
| 2 inches | Medium, natural curls | Everyday styling |
| 3 inches and up | Loose waves | Beachy, undone texture |
| 180-degree turn | Full curl | Volume and definition |
| 90-degree turn | Soft wave | Relaxed day-to-day look |
Some straighteners offer 2-in-1 features with curved plates for curling and straightening. These irons are worth it if you want one tool for both styles. Curved plates create smooth curls and waves without extra heaters.
For shorter hair, use slim plates with rounded edges for precise shaping. Medium plates work best on shoulder-length to long hair for natural, full curls. Wide plates suit thick, long hair where you want quick waves instead of tight curls.
Controlling Curl Size and Style with Section Size and Iron Angle
Change your hair section size to get different curls. Angle the iron to suit the curl type. This helps create tight curls, medium curls, or loose waves.
Thin sections produce smaller curls, thick sections give bigger waves. The angle and rotation of the straightener control how the curl forms.
Small Sections for Defined Curls
Use very thin hair sections, about 1/2 inch wide, for tight, defined curls. Clamp the straightener close to your hair roots.
Twist it fully, turning about 180 degrees away from your face. This shape looks like ringlets or corkscrews and stands out with clear curls.
Moving too fast will produce loose curls instead of tight ones. Hold the straightener steady.
Glide it slowly down your hair. This keeps the curl bouncy and intact.
Larger Sections for Loose Waves
Grab thicker sections of hair, around 1.5 to 2 inches wide, for loose waves or beachy textures. Clamp the straightener loosely for relaxed waves. Hold it more horizontally to avoid coil curls.
These waves are softer and flow with subtle bends. They work well for casual, easy looks and require less wrist rotation on the iron.
- Use 1/2 inch sections for tight curls
- 1 to 1.5 inch sections for medium curls
- 1.5 to 2 inch or bigger for loose waves
- Slow glide for more curl hold
- Quick glide for gentle bends
- Rotate straightener 180 degrees for tight curls
- Hold straightener closer to horizontal for beach waves
Adjusting Iron Angle and Rotation
Hold the straightener mostly vertical to create tight curls. Rotate it 180 degrees away from your face while pulling down to form coil shapes. This full twist locks in the tight curl pattern.
For medium curls, hold the iron at about a 45-degree angle. Rotate the iron about 90 to 135 degrees.
This makes looser loops with some bounce. To soften the wave, keep the iron near horizontal with minimal twist.
Practice with your straightener unplugged to get comfortable with the angle and rotation.
Remember, a sharp twist plus thin section equals tight curls. A gentle angle and thick section saves time and gives soft waves. Adjust the rotation and section size to match the curl type you want before styling.
How to Curl Hair on Both Sides Without Uneven Curls
Curls often look different side to side because you twist the straightener opposite ways. Your dominant hand may curl hair more tightly or loosely on one side. Changing how you turn the tool fixes uneven curls.
To match curls on the left and right, alternate the curl direction. On the left side, turn the straightener counterclockwise.
On the right, twist it clockwise. This balances the curl flow and stops them from clumping or pointing awkwardly.
Practice helps too. Spend time curling small sections evenly on both sides.
Focus on wrist movement to keep curls identical. This reduces cramping and weird kinks from twisting the flat iron wrong.
- Section your hair from the bottom up in similar sizes. Smaller sections give springier curls. Bigger sections create looser waves.
- Clamp your straightener near the roots and slowly twist it. Turn counterclockwise on the left side.
- Move the straightener down the strand while holding the twist. Keep a steady speed for consistent heat.
- Release the hair after you reach the ends. Hold the curl in your palm for 5 seconds to set.
- Switch sides and twist the straightener clockwise on the right side exactly the same way.
- Repeat for all sections, alternating the curl direction on each side.
- Smooth curls with fingers or a wide-tooth comb to knock them down slightly.
- Use practice curls on small sections near the front hairline. This builds muscle memory for both hands.
For dominant hand limits, curl the dominant side first. This gives you energy to focus on the weaker side.
Use slow, controlled movements with a straightener that has rounded edges. This tool shape helps curls turn out soft and natural.
Adjusting curl direction and practicing with similar section sizes is key. That way, each side matches perfectly. Avoid holding your wrist in uncomfortable angles to prevent fatigue or uneven results.
How to Make Curls Last Longer and Finish Your Style
To keep curls strong and fresh all day, locking them in place is key. Use a few light products and gentle touches after curling to help. The right routine makes a big difference in how long curls hold their shape.
Start with a fine mist of light hairspray while your curls cool. This sets them without weighing hair down.
Skip harsh sprays if your hair is dry or damaged. A moisturizing serum applied sparingly afterwards can add shine without heaviness.
If your curls feel tight right after styling, loosen them by gently sliding your fingers through the strands. Avoid using a brush, as it breaks up curls too much and causes frizz. Finger-combing gives you softer waves while keeping the curl pattern intact.
A simple finishing routine helps your curls last longer and look polished. Follow these steps to seal the deal:
- Spray your freshly curled hair lightly with a flexible hold hairspray.
- Let curls cool for 3 to 5 minutes to lock in shape.
- Run your fingers through curls to gently separate and loosen them.
- Apply a pea-size amount of serum focusing on mid-lengths and ends for smoothness.
- Spritz a final light mist of hairspray to seal everything in place.
Using ceramic-coated straighteners ensures even heat, which helps curls last without extra damage. Products with heat protection and ionic technology also keep hair healthy during styling.
Choose light, flexible-hold sprays around $10 to $15 for best results. Serums usually cost about $15 to $25 and smooth out frizz without oiliness.
Remember to avoid overloading your hair with too much product. Too much hairspray makes curls stiff, while too much serum can weigh them down.
Find the balance by starting light and adding more only if needed. This keeps curls bouncy, soft, and long-lasting all day long.
Common Curling Mistakes and How to Fix Them
Curling hair with a straightener can cause common problems. Overheating, uneven curls, and flat results happen a lot. Avoid these to get better curls.
Knowing how to spot and fix these mistakes helps you get soft, lasting curls. Some fixes also prevent damage and keep hair healthy.
Overheating and Hair Damage
Using too high heat harms hair, making it dry and brittle. Set your straightener temperature between 300°F and 370°F for most hair types. Thicker hair may need up to 400°F. But avoid going above 450°F to prevent burns.
Always apply a heat protectant spray before using the straightener. These sprays create a barrier that limits heat damage and reduce frizz. Don’t use the iron on wet or damp hair.
Wet hair heats unevenly and gets more damage. Always dry your hair before styling.
Applying heat protectant spray before curling saves your hair from serious damage.
Uneven or Loose Curls
Uneven curls happen when you use inconsistent section sizes or curl at uneven speeds. Make sure hair sections are equal in width, about 1 inch each. Curl at a steady pace to let the heat set evenly through the hair.
Try wrapping smaller hair sections with a tighter turn on the iron. Smaller pieces hold curls longer. This stops curls from falling loose.
You can hold the straightener a little longer, up to 10 seconds. Don’t hold it too long or overheat your hair.
Mild extra heat makes curls last better. This helps curls form firmly and last longer.
- Use the same-sized hair sections consistently.
- Hold each curl for 8 to 10 seconds without dragging.
- Wrap hair tightly around the iron.
- Let curls cool on your fingers or clips.
- Adjust speed and pressure on the iron for even curls.
Flat Curls and Lack of Volume
Flat curls often happen because hair is straighter at the roots or curls don’t hold shape. Lightly straighten roots before curling to reduce bulk and create lift. You can also spray a root lift spray to add volume.
For curls that don’t hold, use a light curl-hold spray immediately after styling. Avoid heavy products that weigh hair down. Flip your head upside down for a few seconds to set volume before finishing with spray.
Frizz and Flyaways
Frizz is common when straighteners dry out hair or when humidity affects curls. Use a leave-in conditioner spray that smooths and controls frizz for up to 72 hours. Applying it before or after curling helps keep curls shiny and smooth.
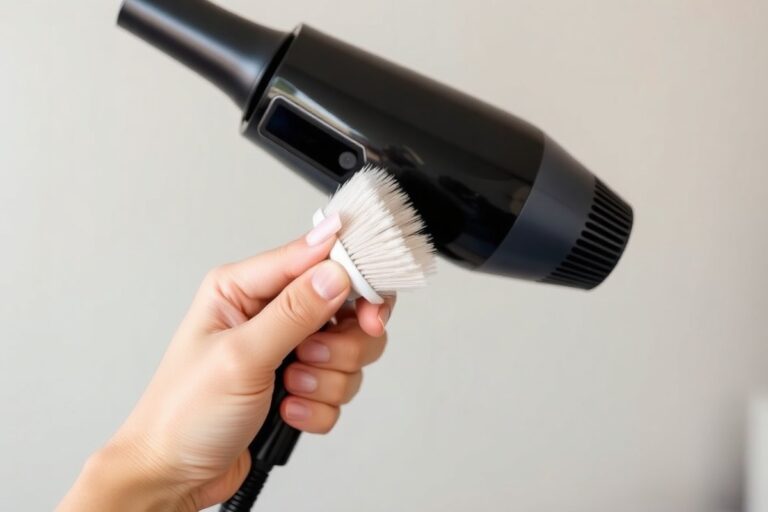
Make sure your flat iron plates are clean to prevent tugging and rough spots. Also, don’t overdry hair before curling; slightly damp hair causes frizz and uneven curls. Finish by lightly running the straightener over the ends to seal cuticles.
Step-by-Step Action Plan to Curl Hair with a Straightener
Follow these simple steps to start curling your hair today. Each one helps build your curling skill and get great results.
- Before you start: Gather your straightener, heat protectant, and a comb. Make sure your hair is dry and detangled for smooth curling.
- First time curling: Set the straightener to 300°F if your hair is fine or damaged. Test one small curl to check heat and shape.
- After a few curls: Adjust your section size to smaller pieces for tighter curls. See if the curls hold their shape after cooling.
- During styling: Use a clamp-and-twist motion at a consistent speed. Avoid pausing too long on one section to prevent damage.
- Finishing curls: Spray curls lightly with a flexible hold hairspray. Wait 5 minutes before touching to help curls last.
- Daily practice: Repeat curling on both sides, checking for even curls. Fix uneven areas by recurling those sections gently.
- Weekly care: Deep condition your hair weekly to keep it healthy after heat styling. Notice if curls look shinier and less frizzy.
Frequently Asked Questions
Can You Curl Hair with Any Type of Straightener?
Yes, you can curl hair with most straighteners. But plate material and shape affect curls. Ceramic plates often give smoother curls, while titanium heats up faster.
Is It Necessary to Use Heat Protectant Before Curling with a Straightener?
Always use a heat protectant before curling hair. It helps avoid damage.
It also prevents dryness when using hot tools. It creates a barrier that reduces heat impact.
How Long Should I Hold the Straightener on My Hair to Form Curls?
Hold the straightener on each section for 5 to 8 seconds. This time depends on your hair thickness.
Adjust as needed. Too long can cause damage, too short may create loose curls.
What’s the Best Way to Avoid Uneven Curls During Styling?
Take small, even sections for best results. Rotate the straightener 180 degrees.
Keep turning the same way for smooth curls. Check each side often to match curl shape.
Can I Curl Damp Hair with a Straightener?
No, curling damp hair can cause heat damage and doesn’t hold curls well. Always dry your hair fully for better curl shape and hair health.
Should I Brush My Curls After Curling with a Straightener?
Gently finger-comb curls instead of brushing to keep their shape and reduce frizz. Brushing can separate curls and cause puffiness quickly.
Before You Go
Using a straightener to curl your hair can give you beautiful, lasting curls. Try your curls on a small section to find your perfect heat setting. Keep practicing these steps, and your skill will grow fast.