How to Curl Using a Straightener: 8 Expert Techniques for Perfect Curls
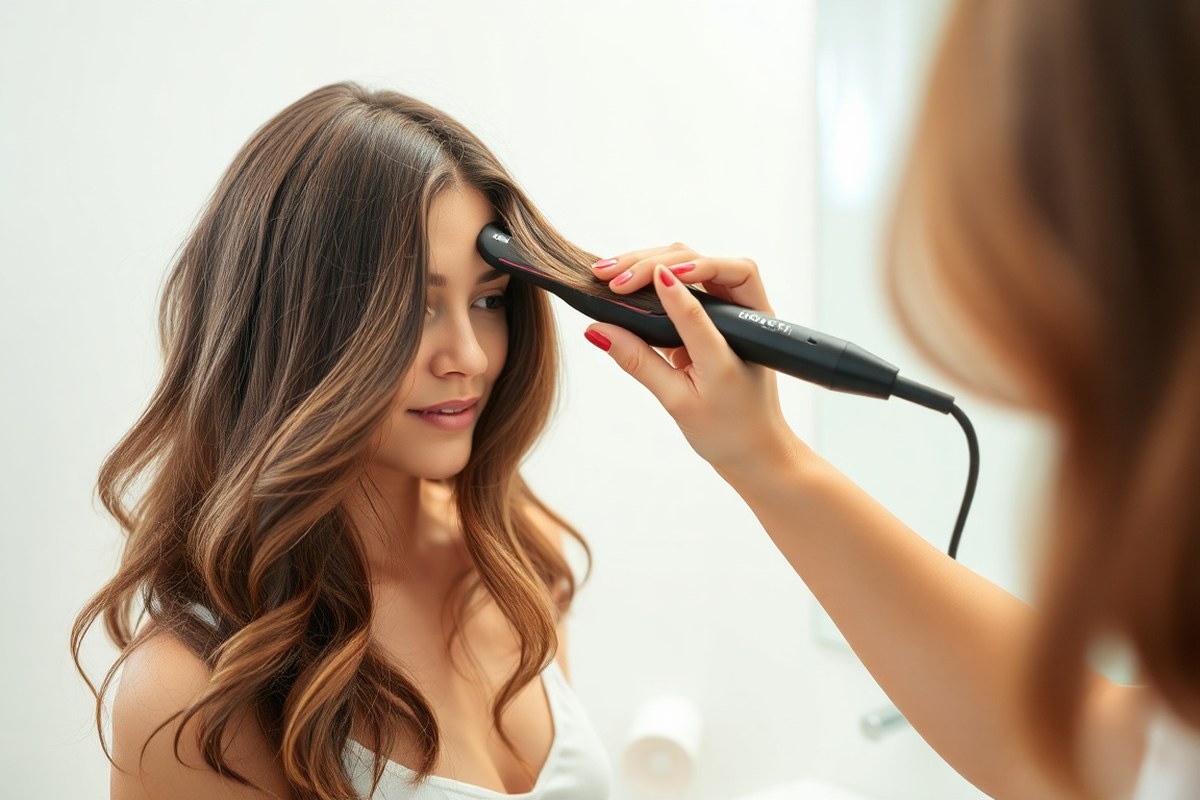
Curling hair with a straightener is easier than you may expect. Take a small section of hair and twist the iron 180 degrees away from your face. Gently glide it down to create soft curls without needing a curling iron.
Start by choosing the right size hair section, about 1 to 2 inches wide works best. Hold the straightener at a slight angle near your roots to shape the curl properly. These details help curls look smooth and last longer.
Make sure the straightener is hot enough, usually between 300°F and 350°F works well for most hair types. Too much heat can damage hair. So avoid pushing higher temperatures if you have fine or damaged hair.
Be patient with your motions: rotate the straightener slowly and glide it down steadily. Quick, uneven moves can cause kinks or uneven curls. With practice, curls come out glossy and defined.
Key Takeaways
- Use a straightener with medium (1 to 1.5 inches) plate width for most curls.
- Clamp about 1-2 inch hair sections for even, well-shaped curls.
- Rotate your straightener 180 degrees away from your face while gliding down.
- Set lower heat (around 300°F) for fine hair to avoid damage.
- For thick hair, use higher heat up to 450°F to hold curls longer.
- Try wide plates (1.5 inches or more) for long hair or looser waves.
How to Curl Hair Using a Straightener Step-by-Step

Curling hair with a straightener takes practice but follows clear steps. Use small sections about 1 to 2 inches wide to get defined curls. Too large sections often create loose waves or uneven curls.
Hold the straightener vertically, clamp a section near the roots and twist away from your face. Rotate the straightener 180 degrees while slowly gliding it down the strand. This motion shapes the hair into a curl or wave smoothly and evenly.
- Section off about 1 to 2 inches of hair. Smaller sections make better curls and reduce uneven heat.
- Hold the straightener near your roots, tilting it slightly from your face. This tilt guides the curl’s path nicely.
- Rotate the straightener 180 degrees, turning it away from your face while keeping your hand steady. This twist wraps the hair around the iron.
- Slowly glide the straightener down the hair shaft to the ends. Keep moving to avoid burning or kinking the hair.
- Release the clamp once you reach the ends and catch the curl gently in your hand. Let it cool to hold the shape better.
- Repeat on the rest of your hair, working through about 10 sections for a full head. Smaller sections take more time but give better curls.
To create softer waves, reduce the twist or change the twist direction while pulling down. This technique gives natural movement without tight curls. Using a straightener with rounded edges reduces sharp lines and kinks.
Make sure you keep the straightener moving steadily. Holding it too long in one spot causes damage and uneven curls. The goal is a smooth, even motion to get bouncy, defined curls fast.
Choosing the Right Straightener for Curling

You can use most straighteners to curl your hair, but some work better. Models with rounded plates or barrels help create smooth curls or waves. Straighteners made just for curling often have features that make curling quicker and easier.
Plate width affects the type of curl you get. Narrow plates, around 1 inch or less, create tight curls. Wider plates, 1.5 to 2 inches, make loose waves or big curls.
The shape of the plates also matters. Rounded plates glide smoothly and reduce sharp lines in curls.
| Plate Width | Curl Effect | Hair Length Best For |
|---|---|---|
| Under 1 inch (narrow) | Tight curls | Short to medium hair |
| 1 to 1.5 inches | Classic curls or waves | Medium to long hair |
| 1.5 to 2 inches (wide) | Loose waves and big curls | Long hair |
Look for straighteners with adjustable heat settings. Different hair types need different temperatures to curl well without damage. Fine hair curls best around 300, 325°F. Thick or coarse hair requires 375, 410°F. Curly or frizzy hair benefits from 350, 375°F after pre-straightening.
The material and design of the plates also help. Ceramic plates usually heat evenly and reduce frizz. Some irons have curved plates for curling hair.
The Cloud Nine Original Contouring Iron uses Sericite®-infused plates. These plates help protect your hair while styling. A lightweight iron is easier to control and helps you make consistent curls.
Use a heat protectant spray every time you curl, no matter your straightener.
Preparing Hair and Choosing Products for Curling
Your hair should be clean and completely dry before curling with a straightener. Use a heat protectant to shield strands from damage and add hold. Applying the right products properly helps curls last longer and keeps hair healthy.
Hair Cleanliness and Dryness
Curling works best on freshly washed hair or hair washed within two days. Clean hair avoids buildup that can weigh curls down.
Make sure your hair is fully dry. Dampness can cause heat damage or uneven curling.
Your hair loses curls fast? Use a firm hold gel first. Apply it before blow drying to keep curls locked in.
This adds grip. Don’t curl dirty or oily hair.
It won’t hold the shape well. The curls may get limp or greasy faster.
Choosing Heat Protectants by Hair Type
| Hair Type | Recommended Heat Protectant | Features |
|---|---|---|
| Fine Hair | Lightweight Spray | Protects up to 450°F without weighing hair down |
| Thick Hair | Oil-Based Product | Adds moisture and shine while protecting from heat |
| Curly Hair | Hydrating Treatment | Provides extra hydration and frizz control |
Applying the correct protectant prevents heat damage and boosts curl hold. Lightweight sprays suit fine strands that can get limp easily. Thick or coarse hair benefits from oils that seal moisture and smooth the cuticle.
How to Apply Products for Best Results
Start with dry hair and spray or smooth the heat protectant evenly from roots to ends. Use your fingers or a comb to distribute the product well. Let the protectant dry fully before curling to avoid steam or damage.
After curling, finish with a flexible hold hairspray to keep curls soft and lasting. For stubborn hair, a thermal protectant with hold can lock curls better. Avoid applying too much product, which can weigh hair down and look greasy.
Preparation Steps Before Curling
Preparing properly avoids damage and sets a good base for curls. Follow these easy steps to get your hair ready for the straightener:
- Wash your hair with a gentle shampoo suited to your hair type.
- Towel dry gently then blow dry completely; no damp spots.
- Apply the suitable heat protectant spray or treatment evenly.
- Comb through to spread the product and detangle any knots.
- Allow a few minutes for the product to absorb fully.
- Optional: For fine or stubborn hair, apply a firm hold gel before drying.
Tips for Healthy, Lasting Curls
Use heat tools on the lowest effective temperature to prevent damage. Hair thicker or coarser needs higher heat. But never above 450°F. Letting curls cool before touching helps them set.
Also, avoid heavy products that can weigh down curls. Choose sprays and creams designed for curling and heat styling. These maintain moisture balance and shield against breakage.
Best Heat Settings and Section Sizes for Different Hair Types
Choosing the right heat setting and section size depends on your hair’s texture, thickness, and condition. Using too much heat can damage fine or color-treated hair. Thick or coarse hair needs more heat to create lasting curls.
Smaller sections create tighter, springier curls, while larger sections make loose waves. You can see the difference when you curl small or big chunks of hair. Adjust the temperature and section size together for the best curls without causing harm.
| Hair Type | Recommended Temperature (°F) | Section Size | Curl Effect |
|---|---|---|---|
| Fine or Damaged | 250 – 350 | Small (0.5 inch) | Tighter, gentle curls that won’t burn hair |
| Medium/Normal | 350 – 375 | Medium (1 inch) | Balanced curls, springy but not tight |
| Thick or Coarse | 375 – 400 | Large (1.5 inch or more) | Looser waves, holds shape longer |
| Color-treated or Very Damaged | 250 – 300 | Small (0.5 inch) | Soft curls, minimal heat stress |
Start low, especially if your hair is damaged or dyed. Try 300°F for fine or color-treated hair, then test a curl.
For thicker hair, raise heat slowly. But never go past 400°F. Use smaller sections on thin hair to avoid overprocessing.
Always work with dry hair and heat protectant. Pull your straightener slowly on small sections for tight curls.
For bigger waves, use larger sections and move the iron faster. This mix keeps your curls looking good and your hair healthier.
Curling Techniques: How to Rotate and Glide the Straightener
Mastering curling techniques with a straightener means controlling the iron’s rotation and glide. Different motions shape your curls from tight spirals to loose waves. Adjust your wrist and iron angle to get the look you want.
Classic Twist-and-Glide Method
This method creates uniform curls using a simple rotation while gliding the straightener down your hair. Clamp the straightener near your roots. Twist your wrist one full turn.
Make sure it goes away from your face. Slide the iron smoothly down the hair without stopping to avoid crimps.
For uniform curls, keep your wrist steady and rotate the iron in one easy motion. Starting too far down the hair or twisting unevenly makes kinks or no curls at all. Consistency here is key for classic spirals.
- Section hair horizontally for more volume or vertically for waves.
- Clamp the straightener near the root on one section.
- Twist your wrist away from your face one full turn.
- Slide the iron slowly down the strand while keeping the twist.
- Release the hair from the iron once at the ends.
- Repeat on remaining sections, maintaining the same wrist motion.
Clamp tightly but gently to avoid pinching hair or creating dents.
Ribbon Curl Technique Explained
Ribbon curls create soft, loose waves. First, make a flat twist with your hair. Then, glide the iron down the twist.
Lay your hair flat in the straightener. Twist your wrist slightly.
Pull the straightener down slowly. This ‘ribbon’ motion smooths the hair as it curls, avoiding tight spirals.
Moving the iron smoothly without clamping too hard creates a glossy, natural wave. It’s faster and works best on long hair.
Use it when you want flowing curls. These curls don’t add volume at the roots.
Creating Waves vs. Tight Curls
To get waves, pull sections tighter and run the iron faster while twisting just once. This creates loose, beachy textures. For tight curls, clamp near the roots.
Rotate your wrist fully. Then glide the straightener down slowly for defined ringlets.
Using vertical sections leads to more natural, beachy waves. Horizontal sections produce bouncier, more voluminous curls. Adjust speed and iron angle to fit your style.
Curling Direction: Toward vs. Away from Face
Twisting the straightener away from your face opens up your look with voluminous curls. Twisting toward the face gives tighter, more defined curls that frame your face closely. For a balanced style, alternate the direction on different sections.
Starting each curl near the face with the iron twisting outward compliments your shape best. Curling all away or all toward your face can sometimes look flat or too uniform. So mix directions for body.
Using Different Curling Techniques for Hair Lengths
Curling techniques need to change with your hair length. Short, medium, and long hair each call for different tools and approaches. Matching your method to your length helps get curls that last and look great.
Curling Short Hair Efficiently
Short hair curls best with a smaller, lightweight straightener. It lets you move quickly and reach the roots without burning your scalp. Using a plate width of about 1 inch works well for short styles.
Here’s how to curl short hair:
- Divide hair into small sections around 1-inch wide.
- Clamp the straightener near the root and twist it away from your face.
- Hold the twist for 3 to 5 seconds, then glide down the strand.
- Alternate curl direction for a natural look.
- Use lower heat (around 300°F) if hair feels fragile.
Short hair curls form quickly and tend to fall faster. Lightly mist with a holding spray after to keep curls firm without weighing hair down. Avoid plates wider than 1.25 inches, they’re bulky and hard to maneuver close to the scalp.
Styling Medium-Length Hair
Medium-length hair takes curls better with a medium plate straightener, about 1.25 to 1.5 inches wide. This size handles most hair mid-shaft sections without slipping or overheating. You get room to style but enough control to keep curls tight.
Follow these steps for medium hair:
- Section hair into 1.5-inch parts for even curl size.
- Start curling from the nape, wrapping strands around the straightener.
- Rotate the straightener 180 degrees away from the face.
- Hold for 5 to 7 seconds, then slowly slide down.
- Repeat with alternate directions or all the same based on look.
Medium hair curls last longer because the strands are thicker. Use heat settings between 320 and 360°F for best results. Prepping the hair with lightweight products helps curls hold without stiffness.
Techniques for Long Hair
Long hair needs more patience and a wider plate straightener, around 1.75 to 2 inches. Wider plates cover longer sections fast but require careful control to avoid loose, limp curls. You might want adjustable heat settings to prevent heat damage.
Try this process with long hair:
- Divide hair into larger 2-inch sections for manageability.
- Start at the scalp and clamp the straightener, twisting it away.
- Hold for 7 to 10 seconds given the length and thickness.
- Slowly glide the tool down while keeping the rotation steady.
- Use a heat setting from 350 to 400°F depending on hair texture.
Long hair can weigh curls down. Use a texturizing spray after curling to boost volume and shape. Avoid too much product at the roots to keep hair from looking flat.
Take breaks if your arms get tired. Long hair needs more work but curls look fuller.
Fixing Common Mistakes When Curling with a Straightener
Uneven curls often come from taking uneven hair sections or wrapping hair inconsistently around the straightener. To fix this, use clips to divide your hair into equal sections. Wrap each section of hair around the iron the same way.
Start at the roots. Glide the iron smoothly down to the ends.
Your curls look too tight or stiff? Try using bigger hair sections. You can also twist the straightener less.
Larger sections create softer curls, especially on longer hair. You can also gently separate curls with your fingers after curling for a more natural look.
Frizz and heat damage often happen when hair isn’t prepped right. It can also happen if the temperature is too high. Always get hair ready before styling.
Use a heat protectant spray before styling. Straighteners that close the hair cuticle can actually help avoid frizz by sealing strands. Keep the straightener temperature between 300°F and 375°F. Very coarse or thick hair may need up to 400°F. Use lower heat for finer hair to avoid damage.
- Uneven curls: section hair evenly and wrap consistently
- Tight curls: use smaller sections and twist tighter
- Loose curls: use bigger sections and less twisting
- Frizz: apply heat protectant and keep correct temperature
- Arm fatigue: rest between curls or change hand position
Sometimes arm cramping leads to uneven curling. Taking short breaks or switching hands briefly can help. Also, ensure you’re not rushing.
Slow, steady glides give smoother curls. Longer hair works better with larger under layers curled less tightly to avoid bulky, unnatural shapes.
Making Your Curls Last Longer: Cooling and Styling Tips
After curling your hair with a straightener, let each curl cool fully before touching it. This helps the hair cuticle seal the curl shape, keeping the style intact longer. Cooling takes about 10 minutes.
This time lets curls set right. They keep their bounce better this way.
Products play a big role in locking curls. Use a lightweight mousse or curl cream before styling to add hold without weighing hair down.
After curling, apply a flexible hold hairspray to keep curls soft yet lasting. Avoid heavy products that can make curls fall flat, especially if your hair is fine.
Hair type affects how long curls last. Fine hair needs stronger setting products. Dry shampoo can add texture.
It also helps with grip. Thick hair holds curls well. Use wider iron plates for styling.
More product helps keep volume longer. For medium hair, a standard heat setting and medium hold hairspray work well.
- Spray a heat protectant and a lightweight curl-improving mousse evenly.
- Curl your hair section by section using your straightener.
- After curling, let your hair cool naturally for about 10 minutes.
- Apply a light to medium hold hairspray all over to lock the curls.
- Use your fingers or a wide-tooth comb to gently separate curls if needed.
- Refresh curls during the day with a spritz of water mixed with leave-in conditioner.
- Touch up any flattened curls by quickly reheating the straightener and recurling small sections.
Cooling curls completely before touching them is key to keeping shape and bounce all day.
Step-by-Step Action Plan to Start Curling with a Straightener
Follow these simple steps to get comfortable curling your hair using a straightener. Practice each phase to see your curls shape well and hold.
- Day 1: Choose a quality straightener with rounded edges. Curl a small hair section and check if it wraps smoothly.
- Before You Start: Apply heat protectant evenly to dry hair. Your hair should feel light, not sticky or greasy.
- First Curl: Use medium heat based on your hair type. Hold the straightener clamped on one section for 10 seconds and slide it down slowly.
- Practice Weekly: Try different curling directions, away or toward your face. Watch which style suits your face shape best.
- After Each Curl: Let curls cool completely before touching them. Curls should feel firm and hold shape when cool.
- Weekly Review: Notice any flat spots or frizz. Adjust heat or section size to fix those issues next time.
- After Two Weeks: Experiment with finishing sprays or serums to boost curl hold. See how long your curls last before needing a touch-up.
Frequently Asked Questions
How Do I Curl My Hair with a Straightener Without Burning My Fingers?
Use a heat-proof glove on the hand that rotates the straightener. This helps protect your fingers while you twist and glide down the hair.
Can I Curl My Hair with a Straightener Every Day Without Damage?
Daily curling can dry out your hair unless you use heat protectant. Try to style your hair with heat only a few times a week.
Always apply a heat-protective spray before styling. This helps reduce damage from the heat.
What’s the Best Way to Cool Curls After Using a Straightener?
Let curls cool completely before touching them to set the shape. Holding them in your hand for a few seconds helps the curl last longer.
Can I Make Straightener Curls Last Through Humid Weather?
Yes, using an anti-humidity hairspray helps curls hold better in moisture. Light misting after curling seals the shape against frizz.
How Do I Get Natural-Looking Curls, Not Tight Ringlets?
Use larger sections and a smaller straightener angle for loose curls. Avoid rotating the iron too tightly around the hair strand.
Is It Better to Curl Hair with a New or an Old Straightener?
A newer straightener with smooth plates creates smoother curls and less damage. Older plates can snag hair and cause uneven heat distribution.
Before You Go
Curling hair with a straightener gets easier with clear steps and practice. Start small and watch your curls shape and hold better every time. Grab your straightener now and try your first curl using what you’ve learned.