

How to Make Natural Shampoo: Complete DIY Guide with Recipes and Safety Tips
Knowing how to make natural shampoo means you can skip harsh chemicals. You simply combine gentle, natural ingredients that clean your hair well. This approach protects your scalp and improves hair health over time.
Start with simple bases like baking soda or herbal infusions. These clean without stripping your hair’s natural oils. Adding ingredients like aloe vera or coconut milk helps nourish and soothe your scalp.
You want to test your mix on a small skin patch first to avoid irritation. Natural ingredients can still cause reactions, so it’s safer to check before using fully.
Massage the shampoo into your scalp for at least two minutes for the best effect. Give your hair a few weeks to adjust, as natural shampoos work differently than commercial ones.
Key Takeaways
- Use baking soda shampoo and massage it for at least two minutes on your scalp.
- Simmer water with dried herbs for 10 minutes to create a natural cleansing base.
- Test new shampoo ingredients on skin and wait 24 hours for any reaction.
- Essential oils like lemon or sweet orange help control oily hair naturally.
- Allow your hair 2, 3 weeks to adjust to natural shampoos before changing routines.
- Store homemade shampoos in the fridge to last up to one month.
How to Make Natural Shampoo Step by Step

Making natural shampoo at home starts with a simple base and a clear order. Using liquid castile soap gives your shampoo a gentle, plant-based clean. Adding water and oils balances the mix to avoid dryness and boost softness.
Follow the steps carefully to mix your shampoo properly. Use clean containers and tools to keep the mixture fresh and safe. Store your shampoo in a cool, dark place to keep it from spoiling quickly.
- Measure 1 cup of liquid castile soap into a bowl or jar.
- Add 1 cup of distilled or boiled, cooled water to the soap. This dilutes it for gentle cleaning.
- Mix in 1 tablespoon of jojoba oil or another carrier oil. This adds moisture to your hair.
- Stir gently but thoroughly to combine all ingredients without causing foam.
- Add 10 to 15 drops of your favorite essential oils for scent and extra benefits.
- Pour the shampoo mixture into a clean bottle with a tight cap for easy use.
- Label your bottle with the date and ingredients to track freshness and avoid mistakes.
- Store the shampoo in a cool, dark cabinet. Use within 2 weeks for best results.
Using distilled or boiled water prevents bacteria growth and extends shelf life. Avoid hot water when mixing oils or essential oils to keep their properties intact. A wide-mouth container helps you add ingredients without spills.
Avoid overmixing to prevent too much foam, which can cause dryness. Your shampoo may feel different than store brands but will clean gently.
Try using it daily or every other day. Reduce essential oils next time when irritation happens.
Choosing the Best Ingredients for Homemade Shampoo
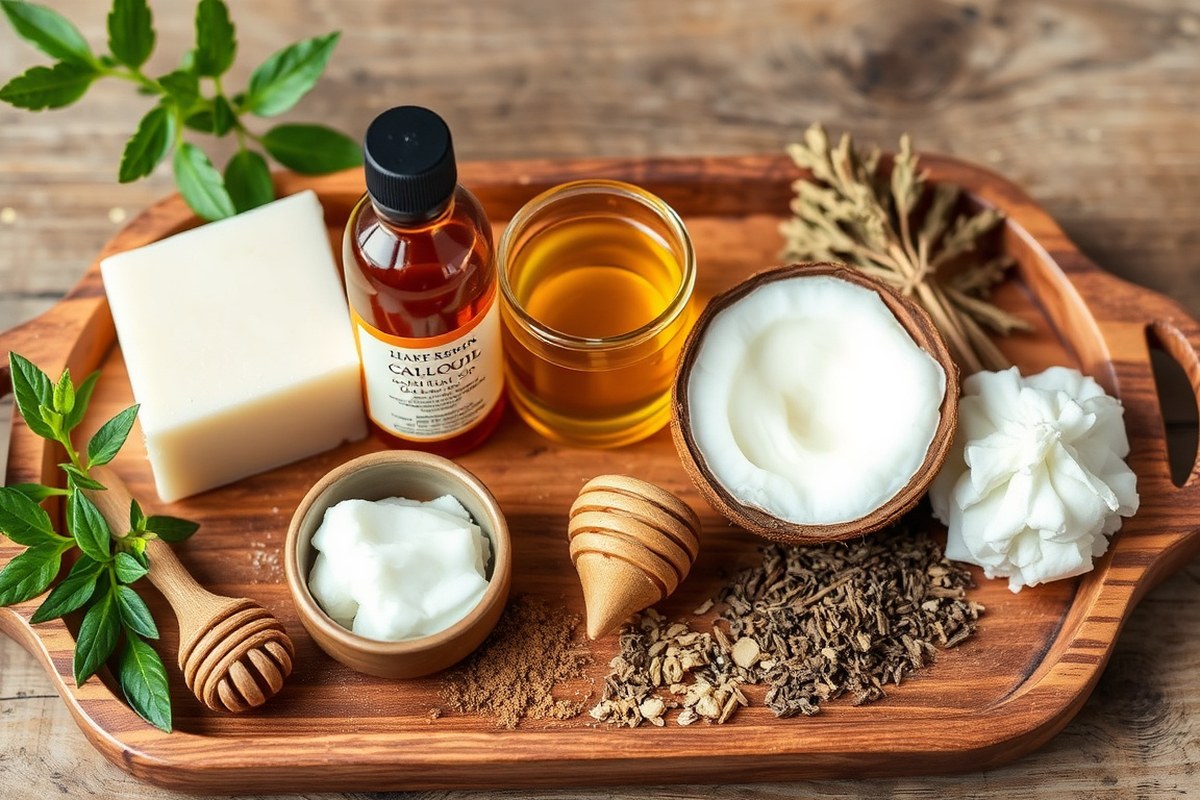
Choosing the right liquids for your shampoo base makes a big difference. Castile soap is popular because it cleans well and is gentle. Coconut milk adds softness and natural oils.
But homemade coconut milk usually works better than canned. Aloe vera juice hydrates and soothes the scalp, making it great for dry or sensitive hair. Distilled water is often used to dilute stronger bases safely.
Carrier oils add moisture and protect hair from drying. Coconut oil nourishes and strengthens, but it might weigh down fine hair. Argan oil is lightweight and fights frizz, working well on most hair types.
Jojoba oil closely mimics natural scalp oils and balances oily hair nicely. Avocado oil delivers deep hydration, perfect for dry or damaged hair. These oils prevent stripping and bring extra shine and softness.
| Ingredient Type | Examples | Pros | Cons |
|---|---|---|---|
| Liquid Base | Castile Soap | Gentle, cleans all hair types | Can be drying if too concentrated |
| Liquid Base | Coconut Milk | Softens hair, adds natural oils | Canned can be less effective than homemade |
| Liquid Base | Aloe Vera Juice | Hydrates, soothes dry scalp | Needs mixing with other bases |
| Carrier Oil | Coconut Oil | Strengthens, nourishes hair | Heavy for fine hair, may cause buildup |
| Carrier Oil | Argan Oil | Lightweight, controls frizz | Pricier than other oils |
| Carrier Oil | Jojoba Oil | Balances oily scalp, mimics sebum | May not moisturize very dry hair enough |
| Carrier Oil | Avocado Oil | Deep hydration for dry hair | Heavier feel, not for oily hair |
Natural additives can boost your shampoo’s effectiveness. Tea tree oil helps fight dandruff and soothe irritation. Lavender oil adds a calming scent and promotes scalp health.
Shea butter deeply moisturizes and smooths rough strands. Honey is a natural humectant, locking in moisture. Adding a teaspoon of vitamin E oil can protect your scalp and extend shelf life.
Use small amounts, about 5 to 10 drops or a teaspoon. Use this to avoid irritation or buildup on your scalp. Avoid putting too much to keep your hair healthy.
Use homemade coconut milk instead of canned for better softness and fewer issues.
Pick organic and cold-pressed oils whenever you can. They retain more nutrients and avoid chemicals. Buying from local or trusted online sources helps you get fresh ingredients.
Keep oils and bases in dark glass bottles to keep them fresh longer. Avoid synthetic additives or sulfates, which can strip your hair’s natural oils or irritate the scalp.
How Essential Oils Boost Natural Shampoo Benefits
Essential oils add more than scent to your natural shampoo. They can boost hair growth, control dandruff, and promote scalp health. Adding about 5 to 15 drops per batch usually works well.
Top Essential Oils for Hair Growth
Rosemary oil is a popular choice because it improves scalp circulation. This stimulation often helps hair follicles and encourages growth. Applying 5 to 10 drops in your shampoo gives soothing and strengthening effects.
Carrot seed oil also supports hair growth by fighting fungus naturally. Studies show it helps keep your scalp healthy and balanced. Adding 5 drops can complement rosemary or stand alone in your mix.
Lavender and chamomile oils calm the scalp and promote healthy hair. Their gentle scent adds relaxation while supporting growth. Use 5 to 10 drops combined or separately for added care.
Essential Oils That Fight Dandruff
Tea tree oil stands out as an antifungal that fights dandruff well. It reduces flakes and soothes irritation. Start with 5 drops to avoid overwhelming your shampoo’s scent.
Lemon, lime, and sweet orange oils help control greasy scalp conditions. These citrus oils balance natural oils and refresh your hair. Add 6 to 8 drops to keep scalp oiliness in check.
Maple syrup is not an essential oil but has antibacterial traits that nourish your scalp. Including natural oils like jojoba or avocado with essential oils helps moisturize and prevent dandruff.
- Rosemary: reduces itchiness and scalp flakes
- Tea tree: antifungal and antibacterial properties
- Lemon: controls excess oil on scalp
- Sweet orange: refreshes and brightens hair scent
- Carrot seed: supports scalp health and antifungal effect
- Lavender: soothes scalp irritation and calmness
Combining these oils can target both dandruff and scalp dryness. Use no more than 10 to 15 drops total for balanced results.
Safety Tips When Using Essential Oils
Essential oils are strong, so never use them undiluted on your scalp. Always mix them into your shampoo base or carrier oils like jojoba. This prevents irritation or allergic reactions.
Start small with 5 drops and see how your scalp reacts over a week. Reducing drops helps if your hair is oily or very sensitive. Those with certain health issues or pregnant should consult a doctor first.
Keep essential oils away from your eyes and rinse shampoo thoroughly. Store your shampoo in a cool, dark place to protect the oils from breaking down. Use within a few weeks for best potency.
Adjusting Recipes for Different Hair Types and Conditions
Adjusting your natural shampoo recipe lets you match your hair type and scalp needs. You swap ingredients and tweak the mix to control oil, soothe dandruff, or reduce frizz. This helps your hair look better and feel healthier without harsh chemicals.
Recipe Adjustments for Oily Hair
Oily hair needs a shampoo that cleans well without stripping the scalp. Use gentle cleansers like castile soap or decyl glucoside to remove excess oil but keep balance. Cut back on heavy oils or butters that add weight and can make hair greasy faster.
Add astringents like apple cider vinegar or lemon juice to help control oil. They close pores on the scalp and reduce oil production naturally. Use these sparingly, about 1 teaspoon per cup of shampoo, to avoid dryness or irritation.
- Swap heavier oils (coconut, avocado) for lighter ones (grapeseed, jojoba)
- Add 1 to 2 teaspoons of apple cider vinegar per cup of shampoo
- Use mild cleansing agents like castile soap or decyl glucoside
- Skip honey or add a small amount to avoid extra moisture
- Adjust water content to keep shampoo light and rinsing easy
You can thin the shampoo slightly with water to lower the thickness. A lighter formula rinses faster and reduces buildup on an oily scalp.
Remember, shampooing too often can boost oil production. So limit use to every other day or less.
Formulations for Dry or Damaged Hair
Dry or damaged hair craves moisture and nourishment to repair strands and soften frizz. Use creamy oils like coconut or avocado to seal in moisture. Honey is a great humectant that attracts water and keeps hair hydrated longer.
Use natural thickeners like xanthan gum or guar gum. They make your shampoo feel creamier. Add just enough until you get the thickness you want.
This helps coat the hair more evenly and prevents stripping. Adding aloe vera gel calms dryness and adds gentle hydration.
- Include 1, 2 tablespoons of honey for hydration and shine
- Use rich oils such as coconut or avocado for deep nourishment
- Thicken shampoo with 0.5%, 1% xanthan or guar gum
- Add aloe vera gel (1, 2 tablespoons per cup) to soothe dry scalps
- Lower cleansing agent concentration for gentler washing
Stop using too much soap or strong surfactants to avoid further damage. Wash less often, about two to three times a week, and condition well after shampooing. You’ll notice softer, shinier hair with less breakage.
Natural Ingredients for Dandruff Control
Dandruff often happens with dry or irritated scalp, sometimes oily scalp with flakes. Natural shampoos can help calm irritation and control flakiness using antimicrobial and soothing ingredients. Essential oils like lavender reduce inflammation and fight bacteria on the scalp.
Add 5 to 10 drops of tea tree oil per cup of shampoo. This helps kill fungus that causes dandruff. Make sure to mix it well.
Oatmeal extract or colloidal oatmeal soothes itchiness and redness. Keep your shampoo gentle and avoid harsh detergents that can worsen dandruff.
- Add 5 to 10 drops of tea tree or lavender essential oil per cup
- Use oatmeal extract or colloidal oatmeal for soothing effects
- Reduce surfactants concentration for gentle scalp cleansing
- Include moisturizing oils like jojoba for scalp balance
- Use apple cider vinegar rinse occasionally to restore scalp pH
Mix these ingredients carefully to keep your shampoo mild but effective. Watch how your scalp reacts over a few weeks. Reduce the amount of essential oil if irritation gets worse.
Try a different soothing ingredient instead. Always watch how your skin reacts.
Testing and Ensuring Safety of Homemade Shampoo
You need to test your homemade shampoo on your skin first. This helps catch allergies or irritations before using it on your scalp. A simple patch test takes a few minutes and can save you discomfort.
Look for redness, itching, swelling, or burning where you apply the shampoo. These signs show your skin might react badly. If you see any, stop using the shampoo and rethink your ingredients.
Before your first full wash, check your hair’s condition during the first few days. Some natural shampoos change hair texture temporarily. Greasiness, dryness, or fluffiness can happen but often fade with use.
Follow these steps to do a safe patch test for your homemade shampoo:
- Clean a small area on your forearm, about the size of a quarter.
- Apply a pea-sized dab of your shampoo to that spot.
- Wait 24 hours without washing the area to observe any reaction.
- Check for redness, bumps, itching, swelling, or burning sensations.
- Rinse the spot gently after 24 hours if no irritation appears.
- Test again on a slightly larger area if the first test is clear.
- Use your shampoo cautiously the first few times on your scalp.
- Stop using immediately if you notice discomfort or irritation while washing.
Always start with a patch test. It’s the safest way to avoid bad reactions.
Troubleshooting Common Problems with Homemade Shampoo
Hair feels greasy after using natural shampoo when there’s too much oil. You might also not have rinsed your hair well enough. Both can make your hair feel oily and heavy.
Dryness often happens when the shampoo strips away natural oils or has harsh ingredients. If your shampoo doesn’t lather well it may lack gentle cleansers.
Sometimes it needs to be diluted with water to work better. This helps it spread and rinse more easily.
Scalp irritation can come from ingredients like essential oils or herbs used in high amounts. Overusing fragrance oils or leaving shampoo on too long also causes itchiness and redness. Adjusting your recipe or how you apply it can stop these problems quickly.
Here’s a troubleshooting checklist for common symptoms and fixes:
- Greasy hair: reduce oils like jojoba or rinse longer with warm water.
- Dry, brittle hair: add hydrating ingredients, like aloe vera or argan oil.
- Little or no lather: dilute shampoo with water before use to boost suds.
- Residue feels sticky: rinse thoroughly and use less thickening agents.
- Scalp irritation: cut back on essential oils or switch to milder ones.
- Itchy scalp: massage gently and avoid harsh scrubbing during shampooing.
- Fragrance too strong: reduce essential oil drops, max 10 drops per 8 oz shampoo.
Shake your shampoo bottle before use. It helps mix ingredients evenly. Rinse your hair with warm water for at least 30 seconds.
Let the water flow over your scalp and hair evenly. Warm water helps loosen dirt and oil for a cleaner rinse. This helps remove all residues carefully without stripping moisture.
After rinsing shampoo, apply natural conditioner or a few jojoba oil drops. These help lock moisture into your hair strands. It keeps hair soft and less frizzy.
Leave the conditioner or oil on for 1 to 2 minutes. Then rinse with cool water to close the hair cuticles.
This step helps your hair shine and stay smooth. This step stops dryness and keeps hair smooth.
Watch how much essential oil you add. Overuse causes irritation and overpowering smell. For beginners, try 5 drops per 8 ounces of shampoo.
Test on a small scalp patch first to avoid reactions. Always dilute your shampoo when it feels too harsh or doesn’t rinse well.
Shelf Life, Storage, and Preservation of Natural Shampoos
Homemade shampoo usually stays fresh about 7 to 10 days without preservatives. You can store it in the fridge to extend its life up to one month. Chilling slows bacterial growth, especially because homemade shampoo contains water.
Keep your shampoo in a clean container with a tight lid. This stops germs and air from spoiling it faster. Airtight containers work best.
Avoid storing shampoo near heat or sunlight since warmth invites bacteria and molds to grow. Make small batches that you can finish within a week or two.
You can add natural preservatives like essential oils to help. But they aren’t strong enough alone for long-term storage. Oils such as tea tree, rosemary, or lavender have antibacterial properties and add scent.
Mix about 10 to 20 drops per 8 ounces of shampoo. This adds some protection but doesn’t replace refrigeration or quick use.
Strong natural preservatives can help your shampoo last longer. Grapefruit seed extract is one option. Geogard 221 is a cosmetic-grade choice.
These cost a bit more but keep your shampoo safer longer. Follow the product instructions for the right amount to add.
Don’t add too much water when mixing your shampoo. Extra water invites mold and bacteria faster. Instead, use distilled or boiled water cooled to room temperature.
Make sure your hands and tools stay very clean. This stops germs from getting into the shampoo. Clean tools help keep it fresh.
Adding natural oils makes your shampoo more moisturizing. Oils add moisture your hair needs. They work well in DIY shampoos.
But oils can shorten how long your shampoo lasts. So make smaller amounts to avoid waste. Check your shampoo every time before you use it.
A sour or strange smell means the batch is bad. Toss it to stay safe.
DIY Shampoo Bars: An Alternative to Liquid Shampoo
Shampoo bars offer a solid and eco-friendly way to clean hair without plastic bottles. These bars use gentle ingredients similar to soap. They are made to be mild on hair.
They also care for your scalp. Making your own shampoo bars lets you control what goes into them while cutting waste.
Key Ingredients for Shampoo Bars
Shampoo bars usually start with a soap base that’s gentle enough for hair. Castile soap or melt-and-pour soap bases are good picks. Adding nourishing ingredients like honey, coconut oil, or shea butter helps keep hair soft and moisturized.
A splash of apple cider vinegar can help balance pH. Dried herbs can reduce scalp flakes too. Both work well for hair care.
Essential oils add scent and scalp benefits. But use just a few drops to avoid irritation. Avoid harsh detergents or too much alkali, which dry hair out.
Molding and Curing Process
Making shampoo bars needs careful molding and curing to perform well and last. Use silicone molds or any clean plastic container that lets you shape the bars evenly. After pouring the soap mixture, let it sit at room temperature for 24 hours to harden.
Once firm, pop the bars out of their molds. Let them cure on a rack in a dry spot. It should be ventilated well.
This process takes about 3 to 4 weeks. This drying time helps harden the bars and prevents them from dissolving too fast in water.
- Mix melted soap base with your chosen oils and additives.
- Pour mixture into clean silicone molds or lined containers.
- Allow bars to harden uncovered at room temperature for 24 hours.
- Remove bars gently from molds to avoid cracking.
- Place the bars on a dry rack with airflow around them.
- Let bars cure for 3 to 4 weeks, checking for hardness.
- Store bars properly after curing to keep them firm.
Keep shampoo bars away from direct water when stored to extend their life.
How to Use and Store Shampoo Bars
To wash hair, wet both your hair and the bar. Rub the bar between your hands or directly on your hair to create a light lather. Massage the lather into your scalp, then rinse thoroughly with warm water.
Store shampoo bars in a dry, ventilated soap dish or container between uses. Avoid leaving them in standing water or on damp surfaces, which can make them soften prematurely. Dry bars last several months if cared for well.
Step-by-Step Action Plan to Start Making Natural Shampoo
Follow this plan to make your first batch of shampoo with confidence. It breaks down the process into easy steps you can follow over a few weeks.
- Day 1: Gather your ingredients. Choose gentle surfactants, oils, and essential oils suited to your hair type.
- Day 2: Mix a small test batch of shampoo. Use the recipe that matches your hair, and note the texture and smell.
- Day 3: Try the shampoo on a small patch of scalp. Watch for any irritation over 24 hours.
- Week 1: Use your shampoo regularly every 2 to 3 days. Observe how your hair feels and looks after washing.
- Week 2: Adjust your recipe if needed. Add more moisturizing oils for dryness or more cleansing agents for oiliness.
- Week 3: Experiment with essential oils to customize scent and scalp benefits. Keep track of results.
- Week 4: Store your shampoo in a cool, dry place. Check for changes in smell or texture to ensure freshness.
- After 1 month: If your shampoo works well, scale up your batch size for regular use. Keep testing new variations occasionally.
Frequently Asked Questions
Can I Use Natural Shampoo on Color-Treated Hair?
Yes, natural shampoo is gentle and safe for color-treated hair. It won’t strip color like harsh chemicals do.
Test it first. Make sure it keeps your color well.
How Often Should I Wash My Hair with Natural Shampoo?
Washing with natural shampoo 2 to 3 times a week is best for most hair. It keeps natural oils healthy without over-drying your scalp, which can happen with daily washing.
Is It Okay to Add Conditioner After Using Homemade Natural Shampoo?
Yes, using conditioner after natural shampoo helps maintain moisture and smoothness. Natural shampoos can clean well but may need extra hydration for some hair types.
Can I Store Natural Shampoo in a Plastic Bottle?
You can store it in plastic, but glass is better to avoid chemical leaching. Dark glass helps protect essential oils from sunlight, keeping your shampoo fresh longer.
Does Natural Shampoo Foam as Much as Commercial Shampoo?
Natural shampoos generally foam less because they lack strong synthetic detergents. Foaming isn’t a sign of cleaner hair, so low foam still means effective cleaning.
How Long Does It Take to See Results After Switching to Natural Shampoo?
You may see results in 2 to 4 weeks as your scalp adjusts. Some people experience an initial transition phase before hair feels balanced and healthy.
The Bottom Line
Making your own natural shampoo is simple with the right steps. You get to control what goes in and care for your hair gently. Pick one recipe today and start mixing your shampoo at home.


