How to Dry Curly Hair: 8 Proven Methods for Defined, Frizz-Free Curls
How to dry curly hair without causing frizz or damage is key. The best way is to handle curls gently while reducing heat exposure. Start by squeezing hair with a microfiber towel to remove excess water quickly.
Next, avoid rubbing your curls rough with a towel to prevent breakage. Using low heat or air drying helps keep curls defined and less frizzy. Always keep drying tools at least 6 to 8 inches away from your hair.
Waiting is key since curls need time to dry properly. Air dry your hair for at least 15 minutes before you use a diffuser. This helps styling products lock in and shields your curls from heat damage.
Key Takeaways
- Use a microfiber towel to absorb water faster and reduce drying time.
- Never rub curly hair with a towel; instead, gently squeeze out moisture.
- Keep the blow dryer on low heat and hold 6, 8 inches away from hair.
- Air dry curls for at least 15 minutes before diffusing for better hold.
- Stop blow-drying when hair is 80 to 90 percent dry to avoid damage.
- Scrunch out any gel cast only after hair is completely dry.
1. Best Ways to Dry Curly Hair Without Damage

Letting your curly hair air dry is the safest way to avoid frizz and damage. Start by gently squeezing water with a microfiber towel. An old cotton T-shirt works well too.
Avoid rubbing your curls roughly to reduce frizz. Avoid rough drying or rubbing, which causes frizz and breakage.
Air dry for at least 15 minutes before using any heat tool. Stopping when your hair is about 80 to 90 percent dry helps protect curls. At this stage, your hair still holds some moisture, which keeps curls defined and soft.
Use a diffuser after air drying for best results. Set heat between 55 and 65 degrees Celsius. Keep the setting low to protect your curls.
Hold the diffuser 6 to 8 inches from your hair. This helps curls dry evenly without direct heat.
Avoid pressing the diffuser tightly against curls. This cuts down drying time and reduces frizz compared to full air drying.
Using low heat and a diffuser evenly distributes warm air around curls. That prevents moisture loss and protein damage, which worsens curl texture. Diffusing also improve volume and shape, giving your curls bounce and definition.
You can stop drying when your hair is 80-90% dry. Let the rest air dry naturally without touching it. This avoids heat damage while drying curls.
This keeps your curls from breaking or puffing up into frizz. Avoid over-drying, which dries hair out and ruins your curl pattern.
For days without washing, try dry shampoo made for curly hair. It soaks up oil and boosts volume gently. It won’t mess up your curl pattern.
To refresh curls while drying, make loose buns or braids. These styles keep curl shapes safe from heat damage. They help curls look fresh longer.
2. Choosing the Right Tools and Products for Drying
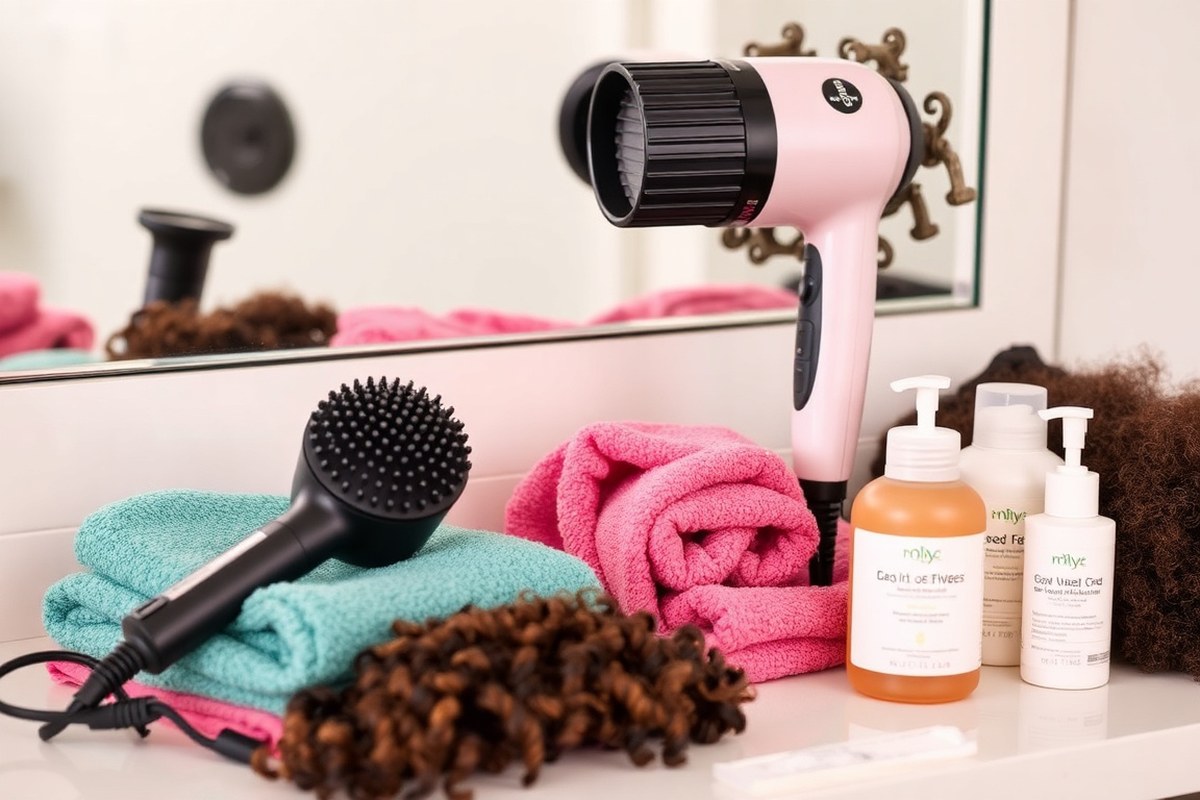
Using the right towel is key to keeping your curls frizz-free. Microfiber towels or cotton T-shirts soak up more water than regular towels. They absorb three times as much water as normal cotton towels.
This helps dry your curls better without causing frizz. This cuts your air-drying time by nearly half and prevents rough friction that breaks curl shape. Gently squeeze out excess water rather than rubbing, to protect your hair’s natural pattern.
When you use a hairdryer, attach a diffuser designed for curly hair. The best diffusers have wide, rounded fingers that lift curls without disturbing clumps. Hold the dryer about six inches from your hair to avoid heat damage and frizz.
Wait 15 minutes before using your diffuser to dry curls. This lets your styling products set properly. It also helps curls start shaping on their own.
Styling products make a big difference while drying curly hair. Apply leave-in conditioner, curl cream, or gel on wet hair right after washing. These products lock in moisture and reduce frizz during heat exposure.
For fine curls, lighter creams or gels work well. Look for products containing natural oils or humectants, which keep strands hydrated through the drying process.
- Microfiber towels or cotton T-shirts for gentle water absorption
- Diffusers with wide, rounded fingers for curl lifting
- Hair dryers with adjustable heat settings to avoid high heat
- Leave-in conditioners to hydrate and soften curls
- Curl creams or gels with natural oils or humectants
- Hold hair dryer 6 inches away during diffusing
- Air-dry at least 15 minutes before using heat
Avoid using thick cotton bath towels and high heat settings on your dryer. They cause frizz and can break delicate curls.
After diffusing, keep your hair slightly damp, about 90% dry, to maintain softness. Then let it finish drying naturally for the best bounce and definition.
Wait at least 15 minutes of air drying before using a diffuser. This helps curls form and reduces frizz.
3. Step-by-Step Guide to Plopping for Curl Definition
Plopping is a zero-heat drying technique that helps define curls and reduce frizz. Use a soft cloth to wrap your damp hair on top of your head. Leave it there to dry for a while.
This helps reduce frizz and damage. This shrinks drying time and keeps curls smooth and shaped.
Materials Needed for Plopping
Choose a microfiber towel or a soft cotton T-shirt for plopping. These materials reduce friction, which helps prevent frizz and breakage. Avoid regular bath towels because they can rough up your curls and cause frizz.
You’ll also want something to keep your hair wrapped securely, like a scrunchie or hair clip. Thick or long hair needs a bigger microfiber towel. It holds all your curls better without squeezing them too tight.
How to Wrap Hair Properly
Begin with clean hair that’s washed and conditioned. Make sure it’s damp but not soaking wet. Lay your microfiber towel or T-shirt flat on a clean surface, then flip your hair forward and place your curls in the towel’s center.
Bring the towel sides around your head. Twist the ends tightly, lifting them up. This helps secure your curls while drying.
Secure the twist at the back or side of your head with a scrunchie or clip. The curls should be piled on top without being crushed or flattened.
- Lay the towel or T-shirt flat on a surface.
- Flip your damp hair forward onto the center of the cloth.
- Gather the edges of the cloth around your hair.
- Twist the cloth together with your hair inside.
- Lift the twist and wrap it back over your head.
- Secure the wrapped cloth with a scrunchie or clip.
- Adjust for comfort to avoid tight squeezing or pressure.
Timing and When to Remove the Cloth
Leave your hair wrapped for 15 to 30 minutes to cut drying time in half. This short plopping period boosts curl definition and reduces frizz. Leaving it longer risks curls drying flat or becoming misshapen.
After plopping, remove the cloth gently. Let your hair air dry fully without touching it to avoid frizz. You can combine plopping with diffusing after unwrapping if you want to dry faster.
4. Diffusing Curly Hair: How to Dry Faster Without Heat Damage
Use a diffuser on low heat and low speed to dry curly hair faster without damage. Keep the dryer moving and lift curls at the roots for volume. This method keeps curls defined and soft while cutting drying time.
Best Diffuser Settings for Curly Hair
Set your diffuser to low heat to avoid heat damage. Use low speed to prevent frizz and maintain curl shape. Many dryers have six heat and speed settings, so choose the gentlest you can.
Low heat keeps your curls safe, especially if you have fine or fragile hair. Use low speed to avoid disrupting your curl pattern while still moving enough air to dry.
Proper Diffusing Technique Section by Section
Work section by section to give every curl a chance to dry evenly. Use a scrunching motion with your hands while holding your curls in the diffuser bowl. Gently push the diffuser upward toward your roots.
Wiggle the diffuser slightly to stop any spot from heating too long. Hold your head forward and cup curls in the diffuser to lock in shape. Repeat with all sections until your hair feels mostly dry.
- Plug in your blow dryer and attach the diffuser.
- Set the dryer to low heat and low speed.
- Flip your hair forward to let curls fall naturally.
- Place a curl section gently into the diffuser bowl.
- Push the diffuser upward toward your roots, scrunching curls.
- Wiggle the diffuser slightly to avoid excess heat on one spot.
- Move to the next section and repeat until hair is mostly dry.
- Finish with your head up to diffuse roots for volume.
When to Stop Diffusing for Soft Curls
Stop diffusing when your hair is about 80 to 90 percent dry. Drier curls will feel soft but not crunchy or stiff. Touch your curls and stop if they feel warm to avoid heat damage.
Switch to air drying once most moisture is gone to prevent extra heat exposure. Gently scrunch curls with your hands afterward to reveal softness and bounce. This keeps curls defined and prevents frizz or stiffness.
5. Preparing Curly Hair Before Drying for Best Results
Choose a sulfate-free shampoo to keep curls hydrated and healthy. Pair it with a silicone-free conditioner with a pH between 4.5 and 6.5 to avoid buildup. These choices help maintain your hair’s natural moisture and shape.
Detangle your hair while it’s wet to prevent breakage. Use a wide-tooth comb and gently work through tangles from the tips, moving upward. Avoid brushing dry curls, as it can stretch and cause up to 30% breakage.
Applying products right after washing is key. Start with a leave-in conditioner on soaking wet hair to lock in moisture. After washing, apply curl cream or gel to your hair.
These products define your curl pattern without making it heavy. Use a small amount to avoid weighing down your strands.
- Wash hair with a moisturizing sulfate-free shampoo.
- Condition with a silicone-free formula to keep curls soft.
- Detangle using a wide-tooth comb on wet hair only.
- Apply leave-in conditioner immediately when hair is dripping wet.
- Layer curl cream or gel after the leave-in conditioner.
- Hand-shape curls gently without touching too much while drying.
- Wait until hair is completely dry before adding extra product.
Stay gentle during every step to avoid stretching and breakage. Applying products while hair is wet helps lock in curls’ natural bounce. Removing your hands after product application until 100% dry keeps frizz low.
Overloading your curls with too much product can cause crunchiness and lengthen drying time.
6. How to Air Dry Curly Hair Without Frizz
Air drying curly hair can take anywhere from two to six hours. The exact time depends on your hair’s length, thickness, and curl tightness. Thicker or longer curls dry slower, so patience is key.
To keep frizz away, avoid touching your hair while it dries. Let your curls hang loose without scrunching or manipulating them until they’re almost dry. Constant touching lifts the cuticle and causes frizz.
Right after washing, scrunch your hair upward toward your scalp. Use a microfiber towel or a cotton t-shirt to do this gently.
This step improve your curl pattern without roughing up the strands. After scrunching, let your hair go.
You can lift wet curls at the crown using Curl Keeper’s Roller Jaw Clamps. These clamps add volume as you air dry without damaging your hair. They keep hair in place and help curls dry in a bouncy shape.
Avoid scrunching or using your fingers once drying starts. This stops breakage and frizz from forming.
The curls set better when left alone. Volume stays natural instead of flattened or puffy.
While waiting, do something else so you don’t keep checking or touching your hair too soon. You can boost volume by gently lifting your roots with your fingers near the end of drying. It takes just a few seconds and won’t ruin the curls.
Using a leave-in conditioner or light curl cream before air drying helps curls stay defined longer. Apply a dime-sized amount when hair is soaking wet, then scrunch gently once. These products reduce dryness and frizz as curls dry slowly.
7. Common Drying Mistakes and How to Fix Them
Frizz often happens when you rub your curls with a regular towel. Rubbing roughs up the hair cuticle, removing moisture and creating friction.
Wet curls are extra fragile. So this damage makes your hair look frizzy and dry once it’s fully dry.
Instead of rubbing, gently squeeze your curls with a microfiber towel. You can also blot them softly using a special curl towel. This helps reduce frizz and breakage.
Microfiber towels absorb three times more water than cotton towels without the harsh friction. This helps keep curls smooth and soft, making them easier to style later.
Flat or crunchy curls usually come from too much product or heat during drying. Crunchiness means your hair has product buildup or you dried curls at too high heat. Flat roots happen when you pull curls too tight.
Heavy creams can also weigh down your roots. This stops your curls from looking full.
- Use a microfiber cloth to scrunch damp curls without rubbing.
- Avoid heavy products near your scalp to prevent flat roots.
- Diffuse on low heat and low speed to keep curls soft.
- Apply a light leave-in conditioner before drying to maintain curl shape.
- Plop your curls for 10 to 20 minutes to add bounce without crunch.
- Finger-detangle curls after drying to loosen any stiffness.
The common mistake of rubbing your hair with a cotton towel damages the cuticle layer. This damage acts like tiny cracks that let moisture escape, triggering frizz. Curl towels or microfiber cloths use softer fibers that protect your curls.
To fix flat curls, add volume by loosening the roots with your fingers. For crunchy curls, reduce the product amount by half or skip heavy gels. Using a diffuser at a 70 to 80 degrees Fahrenheit setting keeps curls dry but flexible.
8. Choosing the Best Drying Method for Your Hair Type and Season
Match your drying method with your hair’s porosity, thickness, and the season. Porosity changes how water stays in curls.
Thick and thin curls react differently to heat and air. Seasonal changes shift humidity and temperature, affecting frizz and dryness.
Hair Porosity and Drying Recommendations
Low-porosity curls hold water on the surface, so they take longer to dry. Use gentle heat like a diffuser on low settings or do mostly air drying. Avoid heavy products that sit on the hair and trap moisture.
High-porosity curls absorb water quickly but lose it fast. They dry best with microfibre towels followed by a diffuser on medium heat.
This method helps lock moisture without over-drying the strands. You’ll see less frizz this way.
Medium porosity hair can handle most drying methods. Air drying or diffusing works well. Adjust your product choices to keep curls soft without weighing them down.
Best Methods for Thick vs Thin Curls
Thick curls usually take longer to dry. Use a powerful dryer like the BaBylissPRO Nano Titanium with ionic settings. It cuts drying time from an hour to around 30 minutes, protecting curls from heat damage.
Thin curls dry much faster and can frizz easily. Air drying or diffusing on low heat avoids damage.
Plopping for 15 to 20 minutes speeds drying without roughing up curls. Thin hair rarely needs high heat.
| Hair Type | Drying Method | Heat Level | Drying Time |
|---|---|---|---|
| Low Porosity | Diffuser, Air Dry | Low to medium | 45-60 min |
| High Porosity | Microfibre Towel, Diffuser | Medium | 30-45 min |
| Thick Curls | Powerful Ionic Dryer | Medium to high | 30 min |
| Thin Curls | Air Dry, Diffuser | Low | 15-20 min |
Use this table to pick methods and heat levels. Thick curls tolerate more heat with faster dryers.
Thin curls need gentler care. Matching porosity and hair density with drying style keeps curls healthy.
Seasonal Adjustments for Curl Drying
Dry winter air can make curls dry and brittle. Use a diffuser with a heat protectant to lock in moisture.
Add a leave-in conditioner before drying to avoid breakage. Avoid air drying in cold, dry months.
Summer humidity causes frizz by making curls swell. Air drying indoors or using a diffuser on low heat works best.
Avoid heavy oils that attract moisture and cause limp curls. Use anti-frizz sprays before drying.
Spring and fall weather can be unpredictable. Check humidity levels.
For humid days, limit drying time and avoid harsh heat. On drier days, use warm diffusing and deep conditioning more often.
Tip: Always test your dryer’s heat on a small section to prevent heat damage and frizz.
Step-by-Step Action Plan for Drying Your Curly Hair
Follow these steps to dry your curly hair safely and boost your natural curls.
- Right after washing: Gently squeeze excess water with a microfiber towel or cotton T-shirt. Your hair should feel damp, not dripping.
- Within 5 minutes: Apply a leave-in conditioner or curl cream evenly. When your curls feel soft and hydrated, you’re good to go.
- Next 10 minutes: Use the plopping method by wrapping your curls in a soft T-shirt. Your curls should look more defined and less frizzy when you unwrap.
- For faster drying: Use a diffuser on low heat and speed. Stop when hair feels mostly dry but not stiff.
- After drying: Avoid touching or combing your curls. They should stay springy and separated, not flat or crunchy.
- Daily care: Keep hair hydrated with a light curl refresher spray. Your curls will stay fresh and bouncy between washes.
Frequently Asked Questions
How Do I Know When My Curly Hair Is Dry Enough to Stop Diffusing?
Stop diffusing once your hair is about 90% dry. This helps avoid over-drying and frizz.
Can I Dry My Curls Overnight Without Causing Damage?
Yes, you can loosely tie your hair in a silk scarf or bonnet overnight. This prevents friction and keeps curls defined by morning.
Should I Use a Towel to Dry Curly Hair Before Styling?
Avoid regular towels; use a microfiber towel or cotton T-shirt instead. These materials reduce frizz and hair breakage.
How Often Should I Deep Condition My Curls If I Air Dry Frequently?
Deep condition curly hair once a week if you air dry often. It keeps hair moisturized and prevents dryness from air exposure.
Is It Better to Dry Curly Hair Upside Down for More Volume?
Yes, drying hair upside down increases volume by letting curls lift naturally. Use a diffuser while flipping your head for best results.
Can Applying Leave-In Conditioner Before Drying Help Reduce Frizz?
Applying leave-in conditioner before drying helps lock moisture and reduce frizz. It also makes curls softer and easier to manage.
The Bottom Line
Drying curly hair carefully makes your curls pop and cuts down frizz. Try one new drying step tomorrow to see the change. Treat your curls gently and enjoy the natural bounce they bring.