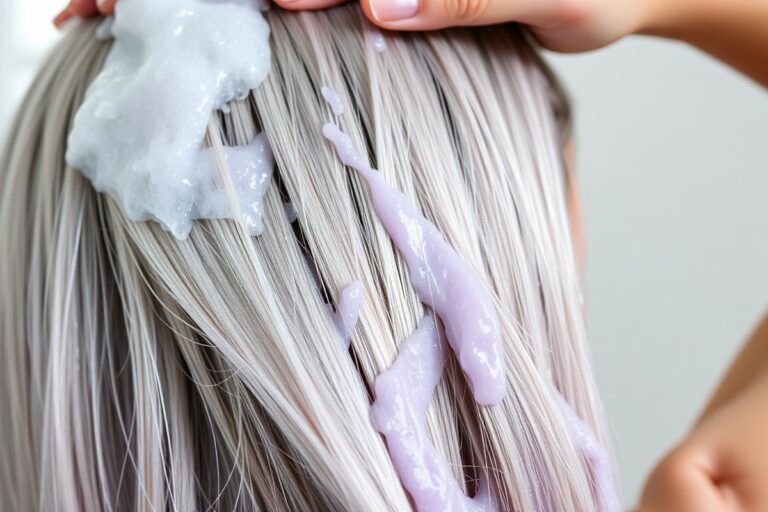
How to Color Your Hair at Home Like a Professional: Simple Steps for Perfect Results
Wondering how to color your hair at home like a professional? The key is to prepare well, use the right products, and follow clear steps.
Taking your time and paying attention to detail will make all the difference. Start by choosing a hair dye suited to your hair type and desired color change.
Prepare your hair and work area well to prevent mess and patchy color. Do a patch test two days ahead to see if you have allergies. Use hair that hasn’t been washed for at least 24 hours to keep color longer.
Set aside about 1 to 1.5 hours on the day you color your hair. Follow timing instructions on the dye package exactly for even color development. Clean up safely right after to protect your skin and surfaces.
Key Takeaways
- Do a patch test 48 hours before applying hair dye.
- Avoid washing hair 24 to 48 hours before coloring for better adhesion.
- Set aside 1 to 1.5 hours for the entire home coloring process.
- Choose hair dye that matches your natural hair condition and color goal.
- Prepare your workspace with towels and gloves to protect skin and surfaces.
- Follow dye timing instructions carefully for even color and less damage.
How to Color Your Hair at Home Like a Professional

Getting an even, vibrant color at home takes a clear step-by-step plan. One key trick is to start dyeing your roots first. Roots are the least porous and need more time for the color to fully process.
Then, apply the dye from root to ends for uniform coverage. Checking the color development during the wait helps you avoid over- or under-processing.
Using enough dye is important. Not using enough can leave patchy spots. Too much won’t improve saturation but won’t hurt either.
Sectioning your hair makes applying easier and more accurate. For extra shine, use an in-shower gloss conditioner after coloring. It smooths your hair and lasts up to 10 days.
- Divide your hair into 4 to 6 sections using clips. This helps you work with manageable parts for even application.
- Mix your dye precisely as the instructions say. Always follow the box directions exactly for best results.
- Apply dye to your roots first. Roots need longer processing because they absorb color more slowly than the ends.
- Work the dye down from the roots to the mid-lengths and then the ends. Use a wide-tooth comb for better blending.
- Check your color development at the time the box recommends. To test, wipe a small strand with a damp cotton ball to see the true color.
- Rinse your hair thoroughly with lukewarm water once the color develops fully. Avoid hot water, which can strip color.
- Use a color-safe conditioner or gloss treatment after rinsing. This locks in color and adds shine.
Apply color only at the roots first for some hair types. Then blend it down your hair for a natural look. Don’t put dye on damaged or very dry ends.
This keeps previous highlights looking bright and fresh. Test on a small hair section before coloring all of it. This confirms the shade suits your hair well.
Choosing the Right Hair Color and Dye Type

Choose a hair shade that suits your skin tone to avoid looking washed out. Warm complexions match well with golden, honey, or copper tones.
Cool tones fit better with ash, platinum, or mocha shades. Neutral skin tones can handle most colors but lean on natural tones for the easiest match.
Picking the right hair dye type depends on how bold or lasting you want your change. Permanent dye lasts through hair growth and requires ammonia and developer. Semi-permanent dye stains the hair without harmful chemicals.
It fades after about 4 to 6 weeks. Natural dyes like henna and coffee are gentler on hair. They give fewer color choices and less precise results.
| Dye Type | Key Features | Typical Duration | Best For | Considerations |
|---|---|---|---|---|
| Permanent | Uses ammonia + developer, changes color until growth | Lasts 4+ weeks, grows out | Permanent color changes | Can damage hair, needs careful application |
| Semi-Permanent | No ammonia, stains hair | 4-6 weeks, fades gradually | Try new shades without long commitment | Less damage, need frequent touch-ups |
| Natural/Herbal | Plant-based (henna, amla, coffee) | Varies, often fades faster | Gentle color changes, sensitive scalps | Limited color range, uneven results possible |
Look at your natural hair color before picking a dye shade. Going more than two shades lighter or darker risks uneven tones.
Start close to your base and adjust gradually for a natural look. Natural dyes suit those wanting gentle changes or avoiding chemicals but require patience and repeated applications.
Test a small skin patch 48 hours before coloring to check for allergic reactions.
Mixing the right shade with the right dye type can keep your hair healthy and vibrant. Permanent dyes deliver stronger color but carry more risk of damage. Semi-permanent dyes allow experimentation and less commitment.
Natural dyes work well if you have sensitive skin. They also give a mild tint without using chemicals.
Preparing Your Hair and Workspace for Dyeing
Preparing your hair and workspace helps prevent accidents. It also ensures your color goes on smooth. This step makes dyeing easier.
Clean hair, a clutter-free area, and safety tests reduce risks and improve results. These steps save time and protect your skin and home from stains.
Hair Washing and Conditioning Prep
Use a clarifying shampoo one day before coloring. This removes buildup and oils but keeps your natural oil balance. It helps protect your scalp.
Avoid washing your hair too close to the dye day. Washing too soon can leave hair fragile or affect color absorption.
Use a mild conditioner to keep hair soft without heavy residue. Avoid deep conditioners or oils right before dyeing.
Assembling Your Dyeing Station
Set up your dyeing space to keep hair dye off furniture and floors. Cover surfaces like counters or tables with old towels or plastic sheets.
Get all your tools ready before dyeing. You’ll need gloves, clips, a wide-tooth comb, and an old brush or applicator.
Set a timer and have a mirror too. This prevents interruptions during the process.
Wear old clothes or a cape, since hair dye can stain fabric quickly and permanently. Have paper towels handy to wipe spills immediately.
Performing Safety Patch and Strand Tests
Do a patch or strand test at least two days before dyeing. This helps you avoid allergic reactions or color surprises. This checks for allergic reactions and confirms you like the resulting color.
Put a small amount of mixed dye behind your ear or on your inner elbow. Leave it for 48 hours to check for irritation.
For a strand test, apply dye to a small hair section. Watch to see if the color turns out right.
Stop using the dye if you see redness, itching, swelling, or weird color results. Read the instructions or talk to a pro before you use it again.
- Wash your hair with clarifying shampoo 24 hours before dyeing.
- Dry and gently detangle your hair before you begin.
- Protect your workspace by covering surfaces with towels or plastic.
- Gather your gloves, applicator, clips, timer, and mirror in one place.
- Wear old clothes that you don’t mind staining.
- Perform a patch test by applying dye on a small skin area, wait 48 hours.
- Do a strand test on a small hair section to check color results.
- Review tests results; skip dyeing if skin reacts or color is off.
Sectioning and Applying Hair Dye for Even Coverage
Splitting your hair into sections helps you cover every strand evenly. It also stops you from missing spots and keeps your hands steady. Start by applying dye to the roots.
They take longer to process. Work on the roots first for even color.
Roots tend to show new growth and need the most attention. Applying dye there first makes sure the color is consistent all over.
Use clips or hair ties to hold sections out of the way after you dye them. This way, your dye won’t mix or drip onto already colored hair.
You’ll want to saturate each section fully with dye. Dye that is thin or patchy won’t give a even color. Be generous, and check under lights if you can to see if any spots look missed.
- Divide your dry hair into four equal sections.Use a comb to part hair down the middle. Do this from forehead to nape. Then part ear to ear.
- Clip each section separately. This keeps hair out of the way as you work on one part at a time.
- Start with the most visible grey or root areas. Apply dye with a brush, covering these spots first since they need longer processing time.
- Work on one section at a time. Apply dye to the roots, then pull it through the length to the ends.
- Fully saturate each strand. Use enough dye to soak your hair to avoid patchiness.
- Clip the section away after dyeing it. This prevents mixing and helps the color set evenly.
- Repeat the process on remaining sections. Check your work under light for missed spots or thin coverage.
Timing Your Hair Coloring and Color Development
You should leave hair dye on your hair between 30 and 45 minutes for most colors. The exact time depends on your hair type and the color you want. Checking your hair color during this process helps avoid unwanted tones or uneven color.
Standard Processing Times by Dye Type
Permanent hair dye usually needs about 30 to 45 minutes to develop fully. Semi-permanent colors often require 20 to 30 minutes and wash out faster. Temporary colors usually sit on the hair for just 10 to 20 minutes.
Box dye instructions give a good starting point for timing. They are tested on common hair types.
Follow them for best results. Their recommended time reflects the usual balance between color development and hair damage risk.
Adjusting Time for Hair Texture and Color Goals
Finer hair tends to absorb color and lighten faster. So reduce processing by 5 to 10 minutes.
Coarse or dry hair may need the full time or a bit longer. Thick gray hair often needs extra time, especially at roots, to cover completely.
Only touching up roots? Use the usual timing on the box. This avoids over-processing your hair length.
For a full color change, start with the roots. Process them longer than the rest. Then apply dye to lengths and ends for less time.
- Fine hair: Cut 5, 10 minutes from box time
- Coarse hair: Use recommended time or add 5 minutes
- Gray hair: Start with roots for longer time
- Full color change: Process roots first
- Root touch-up: Follow box timing precisely
Pin and cover your hair with a shower cap to keep heat in. Warmth helps dye work better.
Keep time close to the label. But feel free to adjust slightly if you know your hair well.
How to Safely Check Color Development
Check your color about halfway through the processing time. Gently peel off a small section of dye.
Wipe the dye from the strand with a damp cloth or tissue. Look for even color and no unwanted orange or green tones.
Once you see the desired shade, rinse immediately to stop further processing. Avoid pulling or scratching at your scalp when checking, which can irritate your skin. Using a timer helps prevent leaving the dye on too long.
Checking your hair color too often can cause uneven processing and weaken strands.
Safe and Effective Hair Dye Removal and Cleanup
Rinsing your hair after dyeing is critical to keep hair healthy and stop irritation. You want water as warm as your skin feels comfortable, not hot. Hot water strips natural oils that protect your scalp and hair from damage and dryness.
Use gentle shampoo and conditioner made for color-treated hair. They help seal in color while soothing your scalp. Avoid regular shampoos or harsh cleansers because they can fade your new color fast.
Cleaning up dye spills quickly stops stains on your skin, clothes, and surfaces. Use oil-based removers or baby oil for skin. For fabrics, rinse immediately under cold water, then use stain remover before washing.
- Start rinsing with lukewarm water. Gently run water over your hair until it runs clear. This usually takes around 3 to 5 minutes. Avoid using hot water, which can damage your hair and irritate your scalp.
- Apply a color-safe shampoo. Choose a sulfate-free shampoo made for color-treated hair. Work shampoo gently into your scalp and hair. Then rinse well to remove leftover dye. Avoid stripping your hair.
- Use a conditioner for color-treated hair. Apply conditioner focusing on mid-lengths to ends. Leave the treatment on for 2 to 3 minutes. Rinse with cool water to seal cuticles. This helps lock in your color.
- Pat your hair dry gently. Use an old soft towel and gently press it against your hair. Avoid rubbing, which can cause breakage and frizz, especially right after coloring.
- Remove dye from skin immediately. Use a cotton ball with baby oil or an oil-based remover. Rub gently along the stained area to avoid irritating your skin.
- Clean surfaces and clothes quickly. Wipe spills with a damp cloth right away. For fabrics, rinse under cold water and treat stains with a stain remover before washing normally.
- Keep styling products off during the whole process. Styling agents can block dye absorption and cause uneven colors. Start with clean hair that has no products. Wait until your hair is dry and set. Then use your styling products.
Maintaining and Protecting Your New Hair Color
After coloring your hair, wait at least 48 hours before washing it. This period lets the color pigments fully set into the hair shaft, helping it last longer. Washing too soon can wash out the dye and dull your new shade.
How often you wash depends on your hair type and lifestyle. Try to wash every two to three days or less to keep color intact.
When you do wash, use shampoos made for color-treated hair. These products are gentler and help maintain shine.
Always condition your hair after shampooing. The conditioner in your dye kit seals the cuticle.
It locks in color and adds shine to your hair. You can also use a clear gloss treatment step to finish for extra shine and protection.
- Use lukewarm water instead of hot to prevent color fading.
- Apply a heat protection spray before blow drying or styling with heat tools.
- Limit heat styling to avoid drying out hair and fading color.
- Wear hats or use UV protectant sprays outdoors to block sun damage.
- Avoid harsh shampoos with sulfates or strong detergents.
- Use a gentle, color-safe shampoo and conditioner.
- Try a weekly deep conditioning treatment for added moisture.
Heat is your hair’s enemy after coloring. Excessive heat dries out strands and can fade color faster.
Always spritz heat protection spray before blow drying or using curling irons. Use moderate heat and keep styling sessions short.
Sun exposure causes hair to lose its color. UV rays break down dye molecules, leading to fading and dullness. Wear a wide-brimmed hat when outdoors for long periods.
Spray UV protector on your hair too. This adds a shield against harmful rays.
Healthy hair holds color better and looks more vibrant. Keep your strands hydrated by conditioning regularly.
Avoid washing hair right before your next coloring session to keep color fresh and avoid damage. Many people find they can safely recolor every two months if their hair is strong.
Troubleshooting Common Hair Color Problems at Home
Uneven, brassy, or unexpected hair colors happen even to careful DIYers. Fixing these problems quickly can save your hair and your look. Some fixes are easy at home, but serious issues need a professional’s touch.
Fixing Patchy or Uneven Color
Patchy hair usually means uneven application or missing spots. To fix this, gently retouch the missed areas with the same dye mix. Use a small brush to blend the color into the rest of your hair.
For more stubborn unevenness, try applying a color-depositing conditioner or dye glaze. These products help even out the tone without soaking your hair in harsh chemicals again.
- Use a precise brush for touch-ups on missed spots
- Apply color-depositing conditioner evenly on dry hair
- Leave the conditioner on for 5-10 minutes before rinsing
- Rinse with cool water to help seal color
- Wait at least two weeks between full re-dyes to avoid damage
Be careful not to overlap fresh dye on already colored hair to avoid patchy buildup. A thin, even layer delivers a smoother finish.
Neutralizing Brassiness and Odd Tones
Brassy tones look orange or yellow and usually show up after bleaching or lightening. Toners with blue or purple pigments can cancel out these warm tones nicely. Use a toner with low-volume developer (10 volume or less) for a mild fix.
Apply toner on damp hair after shampooing. Leave it in for 5 to 20 minutes, checking color every 5 minutes to avoid over-toning. Rinse thoroughly and condition well.
- Choose a purple toner for yellow brassiness
- Pick a blue toner to fight orange tones
- Use low-volume developer (10 volume) with toner
- Apply to clean, damp hair
- Watch the timer, checking progress every 5 minutes
- Rinse with cool water to close the cuticle
- Always follow toner package instructions carefully
Keep in mind that toners fade with washing. You may need to repeat toner every 2 to 4 weeks. This keeps your color looking fresh.
Applying toner too long or too often can damage hair or cause unwanted hues.
Recognizing When to Get Professional Help
Complex color problems often require a colorist’s skill. Uneven color on very dark or bleached hair is a common issue.
A professional can fix these problems well. Professionals can safely lighten or rebalance your hair without causing breakage or too much damage.
Your hair might be too damaged or very dry after DIY color fixes. You may notice it breaks easily.
Visiting a salon is a good idea in this case. Also, major color changes or correcting multiple color layers require pro techniques and products.
- Severe patchiness across large sections
- Persistent brassiness after several tonings
- Hair feels brittle, breaks, or looks fried
- Major color changes needing lightening then re-coloring
- Chemical burns or scalp irritation during or after dyeing
- Unwanted colors that don’t improve with home products
Visiting a hair professional may save your hair in the long run. They can recommend treatments, deep conditioning, and custom color blends to restore balance.
Step-by-Step Action Plan for Your Best DIY Hair Color
Follow these clear steps to get a great hair color at home. Each step helps you check your success as you go.
- Before you start: Choose your dye and patch test on your skin. Wait 48 hours to confirm no irritation appears.
- Day 1: Prepare your area with towels and gloves, and section your hair. Make sure every piece is separated clearly to cover each part evenly.
- During application: Apply dye from roots to ends using a brush. Check that your hair looks fully coated with no missed spots.
- After application: Set a timer according to the dye instructions, usually 25-45 minutes. Check color development by wiping a small strand with a damp cloth.
- Immediately after: Rinse with cool water until it runs clear and use a color-safe conditioner. Your hair should feel softer, not dry or sticky.
- Week 1: Avoid washing hair every day to keep the color vibrant. Use dry shampoo if you need to skip a wash.
- Week 2: Apply a deep-conditioning treatment once to strengthen hair and maintain shine. Look for less fading and improved texture.
- After 4 weeks: Touch up roots if needed following the exact same careful steps. Check that your color matches well and blends smooth.
Frequently Asked Questions
Can I Mix Different Hair Dye Brands at Home?
Mixing brands is not recommended since formulas vary. It can cause uneven color or damage your hair. Stick to one brand for the best results and consistency.
How Often Should I Do a Full Color Versus a Root Touch-Up?
A full color is best every 8 weeks, while touch-ups work every 4-6 weeks. Touch-ups focus only on regrowth to protect your hair from damage. Waiting too long can cause color mismatch.
Can I Speed Up the Dye Development Time with Heat?
Applying mild heat can help color develop but avoid high heat. Excess heat risks damaging your hair and scalp. Follow product instructions for safe timing and temperature limits.
What Should I Do If My Scalp Feels Itchy After Dyeing?
An itchy scalp could mean mild irritation or allergy. Rinse your hair immediately with cool water and use a gentle shampoo. Avoid coloring if irritation persists, and see a professional for advice.
Is It Safe to Use Box Dye over Previously Colored Hair?
You can dye over color-treated hair but be cautious. Use dye close to your current shade and test a strand first. Frequent coloring can weaken hair, so condition it well afterward.
How Long Should I Wait Before Washing My Hair After Dyeing?
Wait at least 48 hours to help the color set fully. Washing too soon can fade or dull the color prematurely. Use cool water and color-safe shampoo when you wash it.
Wrapping Up
Coloring your hair at home takes patience and practice. But you can achieve professional results.
Start with one confident step today, like testing your dye properly. This will help you avoid mistakes and keep your hair healthy and bright.