How to Make Hair Curly Wavy: 8 Effective Ways for Natural, Defined Curls
How to make hair curly wavy starts with understanding your hair’s natural pattern. You can boost curls by drying hair with a diffuser. Stop when hair is about 80% dry.
This helps curls keep their shape. This helps keep the waves intact without frizz or flattening. After drying, wait until your hair is fully dry before separating and fluffing your curls.
Choosing the right products makes a big difference. Use curl-improving creams or gels designed for wavy hair.
These products give hold and definition without weighing hair down or making it crunchy. Watch out for heavy products that can weigh your waves flat or cause buildup.
Heat styling can also help create curls from wavy hair safely. Use tools with adjustable heat settings to avoid damage and always use a heat protectant. Low to medium heat usually works best to form curls without frying the strands.
Key Takeaways
- Always dry your hair with a diffuser on low heat to prevent frizz.
- Use curl creams or gels that boost wave definition without heaviness.
- Wait until hair is 100% dry before separating curls for volume.
- Apply heat protectant before any heat styling to prevent damage.
- Opt for tools with adjustable heat between 265°F and 350°F for curly waves.
- Protein treatments every 2-4 weeks help restore damaged hair to curl better.
1. How to Make Wavy Hair Curly: Step-by-Step Techniques
Making wavy hair curlier takes a mix of gentle handling, the right techniques, and careful styling. You can do this with or without heat, depending on your comfort and hair’s needs. Taking time to prep your hair helps your curls show better.
Follow a solid routine for healthier, defined curls. This keeps your hair in good shape.
Heatless Curling Methods
Working with wet or damp hair helps curls form naturally. Apply a moisturizing product to damp hair first. Then scrunch your hair gently to shape the waves.
This helps bring out curl patterns. Braiding or twisting damp hair sets natural curls overnight without heat damage.
Pin curls and plopping are other heat-free ways to encourage curliness. Take small sections of hair to roll around your fingers. Secure each roll with clips or bobby pins.
This makes tight pin curls that hold well. Plopping wraps wet hair in a towel on your head.
Use soft cotton or microfiber towels to reduce frizz. This method helps curls form and stay defined.
Using Diffusers and Curl Enhancers
Diffusing your hair speeds drying while preserving curls. Use a gentle airflow and keep the diffuser moving to avoid uneven heat. Start with your hair wet, apply curl-improving products, then scrunch as you dry.
Curl activators or light gels work best when applied to soaking wet hair. Spread the product evenly section by section for uniform curls. Always avoid heavy or oily products before drying to prevent weighing curls down.
Heat Styling with Curling Irons and Wands
Heat styling can make curls more defined, but preparation is key. Spray heat protectant on damp or dry hair before styling. Do this every time you use heat tools.
It helps stop heat damage. Choose a curling iron or wand with temperature control and keep heat between 275°F and 350°F.
Work in small sections, wrapping hair evenly around the barrel. Hold the hair for 5 to 10 seconds maximum. Avoid using heat on wet hair to reduce breakage and uneven curl formation.
Post-Styling Touch-Ups
After curls are set, gently separate them with your fingers for soft definition. Avoid using a brush, which can cause frizz and disrupt curl shape. Apply a light hair oil or anti-frizz serum sparingly to add shine and tame flyaways.
Refrain from heavy products or over-touching curls, which flatten the style. Finish with a light mist of flexible-hold hairspray to keep the curls intact without stiffness.
- Start with freshly washed, wet hair for best curl formation.
- Apply a curl-improving or moisturizing product evenly through hair.
- Choose a heatless method like scrunching, braiding, or pin curls.
- Always spray heat protectant when using heat on hair. It protects your hair from heat damage. This step keeps curls healthy.
- Style in small sections using a curling iron or wand on low heat.
- Dry hair gently with a diffuser on low airflow, scrunching as you go.
- Once dry, separate curls carefully with fingers and apply finishing serum.
- Optionally, spritz light hairspray to hold curls without crunchiness.
2. Products That Help Turn Wavy Hair into Defined Curls
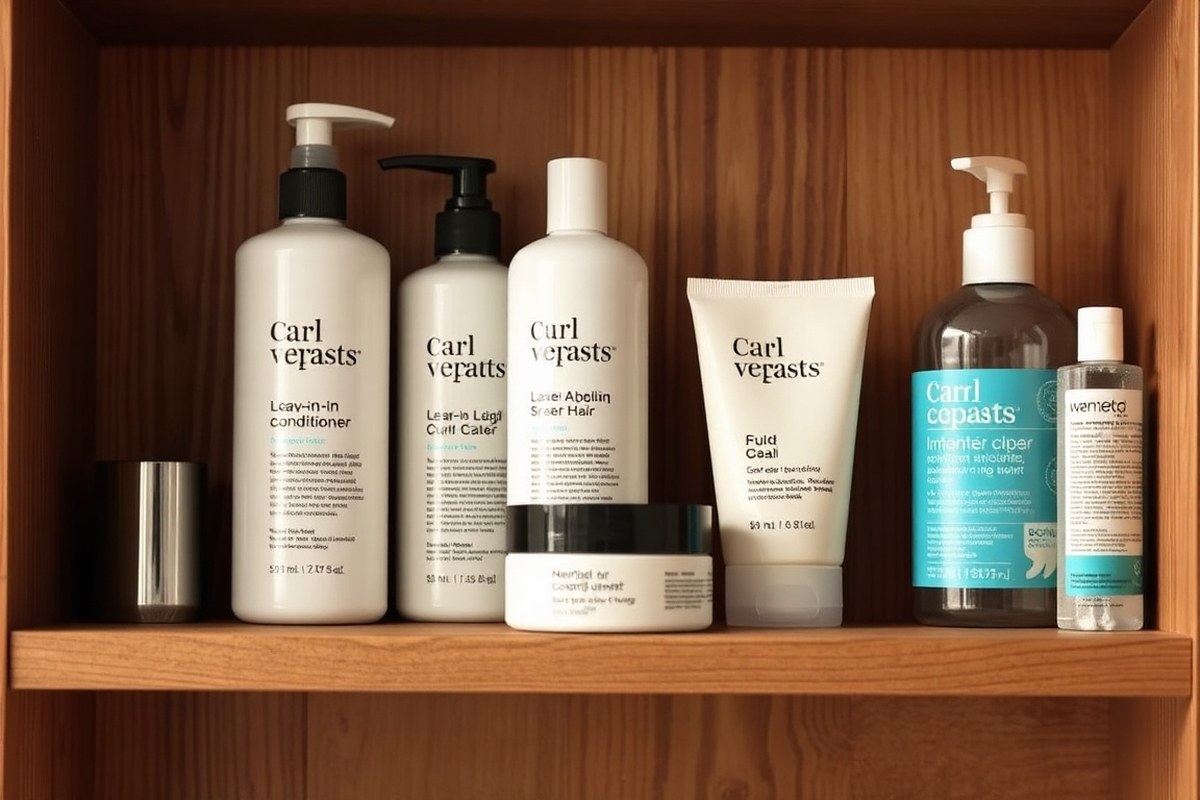
Products that boost curl formation work best when applied to soaking-wet hair. Use a leave-in conditioner first to lock in moisture.
Next, apply a curl cream or activator to define the waves. Finish with gel to hold the curl clumps in place without weighing hair down.
Leave-in conditioners mainly smooth frizz and make detangling easier. They add moisture but don’t tighten curls much. Gels and curl definers help shape tighter curls.
They work well for looser waves. These products hold your curls in place throughout the day. Use less product if your hair is fine or thin to avoid limp curls.
| Product Type | Purpose | How to Use | Effect on Hair |
|---|---|---|---|
| Leave-In Conditioner | Hydrates, smooths frizz | Apply evenly on soaking-wet hair | Improves softness, detangles, slight curl enhancement |
| Curl Cream or Activator | Defines curls, clumps waves | Apply after leave-in, scrunch into ends and mid-length | Tightens curls, builds volume at roots |
| Gel | Holds curl shape, reduces frizz | Apply last, on wet hair; scrunch to set curls | Improve curl hold without stiffness |
Use about a quarter-sized amount of each product for medium-length hair. Adjust based on thickness: less for fine hair, more for thick or coarse hair. Overloading your hair can weigh curls down and stretch the waves out.
Applying products in the right order and on dripping wet hair helps curl clumps form better. This method also lifts roots to keep curls bouncy, which wavy hair often struggles with. Leaving hair too wet or skipping gel can make curls limp or undefined.
Put products on soaking wet hair. Then scrunch your hair up toward the scalp. This forms clumps that keep your curls tight.
3. Why Hair Health and Moisture Matter for Curl Formation
Hair damage breaks down the outer layer, leading to frizz and loose waves. When curls lose their shape, the pattern looks less defined and more stretched out. Keeping hair healthy is key to making your waves bounce back into curls you love.
Moisture keeps curls soft and bouncy, which helps curls form and hold better. Regular conditioning adds water and oils back into your hair.
This prevents dryness that stiffens strands and flattens curls. A well-moisturized curl will look shiny and springy instead of dull and limp.
How often to deep condition depends on your hair’s condition and porosity. High-porosity hair dries out faster and needs more moisture. Use a deep conditioner every one to two weeks to restore softness.
Protein treatments help rebuild the hair’s protein structure. They make curls tighter. But using protein too often can make hair stiff and brittle.
- Use a daily leave-in conditioner, about a dime-sized amount.
- Apply a quarter-sized amount of styling cream to define curls.
- Seal moisture with a nickel-sized amount of gel to reduce frizz.
- Deep condition once a week for dry hair, every two weeks for normal hair.
- Use protein treatments monthly or when curls feel limp or mushy.
- Trim damaged ends every 6 to 8 weeks to keep curls healthy.
Watch out for heavy products that weigh hair down and stretch curls out. Choose lightweight formulas that add moisture without flattening your waves.
Avoid brushing your curls when dry to keep the pattern from loosening. Always rinse out conditioners completely before styling to prevent buildup.
Good curls have a springy, well-defined shape with a soft feel. If curls look frizzy or baggy, your hair likely needs more moisture or a trim.
Keep an eye on how your curls react, then adjust your deep conditioning and protein routine. Healthy, moisturized hair is the foundation of natural, bouncy curls.
4. Understanding Hair Type and Follicle Shape’s Role in Curling
Wavy hair and curly hair differ mainly in their follicle shape. Type 2 wavy hair grows from slightly oval or elliptical follicles that create gentle bends. Type 3 curly hair grows from more oval-shaped follicles that twist more tightly, forming visible curls.
Your hair’s curl potential comes from those follicle shapes, which genetics set. Genes decide if your hair lies flat, waves, or curls naturally.
This means some wavy hair can become curlier. But the amount depends on your natural follicle shape.
All wavy hair can become curlier to a degree. But it won’t transform into tight curls if your follicles don’t support it. If your hair is light Type 2A wave, expect soft waves.
You might also see light curls forming. This depends on your hair’s natural pattern. Those with Type 2C hair may see more defined and lasting curls with the right care.
Your natural curl pattern affects how your hair styles. Heat or tools alone won’t make curls last. This happens if your follicle shape doesn’t support curls.
Use gentle styling techniques to match your hair’s natural bends. These methods bring out the existing curl pattern best.
Avoid harsh styles that fight your hair’s shape. Overdoing heat can cause damage and break the natural curl pattern.
Some people consider chemical texturizers to reshape follicles for lasting curls. These treatments change your hair’s structure permanently. These styles usually need a pro to apply them safely.
Damage risks and costs make DIY tricky. Prices start near $100 and change by salon and product.
Understanding your natural hair type helps set realistic goals. Trying to push hair beyond its natural curl potential usually leads to frizz or breakage instead. Embracing your current curl level and improving it gently brings the best results.
5. Safe Heat Styling Strategies to improve Wavy Hair Curls
Use tools with heat settings between 265°F and 350°F to protect hair. Choose tools that let you adjust the temperature. This helps improve your natural waves safely.
Always prep your hair with a heat protectant spray before styling. Keep the heat on each hair section no longer than 8 seconds.
Long heat can cause hair damage. Short time helps create clear, defined curls.
Choosing the Right Heat Tool
Select a curling iron with a barrel size between 1 and 1½ inches. This size works best for your wavy hair. It helps make curls that look natural.
This size quickly forms natural, tousled curls without weighing hair down. Titanium plates help with even heat distribution, preventing hot spots that can fry hair strands.
Curling wands without clamps are great for wrapping your hair. They let you release curls without messing them up. This gives smooth, neat curls every time.
Flat irons with smooth, rounded edges curl hair well. Twist hair around the plates to form curls.
This method gives a soft, natural curl look. Different tools heat up fast, so adjust settings before you start.
Prepping Hair with Heat Protectants
Start with clean, damp hair and spray an even layer of heat protectant all over. Choose sprays that shield up to 450°F, but keep your heat lower for safety. Apply using your hands to spread the product evenly, focusing on the ends and mid-lengths.
Let the protectant dry fully before applying heat to prevent sizzling or steaming hair strands. This step greatly reduces cuticle damage and split ends, keeping curls soft and shiny longer. Reapplying every few days can help if you heat style often.
Heat Application Best Practices
Divide hair into 2 to 4 sections for easier and safer curling. Work with small sections about 1 inch wide to let heat reach all strands uniformly. Hold the curling iron or wand on each section for 5 to 8 seconds.
Longer heat times can burn and damage your hair. Keep sessions short to avoid harm.
After curling a section, gently release the hair carefully. Hold the curl in your hand until it cools down. This helps the curl set and last longer.
Avoid brushing or touching curls right away to maintain their shape longer. Cool the hair completely before applying any finishing products.
- Wash and towel-dry your hair until damp.
- Spray a heat protectant evenly and let it dry.
- Section your hair into manageable parts.
- Choose a low heat setting, ideally 265°F to 350°F.
- Wrap or clamp a 1-inch section around the heated tool.
- Hold heat for 5 to 8 seconds, then release carefully.
- Hold the curl in your hand briefly for it to cool.
- Repeat until all hair is curled, then cool fully before styling.
Always keep your tool’s temperature low to protect your hair. Never hold the heat on hair for more than 8 seconds. This prevents heat damage and keeps hair healthy.
6. Overnight and Day-After Techniques to Maintain Curly Texture
Protecting your curls overnight helps keep them bouncy and frizz-free. Wrapping your hair in a silk or satin scarf reduces friction that causes breakage and frizz. You can also sleep on a silk pillowcase, which is softer on curls than cotton.
Another way to preserve curls is to use protective hairstyles before bed. Loose buns or pineapple buns gather your curls on top without crushing them.
Avoid tight ponytails that pull hair and create dents. These styles keep curls lifted and defined as you sleep.
Day 2 and day 3 curls often need a refresh without washing. You can spritz your hair lightly with water mixed with a leave-in conditioner.
Then scrunch gently to bring curls back to life. Avoid rough combing or brushing that breaks curl clumps and creates frizz.
- Wrap hair with a silk or satin scarf each night
- Use a silk or satin pillowcase to reduce friction
- Try loose buns or pineapple buns before bed to protect curls
- Sparingly mist curls with water and leave-in conditioner to refresh
- Scrunch curls gently after misting to revive shape
- Skip harsh combing or brushing to avoid frizz and breakage
Keeping your hair hydrated with light leave-in products overnight can boost curl definition. Avoid heavy products that weigh curls down or make hair greasy.
If you prefer, a cool air setting on your blow dryer can refresh curls without heat damage. This technique saves curls while preserving moisture.
7. Common Mistakes That Prevent Wavy Hair from Curling More
Brushing wavy hair too often can break curl patterns. Each stroke pulls and stretches the waves, making them loose and frizzy. Use your fingers to detangle your hair when wet.
Using heavy, greasy products may weigh down your curls. That makes waves look flat and limp.
Try lighter gels or mousses that define curls without dripping or feeling sticky. Apply these products while hair is damp to lock in your natural pattern better.
- Don’t rub hair with a towel; gently squeeze or pat dry instead
- Avoid over-brushing; use wide-tooth combs or fingers on wet hair
- Choose curl-friendly, lightweight products rather than heavy oils
- Keep curls in shape by scrunching or clipping them while drying
- Limit heat styling to under 350°F and use heat protectant
- Sleep on silk or satin to reduce friction and frizz
- Don’t overwash; shampoo 2, 3 times a week to avoid drying
Stretching curls while drying is another common mistake. When hair hangs and stretches fully, waves lose their curl shape.
Instead, scrunch hair upwards or use clips to hold curls in place while drying. That preserves the natural curve better.
Wrong drying practices, like rough towel drying or blow-drying without a diffuser, cause frizz. Don’t rub your hair with cotton towels.
Rather, use a microfiber towel or old cotton T-shirt to gently squeeze excess water. This keeps curls intact and reduces breakage.
Some products or habits strip moisture, causing your hair to become brittle. Dry, damaged hair won’t hold curls well.
To protect your waves, consider a leave-in conditioner or deep-conditioning treatment weekly. It keeps hair soft and improves curl definition over time.
8. When to Consult a Professional About Making Hair Curly
Professional help is useful when your waviness isn’t curling the way you want. A curl specialist can cut your hair to boost its natural shape. They can also offer chemical treatments if your curls are lost.
These options help shape or bring back curls effectively. Knowing when to consult saves time, money, and protects hair health.
Benefits of a Curl-Improving Haircut
Curl specialists cut hair to support your natural curl pattern. They add layers to reduce weight that pulls curls downward. This shaping creates springier curls and more volume without harsh tools.
The hairdresser trims dry, wavy hair to see exactly how curls fall. This method lets them remove bulk from problem spots or fix uneven curls. Expect a session to last 45 to 60 minutes and cost between $50 and $150.
Skipping a flowy curl cut can leave curls weighed down or undefined. A specialist haircut improves curl bounce and makes styling easier day to day. Regular trims every 8 to 12 weeks keep curls fresh and lively.
Chemical and Protein Treatments Explained
Curls lost from straightening or damage sometimes come back with chemical treatments. These use protein formulas to rebuild hair bonds and boost curl structure. You should get a professional’s assessment before trying these services.
Curl revitalizers do not always reverse straightening perfectly. They work best when hair is healthy and only lightly damaged. Chemical treatments can cost between $100 and $300 each time.
They usually take two to four hours during your salon visit. Plan your schedule and budget accordingly when choosing these options.
Overusing chemical treatments or trying them at home risks dryness or breakage. Follow every instruction from the stylist and keep hair moisturized afterward. Severe damage calls for gentle care before doing anything else.
Give your hair time to heal and regain strength first. Avoid harsh treatments until it looks healthier and feels stronger.
Choosing a Qualified Curly Hair Specialist
The right stylist knows how to cut and treat waves and curls. Look for salons advertising curly hair services and with reviews praising curl expertise. Ask about their training specifically for curly hair care techniques.
Book a consultation where they assess your hair type and goals. They should explain what’s possible with your specific waves and whether chemical options suit you. Clear communication helps avoid disappointment.
Expect to invest more time with these stylists, since curly hair needs special attention. Prices may be higher but usually reflect quality care and better results. Don’t hesitate to change stylists if you don’t feel confident with their advice.
Chemical curl treatments are not guaranteed to fully restore curls. Always get a professional assessment before deciding on any treatment. This helps set the right expectations for your hair results.
Step-by-Step Action Plan for Curlier Waves
This quick plan helps you turn wavy hair into curlier locks over a few weeks. Follow each step and watch your curls get more defined.
- Before you start: Use a moisturizing shampoo and conditioner to prep your hair. Healthy hair holds curls better.
- Day 1: Apply a curl-improving cream to damp hair. If your hair feels more textured and less frizzy, it worked.
- Day 2: Try finger coiling sections of your hair while damp. Let it air dry and check for tighter curls.
- After 3 days: Sleep with a loose pineapple style or use a satin bonnet. Curly shape should last longer by morning.
- Week 1: Add occasional heat with a diffuser on low heat. See if curls look rounder and less stretched.
- Week 2: Experiment with a light gel to hold your curls without crunchiness. You want soft, bouncy curls.
- After 3 weeks: Evaluate your hair health and moisture. Adjust deep conditioning to keep curls defined and soft.
- Ongoing: Avoid heavy brushing and overwashing. This helps curls stay tight and last longer.
Frequently Asked Questions
Can Diet Affect How Curly Wavy Hair Becomes?
Yes, a balanced diet with vitamins helps hair stay healthy and supports curl formation. Drinking water helps keep your hair hydrated.
Eating omega-3 rich foods improves moisture retention. This is key for curl definition.
Can Swimming in a Pool Change My Wavy Hair Texture?
Swimming can dry out your hair and make curls frizz or loosen. Chlorine removes moisture from your hair.
Use a leave-in conditioner before swimming. Rinse hair well afterward to protect your curls.
Do Certain Haircuts Make Wavy Hair Curlier?
Layered haircuts can improve your natural wave pattern and help curls bounce more. Avoid blunt cuts if you want better curl definition.
Ask for layers instead. Layers reduce weight and encourage springy curls.
How Does Humidity Affect Wavy Hair Curling?
Humidity adds moisture to hair strands. This can boost curl definition.
But it may also cause frizz to appear. Using anti-frizz products with humidity resistance can help keep curls shaped instead of frizzy or limp.
Is Brushing Wavy Hair Bad If I Want Curls?
Brushing dry wavy hair can break curls and cause frizz. Detangle your hair in the shower while wet.
Use a wide-tooth comb with conditioner. This helps protect your curl pattern.
Can Scalp Massages Improve Curl Formation?
Scalp massages increase blood flow to hair follicles. This can support healthy hair growth.
Over time, curls might get stronger. Use your fingertips gently for a few minutes daily to help stimulate follicles.
Before You Go
Your hair can become noticeably curlier with the right care and techniques. Start small and track what works best for your waves. Try the finger coiling method tonight to see the difference quickly.