How to Use a Curling Wand: Complete Guide for Perfect Curls Every Time
Learning how to use a curling wand is easier than you think. The key is picking the right barrel size and heat setting for your hair. Start with dry hair and a good heat protectant spray to avoid damage.
Wrap small sections of hair around the barrel and hold for a few seconds. The curls will last longer if you let them cool before touching. Knowing your hair type helps you adjust the heat for perfect curls every time.
Thicker hair usually needs higher heat and smaller sections for better curls. Fine hair curls best with lower heat and bigger sections to avoid frizz. These simple steps help you get gorgeous curls with less hassle.
Key Takeaways
- Use a curling wand with a barrel between 19mm and 32mm, based on hair type.
- Set the heat between 300°F and 350°F for most hair types to prevent damage.
- Always curl hair when it is 100% dry for the best results.
- Section thick hair into 1-inch pieces for even, long-lasting curls.
- Use sections 1 to 2 inches wide if your hair is finer or thinner.
- Choose a heat protectant that shields up to at least 300°F or more.
How to Use a Curling Wand Step-by-Step

Using a curling wand is simple if you follow the right steps. Start with dry, sectioned hair. Wrap each piece around the heated barrel.
Hold it briefly, then release carefully. Doing this properly helps you get lasting curls that look natural and smooth.
Preparing and Sectioning Hair
Start by making sure your hair is dry and detangled. Divide your hair into sections about one to two inches wide. This helps create curls that last longer.
Thin or fine hair usually works better with smaller sections, around one inch. Thicker hair needs about two-inch sections, so the heat penetrates fully.
Wrapping Hair Around the Barrel
Pick up a section and wrap it around the curling wand’s barrel. Hold the hair close to the root, then wrap down to the ends.
Wrap the hair smoothly without overlapping to avoid uneven curls. For tighter curls, wrap smaller sections; for loose waves, use bigger sections.
Holding and Releasing Curls
Hold the wrapped hair on the wand for about 8 to 10 seconds. Holding longer, up to 20 seconds, works for very thick hair but risks damage.
After holding, gently slide your fingers along the curl while releasing it. This helps the curl keep its shape without falling apart.
Finishing Each Section
Spray each curled section with a light holding spray. Let the curls cool completely before touching or styling for the best hold.
Repeat the process on all hair sections, working evenly around your head. Use the same size sections and timing for a uniform look.
- Heat the curling wand to your desired temperature.
- Divide your dry hair into 1 to 2-inch sections.
- Hold one section by the root, wrap it around the barrel.
- Hold the hair on the barrel for 8 to 10 seconds.
- Gently slide your hand down the curl and release it.
- Spray the curl with a light setting spray.
- Let the curl cool completely before touching it.
- Repeat until all sections are curled.
Choosing the Right Curling Wand Barrel Size and Shape

Picking the right curling wand barrel size and shape changes your curl looks completely. Barrel size controls curl size and volume, while shape affects curl texture and pattern. You should pair barrels with your hair length and styling goal for the best result.
Standard Barrel Sizes and Their Curl Types
Curling wands come mainly in three sizes: 32mm, 25mm, and smaller variants. The 32mm barrel makes big, loose curls and waves, great for long or medium hair. The 25mm barrel works well for hair past your shoulders.
It creates natural curls or waves. You’ll get moderate volume with it.
Smaller barrels produce tighter curls but suit shorter hair better. Larger barrels give bigger curls but may not hold well on very short hair. Choosing a size that works with your hair length keeps curls looking intentional and lasts longer.
| Barrel Size | Description | Curls It Makes |
|---|---|---|
| 32mm | Large uniform barrel diameter | Big loose, voluminous curls and waves |
| 25mm | Medium uniform barrel diameter | Natural curls and beachy waves |
| 18-25mm (combined) | Variable size for versatility | Medium curls and waves for shoulder length hair |
Barrel size affects both how easy curls form and how natural they feel. Use larger barrels for a soft wave effect and smaller ones for more defined curls.
Shape Variations: Conical, Spiral, Bubble and More
Barrel shape changes curl direction, size, and texture. A straight barrel with the same diameter makes uniform curls, giving soft, even waves.
Conical wands taper towards the tip. So curls start loose at the base and end in tighter ringlets.
Bubble barrels have spherical bumps along their length. These create tousled, natural-looking waves with extra texture.
Spiral barrels have ridges that guide hair. They make tight, defined spiral curls that hold shape well.
| Type | Description | Curls It Makes |
|---|---|---|
| Straight | Uniform barrel diameter | Uniform curls; loose, beachy, soft waves |
| Conical | Tapered barrel narrowing toward the tip | Large curls near base; tight ringlets near tip |
| Bubble | Spherical bubbles along barrel length | Tousled, natural-looking waves |
| Spiral | Barrel with raised ridges along length | Tight, defined spiral curls |
The shape you pick changes how hair wraps and the curl’s final look drastically. Picking a shape that suits your desired curl style saves time fiddling to get it right.
Matching Barrel to Hair Length and Desired Style
For long hair, 32mm barrels suit voluminous big curls or waves perfectly. Medium-length hair handles 25mm barrels well to get loose curls or soft waves. Short hair styling works best with smaller barrels, around 18mm or less, for tight defined curls.
Extensions or recent haircuts don’t mean you must buy new wands. Many styling wands now come with interchangeable barrels in different sizes. These let you change looks without extra tools or costs.
Use hair that’s 100% dry before curling to avoid damage and get better curl hold.
Hold hair on the wand for no more than 15 seconds. Longer use risks heat damage. It can also create unnatural curls.
Adjust barrel size and shape depending on whether you want beachy waves, ringlets, or springy spirals. Matching tools to hair length and style speeds up your routine and makes curls last longer.
Adjusting Heat Settings Safely for Your Hair Type
Pick the right temperature on your curling wand by knowing your hair type. Fine or damaged hair needs low heat under 200°F. Thicker hair can handle higher heat up to 300°F. Adjusting heat keeps your hair safe and curls lasting.
Heat Settings for Fine, Medium, and Thick Hair
Fine hair works best at 180°F to 200°F. This stops weak strands from burning and breaking. Medium hair can use 200°F to 300°F, giving curls enough heat to hold without damage.
Thick or coarse hair needs hotter settings, between 300°F and 350°F. Use higher heat carefully to avoid drying out your strands. Check your wand’s adjustable settings and pick a number in these ranges.
For example, if your wand heats between 220°F and 400°F, choose the lower end for fine hair. Keep fine hair around 220°F to avoid damage.
Thick hair can go up to 350°F to get defined curls faster. But don’t exceed that often.
Protecting Hair from Heat Damage
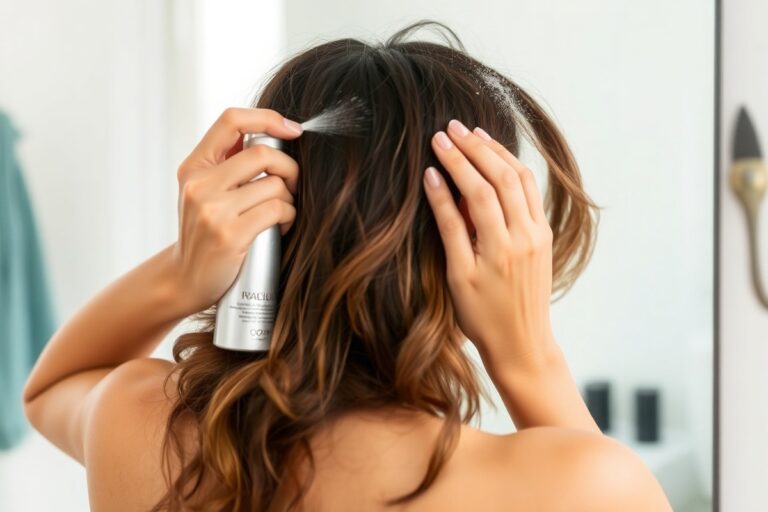
Apply a heat protectant spray before touching any heat tool. This layer shields hair by burning off instead of your strands. Spray evenly on dry hair and comb through for full coverage.
Choose a heat protectant that matches your heat level. Use a wand rated for 350°F or higher to prevent damage. This step takes only a minute but saves a lot of harm.
Skipping heat protectant risks dry, brittle hair that breaks easily. Your curls won’t last either. So spray and spread before every curling session to keep hair healthy.
When to Lower Heat for Damaged Hair
Damage means your hair needs extra care with lower heat settings. Use 180°F to 220°F if hair is brittle or recently coloured. This minimizes further damage and helps curls hold gently.
Also, lower heat near the hairline or on weak strands. Some wands have special low settings for these sensitive areas. Take your time curling these spots to keep them healthy.
Avoid curling wet or damp hair. Heat on wet strands causes steam damage and frizz. Always dry hair fully before adding heat to prevent breaks and get smooth curls.
Preparing Hair for Curling with a Wand
Start by drying your hair completely before you curl it. Curling damp or wet hair can cause damage and won’t create lasting curls. Blow-drying your hair with a heat protectant gives you a smooth base that holds curl better.
Before using the curling wand, apply these products to shield and prepare your hair. A heat protectant spray or serum is a must.
It reduces heat damage and helps your curls look shiny. For extra hold, consider a lightweight mousse or curl-improving cream that won’t weigh your hair down.
- Make sure hair is 100% dry, using a blow dryer or air drying
- Apply a heat protectant spray evenly from roots to ends
- Use a small amount of curling mousse or cream if your hair is fine or frizzy
- Brush through to spread products evenly and detangle
- Section hair using clips or hair ties into 3 to 5 parts depending on thickness
- Choose smaller sections for tighter curls and larger for loose waves
- Keep sections neat but not too tight to avoid marks from clips
Sectioning your hair helps you curl each piece properly and fast. Use clips or hair ties to divide your hair into manageable parts.
For thick hair, smaller sections work best. Thin hair can be curled in bigger chunks to save time.
Good prep makes curls last longer and look polished. Skipping drying or heat protectant causes frizz and breakage. Proper sectioning helps each curl get the right heat.
It makes your curls form evenly. This stops flat spots and uneven waves.
Techniques to Create Different Curl Styles with a Wand
For tighter curls, use smaller sections of hair, about 1 inch wide. More hair touching the heated barrel means it curls more tightly. Curly-wands with smaller barrels also create tighter curls, especially on short hair.
To get looser waves, wrap larger sections around a bigger barrel, around 6.5 inches if you have one. Take your time wrapping and use a gentle hold on the hair. Larger barrels and bigger sections make soft, flowing waves instead of tight ringlets.
Wrap the hair in the direction you want the curl to go. For curls turning away from your face, wrap hair outward.
For curls that frame your face inward, wrap hair inward along the barrel. Changing direction gives your style more texture and volume.
The position where you wrap hair on a tapered wand changes curl size. Wrapping hair near the narrow tip makes tighter curls.
Wrapping near the thicker base creates bigger curls or loose waves. Try different spots to get your preferred curl shape.
Hold the hair on the wand for about 8 to 12 seconds depending on hair thickness. Holding it longer tightens the curl, but avoid overdoing it to prevent heat damage. Use consistent timing for curls to look even and last longer.
Wrap hair smoothly and avoid overlapping sections to prevent uneven curls or heat damage.
Common Mistakes Using Curling Wands and How to Fix Them
Overheating your hair or using the wrong heat setting is a common mistake. Too much heat can damage strands quickly.
Always choose a curling wand with adjustable heat and set it according to your hair type. For fine hair, keep it between 250°F and 300°F. For coarse or straight hair that’s hard to curl, use 350°F to 380°F.
Another frequent error is curling uneven sections of hair. Uneven curls happen if you wrap different amounts of hair. Holding the wand too long on some spots also causes this.
Keep your sections even and timing steady. Always divide your hair into equal sections, about 1 inch wide.
Wrap the sections smoothly and hold each wrapped section for 10 to 20 seconds. Too long or too short can flatten or loose the curl.
- Use a lobster clip to hold upper layers while curling the bottom
- Hold the wand in the opposite hand from the side you’re curling
- Wrap hair quickly around the wand, hold for a few seconds, then release
- Pin curls after releasing them to help set longer-lasting waves
- Avoid touching curls until they cool to keep their shape
- Don’t forget a heat protectant spray before styling
- Use a curl wand with far infrared and negative ion tech for less damage
Curls that don’t hold well usually need the hair to be prepped right. Use a heat protectant spray and dry hair fully before curling. Pinning each curl right after removing it from the wand helps lock in the shape.
Skip this and curls tend to fall flat fast. Cooling the curls completely before brushing or touching also makes waves last longer.
Avoid uneven heat damage by not rushing your curls. Wrap the section neatly and keep the wand steady. Also, holding the curling wand incorrectly can cause burns or uneven curls.
Hold the barrel in the hand opposite to the side you are curling. This grip makes the wrapping motion smoother and spots easier to reach.
Cooling and Setting Curls for Longer Lasting Results
Right after curling your hair, let the curls cool fully for about two minutes. This pause helps the curls set in place and stay shaped longer. Don’t touch or brush your curls right after curling.
They are still soft and can lose their shape. Let them set a bit first for better hold.
Once cool, decide if you want more volume or softer curls. For volume, keep the curls close to your scalp while cooling. But don’t burn your skin.
Let your curls loosen by gently finger combing for softer waves. Avoid using a brush to keep the wave pattern. Using a wide-tooth comb or fingers avoids frizz that brushes often cause.
Apply a light mist of a flexible hairspray such as L’Oréal Paris Elnett Precious Oil Satin Hairspray. This type of spray supports your curls while keeping them soft and natural. Products that distribute heat evenly and release negative ions reduce frizz and increase hair shine.
For longer-lasting curls, you can also try a light hold mousse or curling cream before styling. Apply these products to damp hair and dry it fully before curling.
Avoid heavy or oily products that weigh curls down or make them greasy faster. Second-day hair often holds curls better because it isn’t too soft or slippery.
When you finish styling, avoid brushing your curls too aggressively. Finger combing breaks up curls gently and keeps them defined.
Brushing works best only if you want soft waves. But this can shorten how long the curls last.
Keep in mind, the curling wand barrel gets very hot. Always protect your scalp and face. Spray heat protectant before curling to shield your hair from damage.
It helps keep your curls fresh and healthy for several days. Use it every time you style with heat.
Styling Tips and Safety Practices for Using Curling Wands
Be careful handling the curling wand to avoid burns. The barrel gets very hot, often near 400°F (204°C). Always hold the wand by its insulated handle and avoid touching the barrel directly.
Use a heat-resistant glove on your curling hand to stay safe. This helps prevent burns, especially if you’re new to curling. Wearing one makes curling easier and safer.
Unplug the wand immediately after you finish styling. Let it cool completely on a flat, heat-safe surface before storing. Never leave the wand plugged in unattended since this risks fire or burns.
Keep your curling wand in a dry place to protect it. Store it out of reach of kids and pets. Use a heat-resistant pouch or hang it on a hook.
- Use a heat protectant spray on dry hair before curling
- Divide hair into small sections for faster, even curling
- Keep the wand moving to avoid burning hair in one spot
- Limit heat exposure to 5-10 seconds per section
- Clean the wand only when unplugged and cool
- Wear a heat glove to protect fingers from accidental burns
- Check the wand cord for damage before each use
Protect your hair by using a heat protectant product every time you curl. It lowers dryness and breakage risk. Avoid curling wet or damp hair; always dry it first.
Too much heat or repeated strokes on one hair section cause damage like split ends. Use medium heat settings unless your hair is very thick or coarse.
Don’t touch the hot barrel while the wand heats or cools. Avoid putting the wand on any flammable surfaces. These steps help prevent burns and accidents.
Practicing your curling technique slowly helps reduce accidents and heat damage. Keep the wand in constant motion while curling. Don’t hold hair on the barrel too long.
Unplug the wand right after you finish styling your hair. Store it safely to avoid injuries or home damage.
Taking these steps keeps you and your house safe. These habits keep your curls looking great and your hair healthy.
Step-by-Step Action Plan to Master Your Curling Wand
Follow these simple steps to get comfortable using your curling wand quickly. Each step helps you build skill and avoid common mistakes.
- Before you start: Prepare your hair with heat protectant and dry it fully. This protects your hair and improves curl hold.
- Week 1: Practice using the wand on small sections with low heat. Check that curls form easily and hair feels smooth.
- Week 2: Experiment with barrel sizes and curl directions. Notice which curls look best on you and are easiest to make.
- After 2 weeks: Increase heat slightly if curls fade quickly. Avoid going too hot by testing a small section first.
- Week 3: Try different curl styles like beach waves or tight spirals. Use timer or count seconds to keep curls uniform.
- Every time: Let curls cool completely before touching. This makes them last longer and hold shape better.
- Monthly: Clean your curling wand carefully and check for damage. This keeps it working well and protects your hair.
- Anytime: Use a good quality hairspray or styling product to set curls. Stop if you notice dryness or breakage signs.
Frequently Asked Questions
What Is the Difference Between a Curling Wand and a Curling Iron?
A curling wand has no clamp, while a curling iron uses one. The wand creates natural-looking curls, and the iron makes more defined ringlets. Holding the wand downward helps curls look softer and more relaxed.
Can You Use a Curling Wand on Damp Hair?
No, your hair should be 100% dry before curling. Damp hair can get damaged and will not hold curls well. Fully dry hair also heats evenly for better styling results.
How Do You Avoid Burning Your Fingers When Using a Curling Wand?
Use a heat-resistant glove on your curling hand for protection. Take small sections and be careful when wrapping hair around the wand. Keeping the barrel facing downward also reduces the risk of burns.
How Long Should You Hold Your Hair on the Curling Wand?
Hold the hair around the wand for about 8 to 12 seconds. This timing helps set curls without overheating or damaging the strands. Adjust based on your hair thickness and heat setting.
What Heat Setting Should You Use for Fine Hair with a Curling Wand?
Use a lower heat setting around 300°F to 350°F for fine hair. This prevents damage and keeps curls intact longer. Always start low and increase if curls don’t hold well.
How Do You Properly Clean a Curling Wand?
Unplug the wand and let it cool completely before cleaning. Use a damp cloth to gently wipe off residue from styling products. Avoid harsh chemicals that can damage the wand’s surface.
Wrapping Up
Curling your hair with a wand takes some practice but will get easier fast. Keep protecting your hair and trying different techniques. Grab your wand now and start your first small curling session carefully.