How to Braid Your Own Hair with Braiding Hair: A Complete Beginner’s Guide
Mastering how to braid your own hair with braiding hair isn’t as hard as it seems. You add synthetic hair to your natural strands.
Then practice braiding motions step by step. Starting with well-combed hair helps keep the braid neat and easier to handle.
Use three strands: synthetic hair, your own hair, and synthetic hair again. This mix helps the braid look full and stay secure longer. Aim for hair at least three inches long to hold comfortably while braiding.
Practice on Day 2 or 3 hair for better grip and longer-lasting results. Keep a ponytail holder handy to tie off the braid’s end once you finish. Giving yourself about 20 minutes for your first tries works well for learning steadily.
Key Takeaways
- Start with clean, well-combed hair to make braiding easier.
- Use one strand of your natural hair between two synthetic strands.
- Keep at least three inches of hair length for easier grip.
- Braid on hair that’s one to three days unwashed for better hold.
- Tie off the braid’s end with a ponytail holder to secure it.
- Set aside 20 minutes to practice your first braid calmly.
Step-By-Step Guide to Braid Your Own Hair with Braiding Hair

Braiding your own hair with braiding hair extensions takes practice. But you can do it step by step.
Start by sectioning your natural hair and attaching the synthetic hair properly. Then braid carefully, blending the two hair types for a smooth look.
Preparing Sections Including Added Braiding Hair
Begin by parting your natural hair into clean, manageable sections. Pick a section to add the braiding hair. Loop the synthetic hair around your natural hair base.
This creates three strands for braiding. Two strands come from braiding hair.
One strand is your natural hair in the middle. Slightly damp hair helps keep everything smooth and in place.
Braiding Technique Integrating Natural and Extension Hair
Start a Dutch braid along your scalp. Cross the left section under the middle strand first. Then cross the right section under the middle.
Add small pieces of your natural hair to each strand. Do this as you braid, like a French braid.
When you reach the end of your natural hair, add more braiding hair. This extends the braid length. Keep your hands close to your scalp.
This helps keep the braid tight and neat. It’s especially helpful with shorter hair.
- Divide your hair into three strands. Use two braiding hair pieces and your natural hair in the center.
- Cross the left braiding hair strand under the middle (natural hair) strand.
- Cross the right braiding hair strand under the new middle strand.
- Add a small piece of natural hair to the left strand. Then cross the left strand under the middle strand.
- Add a small piece of natural hair to the right strand. Then cross the right strand under the middle strand.
- Repeat these steps down your scalp, incorporating natural hair into your braid.
- Once natural hair is fully added, continue braiding just the extension hair to the desired length.
Securing and Finishing Your Braid
Secure the braid with a small elastic band once the braiding hair ends. Wrap it tightly several times so it doesn’t slip loose over time.
Twisting the finished braid gently makes it look smoother and helps keep the braiding hair neat. Trim stray bits carefully when the braid end feels uneven. This cleans up the look.
Essential Supplies and Products for Braiding with Extensions

Start by gathering the basic supplies to make braiding with extensions easier and neater. You’ll need braiding hair and a wide-tooth comb. Get a rat-tail comb for parting.
Use hair clips to hold sections apart. Smooth, tangle-free hair is essential. Brushing it out ahead of time saves frustration and helps the braid look clean.
Next, use products that improve grip and help hold braids, especially with synthetic hair. Applying a light oil or moisturizing gel while braiding keeps hair sleek and adds shine. Edge control or braid balm smooths flyaways and firms edges, giving a polished finish.
- Wide-tooth comb to detangle before braiding
- Rat-tail comb for precise parting
- Clips to separate hair sections
- Moisturizing gel or lightweight hair oil
- Edge control or braid balm for neat edges
- Leave-in conditioner spray for added slip
- Dry shampoo or texture spray for better grip
Lightly mist your hair with leave-in conditioner before braiding. This keeps strands easier to hold and reduces breakage.
For curly or kinky hair, start on freshly washed, detangled hair. For straighter hair, braiding on day 2 or 3 after washing helps the braid last longer.
Stretching your natural hair first also makes braiding smoother. Use braiding gel to keep the hair tight. It helps maintain a uniform look.
Apply it as you add synthetic hair. Apply edge control throughout the process.
It keeps your braid sleek and smooth. This also strengthens the hold at your roots.
Keep your hands clean and dry while braiding. Oily fingers make the hair slippery and harder to control.
Choosing the Right Braid Styles for Braiding Hair Beginners
Some braid types suit beginners using braiding hair better than others. Simple three-strand braids and basic French braids are easiest to start with. Complex braids like fishtails take more time and skill but create stunning looks.
Three-Strand Braids
The classic three-strand braid is the simplest style to learn. It involves dividing hair into three sections and crossing the outer strands over the center one. This braid works well with synthetic braiding hair because it blends easily and holds tight.
You can finish a three-strand braid in about 10 to 15 minutes on medium-length hair. Try small accent braids across your hairline when hair is short. These braids secure extensions well and look natural.
Dutch and French Braids
French and Dutch braids add hair continuously from the scalp, locking natural and synthetic strands together. They give a clean, neat look that lasts longer. Work with smaller sections to braid.
Clip hair as you go. This stops tangles.
Dutch braids are done by crossing strands under the middle one. French braids cross over.
Both styles take about 15 to 30 minutes depending on braid length and thickness. Starting tight helps avoid frizz and keeps braiding hair secure.
Fishtail and Rope Braids
Fishtail and rope braids look intricate but need more practice to master. These styles use smaller sections and twisting or weaving techniques that hold braiding hair snugly. Rope braids especially are trending and suit many hair types.
Expect fishtail braids to take 30 minutes or more because they require careful attention. Rope braids usually take 20 to 40 minutes.
They look great with braiding hair extensions. Beginners might find these styles challenging but rewarding.
The table below compares popular braid types for beginners using braiding hair. It lists difficulty, time, and best uses for each style.
| Braid Type | Difficulty | Approximate Time | Best For |
|---|---|---|---|
| Three-strand braid | Easy | 10, 15 minutes | Beginners, accent braids, quick styles |
| French braid | Moderate | 15, 30 minutes | Neat daily looks, adding extensions smoothly |
| Dutch braid | Moderate | 15, 30 minutes | Bold style, tightly locked braids |
| Rope braid | Challenging | 20, 40 minutes | Textured look, versatile hair types |
| Fishtail braid | Challenging | 30+ minutes | Detailed styles, long hair |
| Cornrows | Challenging | Varies, often 1+ hour | Protective styles, full coverage |
This list helps you pick styles that fit your skill and time. Starting easy builds confidence before trying complex braids. Also, synthetic braiding hair works fine in all styles but managing sections and tension is key.
Preparing Natural Hair Before Braiding with Synthetic Hair
Before adding braiding hair, your natural hair needs the right prep. Clean hair with some texture helps the braid hold better. Braiding dry hair reduces heaviness and breakage compared to braiding wet hair.
Texture also matters. Fine, silky hair can slip out of the braid easily.
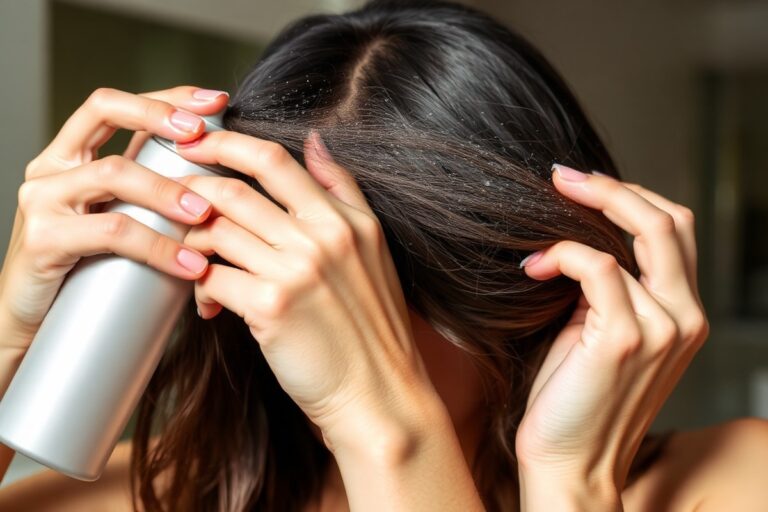
A touch of dry shampoo or texture spray adds grip. Coarser or curlier hair tends to hold braids well but still benefits from detangling.
- Wash your hair with a gentle shampoo and use conditioner lightly.
- Dry your hair completely or mostly dry it with a towel or blow dryer.
- Detangle hair carefully with a wide-tooth comb or your fingers to remove knots.
- Add texture by spritzing dry shampoo or texture spray from roots to ends.
- Section your hair neatly with clips to prepare for braiding each part.
- Stretch your hair if desired using heatless methods like banding or twist outs for easier braiding.
Washing removes oils and dirt that block grip. Choose a mild shampoo to avoid dryness. Conditioner is optional but should be light to avoid slickness that can make braids loosen.
Hair that is 100% dry or slightly damp works best with synthetic braiding hair. Braiding wet hair makes it heavy and prone to breaking. Dry hair grips the braiding hair better, keeping your style neat longer.
Texture spray or dry shampoo keeps hair from slipping. These products give tackiness and volume. It costs around $5 to $15 for a bottle and lasts many uses.
Detangling prevents knots that create bumps in your braid. Take care not to pull hard and cause breakage. For very curly or coarse hair, finger detangling before combing is easier and gentler.
Hair texture affects the technique. Fine hair needs more texture products.
Thick, curly hair needs careful detangling but grips braids well on its own. Pick the right prep based on your hair type for best results.
Common Mistakes When Braiding Your Own Hair with Extensions and How to Fix Them
One common mistake is not detangling hair fully before braiding. Tangled hair can snag and cause breakage when you add braiding hair. Use a wide-tooth comb or detangling brush to smooth your hair gently first.
Another is gripping the hair too tightly or too loosely. Your scalp can hurt and pull when the hair is held too tight.
Too loose can cause your braids to fall apart quickly. Try to keep even tension for a braid that feels secure but comfy.
Getting a good grip takes time, especially on your weaker side. Holding two sections with one hand and one with the other helps. Start slow to get balanced, neat braids before going faster.
- Start with simple three-strand braids before moving to complex styles
- Use a small amount of pomade or wax to grip slippery hair
- Keep your hands close to the scalp when crossing sections to control tension
- Section your natural hair evenly before adding braiding hair extensions
- Practice in front of a mirror or record yourself to spot hand positioning
- Take breaks if your hands get tired to avoid sloppy braids
- Use clips or bands to secure braid ends tightly and prevent unraveling
It helps to practice braiding on your own hair without extensions first. This builds hand coordination and muscle memory. Setting aside 20 minutes regularly lets you improve steadily.
Don’t rush through braiding your own hair with extensions. Slow and steady beats fast and sloppy every time.
Very long hair calls for starting braids a bit loose before tightening. This avoids pulling too hard and damaging hair. Add tension gradually as your fingers get more skilled.
Lastly, avoid braiding freshly washed hair. Slightly dirty hair holds braids better and reduces slip.
Aim for washing your hair a day or two before braiding. So it’s easier to control.
How to Secure and Maintain Braids Made with Braiding Hair
- Start with second-day hair or spray texturizing product to add grip.
- Knot the last one to two inches of your braid with a small elastic band.
- Smooth braid edges using a light pomade or hair gel for a sleek look.
- Wrap your braids in a silk or satin scarf at night to prevent frizz.
- Wash your braids gently after 7 to 10 days using diluted shampoo.
- Moisturize scalp lightly to avoid dryness and flaking between washes.
- Retouch edges with a gentle brush or apply more smoothing product as needed.
Tying off your braids with small elastics protects the ends from unraveling. Using pomade will help reduce flyaways and keep your braids looking neat longer. Braids last best on hair that has texture or light product, it prevents slipping.
Don’t skip the wrap at night. Silk scarves reduce friction against your pillowcase, cutting down frizz.
When you wash braids, dilute shampoo in water, gently massaging your scalp without rough rubbing. Overwashing shortens braid life.
Regular moisturizing keeps your scalp comfortable and minimizes itching or flaking. Use a light oil or braid spray.
Brush edges softly to keep them looking tidy between washes. Avoid heavy products that cause buildup.
How Much Braiding Hair to Buy and Timeline Expectations
For a full head of braids, you generally need 3 to 6 packs of braiding hair. The amount depends on the braid size and your hair length. Smaller, thinner braids require more packs, while larger braids use less.
Here’s a quick guide on how many packs you may want. It’s based on common braid types and hair lengths.
Use this to plan your purchase. These estimates help you avoid running short mid-style or buying too much hair.
| Braid Style | Hair Length | Estimated Packs Needed |
|---|---|---|
| Box Braids (Medium size) | Shoulder length | 3 to 4 |
| Box Braids (Small size) | Shoulder length | 5 to 6 |
| Cornrows with extensions | Short to medium | 2 to 3 |
| Large Feed-in Braids | Long (mid-back) | 4 to 5 |
| Passion Twists or Senegalese | Long | 5 to 6 |
Mastering your first braid usually takes 15 to 20 minutes. Practice helps you get smoother and faster over time. Turn your head slightly as you work.
Pull hair firmly to keep braids tight. This helps your braids look neat.
Braids made with synthetic hair can last between 4 to 8 weeks. The time depends on how well you maintain them. Avoid excessive pulling or harsh products to keep braids looking fresh longer.
Post-Braiding Care Tips to Protect Natural and Synthetic Hair
Taking care of your scalp and braids after styling keeps them healthy and fresh. Moisturizing your scalp and cleaning it gently prevents dryness and itching. Protecting your braids from frizz and nighttime damage helps them last longer and look nicer.
Scalp Moisturizing and Cleansing
After braiding, your scalp needs gentle care to avoid buildup and dryness. Using light oils or scalp sprays maintains moisture without weighing down your braids. You can also refresh your scalp without washing by using dry shampoo or braid-specific sprays.
- Apply jojoba or tea tree oil sparingly between braids every few days
- Use dry shampoo or a spray-on braid wash once a week to freshen scalp
- Avoid heavy creams or thick pomades that cause buildup
- Massage oils lightly to boost blood flow and prevent itchiness
- Don’t overload your scalp; a little oil goes a long way
Cleaning your scalp too often with water can loosen braids and cause frizz. Stick to cleaning sprays or dry shampoos to save time and protect your style.
Refreshing and Reducing Frizz
Frizz and flyaways happen from friction and moisture changes. You can tame them by spritzing braid refresh sprays or light conditioning oils. Using hairspray or styling paste on braid edges also helps keep a neat look.
To stretch your hair before braiding, use a heat protectant spray. This prevents heat damage and helps braids look smooth right from the start. Day-old hair usually holds braids better than freshly washed hair, too.
- Spray braid refresher or diluted leave-in conditioner daily
- Apply light styling paste or hairspray to flyaways and edges
- Use thermal protectant before blow-drying synthetic or natural hair
- Avoid heavy styling products that cause buildup or stiffness
- Keep braids dry to prevent frizz caused by humidity
Using too much product can weigh down braids and cause buildup.
Protective Nighttime Routines
Wrapping your braids each night protects them from rubbing on your pillowcase. Satin or silk scarves and bonnets reduce friction and help prevent frizz. Sleep on a satin or silk pillowcase.
This protects your hair better. Use it if you don’t want to wrap your hair.
Different braiding hair types react differently to friction and moisture. Synthetic hair needs gentler care to avoid tangling, so wrapping is highly recommended. Natural hair braids also benefit from night protection to keep roots from drying out or matting.
- Wrap braids in a satin or silk scarf every night
- Use a satin or silk bonnet if you don’t want a scarf
- Sleep on a satin or silk pillowcase for extra protection
- Avoid cotton scarves or pillowcases that cause friction
- Adjust your routine if scalp feels dry or braids tangle easily
Skipping nighttime protection can lead to early frizz and tangled braids.
Step-by-Step Action Plan for Your Braided Hair Extensions
Follow these easy steps to braid your own hair with extensions confidently. Each step helps you check your progress and avoid common errors.
- Before you start: Wash and detangle your hair thoroughly. Your hair should feel clean and smooth to the touch.
- Day 1: Section your hair evenly and clip the braiding hair nearby. You’ll know you’re set when sections don’t overlap or tangle.
- Day 1: Begin braiding with extensions, adding small amounts of braiding hair gradually. Your braid should look neat and secure at your scalp.
- Day 1, end: Secure the braid’s ends with elastic bands or thread. They should hold tight without pulling on your scalp.
- After 3 days: Check your scalp for irritation and adjust any loose braids. Your scalp should feel comfortable, not tight or itchy.
- Week 1: Apply light oil or moisturizing spray to your scalp and braids. Your hair stays hydrated but not greasy.
- Every 2 weeks: Wash and condition your braids gently using a diluted shampoo. Your scalp should feel refreshed and your braids still tidy.
- After 6 to 8 weeks: Plan to take down your braids to avoid breakage. Your natural hair should look strong and healthy.
Frequently Asked Questions
How to Braid Hair by Yourself for Beginners?
Start with a simple three-strand braid and use a mirror. Practice makes your hands steady and your braid neater. Take your time and don’t rush through the steps.
Is It Better to Braid Hair While It’s Wet or Dry?
It’s better to braid your hair dry because wet hair is heavier and stretches. Dry hair holds its shape better for braiding and is less slippery. Lightly moisturize it for easier handling without making it too slick.
How to Braid Your Own Hair with Fake Hair?
Attach the braiding hair by looping it around a small section of your natural hair. This creates three strands: two from the fake hair and one from your own. Keep your grip tight to prevent unraveling as you braid.
Why Is It Hard to Braid My Own Hair?
It’s tricky because you can’t see or control the back well. Using two mirrors helps you watch your movement from different angles. Position your hands close to the scalp for better tension and control.
How to Keep Braids Tight When Adding Braiding Hair?
Start braiding close to the roots and hold the strands firmly as you go. When your braid loosens, twist it tightly before moving on. Tight braids last longer and look cleaner.
Can I Braid My Own Hair Without Practice?
Braiding your own hair well usually takes practice and patience. Start with easy styles and practice on detangled hair.
Use your fingers until you get used to the motion. Don’t expect perfection at first; keep trying.
Before You Go
You can braid your hair with extensions by following clear steps and proper care. Keep the scalp healthy by moisturizing regularly. Start your first braid today with well-prepared hair and the right supplies for best results.