

How to Get Beach Waves with a Straightener: Simple Steps for Natural, Lasting Styles
Wondering how to get beach waves with a straightener? It’s easier than curling your hair and takes less time.
Using a hair straightener, you twist sections of hair while pulling the tool down. This method creates soft, natural waves with less effort than traditional curling irons.
Start by choosing a straightener with adjustable heat settings. This helps protect your hair and shapes the waves better. Small sections work best, about 10 cm wide, to get consistent waves without frizz.
Leave the last 1 to 2 inches of your hair straight for that easy, beachy look. Also, alternate the wave direction on each section for natural volume and style. With a bit of practice, you’ll nail perfect beach waves in no time.
Key Takeaways
- Use a straightener with adjustable heat up to 230°C for all hair types.
- Section hair about 10 cm wide for even, manageable waves.
- Clamp near roots, twist 180 degrees away from your face, then pull down slowly.
- Leave the ends straight to keep waves looking natural and relaxed.
- Alternate wave directions section by section for a tousled effect.
- Use a heat setting around 185°C to avoid damage while styling.
How to Get Beach Waves with a Straightener: Step-by-Step Method
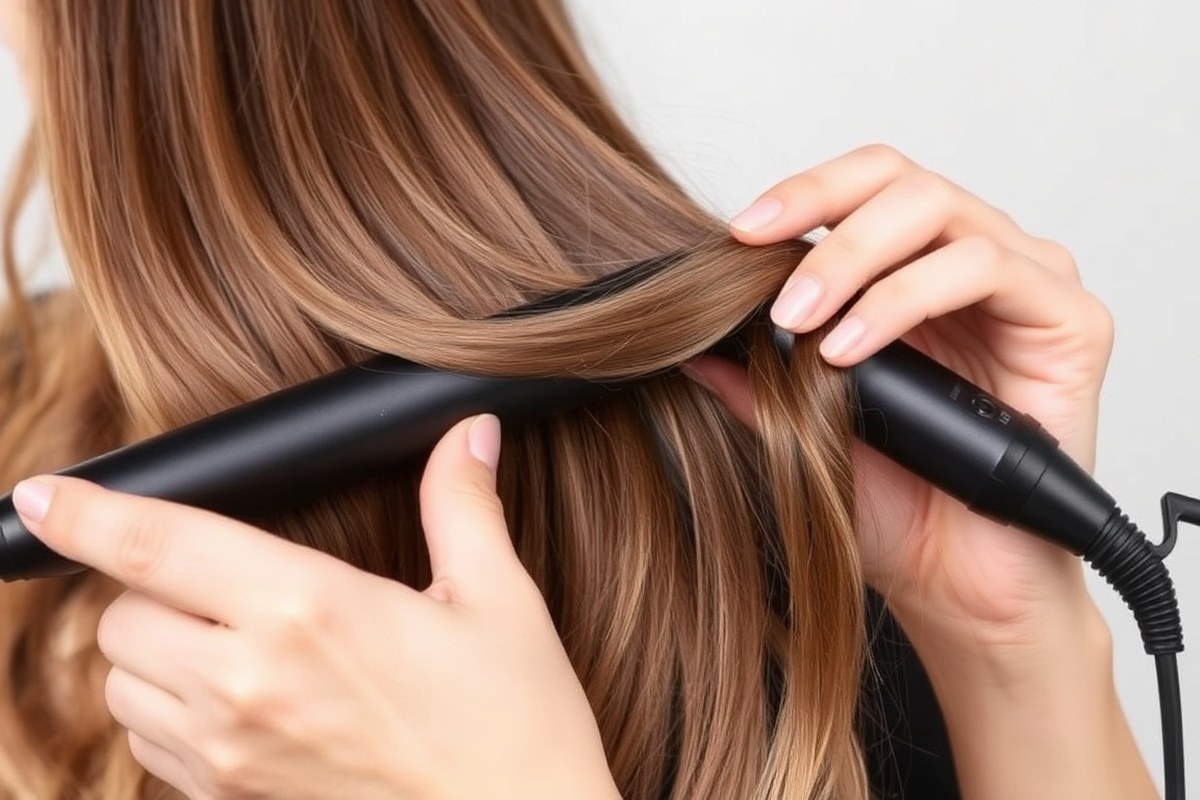
To get beach waves with a straightener, work in small sections close to 1 inch wide. Clamp the straightener near your roots. Twist it 180 degrees away from your face.
Glide the straightener slowly down the hair. Alternate the direction of each wave to avoid perfect curls and achieve a natural look.
Choosing the Right Section Size
Take sections about 1 inch wide and roughly 10 cm tall. Smaller sections give more defined waves, while larger ones create looser waves. Keeping sections uniform helps the waves look balanced and natural.
Start near the nape of your neck and work upward toward the hairline. This allows you to layer waves for a fuller texture. Avoid sections that are too large, which can result in uneven bends.
Twisting the Straightener Correctly
Place the straightener near the roots of your hair section. Twist your wrist 180 degrees away from your face so the plates turn sideways. Glide down slowly, rotating the iron smoothly to avoid creases.
Rotate the straightener about 360 degrees for a natural wave. Do this while moving down the hair shaft.
Keep a relaxed grip and steady speed. This technique bends the hair gently instead of clamping it flat.
Alternating Wave Directions
Change your curl direction between hair sections. This stops curls from looking too perfect. Bend the iron away from your face on one section.
Then bend it toward your face on the next. This gives the beachy, tousled effect.
Mixing directions helps the waves break up and look easy textured. Don’t overthink it, alternate as you go down your head. The slight differences make your waves appear more natural.
Follow these steps to get beach waves with your straightener:
- Divide your hair into 1-inch by 10 cm sections, clipping the rest out of the way.
- Take the first section near the nape and clamp the straightener close to the roots.
- Twist the iron 180 degrees away from your face, then glide it down smoothly.
- Rotate the straightener up to 360 degrees down the hair. This makes a loose bend.
- Release the hair and move to the next 1-inch section.
- Alternate twisting the iron away then toward your face with each new section.
- Work your way up the head until you finish all sections.
- Run your fingers through your hair once done to soften the waves.
Prepping Hair for Long-Lasting Beach Waves

Start with clean, dry hair for the best results. If your hair isn’t freshly washed, spray a light dry shampoo. This helps absorb oils and adds grip for waves that last.
Apply a heat protectant spray evenly. Spray on your fingertips first, then smooth it through your hair. This method avoids product build-up and protects every strand.
Choose a product with ingredients that fight frizz and add moisture, like one with negative ions. These help keep your waves shiny and prevent damage while you heat style.
- Use a light dry shampoo or texturizing spray to add hold.
- Apply heat protectant spray on fingertips, then run through hair.
- Work in sections for even product distribution.
- Let your hair air-dry or blow-dry completely before styling.
- Use products with anti-frizz and moisturizing effects.
- Choose flexible hairspray for a natural hold without crunch.
Dry hair fully before using your straightener to avoid damage. A quick blow-dry or air drying for 30 to 60 minutes works. Wet hair plus heat can lead to breakage and less defined waves.
After styling, a flexible hairspray helps lock your waves without a stiff feel. Applying it with a light hand keeps the look natural and touchable. Stay away from heavy sprays that cause crunchiness or residue.
Never use a straightener on damp hair. It risks serious heat damage and weak waves.
Choosing and Setting the Best Straightener for Your Hair
Not every straightener is equally good for making beach waves. Ceramic plates give you smooth, shiny waves because they spread heat evenly. Titanium plates heat up fast and stay hot longer.
This is good for thick hair types. But too much heat can damage fine hair.
Adjusting your straightener’s temperature to your hair type matters a lot. Low heat, around 250°F to 300°F, suits fine or thin hair to avoid damage.
Medium heat, from 300°F to 375°F, fits normal or wavy hair for better hold. Thick, coarse, or curly hair usually needs 375°F to 410°F for waves that last longer.
Here’s a table comparing plate types and heat settings by hair type. It shows what to pick so your waves come out right without frying your strands.
| Hair Type | Plate Material | Ideal Heat Range (°F) | Effect |
|---|---|---|---|
| Fine/Thin | Ceramic | 250 – 300 | Gentle heat prevents breakage, smooth waves |
| Normal/Wavy | Ceramic | 300 – 375 | Even heat creates natural waves, reduces frizz |
| Thick/Coarse/Curly | Titanium or Ceramic | 375 – 410 | High heat holds waves longer but watch damage |
Choosing a straightener with adjustable temperature helps you avoid too much heat. Some advanced models, like Cloud Nine, even vibrate plates to limit heat damage while styling. That tech keeps hair stronger and shinier, which makes your beach waves look fresh longer.
Using the wrong plates can hurt your hair. High heat adds to the damage risk. This can break hair when twisting it for waves.
Ceramic plates suit most hair types well. Choose titanium only for very thick or hard-to-style hair.
This helps avoid damage and style better. Always start at a lower heat and test a small section before doing your whole head.
Techniques to Customize Beach Waves for Different Hair Lengths
Adjusting your wave technique based on hair length helps create the best beach wave look. Smaller sections and less twisting work well for short hair. Medium hair benefits from alternating wave directions and using soft bends.
Long hair lets you create loose waves by leaving ends out. Mix wave directions for a natural, flowing look. This method keeps the style casual and soft.
Short Hair Wave Techniques
Use smaller sections to avoid overly tight curls. About 1-inch sections are ideal for short styles. Twist the straightener less to add volume without sharp bends.
Hold the straightener at a slight angle and glide slowly for a soft wave. Skipping the last 1 to 2 inches maintains a relaxed look.
For thick hair, use smaller sections to ensure heat penetrates evenly. Fine hair needs less heat and shorter holds.
Medium Hair Styling Tips
Take about 2-inch-wide sections and alternate the direction of each wave. Clockwise twists followed by anticlockwise prevent uniform curls and give a natural wave. Use the straightener to create gentle bends, not tight curls.
Try S-waves by bending hair in an “S” shape during gliding. This adds variety and texture for medium-length hair.
For thick hair, separate larger sections to speed styling. Fine hair looks better with more sections for fuller waves.
Long Hair Wave Options
Start with 3 to 4-inch sections for easier handling. Leave 1 to 2 inches of the ends out for that beachy, undone finish. Alternate bending direction every section for a relaxed, flowing wave.
Soft waves work best when you twist the straightener 360° downward as you glide. Use loose pin curls with 1-inch sections if you want waves to last longer overnight.
Thick hair benefits from sectioning by layers. Fine hair can use fewer sections to avoid damage.
Follow these steps to customize beach waves based on your hair length:
- Divide your hair into sections matching your length type.
- Start with the bottom layers, using a straightener on low to medium heat.
- Clamp small to medium hair sections near the roots depending on length.
- Twist the straightener slightly while gliding down to form waves.
- Leave the last 1-2 inches of hair ends straight for a natural look.
- Alternate wave directions between sections for better texture.
- Use your fingers to loosen the waves after styling for softer results.
Common Mistakes to Avoid When Using a Straightener for Waves
Using too high heat can fry your hair or leave waves looking stiff. Keep your straightener between 300°F and 350°F for beach waves that bend without damage. Too low heat makes waves fall out fast.
This is worse for fine or straight hair. Use enough heat to hold your waves well.
Pulling the straightener too hard makes waves too tight or creased. Let the tool glide smoothly without forcing it. Turn your wrist gently back and forth.
This will create soft, subtle bends. Avoid perfect, uniform curls for a natural look.
Uniform waves look unnatural and staged, not beachy. Vary your wave size by twisting sections differently or leaving some strands almost straight. This randomness gives a relaxed, easy look that falls nicely around your face.
- Use medium heat, around 300°F, 350°F, for better hold and health
- Don’t pull or clamp hair too hard to avoid creases or tight bends
- Twist your wrist gently to add natural wave variation
- Mix wave sizes for a relaxed, uneven texture
- Prep hair with light texturizing spray to help waves stay longer
- Skip heavy, firm-hold hairsprays that make waves look stiff
- Try a middle part for a more natural beach wave style
Always test heat settings on a hidden hair strand to avoid damage.
Soft, natural waves come from easing off tight, uniform patterns. Your waves should look sun-kissed and natural. Not tight or salon-perfect.
They should appear like you’ve been outside all day. A little imperfection makes the style look right.
Beach waves that fall apart quickly often lack prep. Adding a light texturizing spray before styling helps hold the shape without stiffness. Avoid heavy products that weigh hair down or make waves look “cement-like.”
Finishing Touches and Maintaining Beach Waves All Day
To keep your beach waves soft and lasting, reach for a light-hold finishing spray. Look for sprays that add texture without stiffness, especially those with sea salt ingredients.
Spritz a small amount evenly from mid-lengths to ends. Avoid the roots to prevent greasiness or crunchiness.
Refreshing waves without using heat is simple. Use your fingers or a wide-tooth comb to gently separate and fluff the curls. This loosens any flattened sections and revives bounce.
Lightly spritz sea salt spray if you need more texture and hold. Let the spray air-dry for a few minutes before touching again.
Dry shampoo is a great helper for styled beach waves. Apply it sparingly on roots and mid-lengths to soak up excess oil. This adds grip to your hair and prevents waves from falling flat.
Hold the dry shampoo 6 to 8 inches away when spraying. This prevents buildup and a chalky look.
- Choose a lightweight sea salt finishing spray for texture and hold.
- Apply spray from mid-lengths to ends, keep clear of roots.
- Use fingers or a wide-tooth comb to refresh waves gently.
- Lightly spritz sea salt spray to reactivate wave definition without heat.
- Spray dry shampoo at roots and mid-lengths to absorb oil and add volume.
- Use dry shampoo sparingly and hold can 6-8 inches from hair.
- Wait a few minutes after any spray to avoid stiffness or crunchiness.
Finishing sprays usually cost between $8 and $20 for a 4-6 oz bottle. A little goes a long way, so a bottle can last months. Dry shampoo costs about the same as other sprays.
It helps extend styles up to two days. Using these products right will keep your waves soft, bouncy, and natural all day long.
Advanced Wave Styles Using a Straightener: Twists, S-Waves, and Braids
Try these three styling tricks to freshen your beach wave look. Twisted waves add loose, rope-like texture.
S-waves create soft, flowing curves. Braids prep hair to boost wave definition and last longer.
Creating Twisted Waves
This style uses a smooth twisting motion for relaxed waves. It differs by creating a wrapped effect rather than classic curls. It suits medium to long hair that needs soft body and texture.
Here’s how to make twisted waves using a straightener.
- Section your hair into 1- to 2-inch parts for control.
- Clamp the straightener near the roots on one section.
- Twist the iron 180 degrees away from your face.
- Slide the straightener slowly down the hair shaft.
- Repeat the twist and slide motion on other sections.
- Use fingers to separate and soften the twists afterward.
These waves feel less “done” and more natural. They work well for casual outings, requiring about 10 to 15 minutes. Watch for sections getting too tight, keep the twist loose for the best look.
How to Make S-Waves
S-waves add a rhythmic ripple down your hair in soft, wave-like shapes. You create a gentle S shape with each hair section. This method suits hair that’s not too fine and works well for shoulder-length styles and longer.
Follow these steps to get smooth S-waves using your straightener:
- Take a 1-inch hair section. Pinch it gently into an S shape. Use your fingers to shape the hair softly.
- Clamp the straightener over the first bend of the S shape.
- Release the clamp and move a few inches down the same section.
- Pinch and clamp the next S bend further down the hair.
- Repeat till you reach the ends of the section.
- Continue on all sections to cover your head.
The result has smooth curves that flow naturally. It usually takes 15 to 20 minutes, depending on your hair thickness. Avoid tight bends as they turn into curls instead of waves.
Using Braids to Prep for Waves
Braiding is a simple trick to improve and extend your beach waves. You create gentle waves by braiding your hair before styling or even overnight. This method works for all hair lengths and adds texture before applying heat.
Here’s how to use braids to prep your hair for waves:
- Divide dry hair into 2 to 4 loose braids, depending on hair thickness.
- Braid gently and secure the ends with hair ties.
- Leave the braids in for at least 4 hours, or overnight.
- Remove the braids and shake out the hair for loose waves.
- Swipe the straightener lightly over the waves to add definition.
- Avoid clamping too tightly to keep the natural texture.
This takes little active time and can be done while sleeping. It adds natural-looking beachy texture with less heat damage. It’s great when you want soft waves that last all day.
How Much Time Does It Take to Style Beach Waves with a Straightener?
Styling beach waves takes 15 to 45 minutes total. It depends on hair length. Also, how fast you work matters.
Short hair can take as little as 15 minutes. Very long hair might need up to 45 minutes. Medium-length hair typically falls between 20 and 30 minutes for a full head of waves.
Your speed will improve with practice. But rushing can make your waves uneven or frizzy. Taking your time helps create loose, natural-looking waves instead of tight, overdone curls.
Taking your time lets hair cool down well. Cooling helps the waves set better. This way, the waves last longer too.
Setting up your hair before styling saves time while improving your results. Blow-dry your hair fully and detangle it gently to avoid snags during styling. Section your hair into chunks about 1 to 2 inches wide.
This helps you work faster and neater. Avoid missing spots or repeating areas.
Try heating your straightener to about 350 to 400°F, depending on your hair type and thickness. Thicker hair usually needs higher heat, which can shorten styling time. Delicate or fine hair benefits from lower heat to avoid damage and breakage.
The finishing steps add about 3 to 5 minutes. After curling all sections, run your fingers through your hair to separate waves gently. Spray your hair lightly with a flexible hold spray.
This keeps waves soft all day. It also helps them look natural.
Don’t skip cutting down on the number of sections when in a hurry. Use bigger sections for a casual, relaxed look. This creates tousled beach waves.
It’s perfect for laid-back styles. Smaller sections give tighter waves but take more time and careful twisting.
Speed up styling by prepping first. Plug in your straightener early. Get your tools ready and in place.
Use a heat-resistant glove if you want to work faster without worrying about burns. Keep your styling tools clean and free of hair buildup to keep heat consistent.
Taking too fast through sections can cause uneven heat distribution, resulting in patchy waves.
Step-by-Step Action Plan to Get Beach Waves with a Straightener
Follow this plan to create natural beach waves quickly and safely. Check your waves after each step to see the result.
- Before you start: Wash and dry your hair fully. Your waves hold better on clean, dry hair.
- 10 minutes before styling: Apply heat protectant spray evenly. It prevents heat damage and keeps hair smooth.
- Styling phase: Set your straightener to medium heat (about 300°F). Test on a small section to avoid burns.
- First pass: Take 1-inch sections of hair. Clamp the straightener near roots, twist away from your face, and slowly pull down.
- After styling all sections: Let your hair cool for 5 minutes. This sets the curls for longer-lasting waves.
- Finishing touch: Run your fingers lightly through your hair to separate the waves.
- Final fix: Spray a light hairspray or texturizing spray. It holds the waves but keeps them soft.
- Next day: Use a little dry shampoo at your roots. Scrunch your hair lightly. This will help boost your waves’ volume.
Frequently Asked Questions
How Often Should I Wash My Hair If I Style Beach Waves with a Straightener?
Wash your hair every 2 to 3 days to keep waves fresh. Washing too often strips natural oils, making hair dry and waves less defined.
Can I Use Sea Salt Spray Along with a Straightener for Beach Waves?
Yes, sea salt spray adds texture and hold for more natural waves. Spray lightly before styling or after for a tousled finish.
What Heat Setting Works Best for Fine Hair When Making Beach Waves?
Use a lower heat setting around 130° to 160° to avoid damage. Fine hair needs gentle heat, so start low and increase if needed.
Is It Better to Style Beach Waves on Dry or Damp Hair?
Style beach waves only on dry hair for best results and less damage. Damp hair can burn or create uneven waves with a straightener.
How Do I Keep My Beach Waves from Falling Out During Humid Weather?
Use a strong hold product like hairspray to lock in waves. Avoid touching your hair too much to prevent frizz and loss of shape.
Can I Create Beach Waves on Very Short Hair with a Straightener?
Yes, but short hair requires smaller sections and quicker turns. Waves on short hair look softer and more subtle than on long hair.
Final Thoughts
Getting beach waves with a straightener takes practice but is doable for anyone. Start with small sections and protect your hair from heat. Try the simple steps today, and watch your hair transform into soft, natural waves.


