How to Curl Straightened Hair: Simple Steps and Expert Tips That Work
How to curl straightened hair is a common question for many. The quickest way is to use a flat iron or curling iron designed for styling. Both tools can create lasting curls if you prepare your hair right.
Start by working on clean, dry hair that hasn’t been washed for one to three days. This helps your curls hold better because natural oils protect and give your hair grip. Keep your heat tools below 392° F to avoid damage.
Pick the right barrel size based on the curl look you want. Use smaller barrels for tight curls and bigger ones for loose waves.
Section your hair before curling. Lift each section straight up at 90 degrees. Wrap that part around the curling iron carefully.
This technique helps curls form more evenly and look natural. Avoid rushing, as taking your time will give stronger, longer-lasting curls.
Key Takeaways
- Avoid washing your hair for at least one day before curling to improve hold.
- Choose a curling iron barrel between 3/4-inch and 1.25-inch for your hair length.
- Set heat between 350° and 375°F for straight hair to curl safely and effectively.
- Section your hair and improve each part to 90 degrees before curling.
- Limit tool temperature to 392°F or less to prevent heat damage.
- Use natural oils on your hair to help curls last longer.
How to Curl Straightened Hair with a Flat or Curling Iron

Curling straightened hair with a flat or curling iron lets you get quick, long-lasting curls. Using heat tools with the right technique gives you control over curl size and shape. You can create spiral curls, loose waves, or tight ringlets depending on your tool and method.
Choose a curling iron barrel size between 1/2 inch and 1 inch. This works best for fine to medium hair types. A 1-inch barrel works well for classic spiral curls.
For tighter curls, go smaller with a 1/2-inch barrel and hold the heat longer. Flat irons curl fast by clamping hair between two plates and bending it into place.
Here’s how to curl hair that has been straightened using heat tools:
- Divide your hair into manageable sections, around 10 or fewer for the whole head.
- Heat your curling iron or flat iron to medium-high, about 300°F to 375°F. Change the heat depending on how thick your hair is.
- Take a 1-inch section of hair. Wrap it around the curling barrel or clamp between flat iron plates.
- Hold your hair on the barrel or plates for 8 to 15 seconds. Time depends on how tight you want the curl.
- When using a flat iron, twist it while moving down the hair section. This makes spirals or waves.
- Release the curl gently, avoiding brushing or pulling to keep shape intact.
- Repeat with all sections until your head is fully curled.
- Finish with a light mist of hair spray or curl-defining cream to hold curls longer.
Flat iron curls are great for quick styling and soft waves. Keep hair flat against plates and avoid twisting for best results. Using a curling iron gives sharper, more defined curls.
Holding the heat longer makes tighter curls that last. For thin hair, use lower heat and smaller barrels. Thick hair handles higher heat and larger barrels better.
People often curl their straightened hair as the first step for updos like buns or chignons. Curling irons with adjustable heat settings help you avoid damage and get the best results. Adding a curl cream or mousse after curling can boost hold and shine without stiffness.
How to Prep Straightened Hair for Better Curl Hold
Prepping your straightened hair right can make your curls hold much longer. Washing, drying, and using the right products adds grip and texture your curls need. It takes just a few extra steps but helps your curls stay bouncy throughout the day.
Avoiding Washing Too Often Before Curling
Washing your hair right before curling can make your curls slip out faster. Natural oils and light buildup help curls hold better. So styling second-day hair often works best.
Skip shampoos made to keep hair very straight when you wash. They make hair too slippery for curls.
Wash your hair one day before curling. Use a little dry shampoo to refresh.
Add a light mist to give your hair some grip. Styling on hair that’s not freshly washed often gives curls more staying power.
Applying Heat Protectants and Styling Products
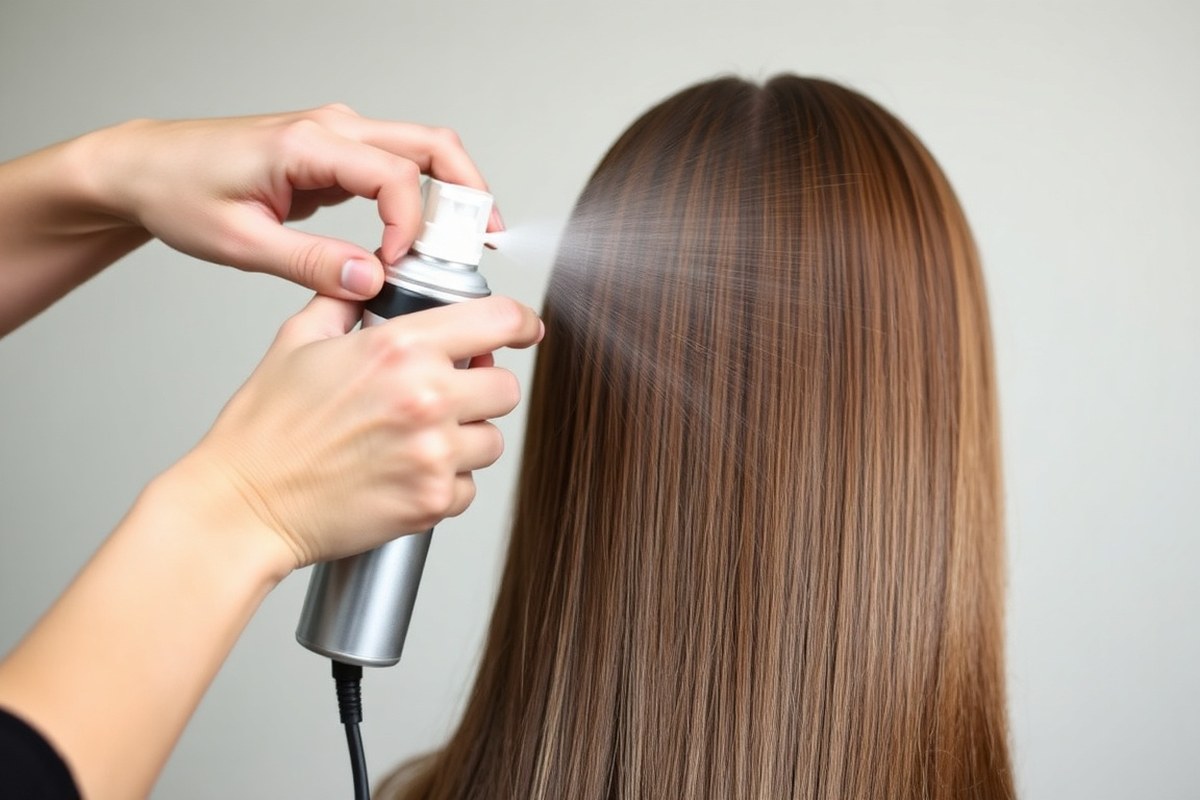
Always spray heat protectant before any curling with heat tools. This product shields your hair from damage and prevents breakage.
After heat protection, add a curl hold spray or mousse to help curls keep their shape. These products coat each strand, making curls last longer.
Use a root lift spray near your scalp for extra volume. Volume at roots helps curls look full and less flat.
- Heat protectant spray applied to dry hair
- Light curl-improving mousse for hold without stiffness
- Root lift spray for volume at scalp
- Texturizing spray or sea salt spray for definition
- Finish mist with curl hold spray or light hairspray
Skip heat protectant only if you plan no heat styling. Always follow label directions.
Products that add texture and hold will work only if you apply them before you curl. Add light layers of product to avoid heaviness that can weigh curls down.
Adding Texture and Volume Before Curling
Straightened hair feels smooth and silky, which makes curls fall out quickly. Rough drying your hair first adds texture and grip.
Use your blow dryer on low heat and sweep or scrunch hair roughly to create volume. This makes curls easier to form and hold.
After drying, a sea salt spray or texturizing spray adds grit to your strands. This extra texture helps your curls stay defined and separates them nicely.
Best Heat Settings and Curling Techniques for Straight Hair
Lower heat settings work best on fine or thin straightened hair. They reduce damage while still making curls hold. Thick or coarse hair usually needs medium to high heat settings to form curls that last.
Use a curling iron temperature between 300°F and 350°F for fine hair. For thick hair, you can go up to 400°F but avoid higher to prevent heat damage.
Hold the hair around the iron for 8 to 15 seconds. The exact time depends on your heat level and hair type.
The size of each hair section affects curl tightness. Smaller sections make springier curls.
Larger sections create loose waves. For spiral curls, twist hair from roots to ends before wrapping it around the iron.
| Hair Type | Heat Setting (°F) | Section Size | Hold Time (Seconds) | Curl Style |
|---|---|---|---|---|
| Fine or Thin | 300-350 | Small (½ inch) | 10-15 | Springy or Loose Curls |
| Medium | 350-375 | Medium (½ to 1 inch) | 8-12 | Defined or Spiral Curls |
| Thick or Coarse | 375-400 | Medium to Large (1 inch) | 8-10 | Loose Waves or Spirals |
Keep the curling iron moving slowly as you wrap hair. Don’t stop or hold too long in one spot to avoid burning. For a relaxed beach wave, leave hair ends straight by curling the mid-shaft only.
Pull smaller sections for tighter curls or waves on short hair. Long hair works well with bigger sections for looser waves. Twist hair before curling to get more defined spirals that hold better.
Common Curling Mistakes and How to Fix Them
Curls often fall flat fast on straightened hair. This happens because the hair is very smooth. It lacks the roughness needed to hold a curl.
Using too much product can weigh curls down. Curling big sections also hurts bounce.
Both make curls lose shape quickly. Avoid these mistakes to get longer-lasting curls.
Common errors include using the wrong curling technique or section size. Curling hair in flat motions or twisting it tightly around a 1-inch barrel creates firm ringlets.
But curling large pieces creates loose waves that don’t hold well. Also, touching curls too much right after styling breaks their shape.
- Don’t brush curls after curling; use fingers to style instead.
- Avoid shampooing hair the day you curl; dirty hair holds curls better.
- Use smaller sections for tighter curls; bigger sections create looser curls.
- Remove bobby pins from curls gently to keep ringlets intact.
- Curl hair near the face outward for a flattering look.
- Gently run your fingers through curls to loosen them. This helps if they look too tight.
- Use a 1-inch curling iron for a good balance of tight and loose curls.
Run your fingers gently through curls when they feel too tight. This softens them slowly. For looser curls, curl hair hours before your event.
Let the curls relax on their own. Skipping brushing until curls cool also helps maintain their form.
Tight curls form best when hair wraps around the iron flat, not twisted. Twisting before curling can make curls uneven and frizzy. Also, avoid curling hair that is too freshly washed.
Slightly dirty hair grips curls better. These small fixes improve curl hold dramatically.
How to Protect Your Hair from Heat Damage When Curling
Always use a heat protectant spray before curling your straightened hair. Spray it on each small section from at least 6 inches away to avoid wet spots. This layer protects your hair from heat up to 300°F or more.
High heat often causes dryness and breakage. It keeps your hair safer during styling.
Don’t skip the spray, even if you’re in a rush. It costs about $10 to $20 for a good thermal protectant and lasts for months. Without this, your curls may lose shape quickly.
Your hair might look frizzy or brittle after a few uses. This happens because the protective spray is missing.
Avoid washing your hair one to three days before curling if you can. Freshly washed hair can be softer and less able to hold curls. Oils built up on your scalp help protect strands and keep curls lasting longer.
Detangle your hair gently with a wide-tooth comb while conditioning or after spritzing thermal spray. This avoids pulling and breaking fragile strands. Brushing dry hair once it’s curled risks loosening the curls and causing damage.
Choose lighter shampoos and conditioners when you know you’ll curl your hair. Heavy, moisturizing products weigh hair down and make curls fall flat sooner. Look for volumizing or texturizing sprays instead to keep your hair bouncy and full.
Test your curling iron’s heat before working on your hair to avoid burns. Start with a medium heat of about 300°F and adjust as needed. Holding the iron on the same spot too long can cause heat marks or split ends.
Try curling a small section of hair first to practice. This helps you learn the technique safely. It also reduces the chance of damage.
Curling takes time, so don’t rush. Slow and steady sections protect your hair and help the curls last.
Never skip heat protectant spray, even for a quick curl. It’s your best defense against damage.
How to Maintain and Refresh Curls in Straightened Hair
Curls on straightened hair need extra care to last longer. Using the right products and protecting curls overnight can help. A few quick refresh tricks keep curls looking fresh on the second day.
Using Hairspray and Setting Sprays Correctly
After curling, spray your hair with a light hairspray or a setting spray. Wait for the curls to cool completely before touching them. This locks the curl shape and prevents frizz.
Spray evenly, holding the bottle about 8 to 10 inches away from hair. Too much product can weigh your curls down or make them sticky. Choose lightweight hairsprays labeled for flexible hold to keep curls soft yet firm.
Sleeping Methods to Preserve Curls
Sleep carefully to protect curls. Cotton pillowcases cause friction, which can flatten curls or cause frizz. Use a 100% silk pillowcase or a silk hair bonnet to maintain curl shape overnight.
Another option is loosely braiding your hair before bed. Braids help hold shape and give curls extra set time. Keep them loose enough to avoid flattening the curls.
- Sleep on a silk or satin pillowcase
- Wrap hair in a silk bonnet or scarf
- Braid hair gently before sleeping
- Use a lightweight leave-in curl moisturizer
- Avoid heavy oils or creams that flatten curls
- Sleep with your hair loose to reduce tangles
These steps reduce frizz and preserve curls longer. Proper overnight care can extend curls up to two days or more.
Touch-Up and Refresh Techniques for Second-Day Curls
Curls generally last about one to two days on straightened hair before they lose bounce. You can refresh them with a few simple tricks. Lightly mist your hair with water or a curl refresher spray.
Use your fingers to gently reshape and separate curls. Avoid brushing, as this can cause frizz. When curls get loose, use a curling or flat iron on low heat.
Apply a small amount of mousse or hairspray during touch-ups. This helps hold the curl shape without stiffness. Keep product use minimal to avoid weighing curls down.
Heat-Free Methods to Curl Straightened Hair
Yes, you can curl straightened hair without heat. Heat-free methods protect your hair from damage and add gentle waves or curls. These methods usually take longer but can create curls that last up to several days.
Using Foam and Fabric Curlers
Foam and fabric curlers are soft, lightweight tools that wrap hair into curls without heat. They work well on damp hair and cause less breakage than traditional curling irons. They come in different shapes, like tubes or three-pronged curlers, to create various curl sizes.
Here is how to use foam or fabric curlers on straightened hair:
- Start with slightly damp hair. You can spritz dry hair lightly with water.
- Apply a small amount of volume foam or curl-improving mousse to hold curls longer.
- Divide hair into sections, about 1 inch wide each.
- Start wrapping hair around a foam or fabric curler from the tip. Roll the curler up toward your scalp to hold the hair. Make sure the curl stays smooth and tight as you roll.
- Secure the curler in place; foam curlers usually twist or bend to hold.
- Allow hair to dry fully. Air drying can take 4 to 6 hours or overnight for best results.
- Remove curlers gently and use your fingers to separate curls for a natural look.
- Finish with a light mist of hairspray for hold and shine.
Using foam curlers overnight is safe and can create curls that last two to three days. Results depend on how well your hair dries around the curlers. Avoid rolling hair too tightly to prevent kinks and discomfort.
Braiding and Twisting Damp Hair
Braiding or twisting damp hair creates waves and curls without any tools. These methods are quick and require nothing more than hair ties or clips. They help your curls last by setting natural waves as hair dries.
To braid or twist your hair for curls, follow these steps:
- Saturate hair with water or a light curl-improving spray for better hold.
- Split your hair into different sections for curl size control. Use more sections if you want your curls to be tighter. Fewer sections will create looser, bigger curls.
- Braid each section tightly or twist the strands around each other.
- Secure the ends with hair ties or clips.
- Let hair dry completely, ideally overnight or for at least 6 hours.
- Carefully undo the braids or twists.
- Finger comb and apply light hairspray to set the curls.
You can pick tight, small braids for bouncy curls or thick, loose braids for soft waves. Braids hold best when hair is damp but not dripping wet. This method avoids heat damage but takes patience.
Setting Curls with Bobby Pins or Clips
Using bobby pins or duckbill clips is another way to curl hair without heat. This technique involves wrapping small sections around your fingers and pinning them to dry. The curls created this way can be tight or loose, depending on section size.
Follow these steps to set curls with pins or clips:
- Apply a curl-improving product to damp or dry hair.
- Take small sections, about 1 inch wide.
- Wrap each section around your finger to form a curl.
- Pin the curl flat against your scalp with a bobby pin or duckbill clip.
- Spray curls lightly with hairspray.
- Leave the curls pinned until hair cools and sets, about 1 to 2 hours or overnight.
- Remove pins gently and separate curls with fingers for volume.
Pinning curls lets you control the curl shape and size precisely. Holding curls in clips until fully cooled sets them firmly, so they last longer. Avoid pinning wet hair too tight to prevent dents in your curls.
Choosing Professional Help for Curling Straightened Hair
Seeing a stylist can help if your straightened hair won’t hold curls. Professionals use tools and techniques that work better than home options. They know how to prep your hair for longer-lasting curls without damage.
A stylist often uses professional curling irons with precise heat control. Some tools let you set heat from 250°F to 400°F. This helps if your hair is fine or thick.
Adjustable heat protects your hair and styles curls better. Some professionals apply a heat protectant or setting spray that locks curls in place.
Stylists sometimes use pin curls or rollers to create curls. They also mix heat with setting products. These methods give lasting curl shapes.
These techniques keep curls defined longer. Struggling with very straight hair?
Stylists can add light texture treatments. Sometimes chemical products help curls stay longer.
Professional curling also involves sectioning your hair correctly, making each curl tight and consistent. This helps avoid uneven curls and flat spots. The process usually takes 45 minutes to an hour for medium-length hair, depending on hair thickness.
Getting a professional curl usually costs $40 to $100 or more. Price depends on your salon and location. High-end salons may charge more.
It’s worth the price if you want a polished look that lasts beyond a few hours. You’ll get curls that bounce and don’t drop within minutes.
One drawback is that some salons use high heat, which can damage already straightened hair. A good stylist checks your hair condition first and lowers heat if needed. Always ask how they protect your hair during styling to avoid breakage.
Make sure to tell your stylist about your hair’s history and any treatments you’ve done.
Step-by-Step Action Plan to Curl Your Straightened Hair
Follow these clear steps to get curls that last without hurting your hair. Each step helps you see if you’re on the right track.
- Before you start: Make sure your hair is clean and dry, with a heat protectant applied. Your hair should feel smooth but not oily.
- Right before curling: Divide your hair into small sections using clips. Check that each section is manageable and free of tangles.
- During curling: Use a curling iron or flat iron on medium heat. The curls should hold shape for at least a few minutes before cooling.
- Immediately after curling: Let curls set without touching them. Cool curls fix in place better this way.
- After finishing all curls: Gently break curls apart with your fingers for a natural look. Your curls should feel soft, not crunchy.
- Maintenance throughout the day: Lightly mist curls with water or curl refresher spray if they droop. Curls should bounce back quickly.
- Before bed: Wrap your hair or use a silk pillowcase. Check that curls stay intact or easily reshape in the morning.
Frequently Asked Questions
How Do I Prevent Curls from Falling Out Quickly on Straightened Hair?
Use a strong-hold spray right after curling. Avoid touching curls too much to keep them intact longer.
Can I Create Curls on Very Fine Hair Without Heat Damage?
Yes, use low heat or heat-free methods like braiding damp hair. Always apply a heat protectant before styling.
Is It Better to Curl Hair Before or After Straightening?
Curl after straightening for smoother, longer-lasting curls. Straightening first creates a clean base for curling.
How Do Humidity and Weather Affect Curls on Straightened Hair?
Humidity can make curls drop or frizz faster. Use anti-frizz or humidity-blocking products for better hold.
What Barrel Size Works Best for Creating Loose Waves on Straight Hair?
A 1-inch to 1.25-inch barrel makes natural-looking waves. Larger barrels create softer, looser curls.
Can I Use the Same Curling Tools on Straightened and Natural Straight Hair?
Yes, but adjust heat settings to avoid over-drying or damage. Straightened hair may need lower heat.
The Bottom Line
Good curls on straightened hair come from careful steps and patience. Start with heat protection and work in small sections for best results. Try one curling session today to see how your hair reacts and adjust from there.