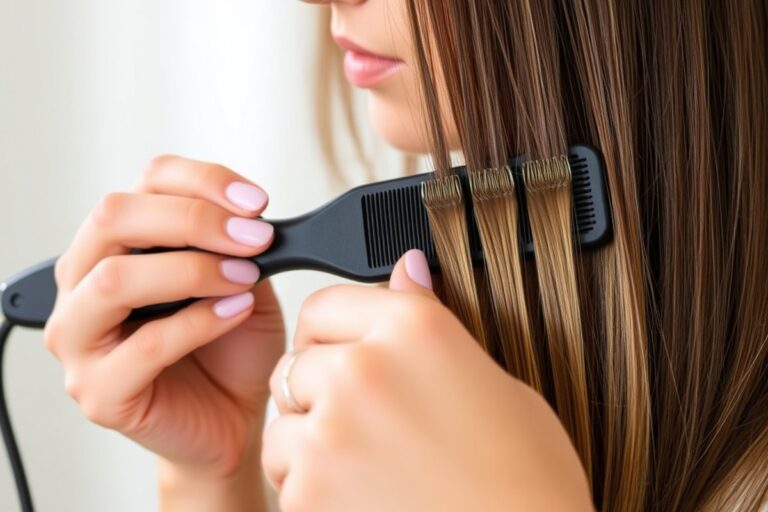
How to Dye Your Own Hair at Home: A Complete Guide for Perfect Results
Learning how to dye your own hair can save you time and money. The key is to prepare your hair properly and follow clear steps. Wash your hair two times using shampoo before coloring.
Do this 24 to 48 hours before applying dye. This removes dirt and buildup from hair.
Choose a dye that suits your hair type and the look you want to achieve. Permanent hair dye lasts the longest but needs touch-ups every 6 to 8 weeks. Pay attention to how long you leave the dye on to get the best results.
Apply the dye evenly, then cover your hair with a shower cap to lock in moisture. This helps the color sink in better and prevents uneven patches. Keep an eye on your hair during processing to avoid over-processing or damage.
Key Takeaways
- Shampoo twice 1-2 days before dyeing to clean hair thoroughly.
- Use permanent dye for longer-lasting color, retouch every 6-8 weeks.
- Leave dye on hair between 30-45 minutes under a shower cap.
- Check your hair every 5-10 minutes while dyeing for even color.
- Fine hair lightens faster; reduce dye time by 5-10 minutes.
- Coarse or dry hair needs the full recommended dye time.
How to Dye Your Hair at Home Step by Step
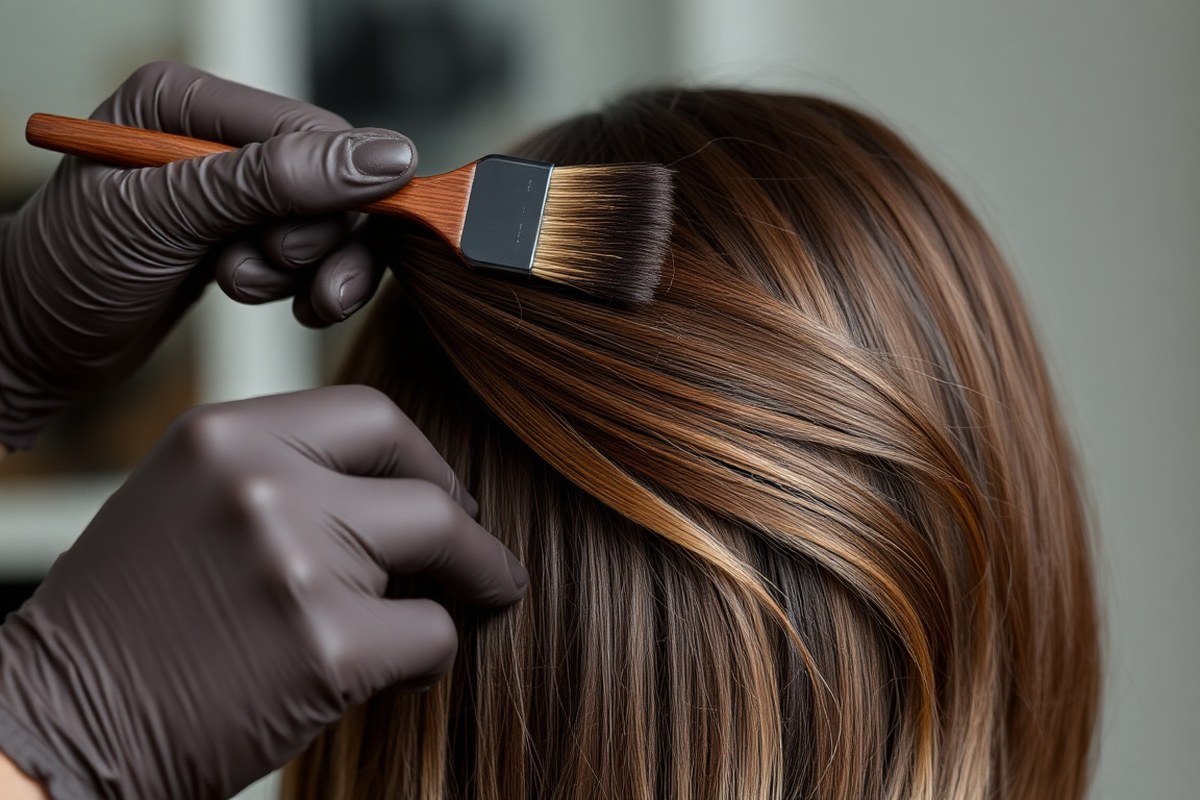
Dyeing your hair at home goes smoothly when you follow a clear plan. You need proper prep, careful dye application, timed processing, and gentle rinsing. These steps will help you get even color and avoid common mistakes.
Preparing Your Hair and Workspace
Start with clean, dry hair that hasn’t been washed for at least a day. Natural oils protect your scalp and help color stick evenly. Gather all supplies like gloves, dye, an old towel, and a comb before you begin.
Protect your skin by applying a clear lip balm along your hairline and around ears. This stops dye stains from sticking to your face. Cover your clothes with an old shirt or cape to prevent dye spills.
Applying the Dye Correctly
Apply dye to your roots first. They soak up color slower. Roots need more time to absorb the dye.
Use a brush or a clean toothbrush to paint dye precisely, especially for highlights or lowlights. Divide hair into sections.
Start dyeing from the back. Move forward to cover all hair evenly.
Make sure you use enough dye to cover the hair well. Too little dye can cause patchy spots.
Keep your hair loose while applying. Tying it up too soon might create uneven color.
Setting a Timer and Checking Color
Check the dye box instructions. Usually, leave color on 25 to 35 minutes. Timing matters for the best results.
Leave stubborn grey hair dyed longer. Add 10 more minutes for better coverage.
This helps the color stick well. Watch your hair color develop by checking the shade through the strands without rinsing.
Avoid disturbing the dye while it processes. Letting your hair hang down helps the color spread evenly. Stop the timer exactly on time.
Over-processing can damage your hair. It may also cause unwanted color tones.
Rinsing and Conditioning Your Hair
Rinse your hair with lukewarm water until the water runs clear. Rinse hair for 3 to 5 minutes. This removes leftover dye.
It avoids staining skin or clothes. Apply the conditioner from your dye kit.
It seals in color. Nourishes your hair after rinsing.
Leave the conditioner on for the time the instructions suggest, often 2 to 5 minutes. Rinse again with cool water to close the hair cuticles, locking in your new color. Gently towel dry your hair to avoid breakage.
- Gather all tools: dye, gloves, comb, timer, old towel, lip balm.
- Apply lip balm along hairline and ears to protect skin from staining.
- Section hair and apply dye starting at roots using a brush or toothbrush.
- Keep hair loose during application to ensure color spreads evenly.
- Set a timer for the recommended processing time, usually 25, 35 minutes.
- Check color development without rinsing by looking at a strand.
- Rinse hair with lukewarm water until clear, then apply conditioner from kit.
- Leave conditioner on 2, 5 minutes, rinse with cool water, towel dry gently.
Choosing the Right Hair Dye for Your Needs

Choosing the right hair dye depends on what you want. Permanent dyes offer lasting color and grey coverage. Semi-permanent and temporary options fade faster but are gentler and less commitment.
Permanent Hair Dye Explained
Permanent hair dye uses chemicals to lift your natural color and deposit new pigment. It works well for full coverage, especially on grey hair. You usually mix it with a developer to activate the color.
It lasts until your hair grows out or you recolor it. This can take about 6 to 8 weeks. Apply it thoroughly on dry hair.
Cover your hair with a shower cap. Let it process for 30 to 45 minutes. Two boxes may be needed for long hair.
Permanent dye can cause irritation if you have sensitive skin. Always do a patch test at least 48 hours before use. Choose options marked as gentle or for sensitive skin.
Pick ones without harsh ammonia. Look for those with conditioning agents.
Semi-Permanent and Temporary Options
Semi-permanent dyes coat the outside of hair strands without chemical lift. They fade after about four weeks or fewer washes. These dyes don’t need developer and are less damaging.
Temporary dyes come as sprays or styling products. They wash out after one shampoo. Use them to try a fun color or test a shade before committing.
Both options are good for sensitive skin because they don’t contain strong chemicals. They don’t cover grey hair well, though. You want permanent dye for that purpose.
| Dye Type | How It Works | Duration | Best Use | Cost (approx.) |
|---|---|---|---|---|
| Permanent | Lifts & deposits pigment with developer | 6-8 weeks | Full color, grey coverage | $30 per kit |
| Semi-Permanent | Coats hair outside, no developer | Up to 4 weeks | Color change without commitment | $10-$20 |
| Temporary | Surface color in sprays or washouts | 1 wash | Try bold colors, special events | $5-$15 |
The decision is simple: you want permanent dye for lasting results and grey coverage. Choose semi-permanent if you want a short-term change. Pick temporary for quick color and no commitment.
Don’t use permanent dye on wet hair, it can dilute the color and cause uneven results.
Eco-Friendly and Cruelty-Free Dyes
Eco-friendly dyes avoid harsh chemicals like ammonia and parabens. These are usually gentler for sensitive scalps and hair. Look for labels stating cruelty-free and vegan.
These options still provide good coverage but might last a bit shorter than standard permanent dyes. They often cost more but are worth it if you want safer ingredients and ethical brands.
Always read ingredient lists and check certifications. Many eco-friendly dyes also include nourishing oils to help keep hair healthy after coloring.
How to Pick the Perfect Hair Color Shade
Picking the right hair color shade means matching your skin tone and natural hair. Choose colors close to your natural shade to avoid strange undertones. Moving just one or two shades lighter or darker keeps your hair looking natural and healthy.
Matching Hair Color to Skin Tone
Warm skin tones pair well with golden, copper, or bronze shades. These colors add a nice glow and blend softly with warm undertones.
Cooler skin tones suit shades like champagne, beige, or ash blondes. They cool down your skin’s warmth and look natural without clashing.
Your natural hair texture matters, too. Frizzy or curly hair looks better with warm, lighter colors.
Fine or straight hair works well with cooler, darker shades. These choices avoid unwanted orange or brassy hues.
Going Lighter or Darker Safely
Choose a hair color just one shade lighter than your natural shade. Or pick one slightly darker. This keeps the look natural and easy to manage.
This approach avoids harsh lines or odd patches. Going darker is easier for your hair at home.
It also harms your hair less. Darker shades boost your natural tone nicely.
Lightening more than two shades risks brassiness and uneven color. You want a much lighter look. Expect to bleach your hair first before dyeing.
Use a toner afterward with 10 volume or lower developer. Toner helps remove yellow or orange undertones that come from bleaching.
Avoiding Unwanted Undertones
Fine to medium hair often turns warmer with dye, picking up orange or red tones. To avoid this, choose ash or cool shades if your hair is fine. Curly or coarse hair dyes cooler, which may cause ashy or slightly blue undertones.
Use color-depositing shampoos or conditioners once a week to keep your tone fresh. Gloss treatments that last about 10 days also boost shine and help tone your hair.
Watch out for mixing brands or colors. It can cause chemical reactions that damage your hair or make the color weird.
Simple Rules for Picking Shades at Home
Check the color swatches on the dye package. See how the color looks on hair like yours. This helps you pick a color that suits you.
Pick one that matches your current shade or is one step lighter or darker. Avoid mixing products from different brands to prevent bad surprises.
For highlights, pick one shade lighter than your natural hair. This keeps highlights subtle and natural looking. Try not to go too light for a soft effect.
Bright or vivid colors need special care and might not turn out right at home. You want bold changes. Getting advice from a professional is safer for big style shifts.
Best Practices for Applying Hair Dye at Home
Start applying dye at the roots because they often need the most attention. Roots grow out lighter than the rest, so they absorb color fastest. Start with dry hair for the best result.
Wet hair can block the dye. It might stop the color from soaking in fully.
Divide your hair into four or more sections to make sure the color covers everything evenly. Use clips to hold hair after applying dye. Clip each section out of the way.
This helps the dye stay put. This method helps you avoid missed spots and patchy color.
Applying dye to dry hair works better for most brands. The dye sinks straight into dry strands instead of sliding off wet ones. Only use wet hair if the instructions say to.
Some products need moisture to work right. Check the label to be sure.
Protect your skin and clothes by coating your hairline, ears, and neck with a barrier product. Coconut oil helps stop dye drips from staining. Apply it around your neck and hairline.
It creates a protective barrier for your skin. Also, wear an old shirt or cover your shoulders with a towel to catch any spills.
- Detangle hair thoroughly before sectioning.
- Work on one section at a time, starting with the front.
- Apply dye first at the roots, then comb through to the tips.
- Use a dye brush for precise application near the scalp.
- Clip each section up once colored to avoid overlap.
- Wipe any dye on skin quickly with a damp cloth.
- Mix a Sweet’n Low packet into your dye to reduce staining.
When your roots are fully coated, comb the dye down your strands for full coverage. Avoid letting dye drip down your hair because runoff can cause uneven color. Timing matters too, don’t rush but finish your sections efficiently within 1 to 1.5 hours.
How to Perform Patch and Strand Tests Safely
Doing a patch test before dyeing helps you avoid allergic reactions. It checks if your skin gets irritated by the dye.
A strand test shows how the color will look on your hair. Both tests save you time and trouble later.
Follow these steps to do patch and strand tests safely. Start two days before your planned dye day. This waiting time helps you spot any reactions or issues.
- Read the instructions on your hair dye box carefully for test details.
- Patch test: Put a small amount of mixed dye behind your ear. You can also try it on your inner elbow. Wait to see if skin reacts. Wait 24 to 48 hours. Look for redness, itching, or swelling.
- Strand test: Pick a small hair section behind your ear or at the nape. Apply dye exactly as you’ll do for your full head.
- Leave the dye on the strand for the time given in the instructions. Usually, this is 20 to 45 minutes. Follow the exact timing for best results.
- Rinse and dry the strand after timing out. Blow-dry and style it like usual to check the color result in different lights.
- Watch the patch test area for any reaction during the 48 hours. Stop dyeing if irritation happens. See a doctor if the problem continues.
- Wait 24 to 48 hours after tests before applying hair dye all over to be safe.
Using a clarifying shampoo about 24 hours before dyeing removes buildup for better results. Wash your hair twice that day to get it truly clean. Dye your hair only when dry, as many products recommend this.
Never skip the patch test, even if you’ve dyed before. It helps avoid serious allergic reactions.
Covering Grey Hair at Home Successfully
Permanent hair dyes usually cover gray hair the best. They contain stronger pigments that bond deeply to your hair strands. Semipermanent dyes coat the hair surface but don’t last as long or provide full gray coverage.
For stubborn gray hair, starting with the roots is key. Your hair is mostly gray on top? Start dyeing there first.
The roots need more time because new hair grows in untreated. Gently work the dye in with your fingers.
Focus on the back of your head. That area is tougher to reach.
Don’t just trust the box’s processing time for gray hair. You can safely add 5 to 10 extra minutes, but no more.
Overprocessing can damage hair or cause uneven color. Follow the directions but watch the clock and check progress in natural light.
Blend gray and natural hair evenly by sectioning your hair carefully. Apply dye to 1-inch sections and saturate every strand.
This prevents patchiness and keeps your roots and grays consistent. Take your time to avoid rushed spots that miss color.
Have thick or coarse hair that’s fully gray on top? Apply dye to the top first. That area needs longer processing.
Then move to less gray parts, which need less time. This step-by-step timing balances the final look.
Using two dye boxes may be necessary if your hair is thick or shoulder-length. Having enough product helps saturate every strand fully. Insufficient dye can lead to uneven or faded gray coverage after rinsing.
Expect good gray coverage to look even and rich. Gray strands shouldn’t peek through or look dull. Notice uneven color after rinsing?
A touch-up on gray spots helps. Avoid leaving dye on longer than instructions say, as it may backfire.
Be patient with yourself, especially if you’re new to gray coverage. Section your hair carefully before applying dye. Massage the dye with your fingers.
Follow proper timing for natural coverage. Your hair will feel healthier and look better than skipped steps let on.
How to Maintain and Care for Colored Hair
You should wash dyed hair every two to three days. Washing too often strips your colour, making it fade faster. When you wash, use a shampoo made for color-treated hair to keep your shade vibrant.
Color-safe shampoos are gentle and often contain pigments that help lock in your color. Look for sulfate-free options costing $10 to $20 per bottle.
Follow with a conditioner for dyed hair. It seals the hair cuticle and prevents fading.
Heat styling tools and sun exposure cause color to dull. Use a heat protectant spray before blow-drying or flat-ironing. These sprays usually cost $8 to $15 and create a barrier against heat damage.
To shield hair from sun damage, wear a hat or use hair products with UV filters. You can find leave-in sprays with UV protection priced from $12 to $25. Applying these daily helps maintain your color’s brightness longer.
After washing, gently pat hair dry with a towel instead of rubbing. Rough drying can open the hair cuticle, letting color escape. Air drying or using a cool blow-dry setting reduces this risk.
Deep condition your hair once a week to keep strands healthy and moisturized. Use a color-safe deep conditioner for 10 to 15 minutes. This boosts shine and prevents brittle hair that fades quickly.
Adding a color-depositing conditioner once a week can refresh your shade between dye jobs. These products let you brighten your tone without extra dye. They usually cost $15 to $30 and come in many colors.
Don’t forget to avoid styling products with alcohol. Alcohol dries out hair and dulls color. Stick to lightweight oils or serums that add shine without buildup.
When to Call a Professional Colorist
Dyeing your hair at home can be tricky. A big change is harder to do. Damaged hair needs more careful care.
Avoid DIY if your hair feels brittle, breaks easily, or has recently been chemically treated. These conditions increase the risk of damage or uneven colour. So a professional can protect your hair while delivering better results.
Big colour changes need a pro’s help. Going much lighter is one example. Fixing strong dye mistakes is another.
Professionals have tools and knowledge to safely lift old colour or blend tones. Home kits can leave patchy spots.
They may create harsh colour lines. These issues need costly fixes later.
Here’s when to see a colorist instead of DIYing:
- Hair feels dry, brittle, or chemically processed
- You want to go more than 2 shades lighter
- Severe colour unevenness or patchiness after DIY
- Previous dye did not fade fully before recolouring
- Allergic reactions or scalp irritation during home dye
- Complex shades like balayage, ombre, or multi-tone effects
- You want professional correction after a dye mistake
Communicate openly with your colorist about any DIY attempts. Tell your stylist what dyes you used. Share how long you left the colour on.
Mention any uneven spots or scalp pain. This helps them choose the safest way to fix or improve your hair colour.
Never try to fix a dye mistake with more at-home dyeing. It usually makes things worse.
Correcting DIY mistakes often means removing or lightening the excess dye. Professionals use hair-safe bleach or colour removers under controlled conditions. These treatments avoid damage by closely monitoring processing time and hair condition.
Colour correction appointments take two to four hours. Costs range from $100 to $300. Prices vary by salon location.
Trying to fix major problems yourself risks further damage, additional cost, and uneven colour. A clear DIY dye history helps your stylist.
It lets them plan your treatment safely. It protects your hair from damage.
Step-by-Step Action Plan to Dye Your Hair at Home
Follow these steps to get a great hair color without stress. Watch your progress and adjust as you go.
- Before you start: Do a patch test 48 hours before dyeing. No itching or redness means you’re good to go.
- Day 1: Gather your dye, gloves, and tools. Read the instructions fully before mixing the dye.
- Day 1, application: Apply dye to dry hair in sections. Ensure even coverage to avoid patchy spots.
- During processing: Keep the timer set to the recommended time on the box. Rinse the dye out right when time is up.
- After rinsing: Use the conditioner included with your dye. It helps seal the colour and soften your hair.
- Week 1: Wash your hair with a colour-safe shampoo twice to preserve the vibrancy.
- After 2 weeks: Check your roots for any touch-ups. Apply dye only to roots if needed.
- Ongoing: Use a deep conditioner once a week. It keeps your hair healthy and colourful longer.
Frequently Asked Questions
How Often Should I Wash My Hair Before Dyeing It?
Wash your hair twice 24-48 hours before dyeing. This removes all dirt and helps the dye adhere better to clean strands.
Can I Dye My Hair Right After Swimming?
Avoid dyeing hair right after swimming. Chlorine and salt water can damage your hair and prevent the dye from coloring evenly.
Why Is Applying Dye to Roots First Important?
Roots are less porous and need more processing time. Applying dye there first ensures even color from root to tip.
How Long Should I Leave Dye on Stubborn Grey Hair?
For stubborn greys, leave the dye on 10 minutes longer. This gives the dye extra time to fully cover them.
Is It Better to Keep Hair Loose or Tied During Dyeing?
Keep your hair down while dyeing to avoid uneven color. Tying it up can cause patchy spots where dye doesn’t reach well.
How Do I Fix Uneven Color After Dyeing at Home?
Use a color remover or a hair primer designed to fade dye. These can help correct uneven or unwanted tones safely.
Before You Go
Dyeing your hair at home can give you great-looking results when done right. Start with a simple colour and follow the safety steps carefully. Get your supplies and schedule your first dye day today.