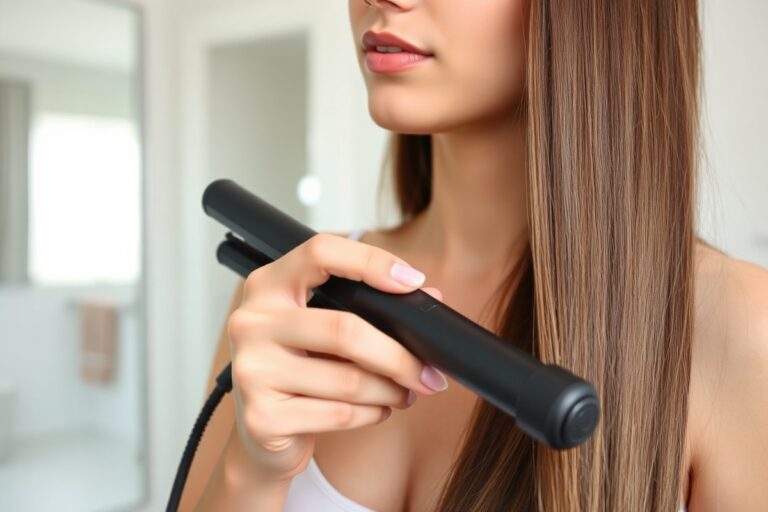
How Can You Curl Your Hair with a Flat Iron: A Complete Guide with Proven Tips
To curl hair with a flat iron, start with a thin section. Clamp the iron about an inch from your scalp. Twist the iron 180 degrees away from your face, then slowly slide it down.
This method heats and bends hair evenly, shaping each curl gently. Curls made with a flat iron tend to last longer and hold better than traditional curling iron curls. This can save time on touch-ups.
Your hair should be dry before curling. Apply heat protectant spray to shield your hair from damage. Use flat iron plates about one inch wide for better control and curl shape.
Adjust heat based on your hair type. Use lower heat for thin hair to avoid damage and higher heat for thicker hair to get smooth curls.
Key Takeaways
- Use one-inch flat iron plates for the most versatile curl size and shape.
- Clamp thin hair at about 300°F and thick hair between 375°F and 410°F.
- Segment hair into 2, 3 cm sections for consistent curls throughout.
- Twist the flat iron 180 degrees away from your face as you glide down.
- Apply heat protectant before curling to minimize heat damage.
- Use slower movements with the iron for tighter curls, faster for loose waves.
How to Curl Your Hair Using a Flat Iron Step-by-Step
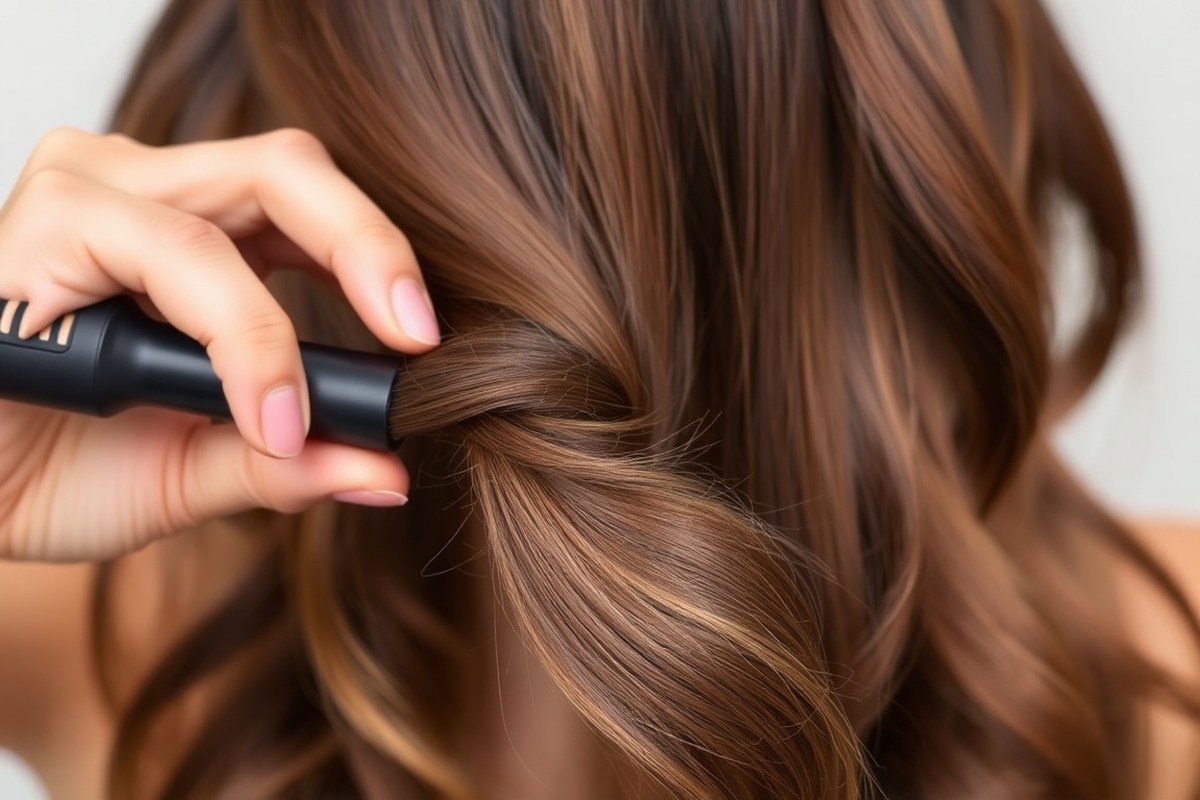
Curling your hair with a flat iron is simple once you follow the right steps. Use 1-inch hair sections for curling. Clamp the flat iron near the root.
Twist your wrist 180 degrees, then slide down to curl. Holding the iron about 10 seconds before sliding down helps shape the curl well.
Preparing Each Hair Section for Curling
Split your hair into small, manageable sections about 1 inch wide. Detangle each section using a brush or comb first for smooth, even curls. This step protects hair from snagging and uneven heat exposure.
Work on dry hair, and clip away the sections you aren’t curling yet. Smaller sections let the flat iron curl your hair more precisely. Larger clumps can cause uneven curls or missed spots.
Twisting and Clamping Technique
Clamp the flat iron near the roots of a 1-inch section for a strong curl base. Hold the flat iron straight up.
Rotate your wrist half a turn away from your face. This helps shape the curl.
This twist wraps the hair around the iron’s edge to shape curls properly. Avoid clamping too close to hair ends to keep the curls natural and less stiff.
Gliding the Flat Iron for Defined Curls
After holding the clamp for about 10 seconds, glide the iron down the hair strand smoothly. Use your fingers to guide the curl’s shape as you move downward.
Move slowly enough, around 5 to 8 seconds per inch, for fine or medium hair. For thick hair, hold slightly longer but never more than 12 seconds to reduce heat damage.
Finishing Each Curl to Set the Shape
Release the hair gently from the iron and immediately wrap the curl around your finger. Hold the curl in your palm or clip it up to cool before letting go.
This step helps the curl hold its shape longer and prevents it from dropping too fast. Cooling curls in place can keep your style put for up to 24 hours. Follow these steps for each section:
- Divide your dry hair into 1-inch sections and detangle each part.
- Clamp your flat iron near the roots of the first section.
- Rotate the iron 180 degrees away from your face with your wrist.
- Hold the clamp for about 10 seconds to shape the curl.
- Glide the iron slowly down the strand, guiding the curl with your fingers.
- Release the hair and twist the curl around your finger immediately.
- Hold the curl in your palm or clip it to let it cool and set.
- Repeat for all sections until your entire head is curled.
Choosing the Right Flat Iron for Curling Hair
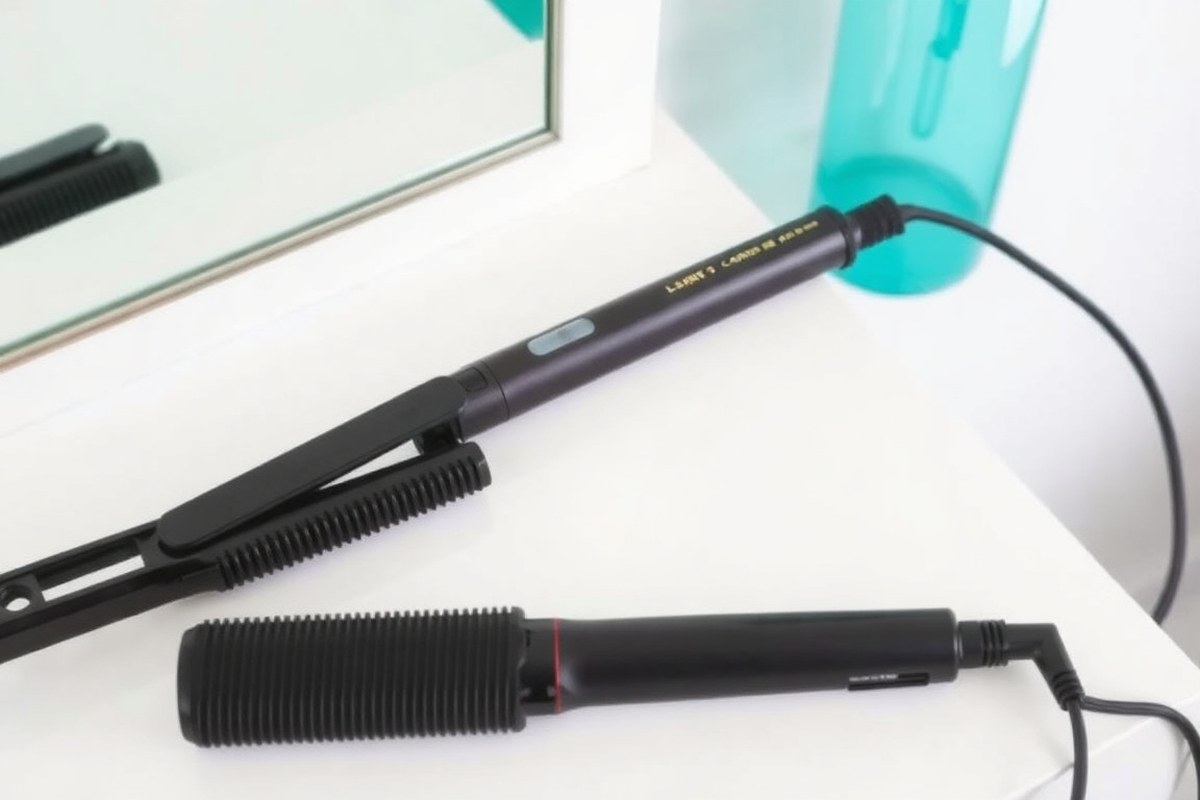
Pick a flat iron with plate material that fits your hair type. Ceramic plates keep a steady temperature within ±10°F. They suit fine or color-treated hair well at 250 to 300°F.
Titanium plates heat faster but vary about ±20°F. They work best on thick or coarse hair types. This hair needs heat around 375 to 410°F. Using the right temperature helps get the best curls. Use a temperature control to avoid damage and get curls that last.
Plate size affects your curl shape. One-inch plates are best for most curling styles.
They let you create anything from waves to tight curls across all hair lengths. Bigger plates work well for long hair but don’t give tight curls precisely.
| Factor | Problem | Solution |
|---|---|---|
| Plate Material | Titanium fluctuates ±20°F, causing uneven curls | Use ceramic plates for ±10°F heat stability |
| Sectioning Effects | Large hair sections cause uneven curls 3x more often | Divide hair into 1-inch sections with clips |
| Heat Settings | Over 400°F creates stringy, damaged curls in 32% of styles | Match heat to hair type: 250°F, 375°F |
Look for flat irons with rounded edges. They let your hair slip smoothly off the plates.
Curled hair won’t have dents or odd lines like with square-edged irons. This makes your curls look natural and bounce freely.
Adjust your flat iron’s temperature to your hair’s needs. Fine or damaged hair needs lower heat around 300°F. Medium hair curls well at 350 to 370°F. Thick or coarse hair requires 370 to 400°F for lasting curls. Setting temps too high risks stringy curls and damage.
Always use a heat protectant before curling to avoid heat damage and keep hair healthy.
How to Prepare Hair and Tools Before Curling
Start curling with clean, dry hair for the best results. Damp hair doesn’t hold curls well and can get damaged easily by heat. After washing, let your hair dry completely or use a blow dryer for faster results.
Apply a heat protectant spray evenly to every section before curling. Heat protectants like Aussie Total Miracle Heat Protecting Spray shield your hair from damage. This step keeps your strands healthy and helps curls last longer.
Detangling your hair before curling is important to avoid pulling and breakage. Use a wide-tooth comb or brush to smooth out knots gently. Detangled hair allows the flat iron to glide smoothly, creating even curls without snagging.
Section your hair into 1- to 1.5-inch wide parts for consistent, tight curls. Smaller sections give you better control and curls that last about 35% longer than larger ones. Work from the bottom layers up to the top for an even finish.
- Start with clean, dry hair without product buildup.
- Apply a heat protectant spray evenly on all hair sections.
- Detangle hair fully to prevent breakage and snagging.
- Section hair into 1- to 1.5-inch widths for tighter curls.
- Make sure the flat iron is clean and fully heated before use.
Check flat iron plates for any leftover hair or product before curling. Dirty plates can cause uneven heat and damage your hair. Wipe plates with a damp cloth and unplugged iron for safety.
Heat your flat iron fully to your hair type’s ideal temperature. Fine hair needs 350°F to 360°F while thick hair can take 380°F to 400°F. Proper heat ensures your curls form correctly without extra heat damage.
Setting the Right Temperature Based on Hair Type and Style
Fine hair needs the lowest heat to avoid damage and frizz. Set your flat iron between 250°F and 300°F for fine or damaged strands. Using higher heat risks breaking your hair and stripping natural texture.
Medium or thick hair can handle more heat for longer-lasting curls. Aim for 350°F to 400°F to shape curls without extra passes. Thick hair often requires higher heat to form tight spirals or defined waves.
Lower heat settings create soft beach waves by gently bending hair strands. Use 300°F to 350°F for loose, natural-looking waves with a few slow strokes. For tighter, ribbon-like curls, increase to 375°F to 425°F, working in smaller sections for control.
Set the temperature as low as possible while still achieving your style. Start at the bottom of your hair type range and test a small section.
Increase heat if curls fade quickly or don’t hold. But avoid going above 450°F to cut damage risk.
Thinner flat iron plates, around 1 inch wide, heat hair evenly and allow precise curl shaping. Larger plates run hotter and work faster on thick hair but usually create looser waves. Use a tool with adjustable heat and smooth, rounded edges for best results.
Remember, overheating raises frizz chances by nearly 50%. Keep passes to two per section and use heat protectant sprays. This combo helps curls last and saves your hair from breakage and dryness.
Different Curling Techniques with a Flat Iron Explained
You can make different curling styles with a flat iron. Twist and glide the tool in various ways. Each motion changes your curl type.
Spiral curls, beach waves, and flicks each use different wrist angles and hair section moves. Mixing these techniques adds volume and dimension, especially on medium to long hair.
Making Tight Spiral Curls
Tight spirals need a complete 360° wrist twist as you pull the iron down the hair. This motion shapes long-lasting, defined curls that look polished and bouncy. Start near the root for full curls or farther down for looser spirals.
Follow these steps to do spiral curls right:
- Section your hair into small, even parts about 1 inch wide.
- Clamp the flat iron near your scalp on one section.
- Rotate your wrist 360 degrees outward and hold tight to twist the iron.
- Slowly glide the iron down the hair shaft, keeping the twist steady.
- Release the curl gently when you reach the end of the strand.
- Repeat for all sections, alternating twist directions to avoid curls joining.
Go slow with each glide to form smooth spirals and avoid kinks.
Creating Loose Beach Waves
Beach waves look natural and relaxed by twisting the flat iron less than a full turn. Letting the ends stay straight creates that easy, undone style. You’ll press for shorter times and use wider hair sections for a soft wave.
This is how you do it step-by-step:
- Divide hair into larger sections, about 2 inches wide.
- Clamp the iron on your hair about 2 inches from the root.
- Twist the iron 180 degrees backward on one side to create a wave.
- Slowly glide the tool down the hair, stopping 1 to 2 inches from the ends.
- Let the tips stay straight for that beachy feel.
- Alternate twisting directions on each section to add natural volume.
Use texturizing spray before styling to boost wave hold and volume.
Flicks and Soft Curls for Volume
The flick technique flips the ends subtlety outward or inward for a lively finish. It lifts the roots when you combine wrist twists with volume sprays. Flicks usually start mid-length instead of close to the scalp.
Try these simple flick steps:
- Pick a section and place the flat iron about halfway down the hair.
- Turn your wrist halfway backward to prepare for the flick.
- Glide the iron down, flipping the hair ends out or under softly.
- Loosen the curl slightly for a natural bounce and softness.
- Alternate flick directions between sections to increase volume and avoid a flat look.
Don’t hold the iron still too long at the ends to prevent obvious creases.
How to Make Your Flat Iron Curls Last Longer
Curls last longer when they cool completely before you style or touch them. Cooling lets beta keratin bonds in your hair lock in the curl shape. Waiting 10 to 15 minutes while pinned curls cool helps curls hold.
It keeps about 85 to 95% of the curl’s shape. Let your hair set completely for the best hold.
Using the right products boosts curl hold without weighing your hair down. Apply a light mousse or holding spray right after curling. Then use your fingers to separate curls gently, keeping their shape and volume.
Switching curl directions gives your hair a natural lift and more body. Curl one section toward your face and the next one away. This creates volume and prevents curls from clumping.
- Let curls cool pinned for about 10, 15 minutes before touching.
- Apply holding spray or mousse right after curling each section.
- Alternate curling directions for natural-looking volume and bounce.
- Use smaller flat iron plates for tighter curls; bigger plates for waves.
- Refresh curls by spritzing water and scrunching without heat.
- Avoid brushing curls until they fully cool to avoid frizz and loss.
Refreshing curls without heat means spritzing some water or a leave-in product. Then scrunch your hair with your hands to wake up the curls. Avoid using a brush; it breaks the curl shape fast.
Using heat on curls again can cause damage or lose curl hold. Stick with cooling and light touch-ups for better long-term style. Proper cooling and the right products help your curls last through busy days or nights out.
Common Mistakes and How to Fix Flat Iron Curling Issues
Curls often fall out quickly because the hair is too heavy or damp. Finish curling only when hair is completely dry to help curls hold better.
Use smaller sections, about 2 to 3 centimeters wide. So each curl gets enough heat and shape.
Creases in hair come from clamping the flat iron too long or not sliding it smoothly. Don’t stop the iron in one spot. Instead, keep it moving gently as you twist the hair.
Keep the flat iron one inch away from your roots. This avoids sharp bends in your hair. It also helps add volume.
Skipping heat protectant spray causes damage and frizz. Always apply a heat protectant like Herbal Essences Argan Oil &.
Aloe Heat Protect Spray evenly before curling. It shields strands from heat damage and helps curls look shiny, not dull or brittle.
Uneven curls happen when some sections get missed or when section sizes vary too much. Take your time dividing hair into even sections, clipping the rest away. Curl each section fully before moving on, so nothing stays straight or limp.
Frizziness and loss of curl definition happen when hair is brushed out or disturbed too soon. After curling, let curls cool down and set for at least five minutes. Finish with a light hold spray to keep curls smooth without stiffness.
Layered hair can make curls look more natural and bouncy but needs consistent curling technique. Curl each layer evenly to get a balanced shape and avoid flat spots. Take smaller sections of your hair if it’s short.
Use lower heat to avoid hair damage. This gives you tighter curls.
Damage also comes from using too high heat. Choose a moderate temperature between 300°F and 350°F. Use lower heat for fine or color-treated hair. Go higher only for thick or coarse hair types.
Adapting Curling Techniques for Different Hair Lengths and Textures
Curling your hair with a flat iron works differently based on your hair’s length and texture. You’ll need to change the flat iron’s plate size and temperature. Also, adjust the size of hair sections for best curls.
This helps avoid damage. Picking the right settings helps protect your hair and saves you time.
Short Hair Curling Recommendations
For short hair, use a flat iron with plates about ½ inch wide. This size helps you grab small sections easily and curl close to the roots. Temperatures between 350°F and 360°F usually work well to avoid burning fragile short strands.
Keep the sections small, about ½ inch wide, to get precise curls that hold their shape. Too large a plate or too much heat can cause uneven curls or heat damage. Moving slowly and using a heat protectant spray protects your hair and creates neat curls.
Medium Length and Fine Hair Tips
Medium length hair pairs best with a 1-inch wide flat iron plate. This size balances speed and control for curls that look natural and last. Fine hair needs a lower heat range, between 350°F and 360°F, to prevent breakage and dryness.
Divide hair into 1-inch sections for even heat distribution and consistent curls. Smaller sections help curls hold longer, especially with fine strands. Avoid cranking the heat past 360°F, fine hair burns easily and loses its shine.
Thick, Coarse, or Long Hair Considerations
Thick or coarse hair needs a flat iron with steady heat. It should reach up to 400°F. This ensures better curling results.
Use plates at least 1 inch wide to cover more hair and speed up curling. Larger sections, up to 1 inch wide, work best to create durable curls and volume.
Long hair needs wider plates on the flat iron. Use higher heat too. The hair is heavier and tougher to curl.
Use heat protectant carefully before styling your hair. Don’t hold the flat iron too long in one spot.
This avoids heat damage. Sectioning hair into clean, larger chunks saves time and prevents uneven curls.
| Hair Type | Temperature Range | Section Width |
|---|---|---|
| Fine | 350°F, 360°F | 1 inch |
| Medium | 360°F, 380°F | 1 inch |
| Thick | 380°F, 400°F | 1 inch |
Use this table as a starting point for your heat and section choices. Adjust depending on how your hair reacts and how tight or loose you want your curls.
Test heat and section size on a small hidden hair part first. Make sure curls look good before styling all your hair.
Always use a heat protectant before curling to reduce heat damage and breakage.
Step-by-Step Action Plan for Curling Hair with a Flat Iron
Follow these steps today to get smooth curls using your flat iron. Each step helps you build skill and check your results.
- Before You Start: Wash and dry your hair completely. Your curls will last longer and look better without wet spots.
- Five Minutes Before Curling: Apply heat protectant evenly. Your hair stays safe and avoids heat damage.
- First Curl: Set the flat iron to the right temperature for your hair type. Test on a small section to see the curl hold.
- During Curling: Use the twisting technique on one-inch sections. The curls should appear smooth and rounded.
- Halfway Through: Check your curls and adjust your speed if needed. They should feel warm, not hot or stiff.
- After Curling: Let your curls cool untouched for 10 minutes. This sets the shape and helps them last.
- Final Step: Lightly spray your curls with a flexible hold hairspray. Feel the curls move without crunchiness.
Frequently Asked Questions
Can You Curl Your Hair with Any Type of Flat Iron?
You can curl your hair with any flat iron. But those with rounded edges work best. Rounded edges stop creases and help you form smooth, even curls.
How Do You Avoid Creases When Curling Hair with a Flat Iron?
Avoid squeezing the flat iron too tightly to prevent creases in your hair. Too much pressure can break the hair’s curve and ruin the curl shape.
Is It Better to Curl Hair with a Flat Iron Using Small or Large Sections?
Small sections around 2, 3 cm give more defined curls with a flat iron. Larger sections usually create loose waves rather than tight curls.
Why Does My Hair Sometimes Not Hold Curls from a Flat Iron?
Your curling technique or heat setting might be off if curls don’t hold well. Using the right temperature for your hair type and section size helps curls last.
How Do You Add Volume While Curling Hair with a Flat Iron?
Clamp hair one inch from the roots and lift vertically to add volume. This technique boosts height by about 10, 18% without extra products.
Can You Curl Your Hair with a Flat Iron If It’s Very Short?
Yes, curling short hair needs quick wrist twists and smaller sections. Extra practice helps to control the flat iron without burning your scalp or hair ends.
Wrapping Up
Flat iron curls can give you a polished, natural look when done right. Try curling one section to practice first. Enjoy your new styling skill and keep experimenting.