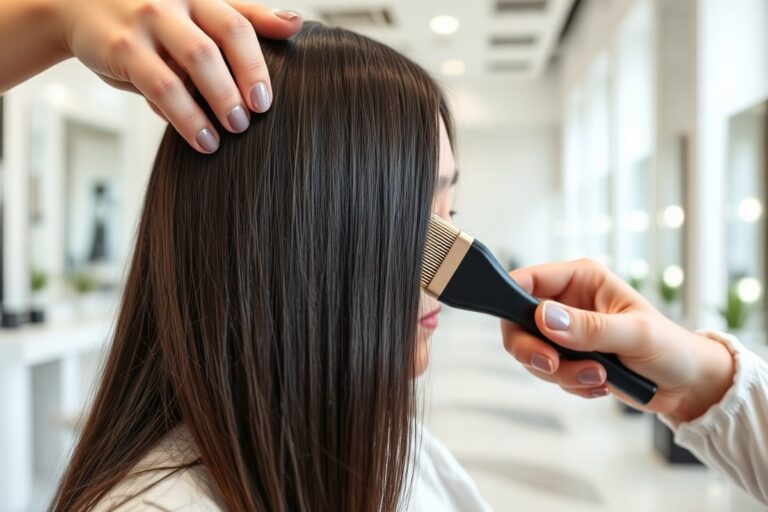
How to Style with a Flat Iron: 8 Essential Techniques for Perfect Hair
Learning how to style with a flat iron can change your hair game fast. You can create sleek, straight looks or soft curls using just one tool. The key is to prep your hair right and know your flat iron’s settings.
Start with completely dry hair to avoid damage and get better results. Use heat protection spray every time before you touch the iron to keep your strands safe. Picking the right temperature depends on your hair type.
Fine hair needs lower heat. Thick or curly hair requires higher heat.
Work in small sections and move the iron steadily to prevent heat spots and damage. Patience pays off here, so don’t rush through your style. With the right moves, a flat iron can give you everyday styles and red-carpet looks alike.
Key Takeaways
- Always dry your hair 100% before using a flat iron.
- Use a heat protectant spray to guard against heat damage.
- Set your flat iron temperature based on your hair thickness and texture.
- Clamp the iron about one inch from the roots for even styling.
- Move the flat iron steadily to avoid creases and heat spots.
- For curls, do a full 360-degree turn away from your face.
How to Style Hair with a Flat Iron: Basic Steps

Start by protecting your hair from heat damage. Spray a thermal protectant evenly through dry hair to help keep strands safe and smooth. Then, divide your hair into manageable sections for even styling.
Sectioning your hair properly prevents redoing areas and helps the straightener glide easily. Start at the bottom of your head. Clip upper layers out of your way.
Work upward in sections. Smaller one-inch sections let the flat iron work through hair more efficiently.
- Spray a heat protectant evenly through dry hair and let it set.
- Part hair into four or more sections using clips, starting from the nape.
- Take a one-inch section from a clipped area and place the flat iron near the roots.
- Clamp the flat iron and slowly glide it down to the ends in one smooth motion.
- Repeat this process, moving section by section toward the top of your head.
- Clamp near the middle when styling curls. Slowly twist the iron as you glide down.
- Allow styled sections to cool before touching to set the shape better.
Using steady, slow strokes helps create smooth, shiny results on straight hair. For curls, twisting the flat iron gently while gliding adds natural-looking waves. Remember, working in small sections and using thermal protectant makes styling safer and easier.
Choosing the Right Flat Iron for Your Hair Type

Pick a flat iron that fits your hair texture and length well. Match plate materials to your hair’s sensitivity and thickness. Choosing the right size and features helps you style smoothly without damage.
Plate Materials: Ceramic vs Titanium vs Tourmaline
Ceramic plates spread heat evenly to reduce hot spots. They work well for most hair types and cost less than other options. These plates also give your hair a sleek, shiny finish without much damage.
Titanium heats up faster and holds higher temperatures. It suits coarse or thick hair because it straightens strands quicker.
Titanium plates can cause damage if your hair is fine or sensitive. So use lower heat with these.
Tourmaline plates emit negative ions that fight frizz and add shine. They are often built into ceramic plates to boost smoothness. Tourmaline works well on frizzy, dry, or damaged hair to make it look healthier.
| Plate Material | Best For | Heat Distribution | Price Range |
|---|---|---|---|
| Ceramic | Most hair types, sensitive hair | Even, gentle heat | $30 to $100 |
| Titanium | Coarse, thick, or curly hair | Very fast and high heat | $70 to $150 |
| Tourmaline (often combined) | Frizzy, dry, damaged hair | Gentle with anti-frizz ions | $50 to $120 |
Picking the right plate material can prevent split ends and heat damage. Adjust your heat setting depending on the material and your hair’s needs.
Flat Iron Plate Sizes and Hair Length
Choose plate width based on hair length to style efficiently. Narrow plates (around 1 inch) suit short hair and detailed areas near the scalp. Wide plates (1.5 to 2 inches) work better for long, thick hair to save time.
Tiny plates help you get close to roots and fix bangs easily. For example, a flat iron like the TS-2 Millenium Professional ($99) fits short styles well. Using the wrong plate size can cause uneven straightening or burns.
| Plate Size | Hair Length | Hair Type |
|---|---|---|
| 0.5 to 1 inch | Short hair, bangs, fine detail | Fine to medium |
| 1 to 1.25 inches | Medium hair length | All hair types |
| 1.5 to 2 inches | Long, thick, or coarse hair | Thick, curly, or coarse |
Size affects styling control and time spent straightening. Match your flat iron width so you don’t overwork your hair.
Special Features to Look for in a Flat Iron
Look for adjustable heat settings so you control the temperature. Lower heat suits fine or damaged hair.
Higher heat helps thick, coarse hair straighten faster. Some flat irons reach up to 450°F, but many hairstyles are fine below 400°F.
Extra-smooth ceramic plates reduce snagging and help your iron glide. Models like the John Frieda Smooth and Style Finish ($43) fight frizz well. Also, a lightweight iron makes long styling sessions less tiring.
Some irons add tourmaline or infrared tech to protect your hair better. These features improve shine and reduce drying out. Choose features that match your hair needs and budget.
Prices usually range from $30 to $150. Pick what works best for you.
Test a new flat iron on a small hair section first. This helps you find the best heat setting safely. Avoid using full heat right away.
Safe Heat Settings and Protection Tips
Set your flat iron temperature based on your hair type to avoid damage. Fine or thin hair needs warmth between 250°F and 300°F. Normal hair can handle 300°F to 350°F. Thick or coarse hair requires 350°F to 400°F. Start low and increase heat only if your hair doesn’t straighten easily. Avoid temperatures above 400°F, as they burn hair strands quickly.
Avoid using a flat iron on wet or damp hair to prevent damage. Water inside hair strands heats quickly and can boil, causing harm. Always dry your hair fully before styling with heat tools.
Spritz every section of dry hair with a heat protectant spray before using the flat iron. These sprays create a barrier that shields hair from intense heat.
Products like Moroccanoil Protect & Prevent Spray also add shine and block UV rays. Apply heat protectant evenly and wait a minute for it to dry before styling.
Apply a thermal protection serum or leave-in conditioner when hair is damp. This helps cut down on heat damage while styling. It adds a layer of protection to your strands.
But don’t rely on these alone; flat iron only dry hair. Lower the flat iron’s heat right away if your hair smells like burning.
This helps avoid hair breakage and damage during styling. Always pay attention to unusual smells.
Flat irons with ceramic or ionic plates protect hair better than metal plates. These materials distribute heat evenly, reducing hot spots that cause burns.
Avoid holding the iron on one section for more than a few seconds. Glide it smoothly and quickly to shape hair without overexposing any spots to heat.
Always unplug your flat iron after you finish using it. Keep it away from water to avoid electrical shocks. These are simple safety steps to remember.
Avoid using oil-based styling products right before flat ironing hair. Oil heats fast and can cause serious damage to your strands. Use water-based products instead before applying heat.
Use these tips to keep your hair healthy and shiny when flat ironing. Proper care helps your hair stay strong and avoid damage. Safety and protection go hand in hand.
3 Techniques to Curl Hair Using a Flat Iron
You can create curls with a flat iron using different methods. Each technique shapes your hair differently, giving curls from tight ringlets to loose waves. Trying three key methods will help you find the style you like best.
Method 1: The Classic Clamp-and-Twist Curl
This method mimics a curling iron by clamping hair and twisting the iron. It’s best for defined, bouncy curls. Using a heat setting between 300°F and 350°F works well for most hair types.
Here’s how to do it step-by-step:
- Clamp a 1-inch section of hair near the roots.
- Twist the flat iron 180 degrees away from your face.
- Slowly glide the iron down the hair while keeping it twisted.
- Release the clamp once you reach the ends.
- Repeat on all sections to cover your head.
- Let curls cool before touching for longer hold.
Holding the iron at a slight angle and moving slowly produces smooth curls. Make sure to clamp tightly to avoid dents. The twist direction shapes the curl’s volume and bounce.
Method 2: The Spiral Curl Technique
This method creates tighter, corkscrew curls for a more dramatic look. Use smaller ½ to ¾-inch sections for best results. Using rounded-edge flat irons helps avoid creases in hair.
Follow these steps for a spiral curl:
- Clamp a small hair section about ½ inch wide near the roots.
- Wrap the hair around the flat iron, spinning it as you go.
- Slowly slide the iron downward, keeping hair wrapped tightly.
- Release the hair at the ends carefully to keep the spiral.
- Repeat until all hair is spiraled.
The flat iron’s curved body acts like a curling iron here. Holding the iron perpendicular to the section helps shape the spiral. Practice will improve your speed and curl uniformity.
Method 3: Creating Loose Beach Waves
Beach waves look relaxed and work well on shorter or layered hair. This method uses less twisting, focusing on flipping strands away from your face. A 1-inch iron with smooth, rounded plates works best for soft waves.
Use these steps for soft waves:
- Clamp a 1-inch hair section near the middle, not at the roots.
- Rotate the iron away from your face while pulling it downward.
- Release the clamp before reaching the ends to prevent curls from being too tight.
- Repeat, flipping each section in alternating directions for natural flow.
This method creates loose waves that add volume and movement. Curling hair away from your cheeks opens up your face. Moving the iron steadily but not too slow avoids heat damage.
Styling Volume and Texture with a Flat Iron
To add volume using a flat iron, lift sections of your hair near the roots. Clamp the iron about two inches from your scalp. Then gently pull it upward.
Rotate your wrist away as you pull. This movement creates a slight bend that lifts the roots, giving body without losing smoothness. Keep your iron at 300 to 350°F for fine hair.
This avoids damage. It still adds volume.
You can create bends and texture with your flat iron. Twist small hair sections around the barrel. Do this in random spots.
Slowly run the iron down the twisted strands to set loose waves or soft bends. This works on most hair types.
It’s great for curtain bangs. Face-framing pieces look good with a subtle curve.
Controlling frizz starts with sectioning your hair finely and using a comb alongside the flat iron. Slowly run the iron from root to tip. Follow with a fine-tooth comb.
This keeps strands smooth. Use heat protectant spray before styling.
It reduces damage and locks in moisture. Your finish will be polished and frizz-free.
For short hair and bangs, the flat iron offers better precision than bigger tools. Clamp near the ends of hair. Twist or flip the iron as you slide.
This shapes short pieces safely without burning skin. Keep the temperature moderate, around 300°F, to prevent heat damage on delicate areas like bangs.
Never hold the flat iron in one place too long. It can cause heat damage or breakage.
Flat Iron Styling Ideas for Short and Textured Hair
Short and textured hair can look amazing with a flat iron. You can create polished styles like sleek pixies or edgy curls. A flat iron also helps make updos and ponytails look sharp on shorter cuts.
Sleek Pixie and Edgy Ringlets
A flat iron works great for styling a pixie cut. Use a small-section technique to get close to the roots and straighten or shape hair precisely. Set your flat iron between 300°F and 350°F for short hair.
This range helps prevent heat damage on delicate strands. Avoid higher temperatures to keep hair healthy.
For edgy looks, try twisting small sections of hair as you glide the flat iron down. This creates tight ringlets or waves with texture and bounce.
Keep sections thin, no wider than half an inch. So each curl forms well and looks defined.
These styles suit fine or coarse textures. Lightweight styling spray helps keep curls intact without weighing hair down. Avoid heavy products that smother short hair volume and texture.
Voluminous Blowouts for Short Hair
You can mimic a blowout by using a flat iron to add volume and movement. Flip your hair upside down first. Run the flat iron through roots carefully.
Bend the ends slightly as you straighten. This lifts hair and adds a soft curve.
Light mousse or volumizing spray before flat ironing will help hold shape. Keep the flat iron between 300°F and 375°F, depending on hair texture. Higher heat may risk damage but may be needed for very coarse hair.
- Work in thin sections around the crown for the most lift
- Use a comb or your fingers to fluff hair after straightening
- Curve ends inward or outward to add shape
- Finish with a light hairspray for lasting volume
- Avoid flat, stiff styles by limiting product use at scalp
This approach gives short hair a fuller, styled look that’s not flat or lifeless.
Sleek Ponytails and Polished Updos
A flat iron can create sleek, shiny ponytails on short hair. Straighten hair smooth first. Then gather hair back.
Use bobby pins or elastic bands to secure it neatly. Flat iron small sections at hairline to eliminate flyaways.
Polished updos like mini buns or twists become easier with straightened hair. Flatten edges to achieve a tidy result. Shine serum applied sparingly after styling adds a smooth finish without grease.
Use a smaller flat iron for short hair. Narrow plates give better control near the neck and temples.
It helps you style with more precision. This helps create clean lines that make updos look professional and kept.
Common Flat Iron Mistakes and How to Fix Them
One common mistake is holding the flat iron in one spot too long. This can cause a ridge or even burn your hair. Move the iron steadily and avoid lingering more than a few seconds per section.
Another frequent error is styling hair that’s not fully dry. Damp hair can get damaged and won’t hold style well. Always dry and brush your hair completely before flat ironing.
Curled styles often fall out quickly when too much hair is grabbed at once. Smaller sections give better, longer-lasting curls because the heat spreads evenly. Try working with 1-inch sections for curls that last several hours.
- Use the right heat: 300°F to 370°F for most hair types
- Apply heat protectant spray before styling
- Avoid going over the same strand multiple times
- Don’t style damaged or overly dry hair
- Let curls cool completely before touching them
- Use light hairspray to set curls without stiffness
- Clean the flat iron plates regularly to prevent residue buildup
Signs of heat damage include dryness, split ends, and breakage. If your hair feels brittle or looks dull, reduce how often you use heat tools.
Using a flat iron two to three times a week is generally safe. But daily use can increase damage risk.
Let your hair rest between heat styling sessions. Deep conditioning treatments after styling days also help maintain moisture and strength. Remember, healthy hair holds styles better and looks smoother with a flat iron.
Finishing Touches to Keep Styles Lasting Longer
Start your finishing routine with a lightweight heat protectant or smoothing serum. Products with argan nut, Moroccan, coconut, or Obliphica Berry oil smooth and protect hair. These oils help keep strands healthy.
Use them to add shine and strength. Put a small amount evenly through dry hair before flat ironing.
It locks in moisture and protects from heat damage. This keeps hair soft and safe.
After straightening or curling, smooth your hair with a wide-toothed comb. This spreads the product and reduces frizz without breaking your style. Brushing can cause flyaways, so avoid it after styling.
Using these oils helps keep your hair smooth. It stays sleek and polished all day.
Seal your look using a silicone-based anti-frizz serum. These serums create a light barrier that blocks humidity and locks in shine. Dab a pea-sized amount on any flyaways or frizz spots with your fingertips.
Using too much can make hair greasy or heavy. So start small and add if needed.
After styling, clamp the flat iron gently. Twist it in an “S” shape for natural waves or curls. This method adds soft, natural movement.
This technique blends sleek sections with soft bends and lasts longer. Let your hair cool for a few minutes before touching it. This helps the style set.
Thin hair can get damaged from too much heat. Don’t overwork it with your flat iron. Use lower heat settings and limit passes.
Use a blow dryer first for volume, then flatten with a low-heat iron. This protects your hair from damage and keeps your style looking fresh and full.
Always make sure your hair is fully dry before flat ironing to prevent breakage and frizz.
Step-by-Step Action Plan to Style with Your Flat Iron
Follow these clear steps to style your hair safely and effectively today.
- Before you start: Wash and dry your hair completely to avoid damage. Your hair should feel smooth, not damp.
- Right before styling: Apply a heat protectant evenly through your hair. If your strands feel light and soft, you’re set.
- Initial styling: Choose a low to medium heat setting based on your hair type. Your flat iron should glide smoothly without pulling.
- First curls or straightening: Practice on a small section of hair to get your technique right. Hair should look shiny and feel soft, not brittle.
- Building volume and texture: Use twisting or lifting techniques with your flat iron slowly. When your hair holds the shape well, keep going.
- Finishing touches: Apply a light hold spray or serum after styling. Your hair should maintain the style without feeling sticky.
- After styling: Let your hair cool completely before touching it. This helps the style last longer.
- Daily care: Always clean your flat iron plates and check cords for damage. A clean tool protects your hair better.
Frequently Asked Questions
How Can I Refresh My Flat Iron Style the Next Day?
Use a bit of dry shampoo to add texture and lift. Warm your flat iron slightly before you use it again.
Smooth any frizz or flyaways quickly to revive your style. This saves time and avoids redoing everything.
Is It Better to Flat Iron Damp or Dry Hair?
Always flat iron dry hair to avoid damage and uneven heat. Damp hair can steam and fry your strands. So fully dry your hair before styling.
Can I Use a Flat Iron to Straighten Curly Hair Without Relaxing?
Yes, a flat iron can temporarily straighten curls by smoothing each strand. Use heat protectant and go slowly to reduce heat damage.
What’s the Best Way to Avoid Heat Lines from a Flat Iron?
Don’t hold the iron in one spot too long or apply uneven pressure. Move the iron steadily along the hair to keep smooth, natural-looking results.
How Often Should I Deep Condition If I Use a Flat Iron Regularly?
Deep condition about once a week to replenish moisture and prevent breakage. Flat ironing can dry out hair, so regular treatments help keep hair healthy.
Can I Use a Flat Iron on Hair Extensions?
Yes, but check if your extensions are heat resistant first. Always pick a lower heat setting on your flat iron.
Test it on a small hair section first. This prevents melting or damage to your hair.
Wrapping Up
Styling hair with a flat iron gives you many look options when you use it right. Always protect your hair and adjust heat to your type. Try a new technique tomorrow to master your style.