How to Use a 3 Barrel Curling Iron: Simple Steps for Long-Lasting Waves
Getting perfect waves with a 3 barrel curling iron starts with heat. Set the iron to suit your hair type. Clamp hair near roots for 10 to 15 seconds, then slide down slowly to form waves.
Before you begin, make sure your hair is smooth and tangle-free. This prevents snags and breakage while styling. Use medium or large barrels for loose, natural-looking waves that last all day.
A 3 barrel curling iron creates consistent waves. It adds more volume than a regular curling wand. This tool shapes your hair into fuller waves.
The iron’s ceramic barrels provide even heat, helping you style safely and quickly. Keep your movements slow and steady for the best results.
Key Takeaways
- Heat the curling iron to match your hair’s thickness for safe styling.
- Smooth and detangle hair fully before using the 3 barrel curling iron.
- Section hair and clamp each part near the roots for better waves.
- Hold the iron for 10 to 15 seconds before moving down to continue waves.
- Choose ceramic barrels to avoid heat damage and get even curls.
- Use larger barrel sizes for loose, natural waves with volume.
How to Use a 3 Barrel Curling Iron Step-by-Step
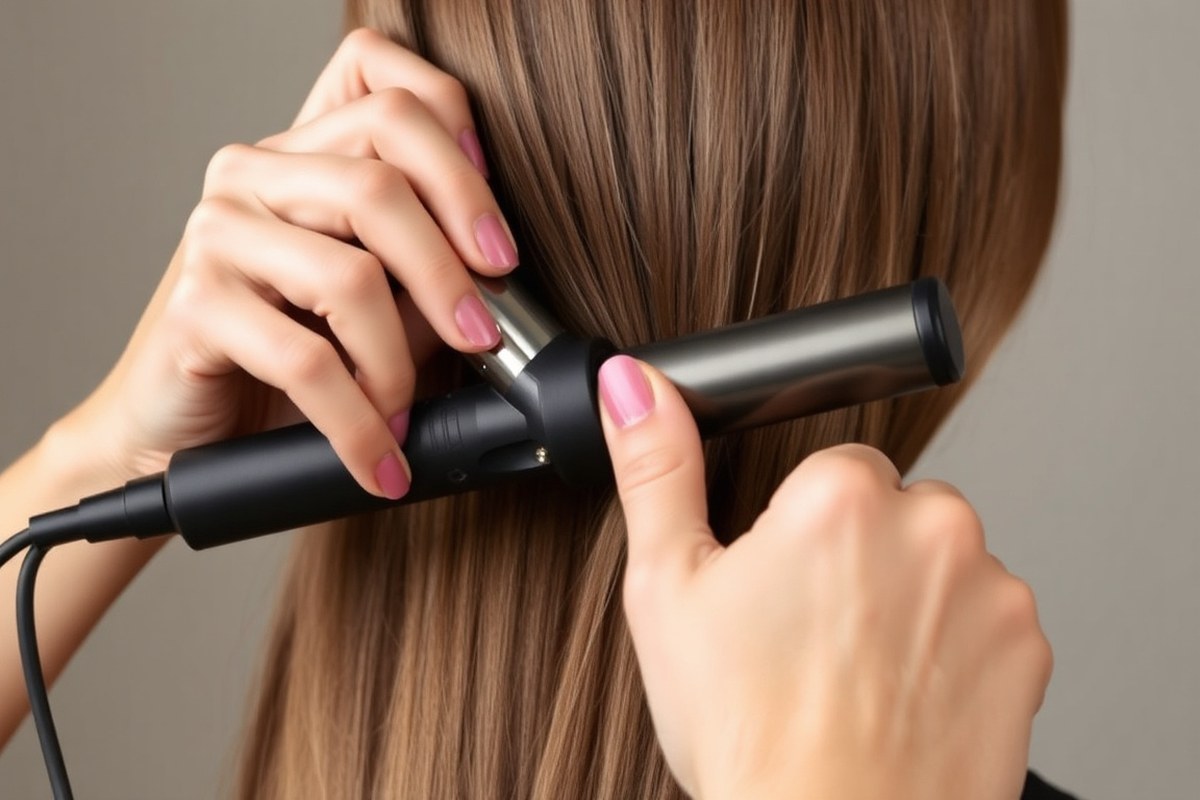
Using a 3 barrel curling iron takes holding, clamping, and moving correctly. You need to get the motion right for good waves. It’s all about these steps working well together.
You want to create smooth, even waves from roots to tips. Hold the iron at the right angle.
Clamp for the correct time. This helps create consistent, natural-looking waves every time.
Start with a small section of hair, about 2 to 3 inches wide. Clamp the iron near your scalp, holding the barrels flat against your hair.
Keep the iron angled so the barrels lay evenly and don’t tilt forward or backward. That helps the heat spread evenly for smooth waves.
- Clamp your first section near the roots: Take a 2-3 inch section. Place the iron close to your scalp carefully. Press the clamp flat and hold for 10 to 15 seconds.
- Release slightly and slide down: Don’t unclamp fully. Slide the iron down the hair about 1 to 2 inches. Hold another 10 seconds to shape the wave.
- Move the iron down your hair: Repeat the clamp-and-slide step until you reach your ends. Keep the barrels aligned with your previous wave indent for smooth continuity.
- Turn the iron as needed: For waves that flow in or out, twist the barrel gently. Do this on the last clamp only. This changes wave direction subtly.
- Work section by section: Release the iron after each clamp. Then grab the next 2 to 3 inch section of hair. Repeat steps 1 through 4 until all your hair is styled.
- Check your timing: Holding each clamp 10 to 15 seconds keeps waves lasting longer. Avoid holding too long to stop overheating.
- Use smooth, steady movements: Sliding down slowly keeps waves even and natural. Quick drops can cause kinks or uneven curls.
Good results show soft, flowing waves without harsh bends or crimps. Poor technique usually causes uneven waves or frizzy sections. Be consistent by clamping flat and holding the right angle.
Time each clamp for about 10 to 15 seconds. Keep this routine for best results.
Choosing the Right Heat Setting for Your Hair Type
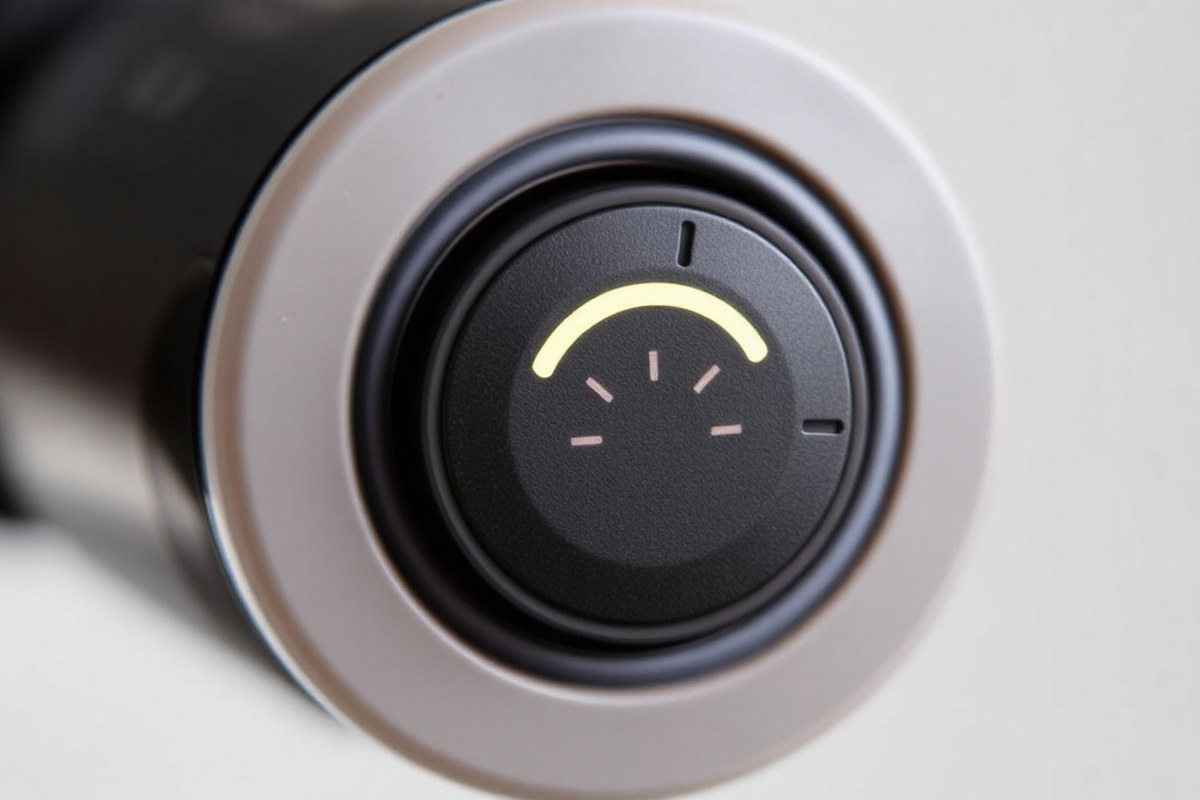
Pick your heat based on hair texture, thickness, and damage risk. Use the low setting for fine or damaged hair. Choose a higher setting for thicker, healthy hair.
Lower heat suits fine or damaged hair to avoid burning. Thicker hair needs higher heat to shape and hold curls well.
Heat Settings for Fine, Normal, and Thick Hair
The heat you choose affects how your waves hold and the chance of damage. Fine or damaged hair needs about 300°F to protect strands. Medium hair does well between 320°F and 380°F. Thick or coarse hair requires 380°F to 410°F for effective styling.
Use this simple table to find the right temperature for your hair. Match your hair type with the correct heat level to avoid damage. Check your hair condition before choosing a setting.
| Hair Type | Recommended Heat Setting (°F) | Reason |
|---|---|---|
| Fine or Damaged | 270, 300 | Prevents further breakage and over-drying |
| Normal | 320, 380 | Balances curl hold and hair health |
| Thick or Coarse | 380, 410 | Requires more heat for longer-lasting waves |
Starting lower and testing first helps avoid excess heat. Your triple barrel curling iron has several heat levels.
These levels match the temperature guide for your hair type. Choose the right level to protect your hair from damage.
Verifying Temperature Accuracy
Some curling irons don’t show exact temperature readings. You can check the heat with a few tricks. Press a small piece of damp white paper gently against the barrels.
The setting is too hot if your hair scorches or chars fast. Lower the temperature to stop burning your hair. Always test on a small section first.
Another way is to use a digital infrared thermometer to read the barrel temperature. These cost around $20 and give you a quick, accurate check.
Always allow the iron a few minutes to fully heat before testing. Feel the heat by quickly touching the setting to your wrist.
Your skin warns if the heat is too hot or burns. Adjust the temperature down if it feels uncomfortable.
Risks of Incorrect Heat Levels
Using heat that’s too high can fry your hair and cause breakage or split ends. Hold the iron for only 4 to 5 seconds per section with the right temperature. Holding longer raises damage risk.
Too low heat might not form waves well, causing you to repeat heat exposure. That leads to more damage overall. Plus, low heat makes curls fall fast and look flat.
Don’t hold the iron in one spot for too long. 4 to 5 seconds per section is enough with the right heat.
Preparing and Sectioning Hair for Best Results
Start by drying and detangling your hair before using the 3 barrel curling iron. Section your hair carefully to control the size of waves and get smooth results. Use a heat protectant spray to keep your hair safe from heat damage.
Detangling and Washing
Wash your hair with shampoo and conditioner suited for your hair type. Clean hair gives better hold and looks shinier after styling.
Dry your hair completely before styling. Using a 3 barrel iron on damp hair causes steam damage and uneven waves.
Brush your hair gently to remove knots. Tangled hair won’t wave evenly and could snag during styling.
Sectioning Methods for Different Hair Lengths
Sectioning hair makes styling easier and helps create uniform waves. Use clips or hair ties to divide hair into parts you can manage.
For medium or long hair, separate your hair into three horizontal layers: bottom, middle, and top. Clip the top sections out of the way.
Shorter hair works best if you section it vertically rather than horizontally. Divide into smaller vertical chunks of about 1 inch wide.
- Work with 1-inch wide sections to get defined waves
- Start styling from the bottom layer and move up
- Use alligator clips to hold sections securely
- Keep hair smooth and taut while clamping the iron
- Smaller sections produce tighter waves, larger sections create more natural waves
Even sectioning ensures each wave has the right shape and heat exposure. Avoid uneven sections, which cause patchy, inconsistent waves.
Using Heat Protectants and Stylers
Apply a heat protectant spray evenly on dry hair before styling. Choose silicone-based formulas to create a protective coating around each strand.
This barrier shields hair from heat damage at temperatures above 300°F (150°C). It also helps your waves last longer and look smoother.
You can use a light mousse or styling cream after heat protectant. They add hold and texture without making your hair heavy. These products keep your style fresh and bouncy.
- Silicone-based heat protection spray for damage prevention
- Lightweight mousse for added bounce and definition
- Anti-frizz serum to fight flyaways after styling
- Dry shampoo to refresh waves between washes
- Leave-in conditioner for extra moisture on dry hair
Putting on products this way protects your hair from heat damage. It also helps create waves that last for days.
Your hair looks healthy and polished longer. Avoid heavy oils before heat styling; they can cause uneven heating.
Adjusting Technique for Different Hair Lengths
Short hair works with a 3 barrel curling iron. You need to change how you section your hair. This adjustment helps create better waves.
Take smaller sections, about 2 to 3 inches wide, to fit the barrels evenly. Use a medium barrel size, around 1 inch, since larger barrels won’t curl short strands well.
Position the clamp near the roots but avoid touching your scalp to prevent burns. Hold the iron horizontally and clamp down on each section for about 5 to 8 seconds. This technique creates waves close to your scalp.
It gives short hair a natural, beachy look. The waves look soft and easy.
For medium hair, choose barrel sizes between 1 to 1.25 inches. You can take slightly larger sections, around 3 to 4 inches. Align the iron so the top barrel hits the wave’s start.
This matches each wave indent. It helps the waves flow smoothly down your hair.
Clamp a section starting near your roots, then slowly move down the strand. Hold for 8 to 10 seconds for defined waves without excessive heat exposure. Medium hair lets you make loose or tighter waves.
You change the look by adjusting pressure. You also change it by changing the time.
Long hair needs bigger barrel sizes, about 1.25 to 1.5 inches, to avoid overly tight waves that can look unnatural. Take larger sections, about 4 to 5 inches. So the waves appear balanced and flowing.
Place the clamp higher on the strand near the middle. This makes waves that start partway down. It also adds volume to your hair.
For long hair, press the clamp firmly and hold for 10 to 12 seconds. But don’t stay too long to avoid damage.
Moving the iron slower lets you keep consistent waves. This method shapes deep, sweeping beach waves that work well with longer layers.
Finishing and Maintaining Long-Lasting Waves
To make your waves last longer, cool them fully before touching. Set your hair with the right products to lock in shape and reduce frizz. Separating the waves gently afterward creates a natural, easy look.
Cooling and Setting Waves
After curling, let your hair cool completely before running fingers through it. The cooling step helps the hair cuticle close, locking in the shape. Leaving the hair undisturbed for 5 to 10 minutes can make waves more durable.
Pin curls with clips if you want stronger waves that last all day. Use clips on each wave section after releasing it from the iron. Let the pinned curls cool fully, then remove clips carefully.
Setting your waves while cooling improves hold without extra heat. This step is essential for long-lasting results, especially on fine or soft hair.
Separating Waves for Natural Look
Once cooled, run your fingers gently through the waves to separate them. This loosens the pattern for soft, natural beach waves instead of tight ridges. You can also flip your head upside down and shake gently to spread waves evenly.
Use a wide-tooth comb or your fingers rather than a brush to avoid frizz. Avoid separating too soon while hair is still warm or damp. Let your waves fully set for a smooth finish before loosening.
- Cool hair for at least 5 minutes before touching
- Use fingers or wide-tooth comb to separate waves
- Flip your head and shake gently for volume
- Pin curls after curling to intensify wave hold
- Avoid brushing waves too roughly to reduce frizz
- Separate waves only after hair is fully cool and dry
Gently spreading waves adds volume and avoids a uniform, artificial look. This simple step makes your hairstyle look easy and fresh all day long.
Applying Anti-Frizz and Shine Products
Finish your style with anti-frizz serum or light hair oil to tame flyaways. Products like argan oil or silicone-based serums add shine without weighing hair down. Spray a light mist of flexible hold hairspray for extra durability.
Apply products sparingly to keep waves soft and bouncy. Focus on mid-lengths to ends, avoiding roots to prevent greasiness. Reapply a tiny amount on dry hair during the day if frizz appears.
Too much product can weigh your waves down and make them look flat.
Choose smoothing sprays over heavy creams for humid weather. This will help maintain smoothness and keep your waves polished free of frizz throughout the day.
Common Mistakes When Using a 3 Barrel Curling Iron
One common mistake is curling damp or wet hair. Heat on wet hair weakens strands, causing breakage and uneven waves. Always dry your hair fully before using your 3 barrel curling iron.
Wet hair can cause damage and weak curls. Take time to ensure your hair is dry for best results.
Applying too much heat or using the wrong setting can fry your hair. Use lower settings for fine or damaged hair, usually around 300°F to 350°F. Thick hair may need higher heat settings on your iron.
Keep each session short, only 8 to 10 seconds per section. This helps prevent heat damage.
- Not sectioning hair evenly, causing uneven waves
- Leaving the iron on hair too long, leading to heat damage
- Skipping heat protectant spray, increasing breakage risk
- Clamping hair too tightly, resulting in flat or misshaped waves
- Rushing and not holding the iron steady, causing uneven heat application
Uneven sectioning makes some waves tighter or looser than others. For even waves, use clips to divide your hair into 1- to 2-inch sections. Make sure each strand lies flat and wraps smoothly around the barrels to get consistent curls.
Waves sometimes don’t form if you move the iron too fast. You also need to hold the hair longer before letting go. Try slowing down slightly for better waves.
Hold each section for about 7 to 10 seconds. For thick hair, try holding the iron for about 10 seconds. Test first to avoid overheating and damage.
Adjust time based on how your hair reacts. Also, avoid sliding the barrel; instead, clamp and hold.
Heat protectant spray is your best defense against damage. Spray it evenly on dry hair before you start. Using heat protectant creates a barrier on your hair.
It lowers split ends and dryness signs. This is especially helpful if you use heat tools often. Skipping this step often leads to brittle hair that breaks easily.
Safety Tips and Caring for Your 3 Barrel Curling Iron
Keep your hands away from the heated barrels to stop burns. Use the iron’s heat-resistant glove if it comes with one. Place the iron on a heat-proof mat when setting it down to avoid accidents.
Unplug the curling iron right after use. Let it cool down completely, this usually takes 10 to 15 minutes.
Never store it while it’s still hot. That can cause damage or even a fire.
- Check the cord for damage before every use
- Use the right heat setting for your hair type
- Clean the barrels with a damp cloth after each use
- Remove any product buildup monthly using rubbing alcohol
- Store in a dry place, out of reach of children
- Wrap the cord loosely to avoid internal wire damage
- Don’t wind the cord tightly around the iron
Wiping the barrels after they cool keeps your tool clean. Product buildup can cause uneven heating or damage the surface. Using rubbing alcohol once a month removes stubborn residue and helps your iron last longer.
Store the iron in a padded bag or on a heat-resistant holder. Don’t cram it with other tools in drawers. That can cause scratches.
It may also harm the heating elements. Keeping it in a dry spot prevents rust or electrical issues over time.
How to Fix and Adjust Waves That Didn’t Turn Out
When your waves look too tight or clumpy, loosen them up. Run your fingers or a wide-tooth comb gently through your hair. This will separate the waves for a softer look.
This breaks up the shape, giving a more natural look without adding heat. Avoid brushing aggressively, or the waves may turn frizzy and lose definition.
You want to soften waves or reshape them without heat? Try misting your hair with water or spray some leave-in conditioner. Then, scrunch the waves with your hands to reactivate the curl pattern.
Let your hair air dry for a natural wave set. Use a diffuser on low heat if you want faster drying. This helps waves settle without causing damage.
Waves often lose their shape by the second day. To refresh, spritz some dry shampoo or texturizing spray at the roots and mid-lengths.
This adds volume and grip, helping the waves bounce back. You can also twist small sections around your finger to redefine any limp areas.
Always test a small section when adding product or restyling to avoid weighing your hair down.
For reshaping waves with heat, warm the 3 barrel curling iron quickly to 300°F. Wrap loose sections around the barrels for a few seconds, then release gently. This works best on dry hair and is quick. It fixes uneven waves or reshapes loose ones fast.
You don’t need expensive products to maintain waves. Light hold hairspray or a light mousse applied before styling helps waves last longer. Your waves might feel stiff or sticky afterward.
Use a small amount of light oil on the ends. This smooths hair without making the style flat.
Your First Steps: Quick-Start Action Plan for Using a 3 Barrel Curling Iron
Follow these simple steps to start creating waves with your 3 barrel curling iron. Each step helps you check your progress quickly.
- Before you begin: Wash and dry your hair completely. Your hair should feel dry and smooth to the touch.
- Right before styling: Apply heat protectant spray evenly in your hair. You should see light mist and feel less dryness.
- Section your hair: Divide your hair into 1-inch sections using clips. Each section should feel separate and easy to manage.
- Heat setting check: Choose your iron temperature based on hair type. Use low heat for fine hair. Use higher heat for thick hair. Test a small strand and feel for easy curling without burning.
- Begin curling: Clamp each hair section between the barrels, hold 5-8 seconds, then release. Check your first wave for shape and softness.
- Adjust technique: Change the iron angle to vary wave size. Hold the iron longer for bigger waves. Experiment with these for best results. You will notice subtle changes in your waves’ look.
- Finish styling: Let curls cool completely, then gently run fingers through to loosen waves. Your waves should look natural, not stiff.
- Maintain waves: Use a light hairspray to hold waves longer. After spraying, touch your waves lightly to keep them soft.
Frequently Asked Questions
What Is the Main Advantage of Using a 3 Barrel Curling Iron?
It creates natural-looking waves quickly compared to a single barrel. You get long-lasting, easy waves in just 10 minutes.
Can I Use a 3 Barrel Curling Iron on Wet Hair?
No, always use it on dry hair to avoid damage. Wet hair can snap or burn when heated with styling tools.
How Do I Prevent Hair Snags with a 3 Barrel Curling Iron?
Make sure your hair is smooth and tangle-free before styling. Brushing well helps avoid breakage during the process.
How Long Should I Hold Each Section in the 3 Barrel Curling Iron?
Hold for about 10 to 15 seconds before moving down. This timing sets the wave without overheating your hair.
Can a 3 Barrel Curling Iron Be Used on Short Hair?
Yes, but you may need smaller sections to get defined waves. Short hair often requires careful sectioning for best results.
Is It Better to Clamp Hair at the Roots with a 3 Barrel Iron?
No, start a little below the roots to protect your scalp. This also helps the waves form more naturally.
Final Thoughts
Using a 3 barrel curling iron is easier than it seems once you practice these steps. Start by trying just one to two sections first today. With time, you’ll get more confident creating long-lasting, natural waves.