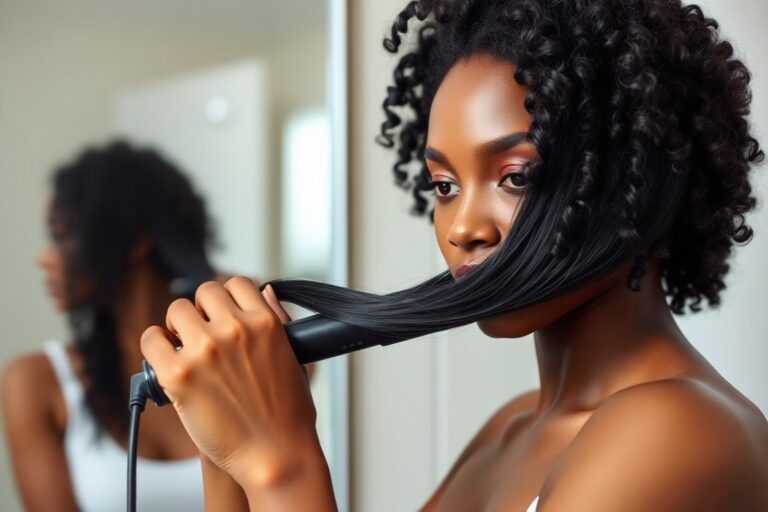
How to Thin Out Hair: Safe Methods, Styling Tips, and Professional Advice
How to thin out hair depends on the thickness and style you want. You can safely thin hair at home using specific tools like thinning shears. These scissors remove bulk gradually without cutting the whole strand.
Start by working with dry hair for better control and less damage. Only remove about 10 to 20 percent of the bulk to avoid over-thinning. Doing too much at once can make your hair look uneven or scraggly.
Separate your hair into five to seven vertical sections for easier thinning. Hold hair up at a 90-degree angle for the best cut. This matches the deep point cutting method.
It helps create even layers and reduces bulk. This technique helps reduce volume without losing length.
Key Takeaways
- Use thinning shears on dry hair for the most control and safety.
- Only cut 10 to 20 percent of hair bulk to prevent over-thinning.
- Divide hair into vertical sections before thinning to stay organized.
- Hold hair at 90 degrees for vertical snips that reduce volume.
- Avoid thinning already fine hair to prevent making it look sparse.
- Wait 2, 3 months to see natural changes from your thinning efforts.
How to Thin Out Hair at Home Safely and Effectively

Thinning your thick hair at home needs the right tools and careful steps. You can use thinning shears or regular scissors along with a comb. Both dry and slightly damp hair work well.
But dry hair gives a clearer idea of the end result. Don’t try to take off too much. Removing about 10 to 15 percent at a time keeps it natural-looking and avoids big mistakes.
Use a quiet, well-lit room with a mirror and some clips to manage hair sections. Start with clean, tangle-free hair so the thinning is smooth and even. Keep your hands steady and patient to get the best control while cutting.
- Prepare your tools: Get thinning shears or sharp hair scissors, a comb, clips, and a mirror. Clean all tools before you start.
- Section your hair: Divide your hair into four or more parts with clips for easy access. Focus on one small section at a time to avoid confusion.
- Comb each section: Comb a small amount of hair straight out from your head. Hold it firmly between your fingers about 1 to 2 inches from the scalp.
- Cut gently: Use thinning shears to snip three or four times per section. Do not cut continuously. Space out your cuts carefully. Avoid cutting too close to the scalp or chopping large chunks.
- Check and blend: Comb the hair back after each cut. Feel if the bulk is lighter. Fix any uneven spots you notice. Blend thicker areas by blending small amounts gradually.
- Repeat for all sections: Work through each hair section the same way. Stop if your hair starts feeling too thin or uneven.
- Style and evaluate: Style your hair as usual and examine the volume. Want less bulk? Repeat the process carefully after a few days.
Thin only small amounts each session to avoid over-thinning. Keep the comb and scissors clean, and work steadily. Avoid thinning wet hair heavily because the cut might look uneven when it dries.
Your hair feels patchy or frizzy? Stop cutting. Consider visiting a stylist to fix it properly.
Differences Between Thinning Techniques and When to Use Them

Thinning shears, layering, and razor cutting are common methods to thin thick hair. Thinning shears have comb-like blades. They cut some hair to reduce bulk.
This keeps the overall hair length the same. Layering cuts hair at different lengths, which spreads out the volume. Razor cutting uses a sharp blade.
It cuts hair at an angle. This makes ends look soft and feathery.
Hair texture changes which method works best. Thinning shears suit straight or slightly wavy hair well. Layering benefits thick, coarse hair by giving it shape and movement.
Razor cutting suits thick or curly hair. It can cause split ends on fine hair. Use it carefully depending on hair type.
Thick hair suits undercutting well. This cuts lower layers shorter. It reduces bulk but keeps the top full.
| Technique | Best For | How to Do It | Pros | Cons |
|---|---|---|---|---|
| Thinning Shears | Straight to wavy, thick hair | Cut every 2-6 inches down the shaft | Quickly reduces bulk, preserves length | Can leave uneven patches if overused |
| Layering | Coarse or very thick hair | Cut hair at different lengths strategically | Creates natural volume control and flow | Needs regular trims to keep shape |
| Razor Cutting | Thick, curly, or wavy hair | Slice hair at an angle with a sharp blade | Softens ends, adds texture | Can cause split ends if done too often |
| Undercutting | Very dense, thick hair | Cut lower layers shorter than top layers | Reduces bulk without changing visible length | May feel uneven if top layers are thin |
Layering and undercutting both lower bulk but act differently. Layering thins hair overall and adds shape. Undercutting focuses removal mainly underneath, keeping length visible.
For very thick hair, undercutting helps avoid a heavy look. Your hair feels coarse.
Layering adds softness and reduces bulk. This works well for thick hair.
Don’t thin hair too much at once; let it grow out before thinning more.
Using thinning shears is easier for home use if you want quick thinning. Razor cutting’s soft texture suits styling by a professional.
The right cut depends on your hair’s density and texture and the style you want. Watch for uneven spots after thinning and adjust carefully.
How Long It Takes to See and Maintain Thinning Results
You usually see the thinning effects on your hair right away after cutting. It takes about four to eight weeks to maintain your thinning with regular trims.
Knowing how often to thin your hair helps keep it healthy. Watching for signs makes your hair easier to manage.
Immediate and Short-Term Effects After Thinning
Right after thinning your hair, you’ll notice less bulk and more movement. The hairstyle feels lighter, and textures show more clearly. That fresh cut can also reveal any uneven sections or spots that got thinned too much.
Some frizz or slight roughness can pop up if you over-thin, especially on curly hair. Proper technique avoids damage, keeping the texture smooth.
Cutting too much can make hair look patchy or flat. It won’t flow naturally like you want.
Hair Regrowth Timeline and Texture Changes
Hair usually grows about half an inch per month. So thinned areas will slowly fill in over time.
It can take roughly six months for your hair to grow back to its original thickness. You might notice new growth feels thicker where you thinned, blending the look.
Texture changes are normal during regrowth. Hair can feel a bit coarse or frizzy if you’ve taken too much bulk at once. Trim your hair every month or two to keep texture right.
This stops split ends from forming. It helps keep your hair consistent.
Scheduling Regular Thinning Sessions
Plan your thinning sessions every four to eight weeks to maintain volume control and texture. Thinning too often might lead to overly flat or frizzy hair.
Waiting too long to thin causes your hair to bulk up. It loses its proper shape and style.
Stick to long layers for thick hair and use thinning shears carefully to avoid patchiness. Professional stylists recommend trimming on a regular schedule because split ends can ruin the look.
Check your hair’s feel and look every few weeks. Use what you see to decide when to thin again.
Recognizing Signs of Over-Thinning or Uneven Results
Over-thinned hair looks flat with no natural bounce or can get frizzy and dry quickly. You may also spot uneven patches where thinning shears took off too much hair. These patches make styling difficult and your hair appear unhealthy.
Correct thinning shows soft texture changes and natural hair flow. A thinner look on one side or patchy spots means trouble. This shows something went wrong with thinning.
Thin less next time to avoid uneven hair. Spread thinning work over several sessions for balance.
Common Mistakes When Thinning Hair and How to Fix Them
One common mistake is rushing the thinning process, which often causes over-thinning or uneven patches. Taking your time and using the right tools helps avoid this. Thick or coarse hair needs a careful thinning approach.
Focus on the densest areas. Avoid damaging the strands while reducing bulk.
Curly hair requires a special thinning method. Cutting too close to the scalp can cause frizz. It also may create uneven shapes.
Always cut away from the scalp when thinning hair. Ask your stylist to add layers first.
This reduces bulk safely. Damaged hair calls for gentle thinning methods or a smoothing treatment like keratin before cutting.
Home thinning often leads to removing too much hair at once. It’s better to take small sections and thin gradually.
Professionals sometimes make errors by using thinning shears all over, which removes too much weight. Spot thinning around the thickest areas is the safest route.
- Don’t thin dry hair right after washing; wait until it’s almost dry.
- Avoid thinning near the scalp on curly or coily hair.
- Hold thinning shears at an angle, not flat, to prevent lines.
- Thin in small sections, especially in thick areas first.
- Stop and check your progress often to avoid over-thinning.
- Delay thinning if your hair feels brittle or tired. Concentrate on conditioning treatments instead. Strengthening helps prevent further damage.
- Consider a professional if you want a big change or have damaged hair.
Harsh at-home chemical treatments can weaken hair and cause patchiness. So avoid layering thinning with relaxers or constant heat. Let your hair rest between treatments and washes to keep it healthy.
Stop thinning if your hair looks uneven or damaged. Seek advice from a professional stylist. They can fix and guide your hair care.
Good results show smooth transitions and less bulk. The scalp should not show any patches. Your hair still looks full and healthy.
It takes patience and the right method to get an even look. If you feel unsure during thinning, ask a stylist for help.
Their advice prevents costly mistakes. Getting help is a safer choice.
Non-Cutting Methods to Reduce Hair Bulk and Appearance
You can reduce hair bulk without cutting by using styling tricks and smart products. Techniques like removing interior weight and adjusting elevation help hair move naturally without losing shape. You avoid a flat look by spreading out the volume instead of compressing it.
Choosing the right products can make thick hair seem thinner. Use moisturizing conditioners and hair masks that tame frizz and add smoothness. A sulfate-free shampoo can clean without puffing your hair up or drying it out.
Heat styling tools can shape your hair to look less bulky but need care. Keep your flat iron or curling iron below 350°F to limit damage. Also, use a heat protectant spray to avoid dryness or breakage while styling.
- Brush hair with a wide-tooth comb to gently detangle and reduce breakage
- Apply a lightweight leave-in conditioner to smooth strands without weighing hair down
- Use mousse or a light styling cream to control volume without stiffness
- Try dry shampoo to add texture and absorb oils that can make hair look heavy
- Blow-dry hair lifting from the roots to keep movement and avoid flatness
- Keep hair clean to prevent scalp buildup that makes hair feel thicker and greasier
Adjusting your habits also helps maintain a thinner look. Wash hair regularly but not daily, avoiding harsh shampoos. Cold water rinses smooth hair cuticles and reduce puffiness.
A healthy scalp supports hair that looks lighter and bouncier. Battling dandruff or inflammation can stop extra shedding. You should eat well and drink plenty of water daily.
Good health affects your hair’s feel and volume. Keep a balanced diet to help your hair stay healthy.
Use only hair thinning scissors designed for cutting to avoid uneven textures and damage.
When to Seek Professional Help for Hair Thinning
You should see a professional stylist if you don’t feel confident thinning your hair. Uncertainty about the right technique or fear of uneven results are good reasons. Also, if your hair is extremely thick, a stylist can tailor a plan just for you.
Look for signs like uneven volume or patchy thinning after trying at-home methods. Heavy hair can linger even after you try different methods. Professional thinning might give you the relief you want.
Going to a pro stops errors like over-thinning your hair. They avoid taking too much weight from one area. That keeps your style balanced.
Most stylists cut hair using deep point cutting. They hold hair straight up at 90 degrees. Then they snip straight up and down.
This method removes weight gradually while keeping natural movement. They cut different lengths on the lower half of hair.
This removes bulk without making the volume uneven. It gives your hair a balanced look.
Prices depend on your salon and where you live. Expect to spend $40 to $100 for professional thinning. This price covers a typical session.
More extensive thinning or additional styling can raise the price. Finding a stylist experienced with thick hair ensures the cost matches quality results.
Visiting a stylist also gives you a chance to discuss your personal goals. They can suggest styles that naturally reduce bulk.
Stylists know how short layers add volume for thin hair. But they’ll focus on removing weight if yours feels too dense.
Visiting a stylist early can help control hair bulk. This works before you lose too much hair. It keeps your hair thick and healthy looking.
You don’t want to wait until your hair feels heavy or looks uneven. Early professional care keeps hair manageable and balanced without risking damage.
Haircuts and Styles That Naturally Thin Thick Hair
Haircuts like layering, undercuts, and texturizing cuts help you control thick hair volume. These styles reduce bulk but keep your hair manageable. They let you enjoy softer, lighter hair without losing too much volume.
Layered Haircuts for Weight Removal and Texture
Layered haircuts remove weight by cutting hair at different lengths. This breaks up thick hair’s heaviness and adds natural movement. Layers also help your hair form piecey waves instead of one big mass.
Layers work best when heavily texturized. They create texture that separates thick hair instead of flattening it. A twist and snip method often targets extra thick spots to remove bulk precisely.
Undercuts to Reduce Bulk in Targeted Areas
Undercuts shave off the bottom layer of hair beneath the top strands. This cuts weight without changing the overall length. It is great for heavy volumes near the neck and sides, where hair feels thickest.
Compared to layers, undercuts reduce bulk in specific spots rather than evenly everywhere. This keeps top hair longer and fuller while taking out extra weight underneath. Undercuts work well for those who want volume up top but less width overall.
Texturizing Techniques for Balanced Volume
Texturizing cuts use thinning shears or razors to selectively remove hair bulk. These cuts soften thick hair edges and create finer layers inside your haircut. It results in more balanced volume and easier styling.
Texturizing is perfect for thick hair needing subtle volume control. It shapes hair without losing length or fullness. You should only do texturizing with a skilled stylist to avoid uneven spots or frizz.
Short vs. Long Styles for Thick Hair
Short styles often trap too much weight and can look rounded, like a mushroom. They need layering or texturizing to break up volume quickly. Long hair takes weight off by its length but may feel heavy without layers.
This length is best because it ties back nicely to your hair. It’s also short enough to remove extra bulk without weight.
Long hair with layers keeps your hair softer with less bulk but preserves volume. Choosing length depends on how much time you want to spend styling.
- Layering cuts reduce weight evenly for natural flow
- Undercuts remove bulk in specific spots under top hair
- Texturizing softens thick edges and balances volume
- Short styles need careful layering to avoid a bulky shape
- Long styles hold volume but benefit from weight removal
- Consulting a stylist helps tailor cuts to your hair’s needs
- Using moisturizing products prevents frizz and poof after thinning
Nutrition, Supplements, and Hair Care for Healthy Thin Hair
Eating well and choosing the right hair products help keep your thin hair healthy. Supplements can fill gaps.
But using too much of some nutrients might harm your hair. Gentle care and stress management also protect your hair as you thin it.
Key Nutrients and Supplements for Hair Strength
Your diet needs enough protein, iron, and vitamins like biotin to support hair growth. A lack of these can slow growth or cause breakage in thin hair. Before starting supplements, get your levels checked since some can worsen hair loss if overused.
Taking supplements with the right balance of nutrients can improve hair strength and elasticity. Talk to your healthcare provider about options if you have deficiencies.
Many find multi-vitamin formulas with B-complex vitamins helpful. But don’t take more than the recommended dose.
Avoiding Damage with Gentle Hair Care Products
Choose shampoos and conditioners that nourish and moisturize without harsh chemicals. Products with nourishing oils and proteins help maintain your hair’s strength and reduce breakage. You can try custom options like Prose that match your hair type and thinning needs.
Avoid frequent harsh treatments like bleaching or heavy heat styling that can weaken fine, thinned hair. Use a wide-tooth comb to detangle gently and prevent pulling.
Regular trims every 6 to 8 weeks keep your style neat. They stop split ends from making thin hair look unhealthy.
Minimizing Stressors That Contribute to Hair Loss
Stress from tight hairstyles or daily tension can cause hair thinning by pulling hair too much. Avoid styles that pull your hair tightly and give your scalp breaks. Managing overall stress with exercise or relaxation can also reduce hair shedding.
Chronic illnesses like thyroid problems affect hair health and could worsen thinning. You should manage health conditions with your doctor to protect hair. Stay gentle with your scalp and hair to avoid aggravating any thinning.
Don’t skip regular hair trims; they keep thin hair looking fresh and prevent damage.
Step-by-Step Action Plan to Thin Out Your Hair
Follow this plan to thin out your thick hair safely and see results soon. Each step builds on the last to reduce bulk without damage.
- Before you start: Choose the right tools like thinning shears or a razor comb. Check they feel comfortable and clean to avoid pulling hair.
- Day 1: Begin thinning wet hair gently in small sections. Stop if you see uneven thinning or too much volume loss to avoid mistakes.
- Week 1: Assess your hair’s volume and shape in natural light. Note if thick spots remain or if thinning looks natural.
- Week 2: Use non-cutting methods like mousse or leave-in conditioners to reduce heaviness. See if hair feels lighter and easier to style.
- After 3 weeks: Trim or thin again only if needed. Focus on areas that grew thick again or seem bulky.
- Monthly: Maintain with regular trims or professional touch-ups. Avoid over-thinning to keep hair healthy and full-looking.
- As needed: Adjust haircuts and styling to complement thinning. Layered cuts work well to reduce bulk without cutting too much.
Frequently Asked Questions
Is It Better to Thin Hair from the Roots or the Ends?
Thinning from the ends removes bulk without altering the roots. This keeps your hair length while reducing weight and volume effectively.
How Often Should You Thin Thick Hair to Maintain a Balanced Look?
Thinning should be done every 6 to 8 weeks for best results. This schedule prevents hair from becoming too thick again or unevenly textured.
Is It Safe to Thin Wet or Dry Hair?
It’s safer to thin dry hair to avoid cutting too much accidentally. Wet hair looks longer and can mislead how much you’re cutting.
Can I Thin Already Fine or Thinning Hair?
Thinning fine or thinning hair is usually not recommended. It can make hair look even thinner and weaker, so gentle care is better.
Do Thinning Shears Damage Hair More Than Regular Scissors?
Thinning shears cause less damage because they remove hair gradually. Regular scissors can create blunt cuts that look harsh and uneven.
Does Heat Styling Affect the Outcome of Thinning Thick Hair?
Heat styling can make hair appear thinner by flattening strands. However, overuse can cause dryness and breakage, so use heat protectants.
Wrapping Up
Thinning thick hair takes time and care to avoid damage. Start with small steps and watch how your hair changes. Try thinning one section first to see if the method suits your hair before doing more.