How to Make Makeup Brush Cleaner: Effective DIY Recipes and Pro Tips
You can make an effective makeup brush cleaner at home. Mix lukewarm water, gentle dish soap, and a bit of coconut oil. This combination breaks down makeup residue while keeping brushes soft and clean.
Lukewarm water protects brush bristles from damage. Dish soap cuts through stubborn oils and product buildup. Coconut oil helps maintain softness in the brush hairs, preventing them from drying out or becoming brittle.
Soak your brushes for 2 to 5 minutes if very dirty. Gently swirl the brushes in the mixture to help release trapped makeup. Avoid adding too many ingredients to keep the process simple and avoid residue buildup.
After a few tries, cleaning your brushes fits easily into your beauty routine. Regular cleaning removes bacteria and oils that can cause breakouts. Keeping brushes fresh helps them perform better and last longer.
Key Takeaways
- Mix water, dish soap, and coconut oil for a simple, effective brush cleaner.
- Use lukewarm water to protect bristles from damage during cleaning.
- Soak brushes for 2 to 5 minutes when they have heavy makeup buildup.
- Stick to one DIY cleaner recipe to avoid cleaning procrastination.
- Condition bristles with coconut oil to keep them soft after washing.
- Clean your brushes every 7 to 10 days to kill bacteria and protect skin.
Essential Ingredients for DIY Makeup Brush Cleaner
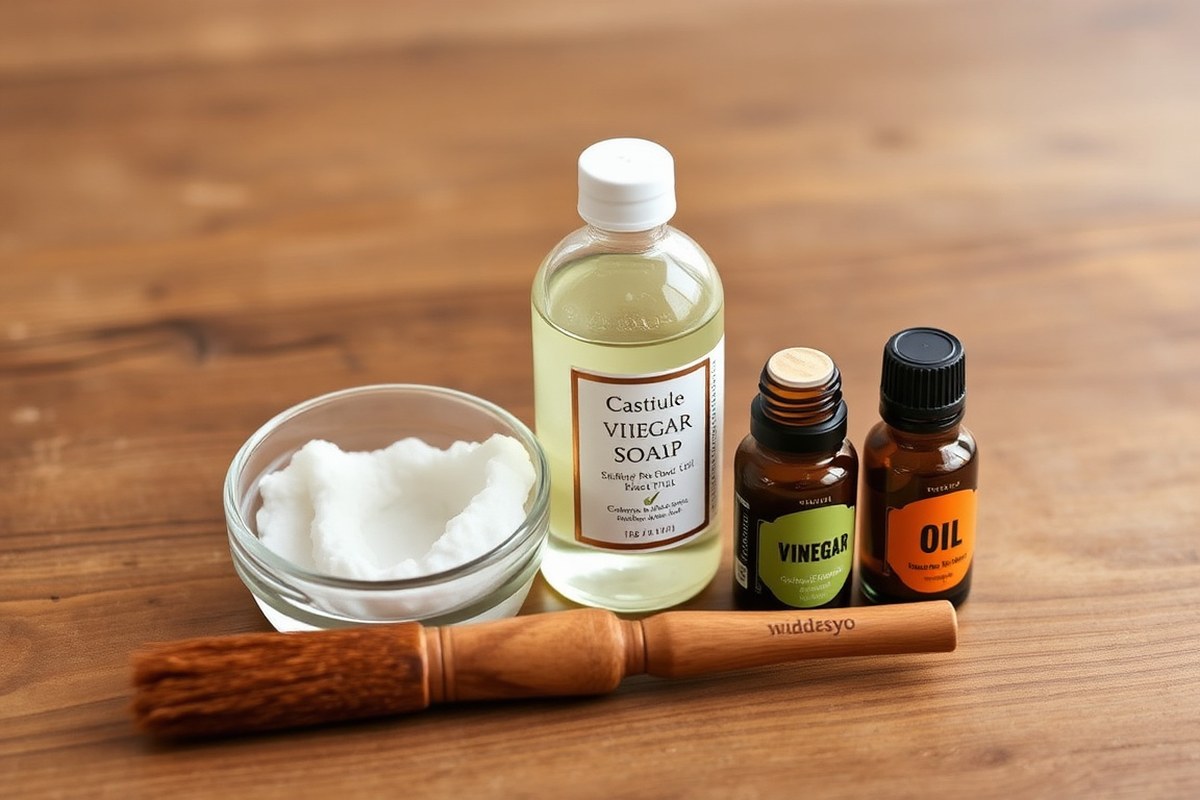
You can make an effective DIY makeup brush cleaner at home with a few simple ingredients. Castile soap acts as a gentle cleanser that removes makeup residue without damaging brush bristles. It also helps avoid skin irritation compared to harsher chemicals.
Adding a carrier oil like coconut oil helps break down stubborn, waterproof makeup. This oil also conditions the bristles to keep them soft and fluffy. Using oil balances out drying effects from soap and water, extending your brushes’ lifespan.
White vinegar or lemon juice brings natural acidity that breaks down oils and disinfects brushes. Their antibacterial properties help reduce bacteria buildup, which can cause skin problems. These acidic ingredients need to be diluted properly so they don’t harm natural bristles.
- Castile soap for gentle cleansing and makeup residue removal
- Coconut oil to break down waterproof makeup and condition bristles
- White vinegar or lemon juice for natural disinfection and oil breakdown
- Essential oils like tea tree for antibacterial benefits and fresh scent
- Water as the base to dilute and mix ingredients safely
Tea tree oil adds antibacterial properties and a light fragrance, improving the cleaner without harsh chemicals. A few drops are enough to avoid overpowering scents or skin irritation. Witch hazel is another natural option that calms bristles while reducing bacterial growth.
Use lukewarm water to mix your ingredients. This helps dissolve residues and activates natural cleaning properties, making your solution more effective. Avoid hot water as it may damage synthetic and natural bristles.
Step-by-Step Recipe to Make Your Own Makeup Brush Cleaner
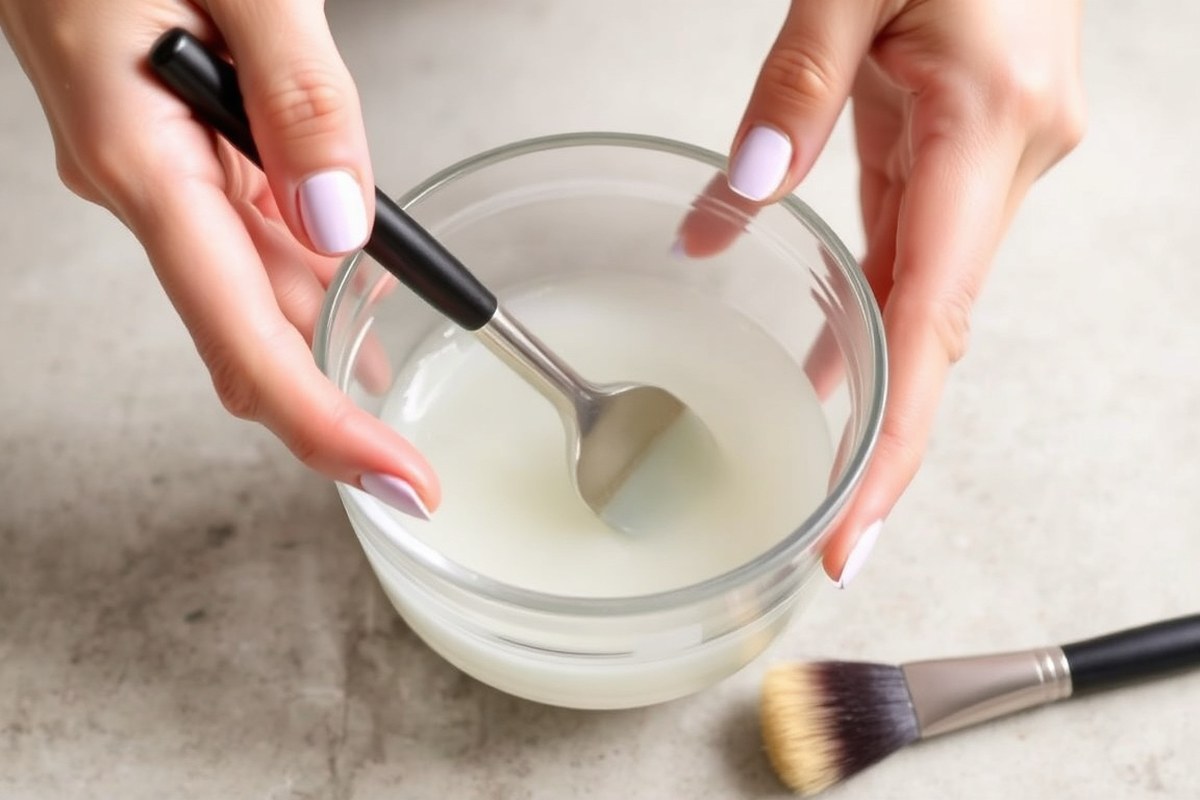
Making your own makeup brush cleaner is quick and easy. Use a few common ingredients and mix in under 10 minutes. Store the cleaner in a sealed bottle for weeks.
Measuring and Preparing Ingredients
Start by gathering your ingredients for a basic homemade makeup brush cleaner. Use gentle, affordable kitchen items that break down makeup and oils effectively. Precise measurement ensures the cleaner won’t irritate your brushes or skin.
Measure 2 tablespoons of mild dish soap. Add 1 tablespoon of olive oil. Mix these ingredients well for your cleaner.
The dish soap cuts through grease, while olive oil keeps your brush bristles soft. Choose a clean bowl or container to mix these together.
Mixing and Storing the Solution
Mix the soap and oil until they blend into a smooth liquid without separation. Stir slowly for about 30 seconds using a spoon or small whisk. Avoid creating bubbles or foam, which makes it harder to rinse the brushes later.
Pour the mixture into a clean, airtight bottle or jar for storage. Keep it in a cool, dry spot out of direct sunlight. Check your cleaner monthly; toss any solution that changes in smell, color, or texture.
- Combine 2 tablespoons mild dish soap with 1 tablespoon olive oil in a bowl.
- Stir slowly and gently for 30 seconds to blend without foam.
- Transfer the liquid into a clean bottle with a tight lid.
- Seal the bottle and store it in a cool, dry place.
- Use a small amount of cleaner per brush cleaning to avoid buildup.
Avoid strong detergents or undiluted soap. They can harm brush fibers. They might also irritate your skin.
Optional Essential Oils and Their Use
Put a few drops of essential oils into the cleaner. This adds a fresh scent.
It also boosts antibacterial effects. Lavender, tea tree, or lemon oils work well and can help reduce bacteria build-up on brushes.
Start with 3 to 5 drops per 1/4 cup of cleaner to avoid overpowering smells. Mix the oil thoroughly into the solution before storing. Avoid using oils if you have sensitive skin, or test a small batch first.
Best Practices for Cleaning Different Types of Makeup Brushes
Different makeup brushes need different cleaning methods based on their bristles and makeup type. Soaking times change with powder, cream, or waterproof makeup. You can also use quick sprays and special care for beauty sponges made at home.
Cleaning Natural vs Synthetic Bristles
Natural bristles come from animal hair and soak up oil and cream better. Clean them gently using lukewarm water and a mild DIY cleaner to avoid damage. Avoid hot water, which can dry natural bristles out and cause shedding.
Synthetic bristles, made from nylon or plastic, handle stronger cleansers and hotter water. They dry faster, so you can use slightly more water pressure when rinsing. Synthetic brushes usually work with cream and liquid makeup better.
Soaking Times for Powder, Cream, and Waterproof Makeup Brushes
Powder makeup brushes only need a quick rinse with a gentle cleaner to remove dry powder. Soak them briefly for 30 seconds to one minute if they are very dirty. Over-soaking can warp the bristles.
Cream and liquid makeup brushes need a bit more care. Soak these brushes for 2 to 3 minutes to break down the product buildup. Stubborn buildup may require gentle finger massage on the bristles during soaking.
Waterproof makeup brushes should soak for 3 to 5 minutes. This loosens tough, water-resistant formulas safely. Rinse well afterward to get all residue out and keep the brushes in shape.
Special Care for Beauty Sponges and Beauty Blenders
Sponges absorb a lot of product and can hold bacteria. Soak them for about 5 minutes in your DIY brush cleaner before squeezing and rinsing thoroughly. This helps break down makeup inside.
Avoid wringing sponges roughly. Press gently to keep the shape and prevent tearing. Use warm water and your homemade cleaner for regular cleaning every week.
DIY Brush Cleaning Sprays and Quick Methods
You can make a quick spray by mixing rubbing alcohol and water in a spray bottle. Spritz the brush bristles and wipe them clean with a towel. This works well if you need fast cleaning between uses.
For a deeper clean, soak as usual instead of relying only on spray. Use a textured cleaning mat with your DIY cleaner.
Massage the brushes on it. This helps remove stuck makeup quickly.
Here is a quick reference table showing cleaning tips by brush and makeup type:
| Brush Type | Makeup Type | Soaking Time | Water Temp | Cleaning Method |
|---|---|---|---|---|
| Natural bristles | Powder | 30 sec – 1 min | Lukewarm | Gentle DIY cleaner, avoid hot water |
| Natural bristles | Cream/Liquid | 2 – 3 min | Lukewarm | Gentle soak + finger massage |
| Synthetic bristles | Powder | 30 sec – 1 min | Warm | Direct rinse or soak, stronger cleaner okay |
| Synthetic bristles | Waterproof | 3 – 5 min | Warm | Longer soak, thorough rinse |
| Beauty sponges | All types | 5 min soak | Warm | Gently squeeze, no wringing |
Following these care steps keeps your makeup tools clean and lasting longer. Using your DIY cleaner every 7 to 10 days prevents bacteria buildup and skin problems. For quick touch-ups, your spray cleaner can refresh brushes between deep cleans.
How to Rinse and Dry Brushes for Best Results
Rinsing and drying your makeup brushes the right way keeps them clean and lasting longer. Use lukewarm running water and be gentle to avoid damaging the bristles. Dry them carefully to keep their shape and prevent water from ruining the handle or ferrule.
Proper drying may take longer in humid or cold places. You might need a full day or more for the brushes to dry completely. Always place brushes where air can circulate freely and avoid keeping them in direct sunlight.
- Hold the brush bristles downward under lukewarm running water.
- Gently massage the bristles with your fingers to remove makeup residue.
- Keep water away from the handle and metal ferrule to prevent loosening.
- Rinse thoroughly until water runs clear, ensuring no cleaner remains in the bristles.
- Squeeze excess water gently without pulling the bristles to maintain shape.
- Reshape the brush head with your fingers to its original form.
- Place the brush bristles over the edge of a counter or in a drying rack.
- Let brushes air dry fully in a well-ventilated area, away from direct heat or sunlight.
Keeping brushes bristle-side down during rinsing stops water from seeping into handles. Water inside handles can loosen glue or warp wood. Don’t press the bristles hard or you’ll bend or lose hairs.
Letting brushes dry flat or upright with bristles touching surfaces causes misshaping. Use a brush holder or hang them so bristles are in the air. That keeps the brush soft and fluffy for smooth makeup application next time.
How Often Should You Clean Your Makeup Brushes?
How frequently you wash your makeup brushes depends on how often you use them. Brushes for daily use, such as foundation or concealer, should be cleaned weekly. Brushes for powder and eyeshadow can be cleaned every two weeks but clean sooner if your skin reacts or breaks out.
Not cleaning your brushes regularly leads to built-up bacteria, oil, and leftover makeup. This can cause skin breakouts, irritation, and dull makeup application. You’ll also see the brush hair clump and look dirty, which means it’s time to wash.
- Foundation and concealer brushes: clean weekly
- Powder and blush brushes: clean every two weeks
- Eye shadow brushes: clean every two weeks or more
- Brushes used for cream or liquid products: clean weekly
- Sponge applicators: clean after each use
A brush needs cleaning if it feels stiff or dirty. You might see makeup buildup on the bristles. It could also have a strange or bad smell.
Pay attention to how your skin reacts after makeup application too. Seeing breakouts or skin irritation means you should clean your brushes more often.
Spending five minutes weekly cleaning your brushes stops bacteria buildup. It also helps keep your brushes lasting longer.
Never wash your brushes in a washing machine with clothing, as makeup stains might transfer.
Use a gentle, homemade brush cleaner to wash your brushes. This keeps bristles soft and prolongs brush life. It also keeps your makeup looking fresh and true to color.
Skipping this routine can shorten your brushes’ lifespan. So stick with it for clear skin and better makeup results.
Common Mistakes When Making or Using DIY Brush Cleaner
Using too much oil in your DIY brush cleaner causes stickiness. Brushes get harder to rinse. Use less oil for better results.
Stick to about one teaspoon of grapeseed or coconut oil for every half cup of cleaner. Too little oil means your brushes may dry out and shed more, so balance is key.
Some skip essential oils like tea tree or lavender, thinking they’re optional. These oils fight bacteria and keep brushes smelling fresh, especially tea tree which has antibacterial properties. Add just 5 to 10 drops per half cup of cleaner.
This amount brings benefits without irritating your skin. Keep drops low to avoid problems.
Sensitive skin users often worry about homemade cleaners causing reactions. Avoid vinegar or lemon juice if your skin is very sensitive, as their acidity can irritate. Use witch hazel with a few drops of lavender oil.
It’s gentler on your skin. It also helps soothe irritation effectively.
- Don’t soak brushes for too long, aim for 5 minutes max to avoid loosened bristles.
- Rinse with lukewarm water, not hot, to protect brush glue and handle finish.
- Mix ingredients fresh every time; old mixtures can lose strength or grow bacteria.
- Test a small skin patch with essential oils before cleaning brushes to check sensitivity.
- Use cotton swabs or gentle finger strokes; harsh scrubbing damages bristles.
- Dry brushes horizontally on a towel to keep their shape and avoid mildew.
Not rinsing thoroughly often leaves residue that irritates skin or clogs pores. Make sure to rinse until water runs clear.
Also, using too strong a concentration of vinegar or lemon can degrade brush bristles over time. Balance your ingredients for safe, long-term use.
Finally, never skip drying. Wet brushes can develop bacteria quickly if stored damp.
Air dry them completely before your next makeup session to keep both brushes and skin safe. With careful mixing and handling, your DIY cleaner will work well without causing damage or irritation.
Ingredient Comparison for Skin and Brush Types
You want your brushes clean and soft without irritating your skin. Carrier oils like jojoba and sweet almond help condition bristles. They keep synthetic and natural brush hairs from drying out or breaking down over time.
Antibacterial ingredients reduce germs that cause acne or infections. Witch hazel and tea tree oil both serve as gentle antibacterial agents. You want enough to kill bacteria but not so much that it irritates sensitive skin.
Skin type and brush material can guide your ingredient choices. For oily skin, use a stronger antibacterial ingredient.
But add less oil to avoid greasiness. For dry skin, more nourishing oil helps protect the skin and brush fibers.
| Ingredient | Benefit | Best for Skin Type | Best for Brush Type | Limit |
|---|---|---|---|---|
| Jojoba Oil (5-10%) | Moisturizes, conditions bristles | Dry, sensitive | Natural, synthetic | Thick if overused |
| Sweet Almond Oil (5-10%) | Softens bristles, light conditioning | All, especially dry | Natural, synthetic | Can clog pores if used on oily skin |
| Witch Hazel (10-20%) | Antibacterial, soothes skin | Oily, acne-prone | All brush types | May dry sensitive skin |
| Tea Tree Oil (1-2%) | Strong antibacterial, antifungal | Oily, acne-prone | All brush types | Powerful; dilute carefully |
| Distilled Water | Dilutes other ingredients | All | All brush types | Not antibacterial by itself |
Add water first to your mix, about 60 to 80 percent of the formula. Use cool or room temperature water to protect bristles. Next, add the carrier oil, no more than 10 percent, or the brush will stay greasy.
Antibacterial liquids like witch hazel help keep germs low. Use witch hazel at 15 percent or tea tree oil below 2 percent. These amounts work well to reduce bacteria on brushes.
Less than 1 percent tea tree won’t kill bacteria well. More than 2 percent risks redness or stinging.
Oily skin or heavy makeup needs more antibacterial liquid. Use a bit more witch hazel or tea tree oil. This helps clean brushes better after heavy use.
For dry or sensitive skin, choose more oil and less antibacterial. Always swirl brush lightly in cleaner and test on your skin first to avoid reactions.
Checklist for Safely Making and Using Homemade Cleaners
Making your own makeup brush cleaner requires care to avoid irritation and contamination. Clean ingredients and safe handling protect your skin and brushes. Proper storage and checking the mixture regularly keep the cleaner effective and safe to use.
Safe Ingredient Handling and Allergies
Use fresh, pure ingredients to avoid skin reactions and infections. Measure each part carefully to keep the cleaner gentle. This matters if you add essential oils or alcohol.
Test the cleaner on a small skin patch first. This helps catch allergies early.
Keep your workspace clean and avoid touching ingredients with dirty hands. Use clean, dry utensils and containers to mix and store the cleaner. Avoid ingredients known to irritate your skin, like strong fragrances or certain preservatives.
Proper Storage Containers and Conditions
Store your homemade cleaner in a clean, airtight container to stop bacteria and mold from growing. Use a glass bottle with a tight lid.
It keeps the cleaner fresh and clean. Keep the cleaner in a cool, dark place like a bathroom cabinet or drawer.
Label the container with the date you made the cleaner. Most DIY cleaners stay good for 1 to 2 weeks when stored properly.
Don’t leave the cleaner in direct sunlight. Keep it away from heat sources too.
- Use a clean glass jar or bottle with a tight-fitting lid
- Keep away from heat, sunlight, and moisture
- Store at room temperature or below
- Write the mix date on the container
- Make fresh batches every 1 to 2 weeks
- Do not double-dip brushes directly to keep cleaner pure
Always use a clean spoon or dropper to take the cleaner out. Avoid shaking the bottle excessively as this can create air bubbles and speed up spoilage.
Signs the Cleaner Needs to Be Discarded
Throw out your DIY cleaner if it changes color, smell, or texture. A sour or rancid odor signals bacterial growth or ingredient breakdown. Cloudiness or separation often means the mixture is no longer stable or safe to use.
See mold, flakes, or slimy film? Throw out the cleaner right away.
Using old or contaminated cleaner can harm your skin and damage brushes. Preparing small batches helps you avoid waste and keeps your brushes protected.
Stop using any cleaner that smells off or looks different than when you made it.
Step-by-Step Action Plan for Homemade Makeup Brush Cleaner
Follow this plan to make and use your brush cleaner effectively. Each step helps you keep your brushes safe and spotless.
- Before you start: Gather ingredients like gentle soap, alcohol, and water. Mixing these right is key to cleaning safely.
- Day 1: Make your DIY cleaner by mixing the ingredients. Check it smells fresh and feels smooth, not sticky.
- Day 1: Use the cleaner on one brush first. The brush should feel cleaner and look less stained.
- After the first use: Rinse brushes under lukewarm water until no soap residue remains. They should feel soft, not rough.
- Day 2: Dry brushes flat on a towel, keeping bristles hanging off the edge. Drying this way keeps brush shape.
- Once a week: Clean all your makeup brushes using the cleaner. Regular washing stops bacteria and makeup build-up.
- Every month: Inspect brushes for signs of damage. Replace any with loose bristles or an odd smell.
- Always: Store your cleaner in a sealed container. This keeps it fresh and ready for the next use.
Frequently Asked Questions
Can I Add Essential Oils to My DIY Makeup Brush Cleaner?
Yes, adding essential oils can freshen your cleaner. Use oils like tea tree or lavender for their antibacterial properties. Avoid adding too much to prevent skin irritation.
How Long Can I Store Homemade Makeup Brush Cleaner?
Store it for up to one month in a sealed container. Keep it in a cool, dark place to maintain its effectiveness. Shake gently before each use to mix ingredients well.
Is It Safe to Use Vinegar in Makeup Brush Cleaner?
Vinegar is safe in small amounts and helps remove buildup. However, use a diluted mixture to avoid damaging delicate brush bristles. Rinse thoroughly after cleaning to prevent residue.
Can I Use Baby Shampoo Instead of Dish Soap for My Cleaner?
Yes, baby shampoo is gentle and works well for sensitive skin types. It cleans brushes without stripping natural oils or making bristles brittle. This option suits those with sensitive skin or allergies.
Should I Use Warm or Cold Water to Rinse Brushes After Cleaning?
Use lukewarm water to rinse your brushes for the best results. Warm water helps remove makeup residues without damaging the bristles. Avoid hot water, which can loosen the glue holding bristles.
Does Homemade Brush Cleaner Work on Synthetic and Natural Bristles?
Homemade cleaners generally work well on both types of bristles. Adjust ingredients slightly if you notice roughness, using more conditioning agents for natural bristles. Always test on one brush first.
Key Points to Remember
Making your own brush cleaner saves money and helps your skin stay healthy. Try mixing your first batch today and see the difference. Clean brushes mean better makeup and fewer skin problems.