How to Curl Your Hair W a Straightener: Simple Steps for Versatile Curls
Learning how to curl your hair w a straightener is easier than you think. Grab a small hair section near your roots. Twist the straightener 180 degrees.
Glide it down slowly along the hair strand. This method works well for soft, everyday curls without needing a curling iron.
The straightener shapes your hair as it moves down. This shaping makes curling work well. That’s why it’s effective.
Make sure your straightener has 1-inch plates for the best control with curls. Avoid clamping too close to your scalp to protect skin and roots.
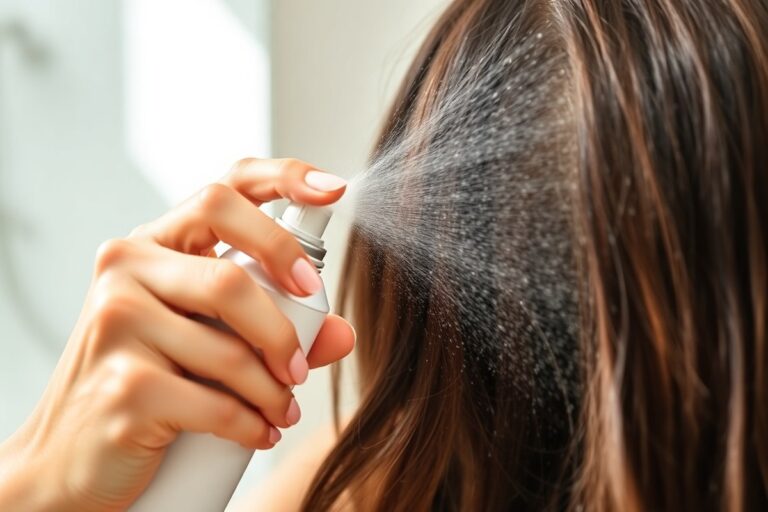
Start with dry, clean hair that’s not oily or heavy with products. Use heat protection spray before you begin to keep your hair healthy. This simple routine helps you get curls that last without damaging your hair.
Key Takeaways
- Use 1-inch wide straightener plates for versatile curls and waves.
- Clamp hair about 6 inches from the roots to avoid scalp burns.
- Twist the straightener 180 degrees away from your face when curling.
- For fine hair, set your straightener below 300°F to prevent damage.
- Section your hair into 1 to 2-inch pieces for even curls.
- Clean, dry hair holds curls better than oily or dirty hair.
How to Curl Your Hair with a Straightener Step-by-Step

Start by dividing your hair into small, manageable sections. Smaller sections make it easier to curl evenly and help the heat work better. Use clips to hold the sections you’re not curling out of the way.
The clamp and twist technique fits most hair textures. Grab a section close to the roots and clamp it.
Turn the straightener 180 degrees away from your face, then glide it down slowly. Twisting shapes the curl, while sliding locks it in place.
- Section your hair: Clip your hair into 8 to 10 sections depending on thickness. Use small sections for thicker or curly hair.
- Clamp a section: Grab about an inch of hair near the roots. Clamp the straightener on it firmly. Hold it steady before moving on.
- Twist the straightener: Turn the flat iron halfway around, pointing away from your face. This action starts curling the hair. Keep the movement controlled for better curls.
- Slide down slowly: Glide the straightener down the hair shaft at a steady pace without stopping.
- Release the curl: Open the clamp carefully at the ends and let the curl fall naturally.
- Repeat across sections: Work your way around the head, repeating the clamp, twist, and glide steps.
- Finish with touch-ups: Curl any missed spots or tighten curls by re-twisting small sections.
Using the right size sections affects your curl style and hold. Larger sections create loose waves, while smaller ones give more defined curls. The straightener must keep moving to avoid burning your hair or creating kinks.
A good curl looks bouncy, smooth, and natural without crimped lines. Try twisting the straightener more or moving it slower if curls don’t hold. These changes help create tighter, longer-lasting curls.
Keep experimenting to find what works best. Avoid clamping too tightly, which can cause dents or break hair.
Choosing the Right Straightener and Heat Settings

Choose a straightener with adjustable heat settings and rounded edges. Rounded plates help create smooth curls and avoid sharp bends. A 1-inch plate size works well for many curl styles.
It fits most hair lengths. This size is very versatile and easy to use.
For short hair, smaller plates (around 0.75 inches) work better. They give you more control near the roots and ends. Larger plates, such as 1.5 inches or more, suit thick or long hair because they heat more strands at once.
Heat settings depend on your hair type. Fine or damaged hair needs lower heat to prevent damage, around 300°F. Thicker or coarse hair tolerates higher heat, up to 450°F, to form lasting curls.
| Hair Type | Ideal Heat Setting | Recommended Plate Size |
|---|---|---|
| Fine or Heat-Sensitive Hair | Around 300°F | 0.75 to 1 inch |
| Normal or Medium Hair | 350°F to 400°F | 1 inch |
| Thick or Coarse Hair | 400°F to 450°F | 1.25 to 1.5 inches |
Lower your heat if your hair feels dry or damaged. Always start on the lowest setting that still curls your hair. This reduces frizz and breakage, especially with fine hair.
A quality flat iron heats hair evenly, producing long-lasting curls. You avoid hot spots that burn strands or create uneven curls. Straighteners with digital controls offer steady temperatures and quick heat-up times.
Adjust heat settings downward if your hair is colored, fragile, or feels brittle before curling.
Techniques to Create Different Curl Styles with a Straightener
You can create many curl styles using a flat iron. Change how you twist and move it to get new looks. Different techniques give you different curl shapes.
Each technique makes a different curl shape, from loose beach waves to tight, bouncy curls. Here are three popular methods that work well for different looks.
Classic Twist-and-Glide Method
This method makes soft, natural curls or waves, depending on how slowly you move the iron. It works best on medium to long hair lengths. The curls look smooth and shiny this way.
Heat hits both sides of the strand evenly. You can curl away or toward your face to change the curl’s direction and style.
Follow these steps to try the twist-and-glide:
- Clamp a 1, 2 inch section of dry hair near the roots with your flat iron.
- Twist the iron 180 degrees away from your face while holding the hair tight.
- Slowly glide the iron down the hair shaft, keeping the twist intact.
- Release the iron near the ends to let the curl form.
- Repeat on all sections, curling away or toward your face as desired.
Wrap and Pull Technique for Bouncy Curls
Use this method for round, voluminous curls that hold their shape. It’s a bit faster and works best with 1-inch plates. Pull the iron down at a steady speed to control curl tightness.
Slower pulls make tighter curls. Faster pulls create looser waves.
Try these steps for the wrap and pull:
- Clamp a thin section of hair about 1, 2 inches from the roots.
- Wrap the section fully around the straightener’s plates once.
- Keep the hair wrapped while you slowly pull the iron down to the ends.
- Let go gently at the ends to keep curls intact.
- Repeat for all sections to build a head full of curls.
Crown Curl Technique for Volume
This style adds volume at your hair’s crown area. Use vertical sections when curling. Curl then away from your face for lift.
It creates beachy waves that look easy and natural. Start curling close to your scalp by placing hair higher on the flat iron.
Feed the hair slowly into the iron. This helps your curls start near the roots.
Steps for crown curls:
- Divide dry hair into vertical sections around your crown.
- Clamp a section near the roots, twisting the iron slightly away from your face.
- Slide the iron down slowly while keeping the twist to create wave shape.
- Let the curl cool before touching to keep volume in place.
- Repeat on each vertical section for full crown volume.
Preparing Your Hair and Using the Right Products
Preparing your hair well helps your curls last longer and protects your strands from heat damage. Start with clean, detangled hair and always use a heat protectant spray or cream. Adding styling products will keep your curls defined and bouncy throughout the day.
Washing and Drying Before Curling
Wash your hair with a mild shampoo and conditioner suited to your hair type. Avoid heavy conditioners that weigh hair down, especially for fine hair. Let your hair air dry completely before curling.
Or, use a blow dryer to dry it fully. This prevents heat damage and uneven curls.
Dry hair holds curls better because moisture can make them limp or frizzy. Thick or coarse hair usually needs just a quick blow dry. This gets it mostly dry before styling.
Then you can curl without extra heat damage. Fine and fragile hair benefits from gentle drying to reduce breakage.
Detangling and Sectioning Your Hair
Use a wide-tooth comb or detangling brush to remove knots before curling. This step makes curling easier and helps each strand wrap smoothly around the straightener. Divide hair into small sections, around one inch wide works well for medium thickness.
Smaller sections heat evenly, hold curls, and prevent repeated straightener passes. For thick hair, working in more sections gives better result and reduces styling time. Fine hair requires gentle detangling to stop breakage during styling.
Heat Protectants and Styling Products to Use
Spray or apply a heat protectant all over your hair before using the straightener. Products like ghd Heat Protect Spray protect hair up to 450°F. Choose one that fits your hair’s thickness and condition.
This helps keep your hair safe when curling. These protectants reduce damage and some add slight hold to curls.
After curling, use a curl hold spray or light hairspray to help maintain curl shape longer. For volume, add a root lift spray before drying your hair. Leave-in conditioners or serums help tame frizz without weighing curls down.
Alternatives to Heat Protectants
Natural oils like argan or coconut oil offer some heat protection. Still, they don’t replace heat protectant sprays. Use oils to add moisture, not full heat guard.
They help smooth hair and reduce frizz. But may not protect against high heat damage. Use oils on dry hair in small amounts to avoid greasiness.
You can try silicone-based serums as an alternative, which coat hairs and help curls hold. These oils don’t block all heat from styling tools. It’s safer to use a heat protectant spray for curling.
This reduces damage better than oils alone. Skipping heat protectants risks dryness and split ends.
Preparation Checklist Before Curling
- Shampoo and condition hair appropriate to your hair type
- Dry hair completely, preferably air dry or blow dry
- Use a wide-tooth comb to detangle gently
- Apply a heat protectant spray or cream throughout hair
- Divide hair into small, manageable sections
- Optionally apply root lift spray or curl hold spray
- Use a smoothing serum or light leave-in if needed
This routine limits damage, makes curling easier, and improves curl hold. Avoid skipping drying or protection steps to keep hair healthy and curls lasting longer.
Curling Hair with a Straightener by Hair Length
Curling short hair with a straightener needs a narrow plate tool. Narrow plates help you control tight curls better on short strands.
You drag the straightener down the hair length just like with longer hair. But smaller sections work best.
Medium-length hair curls easier with a regular-sized straightener. You can curl bigger sections, so waves look looser and more natural. Twist the straightener once at the roots.
Slowly pull it down to the ends. This technique creates smooth curls.
Long hair takes more time and patience since curls must form along a longer strand. Use a straightener with wider plates to cover more hair each pass. Curl smaller sections for curls near the roots.
This avoids limp hair on top. Smaller pieces give a better curl hold.
The size of the straightener plates and how much hair you grab matter most. Narrow plates suit short hair for tight control. Wider plates handle long hair better by saving time on each curl.
| Hair Length | Straightener Plate Width | Section Size | Curl Style |
|---|---|---|---|
| Short (chin-length or above) | Small, narrow plates | Small sections (¼ to ½ inch) | Tight, controlled curls or waves |
| Medium (chin to shoulder) | Standard width plates | Medium sections (½ to 1 inch) | Loose, natural waves or curls |
| Long (shoulder length or below) | Wider plates | Small to medium sections (¼ to 1 inch) | Defined curls with volume near roots |
Short hair curls finish quickly but need precise control to avoid overheating or uneven curls. You can gently shake curls to blend them and add sea salt spray for volume. Medium hair curls easily hold their shape by twisting and pulling method with straighteners.
Long hair needs more sections and slower movements to heat evenly. Curl close to roots for lasting volume. A wider straightener on long hair saves styling time.
You must watch to keep curls even. It works best with careful attention.
Pick the right plate size for your hair length. This prevents damage and improves curls. Using the wrong size hurts curl shape.
Safe Heat Use and Protecting Hair from Damage
Curling your hair with a straightener can be safe when you follow a few key tips. Protect your hair using heat protectant sprays and never use high heat on wet hair. Limit how often you use heat to avoid damage and scalp burns.
Always Apply Heat Protectant
Heat protectants create a barrier that shields hair from heat damage. Spray evenly on dry hair before you start curling. This reduces splits, dryness, and frizz caused by the iron’s high temperature.
Choose a lightweight formula that won’t weigh down your curls. Reapply if you touch your hair with your hands during styling.
Keep Hair Completely Dry
Curling damp or wet hair with a straightener causes serious damage. The heat turns water inside your hair into steam, which can weaken strands. Always dry your hair fully before applying any heat.
Use a towel first, then finish with a blow dryer or air dry. Let your hair dry fully if it feels cold or moist before curling.
Use the Right Temperature and Timing
Flat irons can reach over 200°C, but this is too high for healthy hair. Set your straightener to a lower heat needed to curl your hair type. Fine or thin hair needs 250°F to 300°F, thicker hair up to 350°F.
Hold each section between the plates for 5 to 10 seconds only. Too much heat or too long can burn the hair and scalp.
Move the iron slowly but steadily. Avoid going back and forth repeatedly on the same section.
Protect Your Scalp from Burns
Keep the iron at least ½ inch from your scalp. Moving carefully lowers the risk of burns, which are painful and damage your skin. Use a mirror to check your progress and handle the straightener steadily.
Stop curling and rest your scalp when it feels too hot. Never rush the curling process.
How Often to Curl Your Hair
Using heat on hair too often causes cracks in the keratin and weakens strands. Most stylists recommend curling no more than 2 to 3 times a week. Take breaks between styling sessions to let hair recover.
On off days, wash hair with nourishing conditioners and avoid other heat styling tools. This keeps hair healthier over time.
- Apply heat protectant spray to fully dry hair
- Set straightener between 250°F and 350°F, depending on hair type
- Hold each hair section in the iron for 5, 10 seconds
- Keep the straightener at least ½ inch from scalp
- Dry hair completely before curling
- Limit heat styling to 2, 3 times per week
- Use nourishing hair care products on non-heat days
Curling your hair with straighteners is not bad if you follow these safety steps. Overuse or too much heat causes damage, but careful styling preserves your hair’s health. Shiny, bouncy curls without frizz or breakage show good results.
Maintaining and Refreshing Curls for All-Day Hold
To keep curls looking fresh all day, let them cool completely before touching. Cooling locks in the shape and prevents them from falling flat.
Spray light hairspray after your curls cool down. This helps keep them sleek and tight.
You don’t need heat to refresh curls later. Simply mist your hair with water or a spray designed for curl refreshment.
Use your fingers or a wide-tooth comb to gently lift curls. This reshapes them without damage.
Volumizing sprays, like root lift sprays, add extra body at the scalp. They help curls look fuller and prevent limpness, especially after hours of wear. Choose a lightweight hairspray to avoid stiffness and keep curls touchable.
- Spritz water or curl refresher spray to revive limp curls
- Use light hairspray after curls cool to hold shape without crunch
- Comb or finger-style curls gently to reshape without frizz
- Apply root or volume spray to lift curls at the scalp
- Carry travel-size spray for quick touch-ups during the day
- Start with clean hair on day two after washing for best curl hold
- Keep straightener use to once a day to protect hair strength
Refreshing curls on less-than-fresh hair keeps style longer without extra heat. Curling on day two after washing helps too, as the natural oils support hold. Avoid recurling with a straightener more than once daily to protect hair strength and shine.
Common Mistakes and Troubleshooting Curling with a Straightener
One common mistake is using too much hair in one section. Overloading the straightener makes curls loose or uneven. Separate your hair into smaller sections around 1 inch wide for more control.
Slow down the straightener pull if curls look too loose. Hold the straightener a second longer to set the curl. Use thinner hair sections for tighter curls.
Each section should be less than 1 inch wide. Wrap hair tightly around the straightener plates.
Too much heat or holding the straightener in place too long can damage hair. So stick to 300, 350°F for fine to medium hair and 350, 400°F for thicker hair.
Frizz can happen when hair isn’t fully dry or you use too much heat. Start by straightening the roots slightly. This smooths the base and reduces frizz while curling.
Apply a small amount of frizz-control serum before styling. This helps curls stay soft and shiny. It won’t weigh your hair down.
- Don’t flip the straightener upside down. Instead, rotate your wrist smoothly in one direction when curling.
- Use wider plates (1.5 inches or more) for loose waves on long hair. But pick narrower plates for tighter curls.
- Avoid going over the same hair section multiple times to reduce damage.
- Use a heat protectant spray before styling to shield your hair.
- Don’t touch or comb curls before they cool; let them set for 5 minutes.
- Skip heavy products that make curls fall flat or greasy quickly.
- Keep sections consistent in size for even curls throughout your hair.
Many think you have to curl hair by clamping and twisting the straightener fast. Actually, a slow, smooth wrist turn gives more defined and modern curls. Straighteners create softer curls than barrel irons, which often produce a firmer shape and more frizz.
Some believe straighteners can’t make tight curls. But using smaller sections and higher heat can tighten them safely. Just don’t rush.
Practice rotating your wrist and timing the heat. This helps shape curls without burning your hair. Keep trying till you get the right curl look.
Step-by-Step Action Plan for Curling Your Hair with a Straightener
Follow these simple steps to start curling your hair with a straightener today. Each step builds your skills and confidence.
- Before you begin: Gather your straightener, heat protectant, comb, and clips. This helps you stay organized and work safely.
- Heat up your straightener: Set it to 300°F for fine hair. Use 350°F for medium thickness. Choose 400°F if your hair is thick. You’ll see curls form faster without damage.
- Prep your hair: Spray heat protectant on dry hair and comb through it. Your hair stays smooth and less prone to breakage.
- Section your hair: Clip the top half up and start with the bottom layers. This will make curling easier and more even.
- Curl each section: Take 1-inch sections and clamp the straightener near roots. Twist away from your face. Slowly pull the straightener down. Your curls should look defined and natural.
- Finish each curl: Let curls cool before touching them. This helps them set and last longer.
- Style your curls: Use your fingers or a wide comb to gently loosen the curls. This helps create soft waves. Use hairspray for extra hold without stiffness.
- After curling: Avoid brushing hair too much to keep curls intact. Refresh curls with a mist of water or curl refresher spray as needed.
Frequently Asked Questions
Can You Curl Wet Hair with a Straightener?
No, you should never curl wet hair with a straightener. Wet hair can burn and damage.
How Long Does It Take to Curl Hair with a Straightener?
It usually takes 10 to 20 minutes for a full head. Timing depends on hair thickness.
Does the Thickness of Hair Affect Curling with a Straightener?
Yes, thicker hair needs higher heat and slower runs. Thin hair curls faster.
Can You Create Loose Waves with a Straightener?
Yes, by twisting the straightener less and moving faster. It makes softer, looser curls.
Is It Better to Use a Ceramic or Titanium Straightener for Curls?
Ceramic heats evenly and is better for delicate hair. Titanium heats quickly for thick hair.
How Do You Fix Curls That Are Too Tight When Using a Straightener?
Run your fingers or a wide-tooth comb gently through them. It loosens curls without damage.
Before You Go
Curling your hair with a straightener takes practice but gets easier fast. Start with small sections and the right heat for your hair type. Try your first curls today and enjoy a new look.