
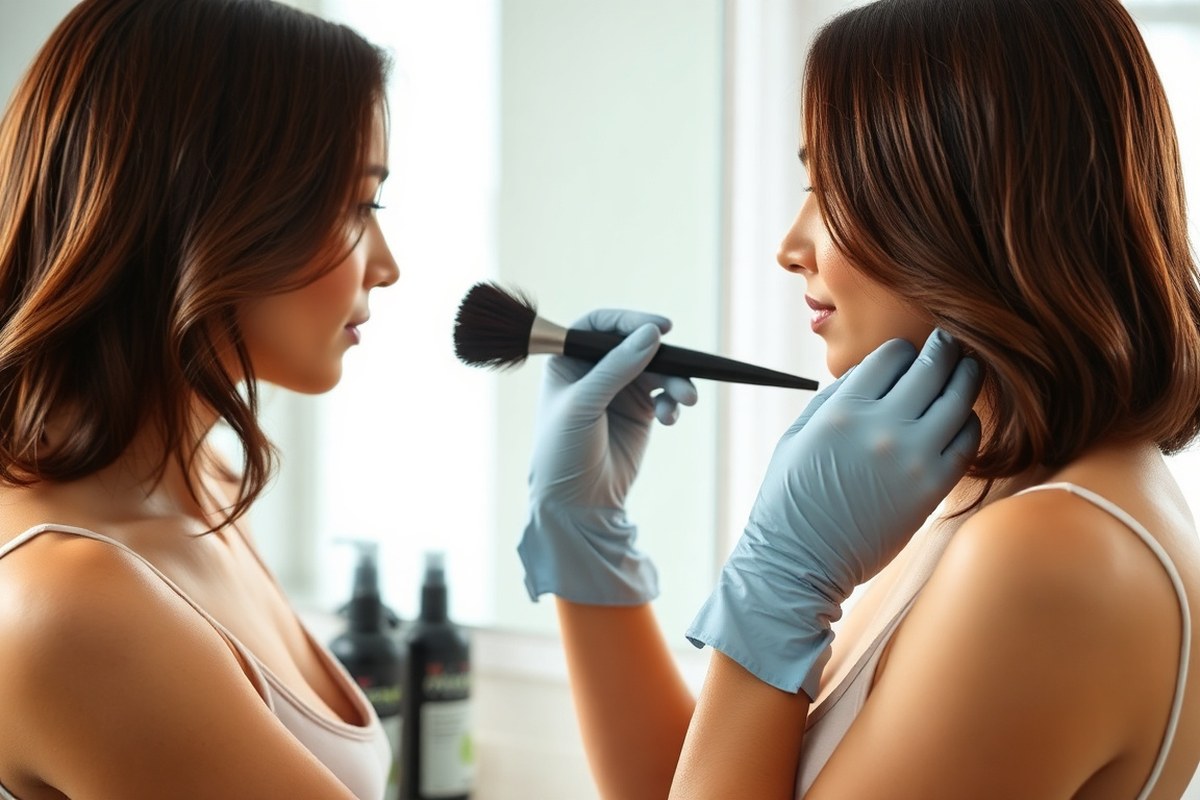
How to Color Your Own Hair at Home: A Complete Guide for Beginners
Wondering how to color your own hair without messing it up? You can get great results by picking the right dye and following simple steps.
Start by choosing a dye type that works for your hair and color goals. Always test the dye on a small hair section first to avoid surprises.
Prepare your hair by shampooing it twice 24 to 48 hours before dyeing. This cleans dirt and oils but leaves natural oils that protect your scalp. Set aside 1 to 1.5 hours on dye day to finish the full process without rushing.
Use gloves and apply petroleum jelly around your hairline to prevent staining your skin. Follow the dye instructions carefully, adjusting time based on your hair texture. Finer hair lightens faster, coarse or dry hair may need the full recommended time.
Key Takeaways
- Choose permanent dye for longer-lasting color, about every 6-8 weeks reapplication.
- Semi-permanent dyes work well for quick color refresh without harsh chemicals.
- Shampoo twice two days before to remove buildup but keep natural oils.
- Use a mixing bowl and applicator brush for precise and even dye application.
- Adjust dye processing time based on your hair’s thickness and condition.
- Protect skin with petroleum jelly along the hairline to prevent staining.
How to Color Your Own Hair at Home Step-by-Step

Set aside about 1 to 1.5 hours to color your hair. You’ll want a clean, well-lit space with plenty of towels and gloves ready. Wear an old shirt and lay down newspaper or plastic to protect surfaces.
Before you start, do a patch test on your skin 48 hours in advance. Shampoo your hair 24 to 48 hours before coloring but don’t condition it. Hair with natural oils holds dye better, helping avoid uneven color.
Use a comb or clips to section your hair. Applying dye in parts helps cover your scalp evenly and reduces mess. Roots take longer to process, so treat them first and then the lengths.
- Mix the hair dye. Follow the instructions on the box exactly. Use a mixing bowl and brush for better control.
- Apply dye to the roots first. Start with the visible roots based on your natural hair part. Use a brush or a clean mascara wand for precision.
- Work toward the lengths.After 20 minutes, start applying dye to the rest of your hair. Avoid overlapping roots to prevent damage. Work carefully around each section.
- Let the dye sit. Keep it on for the time shown on the package, usually 30-45 minutes. Check regularly but don’t rush rinsing out.
- Rinse hair thoroughly. Use lukewarm water until it runs clear. Avoid hot water because it fades color faster.
- Apply conditioner. Use the conditioner included or a color-safe one. Leave it on for 2-5 minutes to lock in moisture.
- Dry and style as usual. Blow-dry on low heat or air dry. Avoid heavy styling products that might strip color.
Use two mirrors or ask for help when coloring hard-to-see areas. This helps you cover spots like the back properly.
For gray coverage, permanent dyes often work best and last 6-8 weeks. Semi-permanent colors need more frequent touch-ups but are gentle on hair.
Don’t forget to keep some petroleum jelly on your hairline before coloring. It blocks dye stains on your skin.
Also, more dye doesn’t mean better color. Use enough for full coverage but no extra waste.
Choosing the Right Hair Dye Type for Your Needs

Choosing the right hair dye depends on your hair’s condition. How long do you want the color to last? This helps you decide the best type.
Permanent dye lasts longest and covers gray hair well. Semi-permanent and temporary dyes are gentler on your hair.
They work well if you want to try new colors. These dyes also refresh your tone without lasting changes.
Permanent Hair Dye: Pros and Cons
Permanent hair dye changes your hair color by opening the cuticle. Then, it seals the color inside the hair shaft. This process makes the color last longer.
Permanent color lasts through many washes, usually 6 to 8 weeks. It works best for covering over 25% gray hair.
This dye holds up well over time. You can also lighten your hair with permanent dye, which semi-permanent types can’t do.
Permanent dyes contain chemicals like ammonia and peroxide. These can cause dryness or damage, especially on weak hair. Handle with care if your hair is fragile.
These dyes require a careful application, mixing with developer, and often cost around $30 per kit. Choosing ammonia and PPD-free options helps reduce irritation.
Permanent dye works well if you want a long-lasting change or need full gray coverage. It’s the best pick for swapping your natural color or going lighter.
Semi-Permanent and Demi-Permanent Options
Semi-permanent hair dyes coat the outside of the hair shaft without changing its structure. They last about 4 to 12 washes and wash out gradually. Semi and demi dyes improve or refresh your color easily.
They’re good if you don’t mind seeing regrowth. They also help tone down brassiness well.
Demi-permanent dyes use a low-volume developer to last longer. They typically last about 20 to 28 washes. This makes them last twice as long as semi-permanent dyes.
Neither semi nor demi dyes open the hair cuticle. Both types skip harsh chemicals.
That makes them safer options for damaged hair. However, they don’t fully cover gray hair or lighten natural color.
You can switch from semi-permanent to permanent dye. But note that semi-permanent color won’t sit properly on mostly gray roots. It’s best to use permanent dyes for roots with heavy gray.
Temporary Hair Color Uses and Limitations
Temporary hair color stays on the hair surface and washes out in one shampoo. These include color sprays, chalks, and color-depositing shampoos or conditioners. They’re ideal for trying out bold colors or adding shine before a special event without commitment.
Temporary dyes won’t cover gray hair or alter your natural color. They simply add a tint or gloss.
Results last up to 10 days with color-depositing conditioners. These products gently tone hair without cause for damage.
Temporary color is perfect for a quick change or fun look. It also works well between permanent dye jobs.
It gives you a chance to try new tones. Avoid using temporary dyes if you expect full coverage or long-lasting results.
Use the table below to compare different hair dye types. Pick the best one for your hair and goals. This will help you get the results you want.
| Hair Dye Type | Duration | Gray Hair Coverage | Effect on Natural Color | Hair Damage Risk | Cost (Approximate) |
|---|---|---|---|---|---|
| Permanent | 6 to 8 weeks | Full coverage | Lightens and changes color | Moderate to high | $30 per kit |
| Semi-Permanent | 4 to 12 washes | Minimal, not full | Coats hair, no lightening | Low | $15 to $25 |
| Demi-Permanent | 20 to 28 washes | Better than semi, less than permanent | Some change, no lightening | Low | $20 to $30 |
| Temporary | 1 wash to 10 days | No coverage | Surface tint only | None | $10 to $20 |
Choose permanent dye if you want long-lasting color and gray coverage. Go for semi or demi-permanent options to refresh color or avoid damage. Temporary color works well for short-term use and styling fun.
Don’t use semi-permanent dye on mostly gray roots. It won’t cover them fully or fade evenly.
How to Pick the Perfect Hair Color Shade for Home Dyeing
Match your hair color to your skin tone by identifying your undertones first. You have warm undertones if your skin glows with golden, honey, or copper. Look for hair dye with those highlights to match it well.
Cool undertones pair well with ash, platinum, or cool brown shades. Neutral undertones can try both warm and cool colors without clashing.
Choose a shade that works with your natural hair color. Staying within two shades lighter or darker than your base tone keeps results natural and predictable. For example, you have medium brown hair.
Pick a shade close to your natural color. Light brown or dark brown works best in this case. Going beyond two shades, especially lighter, may cause uneven color or damage.
Darker shades almost always cover gray hair better. Root touch-up kits often lean toward ashy tones to avoid brassiness on grays.
For lighter hair with grays, try natural softeners like chamomile rinses to blend in grays gently. For darker hair, natural options like coffee or black tea can soften the contrast.
Decide if you want to deepen your color or change the tone. Deepening your natural hair up to two shades is safer and easier at home. Lightening much beyond two shades often needs professional bleaching.
You can change your look by adjusting warmth or coolness in your hair tone. This method does not cause heavy damage. It’s a safer way to try new colors.
Use this checklist to pick hair dye color: First, choose a shade no more than two levels different from your natural hair color. Next, consider your skin’s undertones and pick complementary hues.
Finally, choose a shade that fits your gray coverage needs, darker for better coverage. Avoid drastic lightening or vivid colors that are tricky to get right alone.
Being honest about your hair’s condition helps you avoid breakage. Fine or damaged hair absorbs color more quickly.
So picking a slightly lighter or less intense shade prevents overtone build-up. Reading the box’s starter color swatches against your actual hair also reduces surprises.
Common At-Home Hair Coloring Mistakes and How to Fix Them
Patchy or streaky color usually happens when dye isn’t applied evenly. You might miss spots or apply too much dye in some areas. Using a comb or brush to spread dye evenly helps prevent this.
Roots often color differently because new growth absorbs dye faster. Apply dye to roots first, then blend outwards. Check your roots in good lighting before rinsing to fix missed spots.
Over-processing and scalp burns happen when dye stays on too long. Using strong bleach without protection also causes these problems.
Follow the timing instructions on the box or product exactly. A sting or burning sensation means rinse immediately.
- Use a timer and set alerts for processing time.
- Do a patch test 48 hours before dyeing.
- Wear gloves and protect your scalp with a barrier cream.
- Start dyeing with dry, unwashed hair for less irritation.
- Apply dye in sections for better coverage and control.
- Have a friend check hard-to-see areas.
- Use a color brush for roots and fingertips for ends.
Your color turned out too dark. Wash it with gentle clarifying shampoo to dilute it.
The color will fade faster but you avoid harsh chemicals. For too-light results, apply a toner or a second gentle color layer after a few days.
Damage from bleach or dye shows as dryness and breakage. Use deep conditioners and protein treatments weekly to rebuild strength. Avoid heat styling tools for at least two weeks after coloring to let hair recover.
Uneven roots or missed spots can be fixed by reapplying color only to those areas. Use a small brush and short timing to avoid over-processing. This touch-up works best within a week of the original dye job.
Safety Tips and Precautions for Coloring Hair at Home
Handling hair dye safely means doing a patch test first. You should protect your skin and scalp. React quickly if you feel irritation.
You want to avoid allergic reactions and skin stains. Follow these steps for a safer coloring experience at home.
Performing a Patch Test Correctly
A patch test shows if your skin will react badly to the dye. Apply a small amount of the mixed dye to your skin. Choose a spot behind your ear or on your inner elbow.
Wait to see if a reaction happens. Keep it there for 48 hours without washing it off.
Check the spot for redness, itching, swelling, or a rash. Stop using the hair dye if you see any irritation or reaction. Even if you’ve colored before, always test a new brand or shade.
Many kits include patch test instructions on the box. Use a cotton swab to apply the mix carefully.
Mark the spot with a pencil. This step costs very little time but can save a lot of trouble.
Skin and Scalp Protection Methods
Protect your skin by applying petroleum jelly or thick lotion. Put it along your hairline and around your ears. This blocks the dye from touching your skin.
This prevents spots of dye from staining your skin. Wear old clothes or use a cape to protect your shirt from stray drops.
Clip your hair up in sections during application. This keeps clean parts out of the dye and cuts down the mess. Use gloves provided in the kit to avoid staining your hands or causing irritation.
Avoid hair dyes if your scalp is damaged or very sensitive. Spray heat protection on your hair before styling dyed hair. This keeps hair safe but does not protect your skin during dyeing.
Handling Allergic Reactions Safely
Rinse your hair and skin with cold water right away. Do this if your scalp feels itchy, red, or swollen after dyeing.
Avoid scrubbing the skin. Stop using the dye and watch for worsening symptoms over the next 24 hours.
Seek advice from a healthcare provider if you have serious swelling, blisters, or breathing difficulties. Avoid coloring your hair at home regularly if you have sensitive skin. Some chemicals in dyes can cause long-term problems if used often.
Dispose of leftover dye by sealing it in a plastic bag before throwing it away. This prevents accidental contact or spills. Never pour dye down the drain as it can harm the environment.
Always do a patch test when you try a new dye brand or shade. Don’t skip this even if you colored your hair before.
How Hair Type and Condition Affect Coloring Results
Your hair texture affects how fast dye works. Fine hair lifts color quicker, so reduce processing time by 5 to 10 minutes. Coarse or dry hair usually needs the full time on the box to get even color.
Porosity means how well your hair absorbs moisture and dye. Highly porous or damaged hair soaks up dye too fast and unevenly. To avoid blotchy color, test a strand first and watch the timing closely.
Your hair may feel brittle or break easily. Choose a gentle dye made for damaged hair. These often contain conditioning agents that protect strands while coloring.
Henna is a natural choice that colors hair gently. It lasts for weeks. Henna looks different from chemical dyes.
Curly and coarse hair tends to be drier and harder to saturate. Use thick cream dyes designed for this hair type to coat strands evenly. Apply dye in small sections.
Cover your hair with plastic wrap. This keeps heat in and helps color soak in.
Fragile hair needs extra care during coloring. Use a deep conditioner before dyeing to reduce breakage. Avoid overlapping dye on already colored hair to minimize damage.
Reduce processing time if your hair is very weak. This helps avoid over-processing. Cut back time slightly for safety.
Checking a strand’s color after the first 20 minutes can help avoid surprises. Rinse with cool water to lock in color and smooth the cuticle. Using products with built-in moisturizers afterward keeps hair soft and helps your new color last longer.
How to Care for Your Hair After Coloring to Maintain Vibrancy
Try washing your colored hair less often to keep your color vibrant. For most people, washing two to three times a week works well. Over-washing fades color faster because each shampoo strips some dye.
Choose shampoos and conditioners made for color-treated hair. These products are gentle and help lock in color. Look for sulfate-free shampoos, which don’t dry out hair or strip dye.
Deep conditioning treatments or color glosses help your hair feel soft and look shiny. Use a deep conditioner or hair mask once a week, especially if your hair feels dry. A clear gloss treatment seals the color and boosts shine, lasting about four to six weeks.
Heat styling can make your color fade quicker and damage hair. Try to limit hot tools and keep your styling heat below 350°F. When you use heat, always apply a heat protectant spray to shield your hair.
- Wash hair 2, 3 times weekly with sulfate-free, color-safe shampoo
- Condition with color-protecting conditioner after every wash
- Do a deep conditioning mask or treatment once a week
- Apply a clear gloss to boost shine and seal color
- Use heat protectant and keep styling tools under 350°F
- Air dry hair when possible to avoid heat damage
- Avoid swimming in chlorine without a swim cap to prevent fading
These steps keep your hair hydrated and prevent color from dulling. Deep conditioners relieve dryness caused by coloring chemicals. Skipping them often leads to flaky scalp or brittle strands that look faded.
When your color starts to fade after six weeks, a refresh treatment or gloss can help. If you do need to wash hair daily, try dry shampoo on non-wash days. This keeps hair looking fresh without stripping color.
When to Choose Professional Hair Coloring Instead of DIY
Choose professional hair coloring instead of DIY for complex or risky changes. Bleaching, major color corrections, and scalp issues need expert skills. Professionals reduce risks and deliver better results when hair color is tricky.
Complex Coloring Situations to Avoid at Home
Changing dark hair to very light or platinum blonde is tricky. Doing it safely by yourself is hard. It needs careful steps and products.
Bleaching can cause dryness, breakage, or uneven color when done incorrectly. Professionals use specific formulas and control timing to protect your hair.
Fixing colors that have gone wrong, like unwanted tones or patchiness, also calls for a pro. At-home fixes sometimes damage hair further or cause new color problems. Experts have tools and products designed for delicate corrections.
Trying multi-tone effects such as balayage or highlights is tricky without training. Mistakes leave harsh lines or oddly blended shades that are hard to fix. Salons use skill and professional-grade lighteners to get the look right.
Benefits of Professional Color Correction
Pros can accurately match or blend shades to fit your skin tone and hair history. They understand how previous dyes affect new color results. This avoids muddy or patchy outcomes common in DIY fixes.
Color corrections often require multiple steps spaced weeks apart. Professionals plan these carefully to avoid over-processing. At home, rushing steps can cause serious damage or uneven results.
Salon treatments include repairing masks and pH balancing products unavailable in stores. These protect hair fibers during color changes, keeping hair healthier long-term. Expect professional services to cost from $70 to $150 or more, depending on complexity.
Recognizing When Hair Needs Expert Care
Notice if your scalp feels irritated, burning, or shows rash before dyeing. These signs mean you should see a professional first. Coloring over damaged or sensitive scalps risks pain or chemical burns.
Hair that is very dry or breaks easily won’t work well with strong dye. Intense coloring can cause damage at home. It’s better to treat hair health first.
A stylist can assess hair strength and suggest safer options or restorative treatments. This helps avoid major damage.
When your hair color is uneven or has streaks, get help from a pro. They can even out your color safely. This avoids damage and unwanted results.
They have testing methods and small trial areas that reduce surprises. At home, guessing can worsen the mess.
Bleaching or heavy color corrections done at home often cause hair damage and uneven tones. Consider booking a pro for these tricky jobs first.
Step-by-Step Action Plan for Coloring Your Hair at Home
Follow this plan to get great color results without damage. Take your time and check each step before moving on.
- Before You Start: Do a patch test 48 hours earlier to avoid allergic reactions. Skin should show no redness or swelling.
- Day 1: Choose your hair dye and read instructions fully. You’ll know you’re ready when you understand timing and application details.
- Day 2: Do not wash your hair for 1-2 days before coloring. Shampoo your hair at least 24 hours before you color it. Your hair should feel slightly oily but clean.
- Day 2, Application: Apply dye in sections using gloves, starting at roots first. Follow the exact timing on the box; hair should look evenly covered.
- Day 2, Rinse and Care: Rinse with cool water until clear, then condition. Hair should feel soft and not sticky or rough.
- Week 1: Use color-safe shampoo and conditioner to help color last. Your hair will keep its shine and avoid fading.
- Week 3: Touch up roots only if needed. Match the dye exactly and keep timing consistent with your first application.
Frequently Asked Questions
Why Do Hairdressers Not Like Box Dye?
Hairdressers often dislike box dye because it can cause uneven color and damage. Professionals prefer custom mixes for better results and gentler formulas. Box dyes may also miss subtle color nuances or proper scalp treatments that pros provide.
What Are Common Mistakes with at Home Hair Coloring?
Common mistakes include skipping a patch test and applying dye to wet hair. Not following timing instructions or choosing the wrong shade are also frequent errors. These mistakes can cause irritation, patchy color, or an unexpected shade.
What Is the Least Damaging Way to Color Your Hair?
Semi-permanent hair color is usually the least damaging option. It doesn’t use harsh chemicals or developers, so hair stays healthier. Using natural ingredients for color can also reduce damage, especially for covering gray hair gently.
What Is the Easiest Hair Dye to Apply?
Semi-permanent dyes are often the easiest to use at home. They usually come in simple tubes or bottles and need no developer. This type dries quickly.
It washes out gradually. You have less commitment if you want to change shades.
How Long Does It Take to Color Your Own Hair at Home?
Expect to spend about one to one and a half hours from start to finish. This includes prep, application, processing, and rinsing. Taking time helps avoid rushed errors and ensures a better, more even color.
Can I Use Blonde Box Dye on Dark Hair?
No, blonde box dye alone won’t lighten dark hair. Without bleach or high-lift formulas, the blonde color won’t show up well. Lightening dark hair usually requires a professional or special bleaching products.
Before You Go
Coloring your hair at home can give you a fresh, confident look when done right. Take your time and follow steps carefully for good results. Now, pick your color and get started today.


