How to Clean Hair Trimmers: Effective Steps and Pro Tips That Work
How to clean hair trimmers is a simple process you can master in minutes. Start by removing loose hair using a small brush or an old toothbrush. If your model allows, remove the blades.
Rinse detachable blades under warm water. Otherwise, wipe them carefully with a damp cloth.
Next, disinfect blades with rubbing alcohol or a barbercide solution to kill germs. Avoid soaking the entire trimmer unless it’s designed to be 100% waterproof. Regular cleaning keeps your blades sharp and prevents skin irritation or infection.
Quick cleaning right after each use gets rid of hair buildup. Deep clean your trimmers every few haircuts to maintain performance and hygiene. Proper care extends your trimmer’s life and helps it deliver smooth, reliable cuts every time.
Key Takeaways
- Remove and clean loose hair from blades after every haircut.
- Use 70% or higher isopropyl alcohol to disinfect blades effectively.
- Only rinse trimmers under water if they are fully waterproof.
- Deep clean clippers every 3 to 5 uses to prevent buildup.
- Rotate and remove blades carefully by the ends to avoid injury.
- Oil blades immediately after cleaning to keep them sharp and smooth.
How to Clean Hair Trimmers Properly Step-by-Step
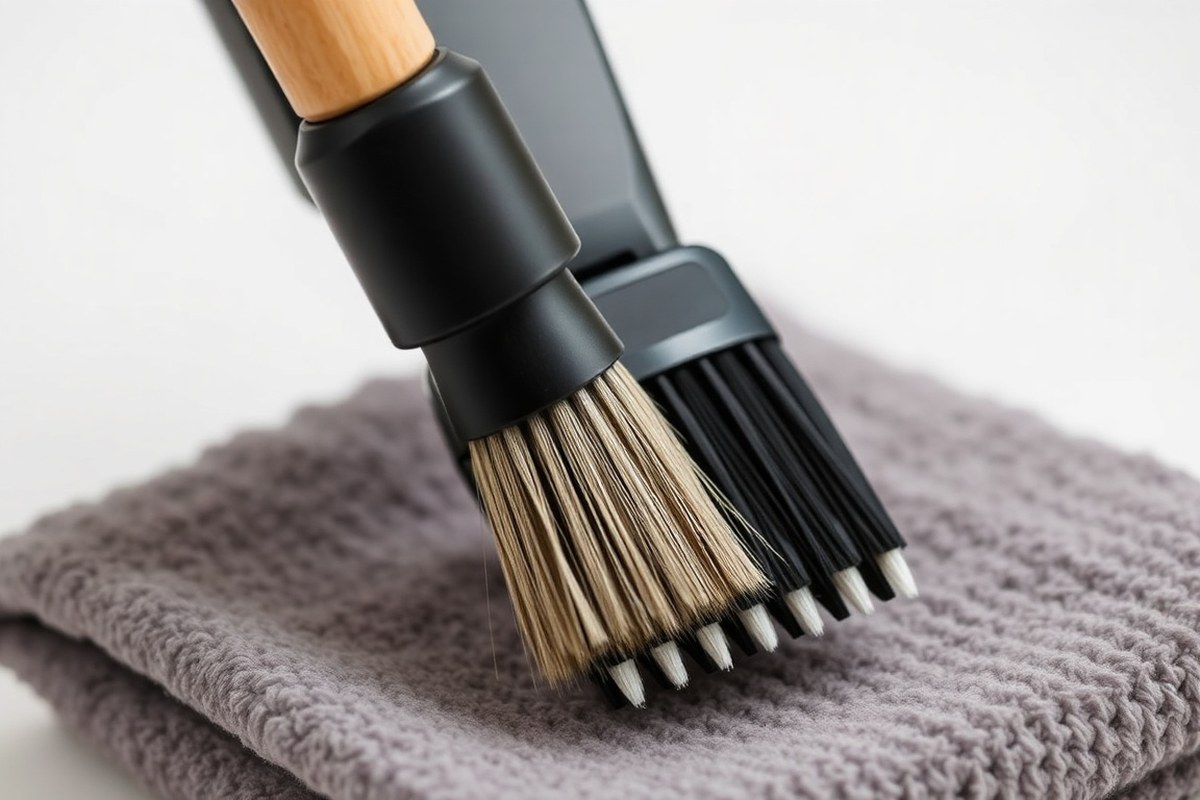
Cleaning your hair trimmers right after use keeps them sharp and hygienic. Dust, hair build-up, and skin oils can slow down your trimmer and cause skin irritation. The process is fast and needs just a few simple tools.
Use a cleaning brush and a soft cloth to clean. This keeps your trimmer ready for the next use.
- Power off the trimmer. Always unplug or remove the battery to avoid accidents. This step protects both you and your trimmer while cleaning.
- Remove any detachable parts. Take off the blades or guards marked as washable. This lets you clean all the nooks where hair gathers.
- Brush out loose hair. Use a small, stiff-bristle cleaning brush to sweep hair from blades and crevices. Be thorough to get rid of all visible debris.
- Rinse washable parts. Hold removable pieces under warm running water with mild soap if allowed by the manufacturer. Dry them completely before reassembly to prevent rust or damage.
- Wipe the trimmer body. Use a dry or slightly damp cloth to clean the handle and non-washable areas. Avoid water touching the motor or electronics.
- Disinfect the blades. Apply a blade-safe disinfectant or rubbing alcohol to a cloth and gently wipe each blade. This kills germs and prevents skin infections.
- Dry thoroughly. Let all parts air dry for at least 10 minutes on a clean towel. Moisture can harm blades or the trimmer’s motor if not removed.
- Reassemble the trimmer. Put blades and guards back in place. Check that all parts fit securely before the next use.
Following these steps after every haircut keeps your trimmer working well and avoids skin problems. Skipping cleaning lets dirt build up, making your trimmer dull and less safe to use. Clean blades have no hair or debris on them.
The trimmer body is smooth and free of rust spots. Take your time to do it right, especially drying parts well to avoid damage.
Tools and Supplies Needed for Cleaning Hair Trimmers

Start by gathering a small cleaning brush, disinfectant spray, and blade oil. A brush helps sweep hair from tight spots and blade edges. Use the brush that came with your trimmer.
Choose a soft, clean brush for cleaning. Make sure it fits well in small spaces.
Disinfectants keep your trimmer sanitary and reduce skin irritation. Choose isopropyl alcohol with 70% or higher concentration for quick drying and effective germ kill. Specialized clipper cleaning sprays or barbercide solutions also work well on blades and guards.
Clipper oil is essential for smooth blade action. Without oil, the blades may heat up or dull faster. Apply oil after cleaning to keep blades quiet.
It helps the blades last longer. A small bottle costs just a few dollars.
- Small brush for removing hair from blades and grooves
- Isopropyl alcohol (70% or higher) or clipper disinfectant spray
- Clipper blade oil, such as Wahl clipper oil
- Soft cloth or microfiber towel to wipe excess oil and residue
- Container for soaking detachable guards if they’re water-safe
Use the brush to clear hair while holding the clipper downward. Spray disinfectant on blades but avoid oversaturation that might harm electronics.
After drying, put clipper oil drop by drop on blade teeth. Then run the trimmer to spread the oil evenly.
Never skip oiling the blades after cleaning, it keeps your trimmer cool and fast.
Cleaning guards separately avoids buildup inside grooves. Wash plastic guards with mild soap and water if safe.
Dry them completely before you put them back on. This stops hair and oil from forming a tough sludge that strains the motor.
Keeping a small kit of these tools makes cleaning faster and more effective. Skipping any step often leads to dull blades, clogged blades, or poor cutting performance. The right supplies keep your clipper working smoothly through many haircuts.
How Often to Clean Hair Trimmers and When to Do Deep Cleaning
You should do a quick clean after every use to keep your trimmer working well. Brushing off loose hair and wiping the blade with a damp cloth takes about two minutes. This stops hair build-up that causes blades to drag or pull.
It is especially important if you cut hair every week. You will notice smoother trimming with no pulling.
Deep cleaning should happen about once a month for weekly cutters. This keeps your tool working well longer. Skipping this can reduce your trimmer’s life.
This means removing the blade set to clear out trapped hair inside the trimmer. Deep cleaning removes buildup a quick clean can miss. It also keeps blades sharp and safe to use.
You won’t risk pulls or skin irritation. It usually takes 10 to 15 minutes, depending on your model.
Professional users who trim daily should do a deep clean weekly, alongside daily quick cleans. This frequent maintenance avoids performance issues like overheating or uneven cutting. Your trimmer needs a deep clean if it feels slow after cleaning.
This means dirt and hair are stuck inside. You should do a deep clean soon.
After a quick clean, use a soft brush to sweep hair away. Brush around the blade area and behind the blade too. This stops buildup and keeps trimming smooth.
Then wipe metal parts with an alcohol pad or damp cloth. For a deep clean, remove the head carefully first.
Brush away all hair from each part thoroughly. Let the parts dry completely before putting them back together.
Neglecting proper cleaning speeds up blade dulling and causes skin irritation risks from bacteria build-up. Fast daily wipes cost nothing and take minutes.
Deep cleaning requires no special tools beyond a small brush and clean cloth. Doing both keeps your trimmer working smoothly and your cuts clean and comfortable.
Removing and Caring for Blades Safely During Cleaning
Removing and caring for blades safely helps keep your hair trimmer sharp and sanitary. You want to take the blades off carefully. Clean between each tooth.
Then put the blades back aligned right. Doing it gently prevents damage and keeps the trimmer working smoothly.
Removing Blades Without Damage
Always turn off and unplug your trimmer first. Removing the blades roughly can bend or dull them, or harm the trimmer body.
Check your manual because some models snap blades off. Others use screws for securing blades.
Use a small screwdriver or blade removal tool if needed. Keep a steady grip, so the blade doesn’t slip and cause injury or damage. Store screws and small parts safely until reassembly to avoid losing them.
Cleaning in and Between Blade Teeth
Cleaning under the blades gets rid of trapped hair and dirt buildup that dull cutting edges. A small brush with firm bristles works well to loosen hair between teeth and inside crevices.
Move any adjustment levers around to free hairs stuck between the blade teeth. For cordless models, avoid water on non-detachable parts to protect the battery. Use compressed air or a cleaning brush for hard-to-reach spots.
Reattaching and Testing Blade Alignment
Line up the blade holes or guides exactly with your trimmer body when reattaching. Tighten screws firmly but don’t overtighten to avoid stripping threads or warping blades.
After reassembly, test the blade by turning on the trimmer briefly. Listen for smooth operation and check for uneven cutting noise. Realign and adjust if you feel vibration or see blade gaps.
- Unplug the trimmer and remove any guards attached to the blades.
- Use a small screwdriver or blade tool gently to lift or unscrew the blade.
- Brush away visible hair from the blades and trimmer body with a firm-bristled brush.
- Move the blade adjustment lever back and forth to shake loose trapped hair.
- Use compressed air or a fine brush to clean between the blade teeth carefully.
- Realign the blade and secure screws or snap the blade back in place.
- Test the trimmer by turning it on, checking for smooth, even blade motion.
- Readjust if you notice strange sounds, vibrations, or blade shifts during testing.
Disinfecting Hair Trimmer Blades: What Works and What Doesn’t
To kill germs on clipper blades, rubbing alcohol and Barbicide work well. Use rubbing alcohol for quick cleaning and Barbicide for a deeper disinfecting soak. Clipper sprays offer a middle ground but vary in ease and effectiveness.
Isopropyl Alcohol for Quick Disinfection
Use 70% or stronger isopropyl alcohol to clean and disinfect blades quickly. It gets rid of hair, product residues, and kills bacteria. Dip a cloth or cotton swab in alcohol and wipe the blades carefully.
This method works best right after you finish trimming, before oiling. Check your trimmer’s instructions first; some brands don’t recommend alcohol on certain parts. It’s affordable, usually under $5 for a bottle, and dries quickly.
Barbicide for Deep Sanitizing
Barbicide is a chemical disinfectant that works well for shared clippers or public use. Mix it as the label says and soak the blades for 10 minutes. This kills stubborn germs that rubbing alcohol might miss.
Soaking takes time but is good if you want stronger sanitation. After soaking, rinse blades in water or wipe dry thoroughly, then oil to prevent rust. Barbicide costs more, around $10 to $15 for a bottle that lasts many uses.
Clipper Cleaning Sprays Pros and Cons
Clipper sprays are easy to use and usually contain disinfectant and lubricant. Spray the blades and wipe off excess with a cloth. These are convenient for quick sanitizing during or after use.
They don’t require soaking like Barbicide but may not clean as deeply. Check ingredients for allergy-causing chemicals or unsuitable oils. Sprays typically cost between $8 and $12 for a travel-sized bottle.
Here’s a simple comparison to help decide what disinfectant to use:
| Disinfectant | How to Apply | Time Needed | Cost Range | Best For |
|---|---|---|---|---|
| Isopropyl Alcohol (70%+) | Wipe blades with soaked cloth or swab | 1-2 minutes drying | $3 – $5 per bottle | Quick hygiene after use |
| Barbicide | Soak blades 10 minutes in mixed solution | 10-15 minutes including drying | $10 – $15 per bottle | Deep disinfection, shared tools |
| Clipper Cleaning Spray | Spray blades, wipe excess off | Minutes, no soak | $8 – $12 per bottle | Quick clean and lubrication |
Choosing depends on your cleaning needs, time, and budget. Use rubbing alcohol for fast jobs and Barbicide if you share clippers often.
Always check your trimmer’s manual before using alcohol to avoid damage.
Cleaning Different Types of Hair Trimmers and Clippers
Hair trimmers vary in cleaning needs based on their type. Corded trimmers usually need careful blade removal and cleaning without water. Cordless trimmers require you to switch them off fully before cleaning to avoid accidental activation.
Washable heads and waterproof models allow more water in cleaning, which simplifies the process. You can rinse detachable, water-resistant heads under warm tap water to remove hair and oils.
Always let the parts dry fully before you put them back. This helps stop rust and electrical problems.
Detachable heads need a bit more care. Removing them lets you clean inside the trimmer base and the attachment thoroughly.
Many manufacturers recommend soaking these parts in a special cleaning solution made for clippers. That breaks down oils and dirt better than water alone.
| Trimmer Type | Cleaning Method | Water Use | Additional Care |
|---|---|---|---|
| Corded Trimmers | Remove blades, brush and wipe down | No direct water on motor or blades | Use spray cleaner for disinfecting |
| Cordless Trimmers | Turn off, clean blades carefully | Use spray cleaner, avoid water on base | Detach heads for separate cleaning |
| Washable Heads | Rinse detachable heads under warm water | Yes, rinse the heads only | Air dry fully before reassembling |
| Waterproof Models | Run entire unit or blades under water | Yes, safe for whole unit | Dry thoroughly after rinsing |
When cleaning cordless trimmers, keep the unit off and detach the head first. Spray cleaner works great on the non-waterproof parts.
If parts can come off, soak them in clipper cleaner. It gets into small crevices that are hard to reach.
Waterproof models let you rinse the entire trimmer or blades, making cleaning faster. Be sure to dry the trimmer well, especially around charging ports. Detachable heads should dry on their own without towels to avoid lint sticking to blades.
How and When to Oil Hair Trimmer Blades After Cleaning
You should oil your hair trimmer blades after every cleaning to keep them sharp and rust-free. A few drops of clipper oil go on the blade teeth. This helps stop overheating.
It also keeps your clipper working smoothly. Skipping oiling can cause blades to dull, get stiff, or even rust over time.
Choosing the Right Clipper Oil
Use a highly refined mineral oil made for hair trimmers or clippers. It’s thin enough to spread evenly and won’t gum up the blades. Avoid thick oils or general lubricants, which can trap hair and dirt.
Some brands make oil just for their trimmers. Wahl’s blade oil is one example. Andis also has its own clipper oil.
These usually cost around $5 to $10 for a small bottle and last a long time. Spray lubricants can work but drops of oil give better control.
Applying Oil for Best Results
Put 2 or 3 drops of oil on the blade teeth. Spread them out evenly. Do this before you use your trimmer again.
Running the trimmer for a few seconds spreads the oil without using too much. This keeps the blades cool and smooth.
Here’s how to oil your blades correctly:
- Hold your trimmer securely and turn it off.
- Wipe any excess moisture or hair from the blades with a dry cloth.
- Apply 2, 3 drops of clipper oil along the top blade teeth.
- Put 1, 2 drops on each side of the blades, if accessible.
- Turn the trimmer on and run it for 10, 15 seconds to spread the oil.
- Turn it off and wipe off any extra oil to avoid buildup.
Too much oil makes the blades slippery and messy. Using just a few drops balances lubrication without drips or stains.
Frequency and Signs to Oil Blades
Oiling after each cleaning or every few haircuts maintains smooth cutting and blade life. Clipper brands recommend oiling every time you clean or at least every 3 to 5 haircuts. Heavy or professional use needs oiling more often.
Listen for squeaking, dragging, or blade heat as signs your trimmer needs oil. Blades that slow down or pull hair also need immediate lubrication. Don’t wait for problems, the best care is regular oiling after every clean.
Common Mistakes When Cleaning Hair Trimmers and How to Fix Them
Using the wrong oils or cleaners on your hair trimmer can cause serious damage. Household oils like WD-40 might seem handy.
But they can gum up blades and harm the motor. This leads to poor performance and may shorten the trimmer’s life.
Not cleaning hair and residue properly causes the blades to dull and clog. Dried product buildup or dead hair can cause rust.
It also can damage the drive shaft under the blades. That damage slows the blades and causes the trimmer to overheat or die quickly.
Overheating often comes from a dirty motor or blade. Dirt traps heat and keeps the motor from running efficiently. This can hurt battery life and may cause the trimmer to stop working during use.
- Don’t spray WD-40 or household oils; use clipper-specific oil only.
- Remove and clean blades regularly to prevent hair and product buildup.
- Wipe blades dry after cleaning to avoid rust formation.
- Rotate and pull off the cutter block carefully to clean under it.
- Brush away debris gently using the right small cleaning brush.
- Oil blades after cleaning to maintain smooth movement and prevent rust.
Always handle blades by their blunt sides to avoid cuts and damage. Accidentally touching blade edges can dull or nick them. This reduces your trimmer’s performance and can pull hair painfully during the next use.
Rust happens when moisture stays on blades too long. That’s why drying the trimmer after washing is necessary. Heat from repeated use can actually speed up rust if the blades aren’t clean or dry.
Never use oils that aren’t made for hair trimmers. They damage the motor and blades.
Step-by-Step Action Plan
Follow these steps to keep your hair trimmers clean and working well.
- Before each use: Brush off loose hairs to prevent buildup. Check that the blades look clear and shiny.
- After each use: Take off the blade. Brush all hair away. Wipe the blade with disinfectant. Confirm the blade feels dry and free of debris.
- Weekly: Deep clean your trimmer by fully disassembling the blades. Soak the blades briefly in an approved disinfectant. Rinse, dry thoroughly, then oil the blades. Make sure blades run smoothly and without noise.
- Monthly: Inspect and sharpen or replace dull blades. Dull blades tug hair or leave uneven cuts.
- Every few uses: Oil the blades lightly. Apply a drop on each blade edge and run the trimmer briefly. Blades should spin quietly without extra friction.
- After any use on others: Always clean and disinfect thoroughly to avoid cross-contamination. The blades should look spotless and feel cool to the touch.
- Notice rust or sticky residue? Take off the blades. Soak them longer in disinfectant. Then scrub with a soft brush. Repeat as needed until clean.
- Store properly: After cleaning, keep your trimmer in a dry place without dust. Check it before the next use to ensure it’s dirt-free.
Frequently Asked Questions
How Do I Clean Hair Trimmers That Are Not Waterproof?
Brush out hair and debris first, then use a recommended blade-care product. Avoid soaking or rinsing these to protect the motor and blades. Handle with care to keep them working well longer.
Can I Use Rubbing Alcohol to Clean Hair Trimmer Blades?
Yes, rubbing alcohol disinfects without damaging metal blades. Use a cotton swab to apply it carefully after brushing hair off. It kills germs but dries fast, so blades won’t rust easily.
What Should I Do If My Hair Trimmer Has a Removable Battery Before Cleaning?
Remove the battery to prevent any electrical issues while cleaning. Then follow your usual cleaning steps without water exposure. This protects the battery and motor from damage.
Can I Use the Same Cleaning Method for Nose Hair Trimmers and Regular Hair Clippers?
No, nose trimmers are smaller and more delicate. Lightly brush loose hairs and use a small brush or wash with mild soap if waterproof. Be gentle to avoid damaging sensitive parts.
Is It Okay to Rinse Blade Attachments Under the Sink Faucet?
Only if the manufacturer says the attachments are washable. Rinse quickly and dry thoroughly to avoid rust. Non-waterproof parts should never be rinsed as water can damage them.
How Can I Tell If a Hair Trimmer Needs Oiling After Cleaning?
Blades that feel sticky or louder than usual usually need oil. Apply a few drops of blade oil and run the trimmer briefly. Proper lubrication keeps blades sharp and the motor running smoothly.
Final Thoughts
Clean trimmers work better and last longer. Start cleaning your trimmer right after using it to avoid buildup. Always keep a small brush and oil near your trimmer.
Use them to clean and maintain it often. This makes upkeep easier.