How to Apply Curlers: A Complete Guide for Perfect Curls Every Time
Knowing how to apply curlers can change your whole styling routine. The key is to work with hair that’s partly dry, about 70 to 80 percent. This helps the curls set well without causing damage or frizz.
Start by dividing your hair into small sections, around 1 inch thick each. Comb through these sections to remove tangles before rolling. This step helps each curl form smooth and defined.
Secure the curlers properly to keep hair in place. You’ll want to leave them in for at least 30 minutes for a strong curl. For softer waves, 15 minutes can work if you’re in a hurry.
Key Takeaways
- Apply curlers on hair that is 70 to 80 percent dry for best results.
- Divide hair into 1-inch sections and detangle before rolling.
- Secure each curler tightly to avoid loose curls.
- Leave curlers in for at least 30 minutes for defined curls.
- Use 15 minutes for looser waves when short on time.
- Prepare hair well; it plays a big role in curling success.
How to Apply Curlers: Step-By-Step for Any Hair Type

Start by dividing your hair into even sections based on thickness and length. Roll small sections of hair, about 1 inch wide, onto curlers starting from the ends. Leave curlers in long enough to fully dry or set curls for lasting shape.
Preparing and Sectioning Your Hair
Section your hair into manageable parts to make curling easier. Use clips to hold sections you aren’t working on out of the way. For thicker hair, create more sections to ensure curls set evenly.
Keep each section about 1 inch wide for a balanced curl size. Smaller sections create tighter curls, while bigger pieces give you loose waves. Comb through each section first to remove tangles and smooth hair.
Rolling Hair Onto the Curler Correctly
Start rolling the hair by the ends onto the curler. Then wrap the strand up toward your scalp. Make sure the hair is tight on the curler.
Rolling from the tips helps the hair curl smoothly and avoids bumps. Hold the section firmly but don’t pull hard to reduce breakage.
Wrap the strand tightly but comfortably around each curler, making sure hair lies flat. For longer hair, begin by winding only the ends around the curler. Next, roll the rest of the strand upward.
This helps make smooth curls. This keeps curls defined and prevents unraveling.
Securing Curlers and Setting Time
Once rolled, secure each curler close to the scalp with clips or bobby pins. Properly attached curlers won’t move and will create a neat curl shape. Avoid placing curlers too tightly to protect your scalp.
Leave curlers in for different times depending on your method. Hot rollers usually need 10 to 30 minutes on dry hair. Check your stylist’s advice.
Foam or flexi rods work best on damp hair. These can be left in overnight for stronger curls. This gives curls time to fully set.
Use a hooded dryer on low heat with damp hair. This speeds up drying and helps set your curls. Keep the heat gentle to avoid damage.
- Comb your hair thoroughly to remove knots.
- Section hair into 1-inch wide parts, clipping away the rest.
- Take a 1-inch section of hair to work on.
- Wrap the hair ends around the curler first.
- Roll the curler upward toward your scalp smoothly.
- Secure the curler with a clip or pin near the scalp.
- Repeat until all hair sections are rolled and secured.
- Leave curlers in for 10-30 minutes or overnight as needed.
Choosing the Right Curler Based on Hair Length and Type
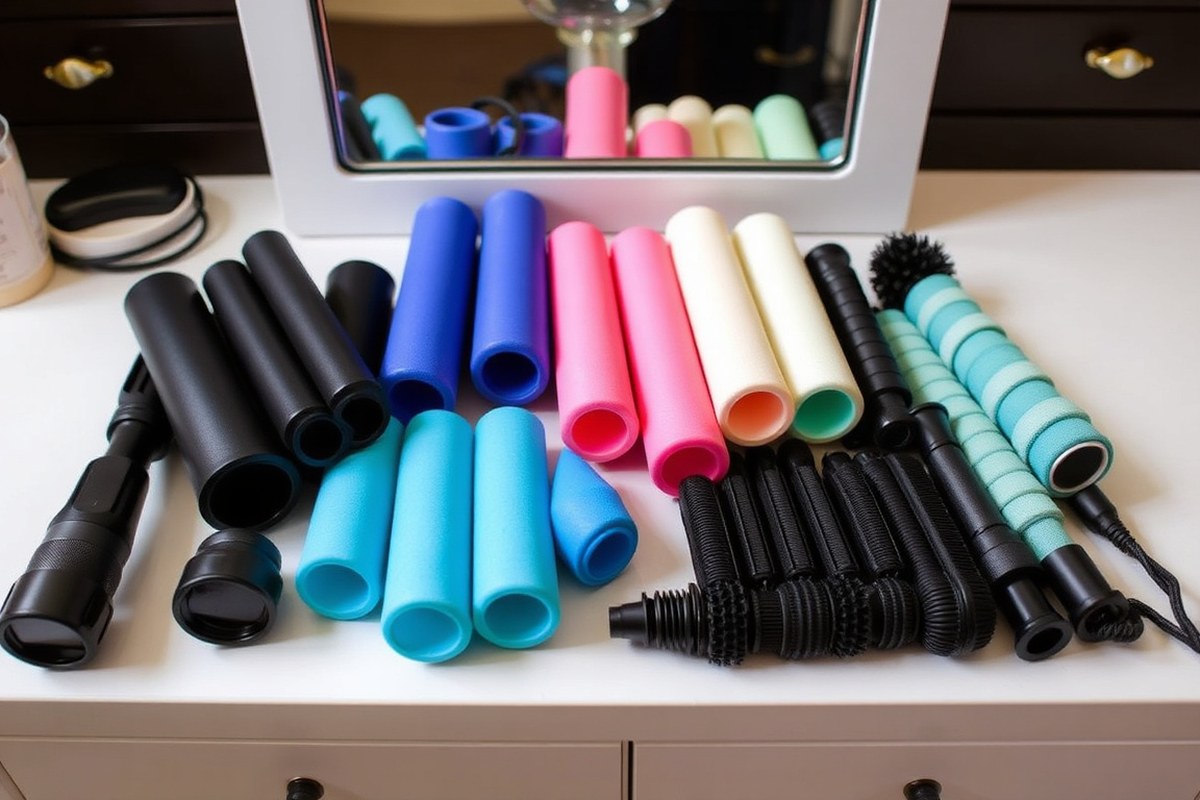
Choosing the right curler depends on your hair length, texture, and the curls you want. Hot rollers suit quick, long-lasting curls on most hair types. Heatless curlers are gentle and great for overnight styling, especially if you want to avoid damage.
Hot Rollers and Their Ideal Uses
Hot rollers heat up to style your hair quickly and deliver lasting curls. They work well on all textures and hair thicknesses, including fine and thick hair. You can select different sizes to achieve tight ringlets or loose waves.
Using hot rollers requires a heat protectant spray to avoid damage. You roll your hair sections around the heated rollers, then let them cool before removing. This method takes about 20 to 30 minutes total.
Heatless Curling Options and Benefits
Heatless curlers avoid heat damage and are excellent for sensitive or damaged hair. Many use 100% mulberry silk, which helps prevent breakage, tangling, and frizz overnight. They sit comfortably on your head because of their flat design.
These curlers work best on medium to thick hair and can create natural, soft curls. You keep them in for several hours or overnight to set curls without any heat.
Curler Sizes and Hair Length Compatibility
Roller size impacts the curl type and suits different hair lengths. Smaller rollers create tight curls, good for short hair or adding volume near roots. Larger rollers give looser waves, ideal for long or medium hair.
Velcro rollers come in various sizes so you can mix and match for your preferred look. Using multiple curler sizes lets you tailor curls from root volume to smooth ends.
| Curler Size | Best Hair Length | Curl Type |
|---|---|---|
| Small (0.5, 1 inch) | Short to medium | Tight curls or ringlets |
| Medium (1, 1.5 inches) | Medium to long | Natural curls or waves |
| Large (1.5+ inches) | Long | Loose waves or volume |
Pick smaller sizes for short hair and larger ones for longer lengths. Mixing sizes works well for medium hair types.
Choosing Curlers for Hair Texture
Fine hair holds curl less well. So hot rollers or heat styling help set curls firmly.
Use smaller rollers for volume and tighter curls. Heatless options may create softer curls but may not last as long.
Thick or textured hair responds better to heatless curlers like silk rollers or ribbons. These reduce frizz and protect strands. Hot rollers also work well but need higher heat and longer set time.
| Hair Texture | Recommended Curler Type | Curl Result |
|---|---|---|
| Fine | Hot rollers, small to medium size | Firm, long-lasting curls |
| Medium | Heatless silk curlers, hot rollers | Soft or defined curls |
| Thick | Heatless curlers, large hot rollers | Voluminous, frizz-free waves |
Use a heat protectant spray before hot rollers to prevent heat damage.
How to Prepare Your Hair for Curling Success
For curling success, your hair should be partly dry, around 90% dry is ideal. Avoid curling when hair is too wet or fully dry, as it won’t hold curls well. Preparing with the right products and sectioning makes a big difference for curl shape and health.
Optimal Hair Moisture Levels for Curling
Hair that is too wet breaks easily and won’t hold curls well. Let your hair dry naturally or blow dry on low heat. Stop when hair is mostly dry but still a little damp.
Silk heatless curlers work best when hair is about 90% dry. So curls set without damage.
Silk curler sets recommend wrapping hair that is nearly dry to keep curls smooth and frizz-free. Dry hair can resist shaping, causing curls to fall out faster. You want to feel your hair soft and just a bit moist before starting.
Choosing and Applying Heat Protectants
Use a heat protectant spray or mousse before any drying or curling. Heat protectants guard hair against damage from hot tools like blow dryers. Apply a light layer evenly, focusing on the ends and mid-lengths where hair is weakest.
For best results, spray the protectant on damp hair and comb through gently for even coverage. Products like silicone-based sprays or lightweight mousses protect without weighing hair down. This also helps curls last longer and reduces frizz.
- Apply a heat protectant spray on damp hair before blow drying.
- Use a mousse designed for curl hold to prep hair further.
- Comb product through hair evenly with a wide-tooth comb.
- Avoid heavy oils that flatten curls or make hair greasy.
- Choose lightweight formulas if hair is fine or oily.
- Use richer products on dry or coarse hair for moisture.
Applying the right product keeps your hair healthy and curls well-shaped. Skipping protectants can lead to breakage and dry strands.
Best Detangling and Sectioning Methods
Gently detangle hair with a wide-tooth comb starting at the ends. Avoid brushing wet hair as it breaks easily. Detangling removes knots that block smooth curling and cause uneven results.
Split your hair into four to six parts using clips or ties. This makes curling easier and helps curls stay even.
- Start detangling from hair ends, working up to roots.
- Use fingers or a wide-tooth comb to avoid breakage.
- Create 4 to 6 sections based on hair thickness and length.
- Secure sections with clips or hair ties for control.
- Work on one section at a time to curl neatly.
Sectioning also speeds up the curling process and helps curls look uniform. Avoid rushing or skipping this step for best curl shape.
Hot Versus Heatless Curling: Benefits and Drawbacks
Hot curlers heat your hair to create curls faster, typically taking 10 to 20 minutes. They use temperatures from about 250°F for fine hair up to 400°F for thick hair. This speed means you get curls quickly.
But the heat poses a risk of damage if not used carefully. Protect your hair with a heat protectant spray and avoid high heat settings to reduce damage.
Heatless curlers work by shaping your hair while it dries naturally. They often need several hours or overnight to form curls. This method causes almost no heat damage, making it safer for fine or fragile hair.
You can keep curlers in while you sleep. This saves daytime styling time. You need to plan your curl style beforehand.
Curl longevity tends to differ by method. Hot curls last about 4 to 6 hours. They can hold up to 8 hours.
Use warm-up tips and products to help. Heatless curls last about the same time. They look softer and more natural.
This is because they skip the intense heat set.” Using silk-based heatless curlers helps maintain hair health and reduces frizz for smoother curls.
For quick styling, hot curlers are your best bet. They deliver curls with more defined shape from root to tip in less time. Heatless curlers work best when you have extra time.
They create gentle, bouncy curls. They come with less risk to hair health. Fine or fragile hair benefits more from heatless curlers to avoid brittleness and split ends.
Hot curlers are usually bulkier and require power, which might limit travel or quick fixes. Heatless curlers include silk scrunchies or soft rollers. They are easy to carry with you.
They are gentle on your hair. Your choice depends on the time you have.
Hair type also matters for curlers. Think about how often you want to style without damage.
Protecting Your Hair from Damage During Curling
Heat settings should match your hair type to avoid damage. Fine or thin hair does best with 250°F to 300°F. Medium hair can handle 300°F to 350°F. Thick or coarse hair needs 350°F to 400°F for effective curling. Use the lowest heat that gives you curls that last.
Products that protect hair from heat and reduce frizz are essential. Start with a heat protectant spray before using curlers. Leave-in conditioners and serums help keep hair smooth and hydrated.
Avoid cotton accessories that pull and tangle your hair. Silk or satin scrunchies, headbands, and pillowcases reduce friction and breakage.
- Apply heat protectant spray evenly on dry hair before curling.
- Choose silk or satin hair accessories to prevent frizz and breakage.
- Wait for hair to dry completely before using heated curlers.
- Do not tug hair when rolling curlers to avoid damage.
- Avoid heat styling on hair weakened by recent chemical treatments.
- Use the lowest effective heat setting for your hair type.
- Allow curls to cool before touching or brushing.
Heat styling should be avoided if your hair feels brittle or has split ends. Overuse of heated curlers causes dryness and breakage. Your hair may look dull and frizzy if damage builds up.
Silk items like pillowcases and curling ribbons help maintain curl shape and hair health. After removing silk curlers, gently run your fingers through curls to keep waves intact.
Don’t use heated curlers on wet hair. Wait until it’s fully dry to prevent damage.
Avoid habits like pulling hair too hard or brushing curls when hot. Heated curlers on extensions may loosen glue if too hot.
Frizz and breakage happen faster if you skip heat protection or overheat your hair. Using the right products and gentle handling keeps curls shiny and your hair strong.
How to Remove Curlers for Long-Lasting Curls Without Damage
Wait for your curls to cool completely before taking out the curlers. This cooling period helps set the curls, so they last longer and reduce frizz.
Removing curlers too soon makes curls fall flat or become messy. Try leaving curlers in for at least 30 minutes for tight curls. A shorter 15-minute wait gives more volume and a looser lift.
Take your time removing each curler gently to avoid hair breakage. Rushing or pulling harshly can cause frizz or damage, especially with heatless curlers.
- Start by loosening the curler carefully, avoiding any tugging on your hair.
- Roll the curler downward following your hair’s natural curl direction.
- Hold the curled section with your fingers as you unwind to keep the curl shape intact.
- Remove all curlers one by one, checking for even tension on each strand.
- Gently separate curls with your fingers to add volume and movement.
- Spray a light mist of hairspray on your curls. It helps them hold longer. This keeps your curls fresh throughout the day.
Avoid brushing curls right after removing curlers, as this flattens or frizzes hair. Finger-combing keeps curls defined and soft. For looser waves, you can comb through carefully with a wide-tooth comb later.
Spend about five minutes to master this slow, gentle removal method. The curls will look smooth and bouncy, giving your hair natural shine without breakage.
Maintaining and Refreshing Curls Throughout the Day
To keep your curls bouncy all day, avoid touching them too much. Lightly mist your hair with water or a curl refresher spray to revive curls without heat. Use your fingers to gently separate curls once dry, preventing them from clumping or flattening.
Products that help maintain volume and shine include a lightweight mousse or curl-improving cream. Apply sparingly to avoid weighing curls down. Use a small amount of serum or oil to control frizz.
Focus on the ends only. Avoid touching the roots.
When curls start to lose shape on day two, try these quick refresh techniques:
- Spritz curls lightly with water or a leave-in conditioner spray
- Use a curl-boosting mousse for added hold and volume
- Scrunch curls gently upward with your hands to revive bounce
- Apply a tiny bit of lightweight oil to smooth frizz and add shine
- Clip curls with Velcro rollers for 15 minutes to reshape. Use this method if needed.
- Avoid heavy, sticky products that can flatten curls
- Sleep on a silk pillowcase to reduce friction and frizz overnight
Velcro rollers are great for refreshing curls without heat. Place them on lifted sections of your hair for 10 to 15 minutes.
This adds volume at the roots, especially on straight or blown-out hair. The rollers keep curls bouncy and natural-looking.
Don’t rush to re-curl your hair with heat on day two or three. It risks damage and dryness. Use gentle refresh methods instead of harsh ones.
Mist your curls lightly. Sleep with a silk scrunchie to hold the curls softly. These small steps help maintain your style longer and keep curls looking fresh and shiny.
Common Curling Mistakes and How to Fix Them
Uneven or loose curls happen if you stop wrapping too soon. Make sure to wrap the hair all the way to the tip. This helps curls form evenly and stay tight.
Wrapping all the way to the end ensures the curl holds. Secure the curler properly without making it too tight, or the curl might crease or break.
Curls that fall flat by midday can mean your hair was dry. You might have used hair sections that were too big. Also, removing curlers too early can cause curls to lose shape.
Leave curlers in longer, ideally overnight, for better hold. Using smaller hair sections helps each curl set firmly. Also, keep hair about 90% dry before curling to avoid flattening.
Flat curls often come from wrapping hair in opposite directions on each side. Make sure both sides wrap away from your face. A crease near the crown means the curler sat too far forward.
Adjust the curler back a little to avoid this crease. Start wrapping right at the root and place the rod along the crown for smooth curls.
Damaged feeling hair after curling happens when heat is too high or curlers are too tight. Loosen curlers to avoid pulling and breakage.
Give hair regular breaks from curling to maintain health. Using foam rollers or flexi rods helps if you want to avoid heat altogether.
- Wrap hair fully to the tip before securing curlers
- Leave curlers in for at least several hours or overnight
- Use smaller hair sections instead of large chunks
- Wrap both sides away from your face for even curls
- Place curlers at the root, especially near the crown
- Keep curlers loose to prevent creases and breakage
- Use heatless curlers for delicate or damaged hair
Steam from hot showers can loosen curls and make them fall flat quickly.
Prevent tangling by brushing hair before curling and using detangling spray if needed. Avoid twisting hair too tightly on the curler, which leads to breakage. Proper sectioning and gentle handling cut down damage while improving curl shape and longevity.
For fine hair, hot rollers create longer-lasting volume compared to heatless options. But those with fragile hair should choose foam rollers to reduce heat damage. Matching your curling method to your hair type helps curls last.
Using the right technique keeps curls fresh and looks healthy. Choose your method based on hair texture and condition.
Step-by-Step Action Plan for Using Curlers
Follow these steps to get great curls with minimal damage. Each step shows you what to do and how to check it’s working.
- Before you start: Wash and dry your hair until it’s slightly damp. Your hair should feel clean but not soaking wet to hold curls better.
- Right before curling: Apply heat protectant spray if using hot curlers. This prevents damage and keeps hair smooth after styling.
- During curling: Section your hair into small parts. Wrap each section tightly around the curler and click it in place to set curls evenly.
- While waiting: Let the curlers stay in for 30, 45 minutes or until completely cool. This timing helps curls solidify for lasting shape.
- Removing curlers: Gently unroll each curler without pulling. Your curls should spring up without frizz or breakage.
- After curling: Lightly finger-comb or shake curls to soften them. Avoid using a brush right away to keep curls defined longer.
- Refreshing curls: Mist curls with water or curl refresher spray throughout the day. This helps keep bouncy curls without redoing the whole style.
Frequently Asked Questions
Can You Sleep with Curlers in Your Hair?
Yes, you can sleep with certain soft, heatless curlers. Silk curlers are gentle and reduce hair damage while you rest.
How Long Should Curlers Stay in Your Hair for Best Results?
Leave curlers in for at least 20 to 30 minutes once your hair is dry. This allows curls to set better and last longer.
Can You Apply Curlers on Oily or Unwashed Hair?
It’s better to curl clean hair for volume and hold. Oily hair might weigh curls down and make them limp.
Does Hair Type Affect How Tight Your Curls Will Be?
Yes, fine hair curls may look looser, while coarse hair holds tighter curls. Adjust your curler size accordingly.
Is It Necessary to Use Hairspray with Curlers?
Hairspray helps curls last longer but isn’t required with heatless curlers. Use it lightly to avoid crunchy hair.
Can You Reuse Curlers on the Same Hair Without Washing It?
You can reuse curlers on dry hair without washing, but buildup may affect hold. Clean them regularly for best results.
The Bottom Line
Applying curlers right takes a little practice but keeps curls healthy and strong. Use the right size and protect your hair every time. Try adding curlers to your routine today for salon-style curls at home.