How Can I Make Shampoo at Home: Complete Guide with Proven Recipes
How can I make shampoo? You can create shampoo at home using simple, natural ingredients.
Mixing oils, liquid soap base, and plant extracts gives you a gentle, effective cleanser. Start by gathering ingredients like castile soap, coconut oil, and essential oils for fragrance.
Making shampoo a DIY project lets you control what touches your scalp and hair. Avoid harsh chemicals by choosing natural oils and extracts that match your hair type. Focus on blending these ingredients carefully to keep your shampoo balanced and safe.
Keep your work area clean and measure ingredients precisely. Test small batches first to check for allergies or unwanted reactions. This way you avoid wasted ingredients and get great results every time you make shampoo.
Key Takeaways
- Use castile soap as a gentle liquid soap base for homemade shampoo.
- Include natural oils like coconut or jojoba for added moisture.
- Essential oils provide fragrance but test them on skin first to avoid allergies.
- Heat oils slowly, then cool before mixing to protect their beneficial properties.
- Leave homemade shampoo on hair for about three minutes to boost nourishment.
- Start with small batches to safely test the formula on your scalp.
What Ingredients and Equipment Do You Need to Make Shampoo?
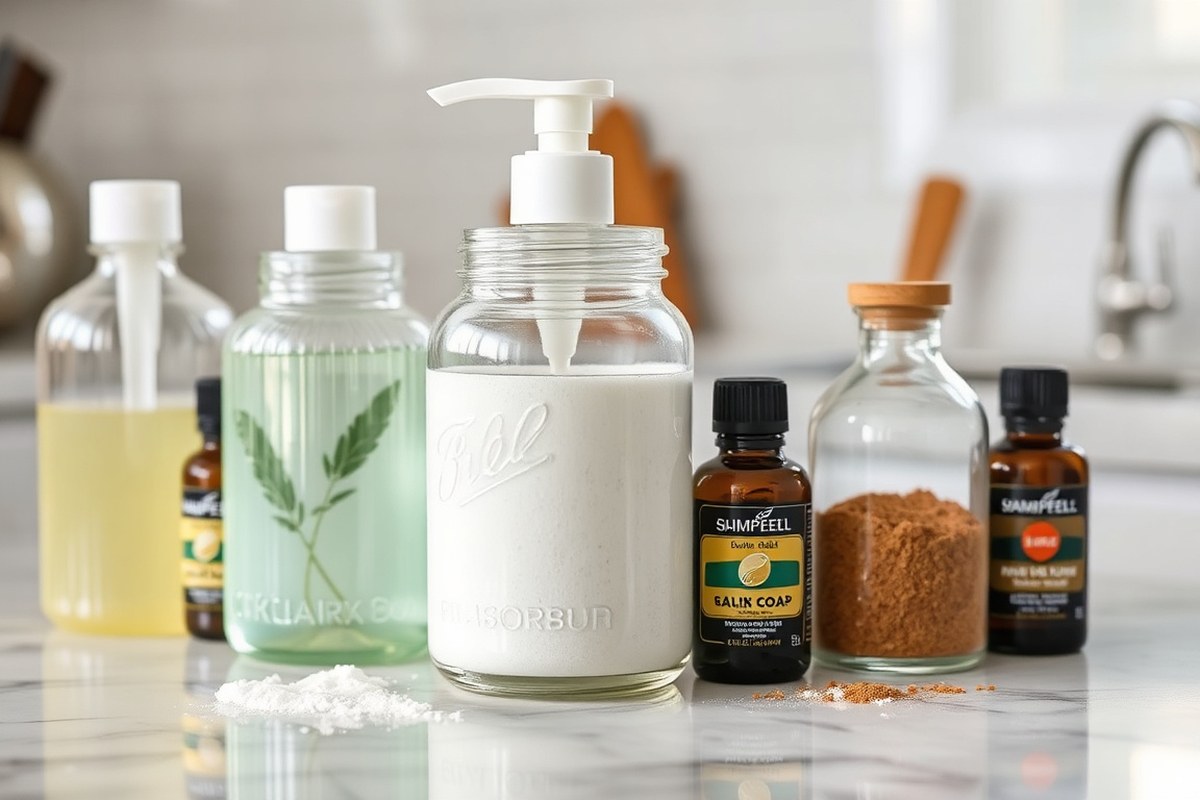
Making shampoo at home needs just a few natural ingredients. You start with a base like liquid castile soap or coconut milk. These cleansers gently clean hair without stripping natural oils, unlike many commercial shampoos.
Adding a carrier oil helps keep hair hydrated and smooth. Jojoba, argan, and coconut oils are popular choices. They suit different hair types and conditions.
Jojoba works for oily scalp. Argan helps dry hair, and coconut fixes damaged strands.
You can boost your shampoo by adding herbs or essential oils. Nettle and horsetail promote stronger hair growth. Essential oils add scent and target scalp needs.
Tea tree helps dandruff. Lavender soothes the scalp.
- Liquid castile soap or coconut milk as the cleanser
- Carrier oils like jojoba, argan, or coconut oil for moisture
- Herbs such as nettle, horsetail, or rosemary for nourishment
- Essential oils like tea tree, lavender, or peppermint for scalp health and scent
- Water to dilute and balance consistency
- Mild emulsifiers or honey to add slip and shine
- Basic tools: a mixing bowl, measuring spoons, and a bottle for storage
Equipment is simple, mostly items you already have. Use a bowl for mixing and spoons to measure ingredients. A reusable bottle with a lid keeps your shampoo fresh and easy to apply.
Customize your recipe based on your hair’s needs. Dry hair benefits from coconut oil and aloe vera. Oily scalp works better with lighter oils like jojoba and a splash of lemon juice.
How to Make Liquid Shampoo with Natural Ingredients

Making liquid shampoo with natural ingredients is easy and rewarding. You start by preparing a clean herbal water base.
Then, mix it with liquid Castile soap and nourishing oils. Finally, store your shampoo properly to keep it fresh and effective.
Preparing Herbal or Water Base
Herbal water adds gentle nourishment to your shampoo and helps soothe your scalp. Use dried herbs like chamomile or rosemary to steep in boiling water for about 10 minutes. Strain the herbs well to avoid leftover bits in your shampoo.
For simple clean water, use distilled or boiled and cooled water to avoid impurities. You can combine your herbal water with the clean water to control the scent and strength. This liquid will mix with Castile soap to form the shampoo base.
Mixing Oils and Castile Soap
Mix the oil-based ingredients first in a glass bowl to spread the essential oils evenly. Use equal parts liquid Castile soap and clean water. Herbal water works well too.
This creates a balanced shampoo mix. Put half a teaspoon of carrier oil in the mix.
Jojoba oil is a good choice. It helps if your hair dries out.
Include 10 to 15 drops of your chosen essential oil to add fragrance and scalp benefits. Stir gently but thoroughly with a whisk or spatula to combine without creating too many bubbles. Too much oil or soap can change the shampoo’s texture.
It might get too thick or too runny. Keep the amounts balanced.
Bottling and Storing Shampoo
Pour your shampoo into clean glass bottles or reused shampoo containers with lids. Keep the shampoo in a cool, dark spot. This helps it stay fresh longer.
It can last up to two or three weeks. Always label your bottles with the date you made the shampoo.
Using smaller bottles helps limit exposure to air and reduces contamination risks. Refrigeration can extend the shelf life but isn’t necessary for most homemade recipes. Shake your shampoo gently before each use since natural separation may occur over time.
- Steep herbs in boiling water for 10 minutes, then strain well.
- Mix one part liquid Castile soap with one part herbal or clean water.
- Combine carrier oils and essential oils in a glass bowl first.
- Add the oil mixture to the soap-water base and stir gently.
- Pour the shampoo into clean bottles, leaving some space at the top.
- Label bottles with the date and store them in a cool, dark place.
- Shake gently before each use to mix any separated ingredients.
Use unscented Castile soap to control fragrance and avoid allergic reactions.
Making Shampoo Bars: How to Craft and Cure Shampoo Soap
Shampoo bars are solid soaps tailored to clean hair gently. They need oils and lye mixed carefully, then molded and cured for weeks. Safety with lye and patience during curing are key to making good shampoo bars.
Mixing Oils and Lye Solution
Start by preparing your lye solution with caution. Always add lye to water slowly, never the other way around, to avoid splashes and fumes.
Measure and heat your oils to about 100°F before combining with the lye solution. This temperature helps the oils and lye mix evenly.
- Put on gloves and goggles to protect your skin and eyes.
- Pour a specific amount of distilled water into a heat-safe container.
- Slowly add lye to the water while stirring gently to dissolve it.
- Allow the lye solution to cool to roughly 100°F before use.
- Warm your chosen oils (like coconut, olive, or castor) to 95-105°F.
- Slowly pour the lye solution into the oils, stirring steadily.
- Mix with an immersion blender until it thickens to a custard-like trace.
Pouring and Molding the Shampoo Bar
Once your mixture reaches a light trace, it’s time to shape it. Pour the mixture into silicone molds or lined wooden molds to hold its form.
Tap the molds gently to release air bubbles, which can weaken the bars. Cover them with a towel to keep heat in for the saponification.
- Prepare your molds with a liner or spray to prevent sticking.
- Pour the soap batter into molds evenly and carefully.
- Tap molds on the counter to remove trapped air pockets.
- Cover molds with a towel to keep warmth steady during saponification.
- Let the soap sit undisturbed for 24 to 48 hours until firm.
- Remove the bars from molds carefully after they harden.
Curing and Testing Shampoo Bars
After molding, shampoo bars need to cure for 4 to 6 weeks. This drying phase lets water evaporate and the pH level drop, making bars mild and safe.
Check bars for hardness and a smooth feel before use. Testing pH with strips ensures they won’t irritate your scalp.
- Place the shampoo bars in a well-ventilated area on a rack.
- Turn bars every few days to expose all sides to air.
- Wait at least 4 weeks for proper curing and hardening.
- Use pH strips to test the bars, aiming for pH between 8 and 10.
- Perform a patch test on your skin before full hair use.
- Store cured bars in a dry place until ready to use.
How to Customize Shampoo Recipes for Different Hair Types
Choose your shampoo ingredients by matching them to your hair type and scalp needs. Oily hair needs more cleansing herbs like rosemary or peppermint to reduce excess oil. Dry hair needs moisture from ingredients like coconut milk and aloe vera.
These boost hydration. They also soften your hair.
Adjust the amount of carrier oil based on how oily or dry your hair is. Use about 1/4 teaspoon for normal hair. Add more if hair is dry.
Use less or none if hair is oily. Too much oil can weigh oily hair down. Too little may leave dry hair brittle.
| Hair Type/Concern | Key Ingredients | Desired Experience |
|---|---|---|
| Curly/Textured | Coconut Milk, Shea Butter, Aloe Vera | Hydration, Curl Definition, Frizz Control |
| Fine/Thinning | Apple Cider Vinegar, Rosemary, Mint | Lightweight, Volume Boost, Fresh Scalp |
| Color-Treated | Chamomile, Argan Oil, Vitamin E | Color-Friendly, Antioxidant-Rich, Gentle |
| Sensitive Scalp | Oat Milk, Calendula, Aloe Vera | Soothing, Ultra-Gentle, Calm |
Essential oils can target specific scalp problems and improve hair health. Tea tree oil and aloe vera help fight dandruff and soothe irritation. Rosemary and mint promote hair growth and add a fresh feeling to your scalp.
Keep essential oils low if your scalp is sensitive to avoid irritation. Use 5 to 10 drops per a 16-ounce shampoo batch for normal scalp health. Reduce by half for sensitive scalps or oily hair to balance cleansing without overdrying.
Measure your shampoo ingredients based on your hair volume and condition. For thick or very dry hair, increase moisturizing agents by 10 to 20 percent. For thin or oily hair, use less oils and heavy butters.
This keeps the shampoo light. It prevents weighing hair down.
Check how your hair and scalp feel after the first few washes. Oily hair should feel clean but not stripped.
Dry hair should feel soft and hydrated without residue. Adjust ingredient amounts gradually to find the perfect balance for your needs.
How to Make Dry Shampoo and Herbal Conditioning Rinses
You can easily make dry shampoo powders with natural clays, arrowroot, and herbs. Herbal conditioning rinses come from strong tea-like infusions of herbs to boost shine and scalp health. Combining rinses with your shampoo can improve your hair’s texture and cleanliness.
Dry Shampoo Powder Mixes
Dry shampoo balances oil and refreshes hair without water. You start with arrowroot or clay powder. Add ingredients that match your hair color or oiliness.
- Choose base powders like arrowroot, kaolin clay, or baking soda.
- Add color-matching powders: cocoa and cinnamon for dark hair.
- For oily hair, mix 1 teaspoon of baking soda or charcoal with arrowroot.
- Combine ingredients in a bowl, mix well, and store in a jar.
- Test a small pinch on your scalp before full use to avoid irritation.
A sample mix for light hair is 2 tablespoons arrowroot and 1 teaspoon baking soda. For brunette hair, use 2 tablespoons arrowroot, 1 tablespoon cocoa, and 1 teaspoon cinnamon.
Only use a little baking soda. Too much raises pH and can irritate your scalp.
Herbal Conditioning Rinse Preparations
Herbal rinses are made by steeping dried herbs in hot water. This creates infusions packed with nutrients to smooth hair and soothe your scalp.
- Pick herbs like chamomile for shine or nettle for scalp health.
- Boil 2 cups of water and pour over 2 tablespoons of your chosen herbs.
- Let the herbs steep for 20 to 30 minutes, then strain the leaves.
- Cool the infusion before use. Store leftovers in the fridge for up to a week.
Strong infusions can be diluted with water or mixed with apple cider vinegar. This adds shine and balances your hair’s pH after washing.
Use fresh herbal rinses within a week to avoid spoilage or scalp irritation.
Application Tips for Best Results
Apply dry shampoo powder directly to your roots. Massage well to absorb oils and blend with your hair.
Pour herbal rinses over wet hair after shampooing. You can also dilute them to use as leave-in conditioners.
- Sprinkle dry shampoo on dry roots, then brush through your hair.
- Rinse your hair with herbal infusions after washing with shampoo.
- Use dry shampoo between washes every 2 to 3 days to avoid dryness.
- Store herbal rinses in a cool place and shake before use.
Combining rinses with shampoo can smooth hair and support scalp health. Using dry shampoo helps extend time between washes, protecting your hair’s natural oils.
Avoid using dry shampoo daily to prevent buildup and scalp dryness.
Adjusting pH and Using Preservatives for Shampoo Safety
Shampoo pH matters because your scalp stays healthiest between 4.5 and 5.5. This mild acidity keeps your hair cuticles closed and your scalp’s natural oils balanced. Using shampoo outside this range can cause dryness, irritation, or greasy buildup.
Testing your shampoo’s pH is simple with pH strips or a digital pH meter. Dip the strip into a small shampoo sample.
Compare the color to the chart. Aim for a pH close to that 4.5 to 5.5 range for best results.
To lower pH, add a few drops of apple cider vinegar or lemon juice. Add slowly, two drops at a time, and test after each addition.
To raise pH, use a tiny pinch of baking soda. Adjust carefully; too much changes the shampoo’s texture or smell.
Natural preservatives can help your shampoo last longer and stay safe. Ingredients like rosemary extract, vitamin E oil, or grapefruit seed extract are popular choices. Add these based on your recipe’s total volume, usually about 0.5% to 1% by weight.
Test your shampoo’s pH first. Add acid or base slowly. Retest the pH after each addition.
Next, stir in your natural preservative and store shampoo in a clean, airtight bottle. Keep it in a cool place to slow spoilage.
For 100 ml shampoo, use 1 ml preservative. This is about 20 drops.
Add about 1 ml of vitamin E oil, then shake well before use. Check pH again after weeks of storage to catch changes early.
Natural preservatives might not stop everything, so watch for changes in smell or color. Throw out homemade shampoo if it smells sour or shows mold. Low pH, proper preservation, and clean storage work together to keep your shampoo safe and gentle.
Common Mistakes in Homemade Shampoo and How to Fix Them
Shampoo that separates or feels too watery usually lacks enough thickener. Using ingredients like xanthan gum or guar gum helps hold the mix together. Add these thickeners slowly, about 0.2 to 0.5 percent of your batch weight, and whisk well to avoid lumps.
Your shampoo may weigh hair down or dry it out due to certain oils or cleansing agents. Heavy oils like coconut can weigh fine hair down.
Switch to lighter oils like olive or aloe vera for balance. Also, strong detergents strip natural oils, leaving strands dry.
Scalp irritation often comes from too much essential oil or harsh ingredients. Stick to no more than 50-60 drops of essential oils per 16 ounces of shampoo. Test a small patch of skin before full use.
Notice irritation? Reduce the amount of oils or avoid them completely.
- Add 0.2-0.5% xanthan gum for thickening
- Use lighter oils for fine or oily hair types
- Limit essential oils to 50-60 drops per 16 oz shampoo
- Test shampoo on skin to catch irritation early
- Adjust detergent levels for better moisture balance
Separating shampoo looks like clear liquid on top and thicker gel below. Stirring it well before each use often fixes this. For lasting stability, store shampoo in a cool place and avoid temperature swings.
Flaky or itchy scalp after shampooing means ingredients irritate your skin. Avoid citrus oils if your skin is sensitive.
Instead, choose soothing options like chamomile or aloe extract. Using less shampoo per wash can also reduce irritation risk.
Safe Practices and Testing Before Using Homemade Shampoo
Before using homemade shampoo, test it on a small skin patch. Mix a small amount of shampoo. Apply it behind your ear or on your inner arm.
Wait 24 hours to see if redness, itching, or swelling appears. Notice any irritation? Avoid using that batch.
For people with a sensitive or damaged scalp, start slowly to avoid irritation. Use homemade shampoo once or twice a week at first. Gradually increase frequency as your scalp adjusts and shows no negative reaction.
Switching from commercial shampoo often causes an adjustment period lasting 2 to 4 weeks. This happens because your scalp is recalibrating from chemicals and surfactants in store products. Your hair may feel different at first.
It might produce less lather. This is normal with natural shampoos.
Keep in mind that homemade shampoo typically costs about $3 to $7 per batch. It may not lather as much as commercial brands. But it cleanses gently without harsh additives.
Use glass containers to keep shampoo fresh. Homemade shampoo lasts 2 to 3 weeks without preservatives.
Be patient during the transition and avoid switching back and forth between homemade and commercial shampoos. Consistent use helps your scalp balance its natural oils.
Scalp feels dry or oily after weeks? Add moisturizing ingredients or rinses for your hair type.
Patch test each new batch. Apply a small amount behind your ear. Wait 24 hours to check for reactions.
Step-by-Step Action Plan for Making Your Own Shampoo
Follow these simple steps to start making shampoo at home with natural ingredients. Track your progress to ensure your shampoo works well and suits your hair.
- Day 1: Gather your ingredients and equipment for the shampoo recipe you chose. Make sure everything is clean and ready to use.
- Day 2: Follow the instructions to mix your natural shampoo, whether liquid, bar, or dry form. Check the texture to see if it matches the recipe.
- Day 3: Test your shampoo’s pH using strips. Adjust with citric acid if too high. Use baking soda if pH is too low. Aim for a pH between 4.5 and 6.
- Day 4: Let your shampoo rest if making bars, or bottle your liquid shampoo. Label containers with date and ingredients for safety.
- Day 5: Try your shampoo on a small hair section or skin patch. Look for any irritation or dryness after rinsing.
- Week 2: Use your shampoo normally two to three times. Notice hair feel, clean scalp, and any changes in oiliness or dryness.
- Week 3: Check your shampoo’s effect on your hair. Add conditioning herbs for dry hair. Add more cleansing agents if hair feels oily. Record changes to improve.
- After 1 month: Check how long your shampoo lasts and inspect for spoilage. Toss it if it smells off or changes color to stay safe.
Frequently Asked Questions
What Is the Best Homemade Shampoo?
The best homemade shampoo matches your hair type and needs. Try simple mixes like castile soap with aloe vera. Adjust ingredients if your hair is dry, oily, or color-treated for the best results.
Can I Make My Own Hair Shampoo at Home?
Yes, you can make your own shampoo at home using natural ingredients. Most recipes need just a few common items like castile soap and carrier oils. Making it lets you customize care for your hair condition.
Can I Create My Own Shampoo?
You sure can create your own shampoo easily with basic kitchen ingredients. Mixing liquid soap, oils, and herbs works well. This approach lets you control what touches your skin and hair.
How to Make Your Own DIY Shampoo?
To make DIY shampoo, mix a gentle cleanser like castile soap with water and oils. Add scents or herbs if you want. Shake well before use and test on a small patch to check for irritation.
What’s the Shelf Life of Homemade Shampoo?
Homemade shampoo usually lasts about 1 to 2 weeks without preservatives. Store it in the fridge to keep it fresh longer. If it smells off, throw it out to avoid scalp issues.
Can Homemade Shampoo Cause Scalp Irritation?
Homemade shampoo can sometimes cause irritation, especially if you skip patch tests. Use gentle, natural ingredients and test the shampoo on your wrist first. Stop use if any redness or itching appears.
Wrapping Up
Making shampoo at home gives you control over ingredients and hair care. Start small with one recipe and adjust to your hair’s needs. Test carefully and enjoy healthy, natural shampoo made by you.