How to Use a Safety Razor: A Complete Guide for Clean, Comfortable Shaves
Wondering how to use a safety razor for a clean, comfortable shave? Start by holding the razor at roughly a 30-degree angle to your skin. This angle lets the blade cut stubble without scraping or cutting your skin.
Pick a safety razor that helps you keep the right angle. The COMPANION Safety Razor is a good example. It makes holding the right angle easier.
It keeps the blade at the right distance. So you shave safely even if you’re new.
Begin with light pressure and let the blade do the work. Pressing hard causes irritation and cuts.
Pair your safety razor with quality shaving soap or cream and a good brush. These help lift hairs and soften skin, giving your shave a smoother, closer feel. Go slow during your first few shaves.
This helps you avoid usual mistakes. You’ll also get more comfortable with your new razor.
Key Takeaways
- Hold the safety razor at a 30-degree angle for optimal blade contact.
- Use a razor like the COMPANION to help maintain proper shaving angles.
- Apply light pressure; pressing too hard can cause cuts and irritation.
- Use a good shaving brush and soap for softer hair and smoother shaves.
- Replace blades every 4 to 5 shaves to keep them sharp and effective.
- Spend around $40 for a quality safety razor suitable for beginners.
What Is a Safety Razor and How Does It Work?
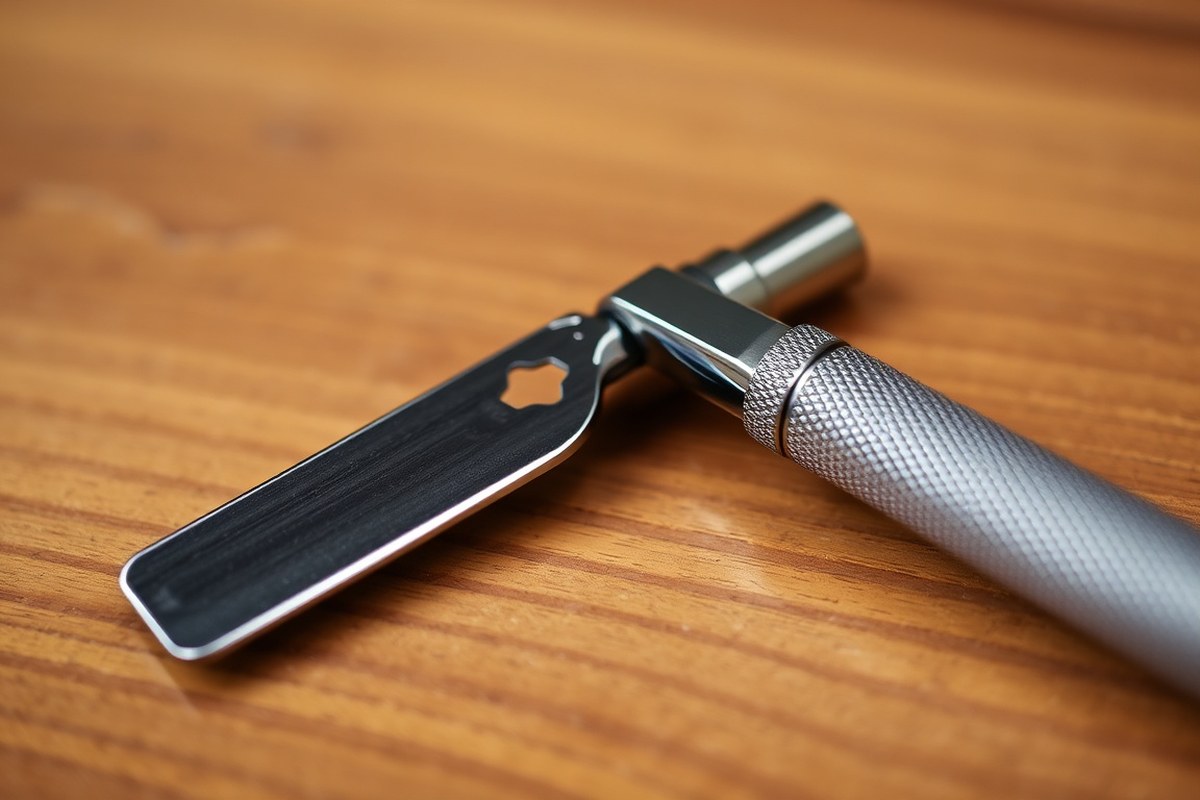
A safety razor is a traditional shaving tool that uses a single, double-edged blade. It has a handle and a head that holds the blade securely in place. The blade slices hair close to your skin.
It doesn’t pull hair. This helps reduce irritation.
The main parts of a safety razor are the handle, the head, and the blade. The head usually has two pieces or a three-piece design that clamp the blade. The blade sticks out just enough to cut hair.
The edge stays covered for safety. This is why it’s called a safety razor.
Safety razors cut hair cleanly with little pressure. Hold the razor at about 30 degrees. Let its weight do the work to avoid irritation.
Compared to cartridge or electric razors, safety razors are gentler on sensitive skin. Cartridge blades lift hair to cut it multiple times. This can lead to razor burn.
It may also cause ingrown hairs. A safety razor cuts once cleanly without tugging, lowering the chance of irritation and redness.
You can choose between different types of safety razors, like one-piece, two-piece, or three-piece designs. Some models help beginners maintain the right shaving angle, improving safety and comfort. Safety razors work well on many face shapes.
They handle thick hair better than some razors. This makes them a flexible option.
Using a safety razor takes a little more skill than cartridges. But it offers better control and cleaner results. The blade lasts about five to seven shaves before needing replacement.
You can choose different blades for your neck or cheeks. This helps customize your shave. It gives a smoother finish on each area.
Essential Tools and Supplies You Need to Start Shaving

Start with a safety razor designed for beginners, like the Merkur 34C. It has a closed-comb head that offers extra protection and control. This design makes it less likely to cause nicks or irritation as you learn.
For blades, Astra brand blades give a good balance of sharpness and comfort. They cost between 10 and 40 cents apiece and last for several shaves. Changing blades freshens your shave and reduces tugging.
A shave brush isn’t absolutely needed but highly recommended. It helps you build a rich lather that softens hair and lifts stubble. A decent brush also spreads shaving cream evenly, letting your razor glide smoothly.
Choose a quality shaving cream or soap over foam. Creams and soaps moisturize your skin and soften the beard better. They create a thick, protective layer that cuts down razor burn and irritation.
Pre-shave oil is optional. It adds a slick surface to help the razor glide better. This is helpful if your skin is dry or sensitive.
The extra slickness makes shaving smoother. Try it on days you feel rough shaving or notice extra tug.
Expect to spend about $40 for a complete beginner’s safety razor. Some starter kits bundle the razor, brush, creams, and blades together for around this price. You get everything at once, which saves shopping time.
Here’s a quick checklist of essentials to have on hand:
| Item | Example | Estimated Cost | Notes |
|---|---|---|---|
| Safety Razor | Merkur 34C (closed comb) | $30 to $40 | Recommended for beginners |
| Blades | Astra Double-Edged | 10 to 40 cents each | Replace after several shaves |
| Shave Brush | Synthetic or badger hair | $15 to $40 | Builds lather and lifts hair |
| Shaving Cream or Soap | Cream or soap over foam | $10 to $20 | Softens beard, protects skin |
| Pre-Shave Oil (Optional) | Light oil formulation | $5 to $15 | Can reduce tug and irritation |
Begin with hot water to prep your beard before shaving. It softens the hair and opens pores. After shaving, rinse your razor with hot tap water.
Do this for 10 to 15 seconds. It helps keep the razor clean.
Don’t skip the brush and cream step, cheap foam won’t give you a smooth introduction.
Buying a complete starter kit is often cheaper and easier than picking items separately. Kits usually include everything you need to get started. This way, you know your tools match well and work together.
How to Safely Load and Handle Safety Razor Blades
Loading and handling safety razor blades is simple but requires care. You open the razor head, place the blade properly, and close it tightly. Handling blades with caution prevents cuts, and storing used blades safely avoids injuries.
Opening the Razor Head Safely
Most safety razors open by twisting the handle or lifting the top, depending on the model. Butterfly razors have doors that open like wings when you twist the handle. Always hold the razor over a flat surface in case the blade slips out.
Use dry hands to avoid slipping. Keep your fingers away from the blade edges when opening. If your model disassembles into parts, separate them carefully.
Correct Blade Placement and Securing
Placing the blade correctly ensures a smooth, safe shave. Make sure the blade sits flat and straight in the razor head. A crooked blade can cause nicks or uneven shaving pressure.
Align the blade holes or notches with the razor head pins or posts. Carefully close the head, locking the blade firmly without over-tightening. The blade should stay still and not wobble.
- Twist the handle to open the butterfly doors or unscrew the head, depending on your razor.
- Remove the old blade carefully, holding it by the short sides.
- Take a new double-edged blade from the pack, also by its edges.
- Place the blade flat inside the razor head, aligning the holes with the posts.
- Close the butterfly doors or screw the head back on firmly but gently.
- Check that the blade edges are even on both sides.
- Store the razor safely, keeping fingers away from the blade.
Safe Blade Removal and Disposal
Change your blade every 5 to 7 shaves, or sooner if it drags. Removing blades safely protects you from cuts. Always handle blades by their short edges to avoid injury.
Use a blade bank or a ceramic container to store used blades. These keep blades out of reach and prevent accidents. When full, recycle or dispose of blades following your local rules.
Preparing Your Face for an Effective Safety Razor Shave
Start your shave by washing your face with warm water. This opens pores and softens your hair for an easier cut. A hot shower before shaving warms your skin and hair.
It also adds moisture. This makes shaving easier.
Steaming your face with a hot towel is another option. Soak a clean towel in hot water and wring it out. Place it on your face for about two minutes.
This makes hair softer and the shave smoother. Be careful with sensitive skin.
Wait 1 to 2 minutes after steaming. This keeps your face warm and moist.
Applying a pre-shave oil or cream helps protect your skin from irritation. Use a small amount of oil, just a few drops or a pea size.
Rub it into your beard carefully. Pre-shave oils reduce friction and create a slick surface for the safety razor to glide on.
- Wash face with warm water or shave after a hot shower
- Apply a warm, damp towel for 1 to 2 minutes to steam hair
- Use a pre-shave oil or cream on inflamed or sensitive skin
- Work a rich shaving cream or soap lather into your beard
- Wait 1 to 2 minutes after prepping before starting to shave
Apply your shaving cream or soap over the pre-shave oil. Use a brush or your hands.
The lather lifts your hair, making blades cut closer and with less tugging. Avoid dry shaving cream since it clogs the razor and reduces protection.
Give your skin a minute or two to absorb moisture and the pre-shave product. This helps hair swell and makes the razor’s job easier.
Well-prepped hair can need up to 70% less cutting force, reducing nicks and irritation. Keep the skin taut when you shave afterward to smooth the surface and prevent cuts.
Mastering Shaving Technique: Angle, Pressure, and Strokes
Hold the safety razor at about a 30-degree angle and use very light pressure. Take short, controlled strokes and shave with the grain first. For curved spots like your chin, pull the skin tight.
Adjust the razor angle carefully. This helps you get a close, smooth shave.
Finding the Ideal Razor Angle
Hold the safety razor so its head touches your skin. Slowly tilt it. Find about a 30-degree angle for shaving.
This angle lets the blade cut hair effectively without digging into your skin. The blade won’t cut well with a shallow angle.
Keep the angle right for a clean cut. Too steep, and you risk nicks or irritation.
Use the mirror as a guide. The razor’s head should lie nearly flat on your skin.
Tilt it slightly so the blade edge hits your beard. This usually means the handle points slightly upward from your face.
Applying Minimal Pressure Correctly
Only use the weight of the razor to shave, not your hand’s force. Pressing too hard can cause cuts or irritation.
Safety razor blades are sharper than cartridge ones. Let the razor glide over your skin, barely touching it.
A light touch stops pulling or tugging hair. This prevents discomfort or razor burn.
Keep your hand relaxed. Reposition your grip if you feel you’re pushing too hard.
Using Short Strokes and Shaving Passes
Shave using short strokes of about 1 to 2 inches. Short strokes give you control and let you maintain the proper angle throughout. Long strokes often lead to uneven pressure and missed spots.
Start by shaving with the grain of your beard to reduce irritation. After the first pass, add more lather if you need to.
Then shave across the grain for a closer shave. Avoid shaving against the grain until you get more practice and your skin adjusts.
- Hold the razor at a 30-degree angle.
- Shave with short, controlled strokes, about 1 to 2 inches long.
- Use light pressure and let the razor’s weight do the work.
- Shave with the grain on the first pass.
- Rinse your face and reapply lather.
- Shave across the grain on the second pass, if desired.
Use no pressure and short strokes; pressing hard causes cuts and irritation.
Shaving Different Facial Areas Safely
On flat spots like your cheeks, hold the razor steady at 30 degrees. Use gentle, short strokes going with the grain. For tricky spots like the chin and jawline, use your free hand to pull skin tight.
This gives a smoother shave. This smooths the surface and helps the razor glide more easily.
Keep adjusting the angle slightly as the face curves. But stay within the 30 to 40-degree range.
Take your time around the chin and neck since hair grows in different directions there. Multiple passes may be needed, always using gentle strokes and careful skin tension.
Common Beginner Mistakes and How to Fix Them
Pressing too hard often causes nicks and cuts. A safety razor’s weight alone is enough for a close shave.
Hold the razor lightly and keep it at about a 30-degree angle. Angles steeper or flatter can scrape your skin or miss spots.
Razor burn happens mainly because of too much pressure, rushing, or poor skin prep. Take your time shaving and use a good lather. Warm water and shaving cream soften hair before shaving.
This helps the blade glide smoothly over your skin. It also reduces the chance of irritation.
Poor prep or bad technique can make your shaves patchy or uneven. Shave in short, careful strokes and rinse the blade often to avoid clogging. Clogged razors pull hair instead of cutting it clean, which leads to discomfort and uneven results.
- Hold the razor lightly; don’t push down.
- Keep a 30-degree angle with your skin.
- Use a thick, warm lather.
- Shave slowly and in short strokes.
- Rinse the blade frequently to avoid clogging.
- Replace blades every 5 to 7 shaves.
When your razor pulls or tugs on hairs, the blade might be dull or clogged. Changing the blade after about five to seven shaves keeps it sharp. Always rinse the razor well during shaving to stop buildup from hair and cream.
Your technique improves when shaves feel smooth and comfortable without nicks or irritation. You’ll notice less bleeding and fewer red spots. Once comfortable, you can focus on getting a closer shave without extra pressure or speed.
How to Clean, Maintain, and Store Your Safety Razor
Clean your safety razor right after shaving to keep it sharp and rust-free. Rinse it under warm water to remove soap, hair, and residue. Make sure you take the blade out to clean both the blade and razor parts separately.
Use mild soap or a gentle brush to remove buildup every week or two. Avoid harsh chemicals that could damage the metal or finish. Dry the razor thoroughly; water left inside can cause rust spots and dull blades.
The best storage keeps your razor dry and safe. Stand it upright on a rack or use a vented container that lets air flow. Storing your razor in a damp area will speed up rust and blade dulling.
- Remove the blade carefully and set it aside on a dry surface or blade bank.
- Rinse the razor thoroughly under warm running water. Use your fingers or a soft brush. Clear out soap and hair well.
- Wash the razor parts gently with a little dish soap monthly to lift stubborn grime.
- Rinse off the soap completely with warm water to avoid residue buildup.
- Dry the razor completely using a soft towel and air dry standing up to prevent moisture.
- Store the razor upright in a dry spot away from the shower or sink splash zones.
- Replace blades regularly. Usually after 5 to 7 shaves. Change sooner if you feel tugging or dullness.
Mild dish soap costs just a few dollars and lasts a long time. Avoid metal polish with abrasives, which can damage the razor’s finish. Drying the razor inside and out prevents rust, especially on stainless steel models.
Keeping the blade sharp means changing it when it pulls or feels rough. A fresh blade offers smoother, safer shaves and reduces skin irritation. Rusted or dull blades increase cuts and discomfort, so don’t delay blade swaps.
Post-Shave Skin Care for Comfort and Long-Lasting Results
Right after shaving, rinse your face with cool water to close pores and reduce irritation. Apply an aftershave balm or lotion that suits your skin type. Use moisturizer regularly to keep skin hydrated and prevent dryness.
Rinsing and Cooling the Skin
Use cool water immediately after shaving to rinse away residue and shave cream. Cooling the skin helps tighten pores and lowers redness. Avoid hot water, which can dry your skin and cause irritation.
Pat your face gently with a clean towel after rinsing. Do not rub, as rubbing irritates freshly shaved skin. Let your face air dry for a minute before applying any products.
Choosing the Right Aftershave
Aftershave balms are best for sensitive or dry skin because they soothe and hydrate. Aftershave lotions with alcohol can sting and dry out your skin.
So use them only if your skin tolerates it. Look for products with calming ingredients like aloe vera or witch hazel.
Applying aftershave helps prevent infection in tiny cuts and reduces razor burn. Use just a small amount and spread it evenly over your face.
This step costs between $5 and $20 depending on the brand. It usually lasts several weeks with daily use.
Moisturizing and Soothing Tips
Using a light, non-comedogenic moisturizer keeps skin soft and hydrated after shaving. Choose one designed for men or for sensitive skin to avoid clogged pores or irritation. Apply moisturizer immediately after aftershave when your skin is still slightly damp.
For irritation or razor burn, apply a cold compress or use products containing hydrocortisone cream. But limit use to a few days. Avoid heavy creams that can clog pores, leading to breakouts or ingrown hairs.
Preventing and Treating Ingrown Hairs
Exfoliate your skin 2 to 3 times a week with a gentle scrub or chemical exfoliant. This removes dead skin cells and helps hair grow out correctly. Be careful not to exfoliate right after shaving to prevent extra irritation.
Follow these tips to reduce ingrown hairs:
- Shave with the grain, not against it, especially on the first pass.
- Use a sharp blade and replace it after 5 to 7 shaves.
- Keep your skin clean and moisturized daily.
- Avoid tight collars or hats that press on freshly shaved skin.
- Use a gentle, alcohol-free toner if your skin is prone to bumps.
Remember not to pick or squeeze ingrown hairs; it can cause infection.
Your First Shave: A Step-by-Step Action Plan
Follow these steps to get comfortable using your safety razor. Each step helps build your skills and confidence.
- Before you start: Gather your safety razor, blades, shaving cream, and a good brush. Check everything feels right in your hand.
- Day 1: Prep your face with warm water and lather up well. The skin should feel soft, not dry or tight.
- Day 1: Shave with light pressure, keeping the razor at about 30 degrees. Stop if you feel pulling or discomfort.
- Day 1: Rinse the razor often under warm water to clear hairs. A clean blade gives a smoother shave.
- After shaving: Rinse your face with cool water and pat dry. Apply a gentle aftershave or moisturizer.
- Week 1: Clean your razor thoroughly after each use and dry it well. This prevents rust and keeps blades sharp.
- Week 2: Notice any missed spots or irritation. Adjust your angle or pressure to improve comfort.
- Week 2 and beyond: Replace blades regularly, about every 5 to 7 shaves. Fresh blades reduce nicks and improve closeness.
Frequently Asked Questions
How Do I Know When to Replace My Safety Razor Blade?
Change your blade after about 5 to 7 shaves or when it pulls hair. A dull blade increases irritation and cuts.
Can I Use Any Shaving Cream or Soap with a Safety Razor?
Yes, but thick, creamy shaving soap or cream works best. It helps the blade glide smoothly and protects your skin well.
Is It Normal to Get Nicks and Cuts as a Beginner?
Yes, minor cuts happen at first. Take it slow, use light pressure, and improve your angle to avoid them.
Should I Shave with or Against the Grain Using a Safety Razor?
Start shaving with the grain to reduce irritation. You can try across or against the grain after you gain skill.
How Do I Safely Store My Safety Razor While Traveling?
Keep your razor in a dry case or pouch to protect the blade and avoid rust. Take the blade out if possible.
Is It Okay to Use Alcohol-Based Aftershave with a Safety Razor?
Use with caution. Alcohol can sting sensitive skin after a close shave. Try a soothing, alcohol-free balm instead.
Before You Go
Using a safety razor takes some practice. But it gives a great shave once you get the hang of it.
Take your time and pay attention to how your skin feels. Try your first shave now with a gentle touch and good prep.