How to Trim Your Own Hair: A Complete Guide with Pro Tips and Methods
How to trim your own hair starts with the right tools and plan. Use sharp hairdresser scissors, sectioning clips, and a fine mist spray.
These help you cut precisely without causing damage. Take your time to avoid cutting too much at once.
Trim hair when it’s slightly damp, not soaking wet or fully dry. Damp hair gives you a clearer view of the length and shapes better. Avoid trimming after a fresh wash because hair stretches differently than when dry.
Section your hair into 4 to 6 parts using clips to keep it tidy. This helps you trim evenly and control the length in each area. Think small sections, and trim just a quarter inch or less each time.
Key Takeaways
- Always use professional hair scissors to prevent split ends and uneven cuts.
- Trim hair every 6 to 8 weeks to keep ends healthy and avoid damage.
- Cut hair when it’s damp for a more accurate length measurement.
- Divide hair into sections before trimming to ensure an even cut.
- Trim only a small amount, about ¼ inch, to maintain your style.
- Use a fine mist spray to keep hair slightly wet without soaking it.
What You Need to Trim Your Own Hair Safely
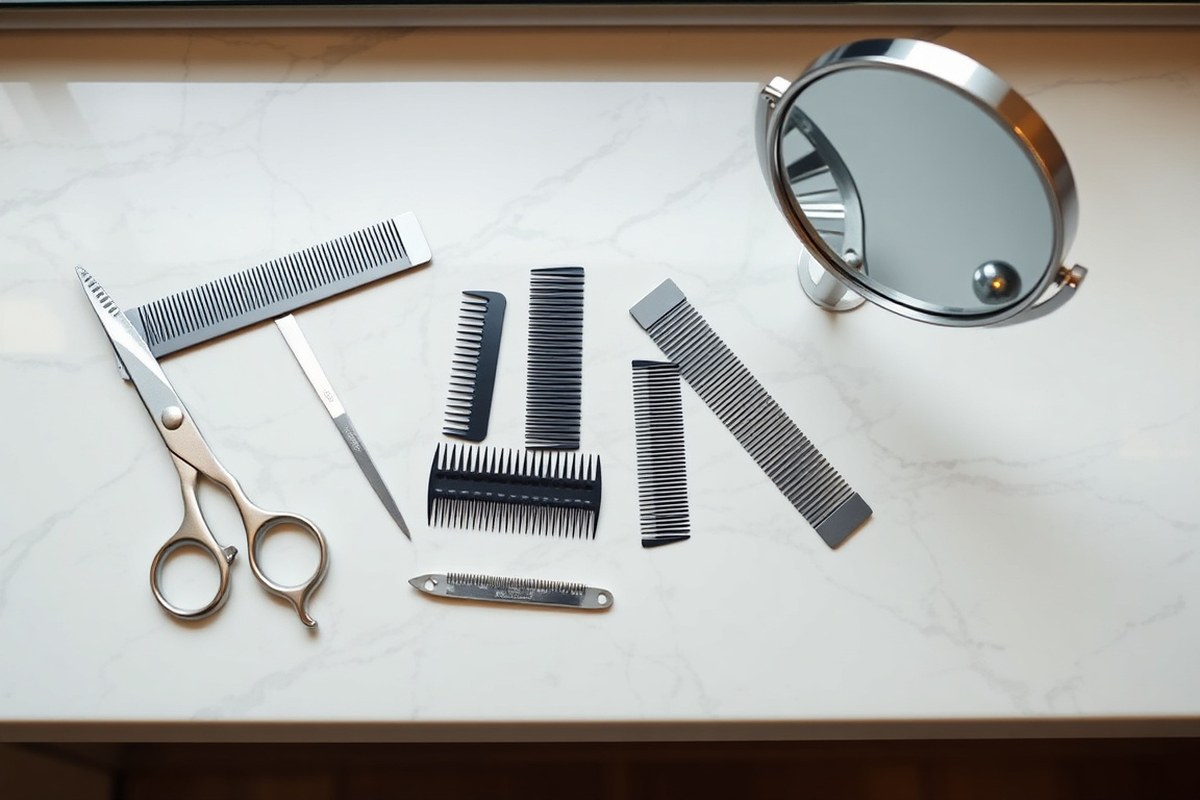
Using the right tools makes trimming your hair safe and more accurate. Hairdresser scissors designed for cutting hair are the best choice.
They cost about $20 to $30 and cut cleanly without damaging strands. Avoid kitchen or craft scissors; they often crush hair ends.
Besides scissors, sectioning clips or scrunchies keep hair out of your way. A wide-toothed comb helps detangle hair evenly before cutting.
Spray bottles with water allow you to dampen hair if needed. Good, bright lighting and a mirror setup that shows your back are essentials too.
- Sharp hair shears for clean cuts
- Wide-toothed and fine-toothed combs
- Sectioning clips or hair ties to divide hair
- A spray bottle to mist hair lightly
- Mirrors, including a handheld or second mirror for viewing angles
- Bright, direct lighting to spot uneven spots
Detangle your hair fully before dividing it into neat sections. This reduces accidentally cutting uneven strands. Wet or dry hair will change how cuts fall.
So decide based on your hair type. Always trim a quarter inch or less to avoid drastic mistakes. Take your time checking angles in multiple mirrors while you cut.
Should You Cut Hair Dry or Damp? Choosing the Right Time

Curly hair should be cut dry. Straight hair often works best when trimmed damp.
Dry cutting curly hair avoids uneven lengths caused by shrinkage. For straight hair, dampening it about 80% usually gives a smoother cut and easier sectioning.
Damp hair lets you see the true length better on straight styles. Wet hair stretches.
So if hair is soaking wet, you risk cutting too much length. Always trim less than you think, around ¼ to ½ inch, especially when cutting damp hair.
Let bangs or face-framing layers dry fully before any final trims. Hair looks shorter when dry.
So trimming while damp might cause you to remove too much. For curls, trim dry so you spot split ends easily and cut by curl clumps.
Trim ¼ inch less than your goal when hair is damp to prevent surprises once dry.
Step-by-Step Hair Sectioning for a Precise Trim
To trim your own hair evenly, divide your hair into smaller sections using clips. This keeps strands separated and manageable, so you cut carefully. Using the right clips and neat sections helps avoid uneven trims.
Dividing Hair into 4, 6 Sections
Start by parting your hair down the middle from front to back. This creates two large halves. Then separate each half into two smaller sections: top and bottom.
This process usually results in 4 sections: left top, left bottom, right top, and right bottom. For thicker or longer hair, add a middle section in the back. This gives you 5 or 6 total sections to work with.
It helps keep the hair organized for trimming. Keeping sections small lets you focus on one area at a time.
Clipping Techniques for Stability
Use wide-tooth combs to create clean parts before clipping. Choose sturdy hair clips or sectioning clips that firmly hold hair without slipping. Place clips close to the scalp, near the part, to secure the hair well.
Make sure clips on opposite sides are level to keep sections even. Avoid thin ties that may loosen mid-trim. Alligator clips are good for thick and curly hair because they grip tightly.
Adapting Sectioning to Hair Length and Texture
Short hair usually needs fewer sections, often 3 or 4, because it’s easier to handle. For longer hair, 5 or 6 sections work better to prevent tangles and uneven cuts. Curly hair benefits from sectioning into smaller, tighter portions to keep curls controlled.
Your hair’s thickness or coarseness may call for more sections. This lets you trim without missing any spots. Fine or thin hair needs fewer sections.
Hold hair firmly while cutting. Take care to avoid uneven trims.
Using Mirrors to Check Sections
Place a hand mirror behind you to see the back sections clearly. Check that each section is securely clipped and evenly parted before you cut. Use a large mirror plus a handheld mirror to inspect every angle.
Before trimming, glance at your hair from all sides. Make sure there are no loose strands outside the clipped sections to avoid uneven cuts. Proper visibility prevents missed spots and uneven edges.
Follow these steps to section your hair for trimming:
- Comb your hair to remove all tangles for smooth parting.
- Create a straight part from your forehead to your neck down the middle.
- Divide each half into a top section (crown area) and a bottom section (near the neck).
- Secure each section with a sturdy clip or hair tie, placing them near the scalp.
- Add another section at the back if your hair is thick or long. Clip this section separately. This keeps it manageable during trimming.
- Double-check sections are even and clips feel tight, readjust as needed.
- Stand in front of a mirror. Hold a hand mirror behind your head. Use both mirrors to check if parts are clean.
How Much Hair to Trim and Measuring for Accuracy
Trim just a small amount at first, about a quarter inch or less. You can always cut more later, but you can’t fix cutting too much.
Start with ¼ inch for a subtle refresh. Use ½ inch for a more noticeable trim.
Use hair ties to mark your cutting point for accuracy. Place hair ties just above where you want the cut. This helps keep length even on both sides and across your back.
To measure precisely, bring the ends together and slide your fingers up from the bottom. Pinch at your desired length before cutting. Cutting just below your pinch point helps avoid surprises.
Cutting too much can leave your hair too short or uneven. It takes weeks to grow back, so trim conservatively to avoid regrets.
You can use style products or accessories to hide uneven spots. This helps if you cut more by mistake.
Trim less than you think, especially with thick or curly hair. It helps avoid cutting too much.
For example, if you want to remove an inch, try trimming ⅓ inch first. Then check your look before cutting more.
For simple trims, avoid layered or complex cuts at home. Keep your scissors sharp and cut in small vertical snips called point cutting. This technique softens edges and reduces harsh lines.
Check your progress often by comparing both sides in the mirror. Take time; rushing can mean uneven cuts. A straight trim across the bottom works well for most basic styles.
Techniques for Trimming Different Hair Types and Styles
Cutting straight, wavy, and curly hair calls for different techniques. Straight hair often looks best with blunt trims for a clean line. Wavy and curly hair do better with softer cuts.
Try point cutting or dusting to keep texture. This helps avoid choppy ends.
Blunt trims mean cutting straight across the ends. This works well for straight hair because it keeps the tip looking even and sharp.
Blunt cuts on wavy or curly hair can create a bulky edge. This edge is hard to blend with natural texture.
Point cutting is done by snipping the ends with the scissors held vertically. This breaks up the line softly, letting layers or texture blend naturally.
Point cutting works well on bangs, layers, or ends. It suits wavy hair and loose curls especially.
Dusting targets only the very tips, just trimming off split or dry ends. It’s subtle and good for all hair types but especially curly hair. Dusting keeps curls looking healthy without taking off much length.
| Hair Type | Best Cutting Techniques | Why It Works |
|---|---|---|
| Straight | Blunt trims, Dusting | Clean edges, avoids uneven ends |
| Wavy | Point cutting, Dusting | Soft layers, keeps natural texture |
| Curly | Point cutting, Dusting, Dry cutting | Prevents choppy edges, preserves curl shape |
For layers or texture, point cutting is your go-to. Hold small hair sections and snip into the ends with sharp hair shears vertically.
Take just a little at a time to avoid over-thinning. Point cutting helps your layers blend smoothly, whether hair is straight or curly.
Dusting split ends involves combing your hair and spotting stray damaged tips. Use sharp scissors to snip off only those ends without cutting a straight line.
This method keeps length and shape. It helps maintain healthy hair until your next full trim.
Keep your scissors sharp, and cut only a little at a time. Dull or blunt scissors can cause fraying and uneven ends.
How to Trim Bangs and Face-Framing Pieces at Home
Trimming bangs and face-framing pieces requires care and small cuts. Starting with damp hair helps control the length and prevents mistakes. You can finish by drying and making minor tweaks to get the shape you want.
Sectioning the Bang Area Precisely
Use your fingers or a small comb to isolate the bang section. Keep it narrow, only including the front hair you want as bangs. This section helps keep your cuts neat.
It stops you from cutting too much face-framing hair. You focus on the hair right near your face.
Pin back the rest with clips behind your ears. This blocks stray strands that can confuse your line. Follow your natural hairline and part as guides so bangs look natural when styled.
Cutting Bangs in Small Increments
Cutting too much at once causes bangs to get too short. Start with tiny snips, about 1/4 inch at a time, to avoid mistakes. Let your fingers hold the hair firmly as you cut with sharp scissors.
Hold the strands vertically or a little forward. Snip the ends in a straight line or with slight angles. This gives the edge a soft look.
Work slowly, checking symmetry often. Use your ears to help keep other hair pushed back so the area stays clear.
- Comb bangs forward and separate a small section at a time.
- Pin back rest of hair behind ears with clips.
- Hold the section straight down with fingers at desired length.
- Trim just 1/4 inch or less from the ends.
- Release next small section and repeat.
- Check in the mirror often for evenness and length.
- Stop and reassess after each pass.
Drying Bangs and Adjusting Final Length
Dry your bangs fully with a blow dryer before final cuts. Straight hair should lay the way you usually wear it. This shows the true length and shape after shrinkage or curling.
Use the dryer with a round brush to smooth bangs into place. Cut a tiny bit more if any strands look uneven or too long after drying. Small adjustments make a big difference.
Fixes for Uneven Bangs
Comb bangs down again when they look jagged or uneven. Trim the longest strands with tiny snips, working slowly. Trimming vertically into ends softens chunky spots.
Use thinning shears lightly if bangs look too thick or blunt. For big mistakes, trim straight across slightly shorter to reset the line. Avoid rushing; check bangs from different angles in natural light to match the shape evenly.
Trimming the Back of Your Hair Without Help
You can trim the back of your hair alone. Set up a good mirror and clear guide points. This makes the job easier.
Using two mirrors lets you see your hair from multiple angles. Guide strands help keep your trim even and help maintain symmetry.
Setting Up Dual Mirrors for Visibility
Use a large wall mirror and a handheld mirror. Position yourself so the wall mirror shows your front and top hair clearly. Hold the handheld mirror behind your head, angled to see the back.
This setup helps you check your work in real time. Make sure the lighting is bright and even to avoid shadows hiding missed spots. A sturdy handheld mirror avoids dropping or shaking during your trim.
Using Guide Strands as Length References
Pick a strand on one side at the nape as your length guide. Comb this strand straight down without tension. Cut this strand first, setting the length for the rest of the back.
Match every other section’s length to the guide strand you picked. This helps keep your hair even.
Cutting the hair at a slight angle creates a natural V shape in your neck area. Wet hair before cutting, so it stays in place and cuts precisely.
Cross-Checking Symmetry and Balance
Regularly step back and look at your hair in the wall mirror. Use the handheld mirror to compare the left and right sides closely.
Check both sides for length differences. Trim the longer side gradually in small amounts.
Check for evenness by combing hair on both sides down. Make sure you trim small amounts to avoid cutting too short. Move slowly and double-check frequently to keep your cut balanced.
Strategies to Prevent Uneven Back Trimming
Keep your hair clean and lightly damp before trimming. Oily or dirty hair can clump, causing uneven cuts. Use a fine-tooth comb to smooth sections and prevent stray hairs from being missed.
Trim in a well-lit area with a reliable mirror setup. Avoid rushing; this reduces mistakes and uneven spots. Take breaks to stretch and re-position mirrors, ensuring consistent views of all angles.
Follow these steps for cutting your hair’s back evenly and safely:
- Set up a large wall mirror in front and a handheld mirror behind you.
- Lightly wet your hair and comb it straight, sectioning the back evenly.
- Choose a guide strand at the nape, cut it to your desired length.
- Use the guide strand’s length to trim adjacent sections, cutting at a slight angle.
- Frequently check your work by comparing left and right sides in the mirrors.
- Trim small amounts gradually to maintain symmetry and avoid mistakes.
- Comb and smooth hair sections to ensure even cutting without missed spots.
- Step back occasionally to assess overall balance and adjust as needed.
Common Mistakes When Trimming Hair and How to Fix Them
One common mistake is cutting too much hair at once. Hair can’t be glued back after cutting it short, so trim little by little. Stop after each snip to check your length in natural light.
Uneven layers happen when you don’t cut at a consistent angle or don’t section hair properly. Dry hair, parted right in the middle, helps you see uneven spots clearly. Use long, angled cuts for layers to avoid blunt edges.
Blunt edges make hair look choppy or heavy. To fix this, point cut by snipping vertically into the ends rather than cutting straight across. This softens the edges and blends layers better.
- Trim small amounts, about ¼ inch at a time
- Use sharp, professional scissors for cleaner cuts
- Section hair into even parts before cutting
- Check your work under natural light frequently
- Point cut ends for a softer finish
- Pull hair taut to get even lengths
- Stop and ask a pro for big style changes
Don’t rush, and avoid major changes unless a pro guides you.
When you see uneven layers or edges, gently trim those spots again. Use vertical snips to fix problem areas carefully. Fix blunt edges by carefully slicing into the ends with the scissors’ tips.
Major mistakes like chopping off too much can sometimes be hidden by layers or styling products. If your trim looks off after a day or two, don’t wait. Book a stylist to fix the uneven areas soon.
Step-by-Step Action Plan for Your First Trim
Follow these steps to trim your hair safely and get good results at home.
- Before you start: Gather all tools like scissors, comb, and clips. Make sure your hair is clean and damp.
- First section: Divide your hair into four parts using clips. Check each section lies flat without bumps.
- Trim ends: Start with the bottom sections, snip only about 1/2 inch. Stop if you see even ends all around.
- Bench test: Look in the mirror from different angles. Fix any uneven spots with small, careful cuts.
- Trim bangs and face-framing pieces: Cut little by little, keeping your head straight. Your bangs should fall just where you want.
- Back sections: Use a hand mirror to see the back clearly. Trim in short snips, checking often to avoid mistakes.
- After 2 weeks: Check for split ends or uneven spots. Trim a tiny bit if needed to maintain shape.
- Monthly routine: Set a reminder to trim every 4-6 weeks. Regular trims keep your hair healthy and styled.
Frequently Asked Questions
How Often Should I Trim My Hair to Keep It Healthy?
Trim a tiny amount every 6 to 8 weeks to maintain healthy ends. Cutting regularly prevents split ends and keeps your hair looking fresh and neat.
Can I Use Regular Scissors If I Don’t Have Hair Shears?
It’s best to use hair shears because regular scissors can cause split ends. Hair shears are sharper and designed for clean cuts, which protect your hair’s ends.
Should I Trim My Hair When It’s Wet or Dry?
Damp hair is easier to section and cut accurately. Dry hair can show the real length, but trimming wet hair reduces uneven cuts.
How Can I Avoid Uneven Cuts When Trimming My Own Hair?
Section your hair carefully and trim small amounts at a time. Using clips and mirrors helps keep your trim balanced on both sides.
What’s the Best Way to Trim Curly Hair at Home?
Use the “dusting” method to remove small split ends without losing length. Trim very small sections to keep curls healthy and bouncy.
How Do I Trim My Hair Layers Evenly by Myself?
Use a guide strand and work section by section, trimming the same length. A comb and clips help manage layers for even cutting.
Wrapping Up
Trimming your own hair can save money and keep your style fresh. Take your time and cut little by little for best results. Start now by gathering your tools and picking a quiet day to try your first trim.