
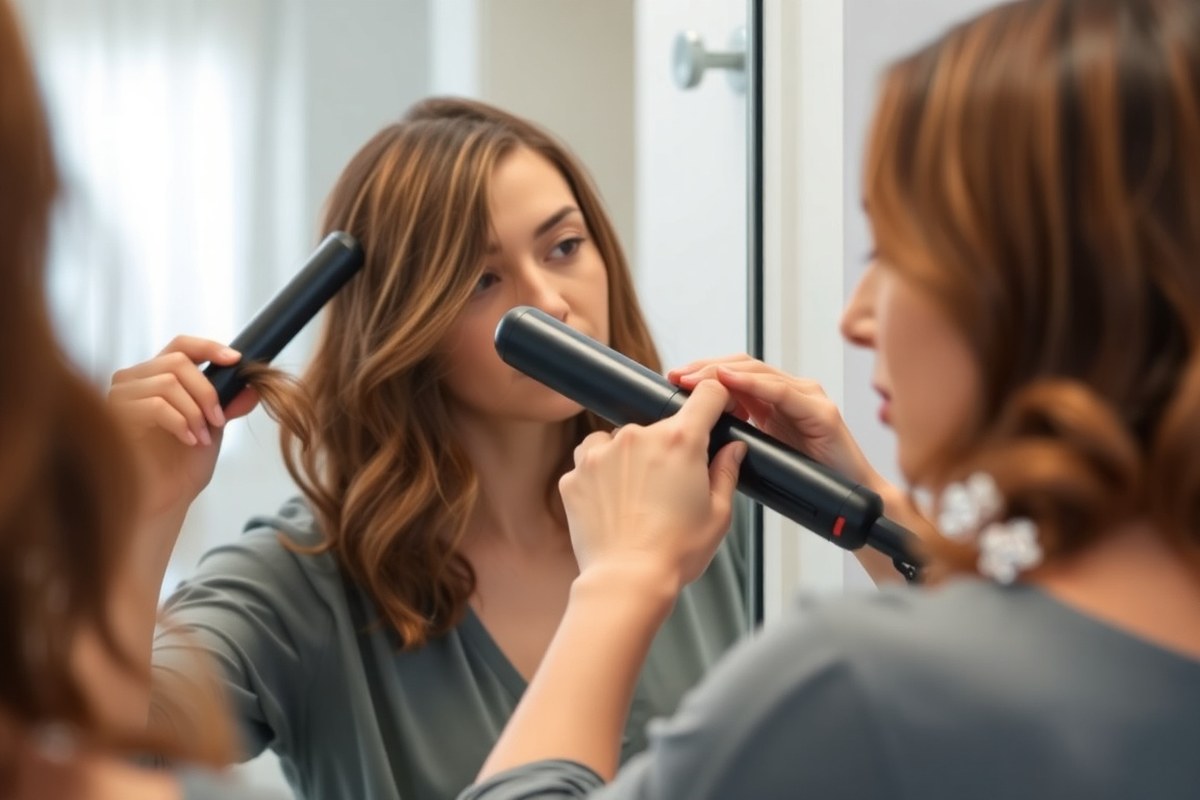
How to Curl Hair with Flat Iron Step by Step: Complete Guide for Great Curls
Wondering how to curl hair with flat iron step by step? The best way is to use a medium heat setting and small sections of hair. Start by prepping hair with heat protectant and then clamp a one-inch section near the roots.
Rotate the flat iron 360 degrees toward you as you glide down. This wrap technique creates curls that look natural and last longer. Make sure to set your iron’s temperature based on your hair type to avoid damage.
Using ceramic plates works well for fine or color-treated hair around 250, 300°F. For thicker, coarse hair, titanium plates heated from 375, 410°F are better. Sectioning hair into 2, 3 cm strips helps get uniform curls faster.
Key Takeaways
- Choose flat iron plates matching your hair type: ceramic or titanium.
- Set temperature between 250°F and 410°F based on hair thickness.
- Protect hair with a heat protectant spray before curling.
- Use narrow 2, 3 cm hair sections for consistent curls.
- Clamp flat iron 1 inch from roots to start each curl.
- Rotate iron 360 degrees toward you for natural-looking curls.
How to Curl Hair with a Flat Iron Step by Step

Start by detangling your hair and dividing it into clean sections. Proper sectioning helps you curl every strand without missing spots. Use clips to hold the sections apart and work with manageable pieces.
Hold your flat iron near the root of a 1-inch section. Clamp the iron securely and rotate your wrist 180 degrees away from your face. This twist wraps the hair around the flat iron’s edge, creating the curl.
Slide the flat iron down the hair slowly, taking about 8 to 10 seconds. Moving too fast will cause weak curls, while holding too long risks heat damage. After releasing the clamp, hold the curl in your hand briefly to shape it.
Let your curls cool completely before touching or styling. Cooling locks in the curl shape for longer-lasting results. If you move your hair while hot, curls may lose their bounce or fall flat.
- Section your clean, dry hair into 1- to 1.5-inch wide parts and clip them up.
- Take one section and clamp the flat iron near the root.
- Rotate your wrist 180 degrees away from your face to wrap hair around the iron.
- Slowly glide the flat iron down the hair shaft for about 8 to 10 seconds.
- Release the clamp and let the curl cool while holding it briefly.
- Repeat for all sections, alternating curl direction for volume.
- Once done, allow hair to fully cool before running fingers through or adding styling products.
Choosing the Right Flat Iron and Setting Temperature

Picking the right flat iron makes curling easier and safer. Look for one with rounded edges to help shape curls smoothly without sharp creases.
Not all flat irons curl the same. So choosing the right material, size, and temperature is key for your hair type and length.
Plate material affects heat distribution and protection. Ceramic plates heat evenly and suit fine or color-treated hair. Titanium heats faster and hotter, which works well for thick, coarse hair.
The size of the plates matters too. A 1-inch plate fits most hair lengths and styles well.
It works for many hair types. This makes it a flexible tool for curling.
Curling short hair with a flat iron needs narrow plates. Narrow plates let you wrap hair around once to create curls. Wide plates make curling short hair harder.
| Plate Material | Hair Type | Ideal Temperature (°F) | Ideal Temperature (°C) |
|---|---|---|---|
| Ceramic | Fine or color-treated | 250 – 300 | 120 – 150 |
| Titanium | Thick, coarse | 375 – 410 | 190 – 210 |
| Ceramic | Medium hair | 350 – 370 | 175 – 190 |
Set the temperature based on your hair’s thickness and health. Fine hair curls well at around 300°F (150°C). Medium hair needs about 350-370°F (175-190°C).
Thick or coarse hair can handle 375-410°F (190-210°C). Using too much heat risks damaging your hair texture and causes breakage.
The right flat iron size and temperature help save time and protect your hair. Curling usually takes 10 to 30 minutes depending on length and thickness.
Short hair curls best with smaller plates that let you wrap hair easily. For longer hair, 1-inch plates give better control and consistent curls.
Choose rounded edges and a 1-inch plate flat iron for safer curling and smoother curls.
Preparing Hair for Curling and Applying Heat Protectant
Start curling only after your hair is clean, dry, and tangle-free. Heat protectant must be on to avoid damage. Proper preparation keeps curls smooth and long-lasting.
Wash and Condition Properly
Wash your hair with a gentle shampoo to remove grease and buildup. Use a conditioner suited for your hair type to keep strands soft. Well conditioned hair curls better and looks shinier.
Rinse your hair with cool water to close cuticles. This step helps hair hold the curl and reduces frizz. Avoid heavy oils or silicones that weigh hair down.
Dry and Detangle Thoroughly
Always work with completely dry hair before curling. Wet or damp hair exposed to heat can frizz or even sizzle. Use a blow dryer or air-dry your hair fully.
Detangle your hair gently using a wide-tooth comb or a detangling brush. Work from the ends toward the roots to avoid breakage. Tangles baked into curls look messy and uneven.
- Blow dry hair fully on a cool or medium heat setting
- Comb out knots carefully starting at the ends
- Separate hair into sections for easier detangling
- Apply a leave-in conditioner if needed before detangling
Skipping detangling can create bumps in curls and ruin your style. Take your time to get hair smooth before any heat goes on.
Apply Heat Protectant Correctly
Use a heat protectant spray or serum on dry hair from roots to ends. This forms a shield to prevent burning and frizz. A product like Aussie Total Miracle Heat Protecting Spray works well.
Spray evenly and don’t overload to avoid greasy buildup. Using your fingers, spread the product through hair or comb it in lightly. Protectants also help curls stay shiny and healthy.
Remember that heat protectant cannot fix damaged hair, only prevent more damage. Choose one that suits your hair’s texture and needs.
Wait Time Before Curling
Give your heat protectant about 1 to 2 minutes to dry after applying. This lets the product set and avoids steam or sizzle from wet spray. Curling too soon can lead to uneven curls.
Check that hair feels dry and not sticky before turning on your flat iron. You can section your hair during this time to speed up the process. Starting on damp hair risks damage and frizz.
Curling Techniques for Different Hair Lengths and Styles
You can shape curls with a flat iron by adjusting your technique. Hair length and style affect how you curl. Use different moves for short or long hair.
Start curling about an inch from the roots to protect your scalp and allow volume. Different curls like spirals, loose waves, and beach waves each need a unique approach.
Creating Spiral Curls
Spiral curls look tight and defined. Take small sections, about ⅓ inch wide. Wrap your hair tightly around the flat iron.
Keep the iron vertical as you twist down. Twist the strand the whole way smoothly.
Use higher heat for thick hair, around 380°F to 400°F. For medium hair, set the iron between 360°F and 380°F. Use 350°F to 360°F for fine hair. Adjust heat based on your hair type. Hold the flat iron on your hair for 3 to 5 seconds.
This gives a good curl set. It helps avoid heat damage too.
Slowly glide the iron downward, keeping the twist tight and steady. For best results with spiral curls, work with dry hair that is not heavy with products. Too much product can weigh curls down or make them stiff.
Making Loose Waves and Beach Waves
Loose waves require wider sections and a gentle twist. Take 1-inch sections and clamp the flat iron near the middle of the strand. Twist the iron slowly as you pull it down the hair’s length.
Beach waves need a more relaxed twist. Start curling about 2 inches away from the roots. Rotate the iron around the hair in a loose spiral.
Then straighten the ends a bit. This creates a natural, undone look.
The key is not to over-twist or hold too long. Pull the flat iron through your hair at a moderate pace to create natural, lived-in waves. Avoid tight wrapping to keep the waves soft and flowing.
Adjusting Approach for Hair Length
Short hair curls best with small sections and a quick twist. Flat irons offer the control needed for short styles since curling irons can be too large. Start curling about ¾ inch from the roots to add volume without risking scalp burns.
Medium-length hair allows for versatile curl size. You can do tighter curls or loose waves by changing section width. Make sure to use smaller sections for tighter curls and larger ones for looser styles.
Long hair takes longer to curl and benefits from lower heat to avoid damage. Work in smaller sections to ensure even curling. Start curling about 1 to 2 inches away from your scalp.
This keeps roots smooth. It lets your hair keep its natural body.
Hair texture matters, too. Thick hair can hold curls longer but needs higher heat. Fine hair curls better with lower heat and quicker passes to avoid breakage or frizz.
How to Make Flat Iron Curls Last Longer and Look Natural
To make flat iron curls last and look natural, use cooling and holding sprays. Curl your hair in different directions and gently loosen curls. Avoid brushing too much to stop frizz and keep curls intact.
Using Cooling and Holding Sprays
Spray a light cooling mist or finishing spray after curling each section. Cool hair sets the curl in place, helping it last for hours. Hold the spray about 8 to 10 inches from your hair.
This distance gives an even mist. It also prevents wet spots.
Follow up with a holding spray or mousse to lock in the texture. Products with a medium to strong hold work best for curls made with flat irons. Avoid heavy formulas that weigh down your hair or cause stiffness.
- Use a heat protectant spray before curling to shield hair.
- Apply a texturizing spray for added volume and grip.
- Choose a lightweight mousse or curl hold spray after curling.
- Allow curls to cool fully before touching or styling.
- Avoid spraying too close to prevent product buildup.
Proper product use extends your curls’ life and keeps their bounce fresh. Cooling hair in place prevents curls from falling flat too quickly.
Alternating Curl Direction for Volume
Twist your flat iron 360 degrees, curling sections away from and toward your face. This technique lifts hair and adds dimension. Alternating directions increases volume by around 40%, so your curls don’t clump together.
Curl the first section away from your face. Then curl the next section toward your face.
Keep changing directions for a natural look. This creates natural movement with no uniform pattern, making the style look easy and tousled.
| Curl Direction | Benefit |
|---|---|
| Away from face | Adds lift and frames features |
| Toward face | Creates depth and natural flow |
| Alternating pattern | Boosts volume by 40% |
| Mixed placement | Increases tousled texture |
| Section-by-section rotation | Extends hold up to 22 hours |
This method is especially helpful for fine hair that needs extra volume. Thick hair also benefits by avoiding heavy, one-direction curls that flatten quickly.
Loosening Curls for Natural Look
After your curls cool completely, gently separate them with your fingers. This softens tight curls into waves with a relaxed, natural look. Avoid pulling too hard to maintain the curl’s shape and bounce.
Finger combing prevents frizz and keeps curls intact longer than brushing. You can also lightly shake sections for added lift and movement. This creates that soft, lived-in style without losing hold.
Let your curls cool before you touch them to keep their shape and stay frizz-free.
Avoiding Over-Brushing
Brushing flat iron curls too much can cause frizz and loosen the curl pattern. Stick to using your fingers or a wide-tooth comb for styling. This keeps the curls looking fresh and defined while preserving hold.
Use detangling spray on tangled curls. Work through knots gently to avoid breaking curls. Over-brushing often leads to hair looking fluffy instead of naturally curled.
- Skip small, stiff brushes on curls.
- Use fingers or a wide-tooth comb to separate curls.
- Apply a lightweight serum to smooth frizz.
- Limit combing to only when needed.
Respect your curl’s natural texture by brushing less. This will keep the style lasting through your day or night.
Common Curling Mistakes and How to Fix Them
Many beginners clamp the flat iron too tightly, which can cause hair creases or crimps. Instead, hold the iron gently around each section to avoid dents. Clamping too hard also stresses hair strands, making them prone to breakage and damage over time.
Not sectioning hair into small pieces leads to uneven curls or flat spots. The best way is to work with narrow sections about 2 to 3 centimeters wide. Start curling about one inch from your roots.
Hold the iron vertically. This adds about 10 to 18 percent volume and gives a natural bounce.
Here are other common curling mistakes and how to fix them:
- Using high heat without a heat protectant, always apply one to avoid damage.
- Skipping the twist, twist the iron away from your face before pulling to create smooth curls.
- Holding the iron too long on the hair, keep it moving slowly to prevent burning.
- Ignoring hair texture, adjust heat settings: 300°F for fine hair, up to 375°F for coarse hair.
- Not letting curls cool before touching, allow 10 minutes to set curls firmly.
- Begin curling about an inch down from your scalp. This prevents burning your skin. It also stops roots from getting flat.
- Forgetting ends, apply extra heat protectant on ends, where damage shows first.
Curls often don’t hold if your sections are too large. Curling too fast also causes curls to fall. You need time to set each curl.
Try curling smaller sections and letting the hair cool fully before touching or styling. Use a light hairspray to help curls last longer.
Avoid heavy sprays that weigh hair down. Light sprays keep your hair bouncy.
Curling with a flat iron can damage hair if you skip heat protection. Overheating strands also causes damage. Always protect your hair before heat styling.
Keeping your iron’s temperature between 300°F and 375°F reduces risk, depending on your hair type. Use a professional heat protectant spray for best results.
Don’t curl the same section repeatedly. This also helps reduce damage.
Clamp your flat iron just firmly enough to hold the hair smoothly without squeezing. A too-tight grip leaves creases and may pull the hair harshly.
On the other hand, a loose clamp will not curl hair evenly. Practice a gentle, steady squeeze, that balance helps create sleek, lasting curls without harm.
Timing and Handling: How Long and How Often to Curl Hair
Curling your hair with a flat iron takes 10 to 20 minutes, based on length and thickness. Divide your hair into sections to stay organized and move faster. Each piece should be one to two inches wide for balanced heat spread.
For fine or medium hair, keep the flat iron on each part for five to eight seconds. Thicker or coarse hair needs seven to twelve seconds for curls that last longer.
Don’t leave the iron on a spot too long. This can flatten curls and harm your hair.
The safe temperature for curling is usually between 300°F and 350°F. Staying on the lower end protects your hair from damage while still shaping curls well. Use a heat protectant spray before heating to shield your strands, and never skip it.
Limit heat styling to two or three times per week to prevent dryness and breakage. Give your hair breaks from heat styling whenever possible. On no-heat days, try gentle styles that don’t stress your hair.
Real curls form quickly if you control the clamp time carefully. Taking too long can cause flat spots or crispy hair ends. Check your section size and clamp time if curls lose their shape quickly.
When and Why to Call a Professional for Flat Iron Curling
Call a professional if your hair is very damaged, thick, or hard to style at home. They know how to handle fragile strands without causing more heat damage. Also, complex curls or polished looks need their skill to last longer and hold shape better.
Pros use the twist-and-glide method with flat irons to give you precise curls. They position the iron near the scalp, turn it halfway backward, then slide it down smoothly. That control shapes curls that look natural but stay firm for hours.
Stylists add a protective barrier by applying salon-grade heat protectants. These products reduce damage and add shine that’s hard to get with regular sprays.
Their irons reach the right temperature for your hair type. The range is usually between 300° and 370°F. This helps protect your hair while styling.
Some styles, like tight spiral curls or layered waves, need expert hands to get right. Hair prone to breakage or chemical treatments also benefits from professional care. They can adjust heat and techniques that fit your hair’s specific needs.
Begin with a consultation appointment. The stylist checks your hair health. Then they discuss your style ideas with you.
Watch them work to learn tricks you can mimic later. This approach helps you trust their skills while learning to do your own curls safely.
Always inform your stylist about recent color treatments or damage. This helps them adjust heat settings. They also choose suitable products for your hair.
Step-by-Step Action Plan
Follow these clear steps to curl your hair with a flat iron today. Each step includes how to check if it turned out right.
- Before you start: Wash and dry your hair completely. Your hair should feel smooth and dry to touch.
- Right before curling: Apply a heat protectant spray evenly. Your hair should not feel sticky or greasy afterward.
- Set the flat iron temperature: Use 300°F for fine hair. Set 350°F for medium hair. Use 400°F for thick hair. The iron should heat quickly and stay steady.
- First section: Clamp a 1-inch strand near roots. Twist the flat iron once around hair. Slowly pull the iron down. The strand turns into a clear, smooth curl.
- Midway through curling: Check if curls formed well and hold their shape. Lower your speed when sliding the iron if curls are loose.
- After curling: Let curls cool completely to set their shape. Hair should feel firm but not stiff.
- Finishing touches: Run your fingers gently through curls to loosen them. They should look soft and natural, not clumped.
- Next day: Use dry shampoo or lightly spritz water to refresh curls. Curls should bounce back without extra heat.
Frequently Asked Questions
What Section Size Is Best for Curling Hair with a Flat Iron?
Smaller sections, about 1 inch wide, curl more evenly and last longer. Large sections can create loose curls or miss spots on your hair.
How Can I Avoid Heat Damage While Curling with a Flat Iron?
Always use a heat protectant before curling. It shields your hair from high temperatures and keeps strands healthy. Don’t set the iron hotter than needed for your hair type.
Is It Better to Curl Hair on Damp or Dry Hair with a Flat Iron?
Always curl your hair when it’s completely dry to prevent damage. Damp hair can steam and fry under heat, leading to breakage and frizz.
Can I Add Volume While Curling Hair with a Flat Iron?
Yes, curl your hair away from the scalp and start curls lower on the strand. This lifts roots and adds a natural bounce to your style.
Should I Use a Flat Iron with Rounded Edges to Curl Hair?
Yes, rounded edges help create smooth, natural-looking curls without sharp bends or dents. A square-edged flat iron might leave creases on your curls.
What’s the Best Way to Hold My Wrist While Curling Hair with a Flat Iron?
Keep your wrist relaxed and twist gently while moving the iron. Over-twisting can crimp hair or cause awkward curls, so practice for smooth motion.
Key Points to Remember
Curling hair with a flat iron takes practice but is doable step by step. Start by mastering temperature control and small sections. Try your first curls today.
Learn what works best for your hair type. Adjust as you go.


