How to Trim Your Own Hair for Guys: A Complete Guide with Expert Tips
How to trim your own hair starts with accepting some mistakes. You won’t get it perfect right away. That’s okay and very normal.
Your first few tries might look rough, but you’ll improve with practice. Taking it slow and steady helps you avoid mistakes and build confidence.
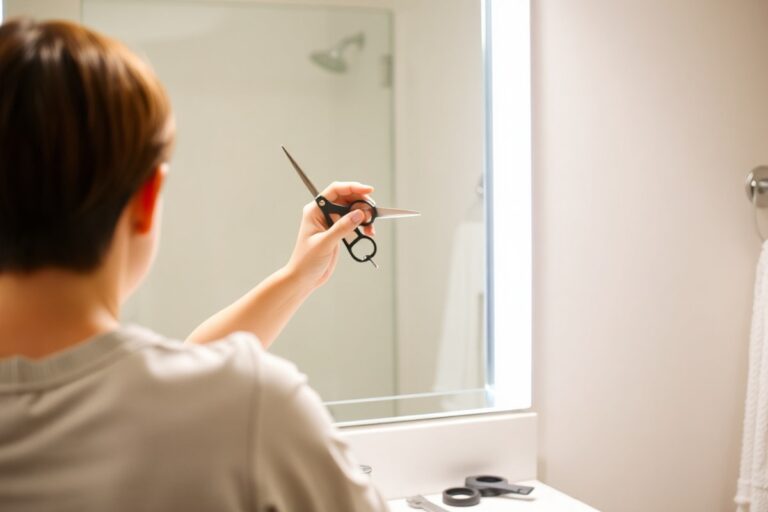
Start by choosing simple styles like buzz cuts or trims with clippers and one guard. Use a hand mirror to check the back and take breaks to avoid rushing.
Don’t expect a barber-level finish at home. But small trims every few weeks keep your hair looking neat.
Investing in quality tools like a 6-inch hair shear and reliable clippers makes a big difference. Avoid cheap gear that breaks fast or cuts unevenly, it only leads to frustration. Focus on neat edges and even cuts before moving to complex styles.
Key Takeaways
- Use clippers with one guard for easy, consistent length trimming.
- Start trimming in good lighting and use a hand mirror for the back.
- Trim small amounts regularly, about every 2 to 4 weeks, to keep shape.
- A quality 6-inch hair shear helps refine texture on top.
- Don’t rush; take 15 to 20 minutes for your first few trims.
- Expect imperfections at first, it’s normal as you learn clipping skills.
How to Trim Your Own Hair at Home Step-by-Step

Trimming your own hair at home takes patience and the right steps. Follow a clear order and work slowly to avoid mistakes. Use a comb and clips to section hair and check progress often.
- Prepare your space and tools. Drape a towel or cape over your shoulders to catch hair. Have clippers with guards, a comb, and a handheld mirror ready.
- Start with clean, dry hair. Comb your hair to remove tangles. Dry hair shows true length better, making even cuts easier.
- Section your hair. Divide into four parts: two on top and two on sides. Clip the top sections out of the way if needed.
- Cut the sides first. Attach the guard for your desired length. Move clippers upward from the bottom to the top of your sides.
- Trim the back next. Use two mirrors or a handheld mirror to see behind. Cut the hair in small sections, moving the clippers steadily and lightly.
- Cut the top last. Use scissors or clippers with a longer guard. Lift small sections of hair with your fingers and trim the ends evenly across.
- Check your work with mirrors. Use your handheld mirror to see your head from different angles. Fix any uneven spots carefully with small trims.
- Finish with the hairline. Remove the guard or use a trimmer for clean edges around your neck and ears. Go slowly to avoid cutting too high.
Cutting hair in this order helps you manage length and blend sections better. Taking breaks to inspect your progress prevents big mistakes. Press clippers lightly and take small cuts to keep length consistent.
Choosing and Using the Right Tools for DIY Haircuts

To trim your own hair well, start with a good clipper set. Clippers with multiple guard sizes give you control over hair length. Get a hand mirror to check your work from all angles.
A comb helps you lift and even out hair before cutting. Sharp hairdressing scissors matter if you want to trim longer hair or tidy specific spots.
Most clipper sets come with 8 guards, numbered 1 through 8. These guard numbers control the hair length left after cutting. Guards usually cut hair between 1/16 inch and 1 inch.
Higher guard numbers cut longer hair. Lower numbers cut the shortest length.
You’ll want to match guard size to the style you’re trimming. Using the right guard avoids cutting too short or too uneven.
| Guard Number | Approximate Hair Length Left | Common Use |
|---|---|---|
| 1 | 1/16 inch (1.5 mm) | Very short buzz cuts |
| 2 | 1/4 inch (6 mm) | Short sides and back |
| 3 | 3/8 inch (10 mm) | Medium length trimming |
| 4 | 1/2 inch (13 mm) | Longer top or blending |
| 5, 8 | 5/8 inch to 1 inch+ (16, 25 mm+) | Long top hair trimming |
Scissors are optional but useful if your hair stays longer on top. Use sharp hairdressing scissors made for cutting hair. Avoid household scissors because they slip and cause uneven cuts.
Trim long hair when damp. Snip vertically to prevent harsh blunt lines.
Keep your clippers clean and oiled to avoid pulling hair. Follow the instructions for blade maintenance. Clean blades after each use, spray or brush away hair, and apply clipper oil regularly.
This keeps cuts smooth and extends your tool’s life. Sharp blades cut faster and with less effort.
Use a higher guard number on top for longer hair. Lower guards on sides for a neat shape.
How to Trim the Back and Sides Yourself Without a Barber
Trimming the back and sides of your hair yourself takes practice and good setup. Use two mirrors to see the back clearly. Trim slowly with clippers, checking your view often to avoid uneven spots.
Setting Up the Two-Mirror System
Position a large mirror in front of you at eye level. Hold a smaller hand mirror behind your head angled to reflect the back of your scalp.
Adjust the mirrors so you can see your head’s back without moving your neck too much. This setup shows you the hard-to-see areas clearly.
Moving the Clippers Safely on the Back
Choose the right clipper guard for the length you want on the sides and back. Start trimming from the bottom, moving upward in slow, steady strokes.
Keep the clippers flat against your scalp to avoid cutting too much hair at once. Use the hand mirror to guide your hand and keep your movements even.
Trim along the neckline carefully by tilting the clippers slightly and cutting in short bursts. Follow the natural curve of your neck to avoid sharp lines or uneven spots.
Checking and Fixing Uneven Areas
Scan your reflections in the two mirrors for spots that look thicker or patchy. Use the clippers without a guard or scissors to blend these areas.
Work in small sections, trimming little by little and checking your progress often. Avoid cutting too much in one go to keep the look balanced. Use this step-by-step method to trim the back and sides with ease:
- Set up a front mirror and hold a hand mirror behind your head.
- Pick the clipper guard for your desired hair length.
- Start trimming the sides, moving clippers from bottom to top.
- Switch to the back, trimming upward in short, even strokes.
- Use the hand mirror to see the neckline clearly.
- Trim the neckline carefully following your hairline curve.
- Check for uneven areas using both mirrors frequently.
- Touch up any spots by blending with scissors or clippers.
Understanding Clipper Guard Numbers and Hair Lengths
Clipper guard numbers tell you how much hair the clipper leaves behind. Each number matches a specific length in inches or millimeters. Using the right guard helps you achieve the style you want without cutting hair too short.
Guards are numbered from 1 to 6 on most clippers. A lower number leaves shorter hair, while a higher number leaves it longer. A #1 guard cuts hair to about 1/8 inch (3mm).
This size is good for very short buzz cuts. It’s a simple choice for a neat look.
Blending different lengths means choosing guards between your shortest and longest lengths. This step avoids harsh lines and keeps the haircut looking natural. Use the same guard number on your sides.
Match that number on the back, too. This keeps your haircut even all around.
| Guard Number | Approximate Length | Style Uses |
|---|---|---|
| 1 | 1/8 inch (3mm) | Very short buzzcuts, tight fades |
| 2 | 1/4 inch (6mm) | Short crew cuts, clean edges |
| 3 | 3/8 inch (10mm) | Classic short cuts, tapered styles |
| 4 | 1/2 inch (13mm) | Medium length tops, blended sides |
| 5 | 5/8 inch (16mm) | Longer layers, shaping edges |
| 6 | 3/4 inch (19mm) | Longer cuts, gradual blends |
Choosing the right guard depends on your hair type. Curly hair looks shorter with the same guard than straight hair. Wash and dry your hair before cutting to get the most accurate length.
Start by using a longer guard to protect hair length. You can switch to a shorter one if needed later. Use blender guards to smooth edges and avoid uneven patches.
How to Create a Basic Fade or Blend at Home
You can create a basic fade or blend at home. Use clippers and a few different guard sizes. It takes only simple tools.
Start with the longest guard on top, then blend to shorter guards on the sides. This gradual shortening prevents harsh lines and leaves a neat, natural look.
Starting with the Longest Guard
Pick the longest guard suitable for your hair length on top, usually #6 or higher. This sets the top length and creates a base for the fade. Run the clippers evenly over the top in smooth, slow strokes from front to back.
Keep your clippers blades flat against your scalp. Tilt them slightly to avoid blunt edges. This helps blend the hair better.
Work only on the top section until it’s fully cut and even. Don’t rush; even length on top makes blending easier.
Creating a Transition with Mid-Length Guards
Next, choose a mid-length guard like #4 or #5 to blend the sides. Start from just below the top and move downward, slightly overlapping the clipped top. This softens the line between the top and sides.
Use upward strokes as you move from bottom to top to pull up longer hairs. Tilt the clipper blade at an angle for a smoother fade effect. Repeat the process until the two lengths look like one gradual change instead of a line.
Using No Guard or Shortest Guard for the Edges
For clean edges, switch to no guard or the shortest guard, such as #1 or #2. Trim around your sideburns, ears, and neckline with precision. Hold the clippers gently but steady to create sharp, defined borders.
Move slowly and carefully to avoid cutting too much or making uneven edges. Clean edges frame your fade and give your haircut a polished finish. Double-check the edges with a hand mirror for any missed spots.
- Attach the longest guard and cut the top evenly front to back.
- Switch to a mid-length guard and blend the sides upward into the top.
- Use short, upward strokes and slightly tilt the clippers for smooth blending.
- Switch to the shortest guard or no guard to clean edges around ears and neckline.
- Go slow and check your work with a hand mirror.
- Fix any harsh lines by blending with the mid-length guard again.
- Use scissors to trim stray longer hairs on top if needed.
- Wash off cut hair and style as usual.
Don’t press the clippers hard against your scalp; lighter pressure helps avoid harsh lines.
Adjusting Trimming Techniques for Different Hair Types
Hair type affects how your hair cuts and how you should trim it. Straight hair lies flat and is easier to cut evenly. Curly and coily hair needs special care during home trims.
It keeps its shape and stays healthy. You need to handle it gently.
Trimming Straight and Fine Hair
Straight hair is often the easiest to trim yourself because it feeds evenly through clippers. You can use guard combs without worrying about uneven cuts as much. Fine hair may look thin after trimming.
Use a thickening conditioner to add volume. It helps your hair look fuller.
Cutting your straight hair while it’s dry can show flaws more clearly. So trim it damp to get a cleaner line.
Use scissors for the top to spot split ends and uneven spots. Keep clippers clean and sharp to avoid snagging fine strands.
Handling Wavy and Loose Curls
Wavy hair is easier to trim. It lies in gentle waves. It’s less fragile than tight curls.
Wet or dampen your hair before trimming. This helps you manage it better.
It won’t mess up your waves. Use scissors for better control on wavy sections, trimming small amounts at a time.
Make sure to comb through your wavy hair and separate it into straight lines before cutting. This method helps keep the waves shaped and prevents uneven areas. After trimming, wash your hair to remove loose strands and reshape your waves naturally.
Techniques for Tight Curls and Coils
Tight curls and coils are fragile and dry, so handle them with extra care. Don’t cut hair while it’s dry. Hair shrinks when dry.
This makes trimmed hair look shorter than expected. Instead, trim when your hair is slightly damp or stretched gently to target the true length.
Cut coils with scissors in small sections. Avoid clippers; they can cause uneven cuts or damage. Use scissors to protect curls.
Regular moisturizing and protective styling help keep your hair healthy between trims. Good scissors and patience are key to maintaining your natural curl shape.
Common Beginner Mistakes and How to Fix Them
Cutting your own hair can feel tricky at first. You might cut too much or wind up with uneven sections. Taking it slow helps, so work in small amounts and check your progress often.
One big mistake is rushing through without proper tools or a clear plan. Without good clippers, you risk harsh lines or patches. Use scissors and the right guard lengths to avoid this.
They help create a smooth, even cut. Setting up a mirror where you can see the back clearly prevents unevenness.
- Cutting hair when it’s soaking wet, causing you to trim too short when dry
- Using scissors on short hair without practice, leading to jagged edges
- Forgetting to blend guard numbers, which leaves visible lines between lengths
- Trimming quickly without stepping back to check for symmetry
- Trying to fix mistakes by cutting too much more, making the problem worse
Fixing uneven cuts often means using scissors with a point-cutting technique. Point-cutting involves snipping vertically into the hair tips instead of straight across.
This softens rough edges and smooths the transition between lengths. Avoid heavy, horizontal lines, they are hard to fix and look unnatural.
Cut your hair when it’s just damp or dry for most styles. Wet hair stretches and looks longer. So you might cut off more than you want.
Your style needs sharp lines? Cutting wet helps you get those. Wet hair is easier to shape precisely.
But be extra cautious and cut less than you think. You can always trim more later.
Prevent errors by checking your work in clear lighting with multiple mirrors. Don’t try to cut all at once. Break the process into sections starting from the sides or back.
Not sure about your cut? Snap a photo and check it.
This shows details you might miss with fresh eyes. With a little patience and careful steps, you’ll improve fast.
When to Skip DIY and See a Professional Barber
Some haircuts are just too complex to cut yourself well. Styles with layers, sharp fades, or textured tops demand steady hands and precise angles. Trying these without practice often leads to uneven or patchy results that look messy.
You should avoid cutting your own hair if you need a professional neckline or detailed blending. Necks and edges usually need careful shaping to look clean. Missing the right curves can ruin the haircut.
Trimming too high also causes problems. It often leads to a costly fix at a barber.
Look for signs that you’ve gone too far with a DIY trim. Uneven lengths, sudden choppy spots, or hair that sticks out oddly are common red flags. Spot these problems?
Book a pro appointment. Avoid struggling to fix it yourself.
Hair conditions like cowlicks or thick, curly hair can also make a DIY haircut tricky. These features require skill to cut in a way that falls right naturally. Mixing up your hair’s pattern may leave you with unwanted bulges or different lengths.
Two rules help decide if you need a barber. First, choose professional help for cuts with complex shapes or big style changes.
Second, leave trims alone if your hairline or scalp needs repair or you spot skin irritation. Barbers handle scalp issues safely and can match your style best.
Going to a barber usually costs $20 to $50 depending on location. The cost is worth it to avoid a bad cut that takes months to grow out. Professionals finish haircuts faster, usually in 30 minutes.
This stops guesswork. You won’t spend long trimming at home.
Avoid carving your neckline too high or uneven. It’s a sign to see a barber quickly.
Step-by-Step Action Plan to Trim Your Own Hair
Follow these steps to get a neat haircut on your own. Check your progress after each phase to stay on track.
- Before you start: Gather clippers with the right guards, scissors, and a handheld mirror. Make sure your hair is dry and clean for accurate trimming.
- Minute 1-5: Use the longest clipper guard to trim the sides and back evenly. The hair should feel shorter but still blend with the top.
- Minute 6-10: Use a shorter guard to trim the lower sides. Focus on the back too. This creates a basic fade look. Check under the handheld mirror for smooth blending.
- Minute 11-15: Trim the top with scissors or clippers at your desired length. Look straight in the mirror to ensure even length all over.
- Minute 16-20: Use scissors to clean up around the ears and neckline. The edge should look crisp but not overcut.
- Minute 21-25: Double-check the fade and blend. Fix any rough spots by trimming small sections carefully.
- After 1 week: Trim any stray hairs or uneven spots. Your haircut should still look fresh and neat.
- After 2-3 weeks: Check how fast your hair has grown. Pick the right guard for your trim. Plan based on this growth. Regular timing keeps your style sharp.
Frequently Asked Questions
How Often Should I Trim My Hair at Home to Keep It Looking Neat?
Trim your hair every 3 to 6 weeks to maintain a fresh look. Regular trims prevent split ends and keep your style sharp between salon visits.
Can I Trim Facial Hair Like My Beard or Mustache Using the Same Tools?
It’s best to use separate trimmers for facial hair to avoid dulling blades. Beard trimmers usually have finer guards for more precise shaping.
What’s the Easiest Way to Clean and Maintain My Clippers After Trimming?
Use a brush to remove hair clippings from blades after every session. Oiling blades regularly keeps them sharp and prevents rust.
How Do Humidity and Weather Affect Trimming Curly Hair at Home?
Humidity can make curls puffier, so trim dry hair in low humidity when possible. This helps you see the true length and shape of your curls.
Should I Trim My Hair While It’s Wet or Dry for Better Results?
Trim curly or wavy hair dry for more accurate shaping and volume control. Straight hair can be cut wet for a cleaner, straighter finish.
Can I Fix an Uneven Trim on My Own Without Visiting a Barber?
Yes, carefully use scissors or clippers to even out the longer areas. Trim small amounts gradually to avoid making the uneven spots worse.
Final Thoughts
Trimming your own hair at home takes some patience, but it gets easier. Keep your tools clean and practice the fade technique slowly. Start your trim by checking all clipper guards.
Set a specific time for trimming. This stops you from feeling rushed.