How to Style Hair: 11 Essential Steps and Styles for Every Hair Type
Styling hair might seem tricky at first. It’s really about simple steps. You can master it easily with practice.
Start with hair that’s damp, around 60 to 80 percent wet, to get the best results. This softness lets you shape hair without it breaking or getting frizzy.
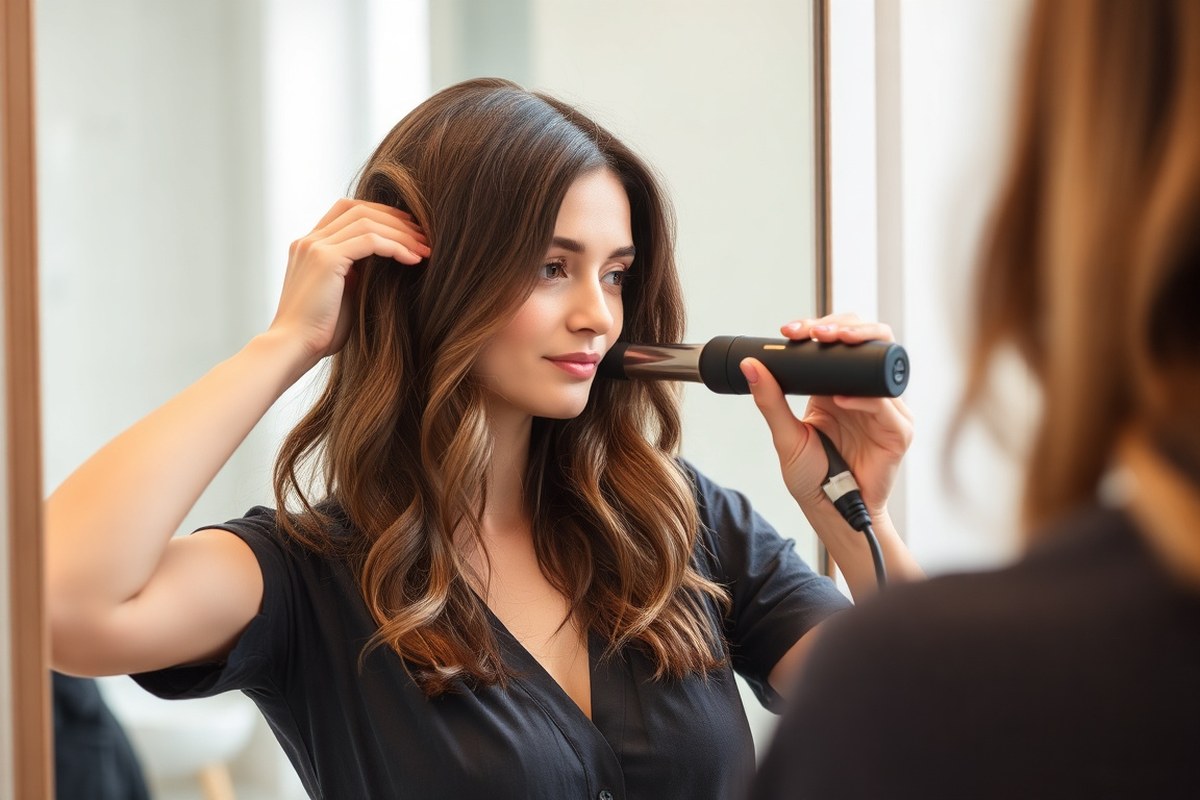
Apply heat protectant evenly before using heat tools. Let it absorb well. Wait one or two minutes before styling.
This cuts down on damage and keeps hair healthy longer. Choose the right tool temperature carefully.
Keep it at 300°F or lower for fine hair. This prevents burning your strands.
Small sections work wonders for styling. Take sections about 1 to 2 inches wide each time. This size helps control the style.
It also stops you from missing parts. Working in sections avoids frustration and saves time.
Key Takeaways
- Always start styling on damp hair to keep strands flexible and manageable.
- Apply heat protectant evenly, then wait 1-2 minutes before using heat tools.
- Set your heat tool below 300°F if your hair is fine or damaged.
- Divide hair into 1 to 2-inch sections for better control and even styling.
- Never use flat irons or curling irons on wet or soaking hair.
- Use a mixed-bristle brush to smooth hair into sleek ponytails.
1. How to Style Hair Step-by-Step for Beginners

The easiest way to style hair starts with clean, damp hair and good tools. You prepare your hair, section it for control, then finish with the right products. These steps suit all hair types and lengths for a fresh, lasting look.
Prepping Hair: Washing, Drying, and Protecting
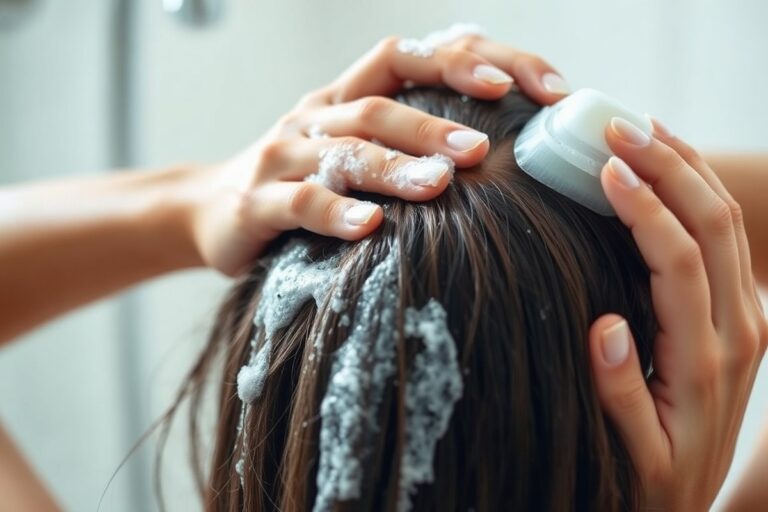
Clean hair gives your style a fresh base and helps products work better. Wash your hair using mild shampoos without sulfates or drying alcohols. Avoid heavy waxes and mineral oils that weigh hair down.
Dry hair to about 60, 80% moisture before styling. Hair should feel damp but not wet.
So styles hold better and tools glide smoothly. Apply a heat protectant evenly and wait 1 to 2 minutes to let it activate.
Sectioning Hair Correctly for Best Results
Breaking your hair into sections keeps styling neat and prevents uneven results. Start by parting your hair into 4 to 6 sections depending on length and thickness. Clip each section separately to work on one area at a time.
Use small 1- to 2-inch sections when working with heat tools for better control. Sectioning helps stop frizz and flyaways from spoiling your style. It also speeds up the process by keeping hair manageable.
Finishing Touches: Products and Setting
Choosing the right products makes your style last and look polished. Use styling serums to tame flyaways and add shine without heaviness. Pick hold products suited for your hair type to avoid stiffness or limpness.
Set your style by blasting with cool air on your blow dryer. This cool down seals the shape and keeps your hair in place longer. Avoid touching your hair too much after styling to prevent frizz and loss of hold.
The step-by-step process:
- Wash hair with gentle shampoo and condition as usual.
- Towel dry then blow-dry hair to about 60, 80% dampness.
- Apply heat protectant spray or serum evenly through hair.
- Divide hair into sections using clips or hair ties.
- Style each section with your chosen heat tools or techniques.
- Apply a light styling serum or anti-frizz product to finish.
- Use cool air to set the style before letting hair loose.
2. Choosing the Right Tools for Your Hair Type

Choosing the right styling tools depends on your hair texture and thickness. Fine hair needs lower heat settings and lighter brushes to avoid breakage. Thick or coarse hair requires stronger tools that handle higher temperatures to tame stubborn strands.
For straight hair, flat irons with ceramic plates work well to smooth or create curls. Curly and wavy hair works best with blow dryers that include diffuser attachments. These help control frizz and keep your natural hair shape.
Use the diffuser to avoid disrupting curls. Brushes with natural bristles help distribute oils gently in all hair types.
| Hair Type | Recommended Tool | Temperature Range | Brush Type |
|---|---|---|---|
| Fine | Ceramic flat iron or lightweight blow dryer | 250, 350°F (120, 175°C) | Boar bristle brush |
| Medium | Medium heat flat iron or blow dryer with diffuser | 350, 365°F (175, 185°C) | Mixed bristle brush |
| Coarse | High heat flat iron or professional blow dryer | Up to 400°F (205°C) | Wide-tooth comb or sturdy paddle brush |
| Straight | Ceramic flat iron or round brush blow dryer | 250, 365°F (120, 185°C) | Round or paddle brush |
| Curly/Wavy | Blow dryer with diffuser or curling wand | 300, 375°F (150, 190°C) | Wide-tooth comb or boar bristle brush |
Temperature control is key for healthy styling. Fine or bleached hair should stay under 300°F to prevent damage. Coarse strands can tolerate 355-400°F but always use a heat protectant spray beforehand.
Never style damp hair with irons; wait until it’s fully dry before applying heat.
Invest in a lightweight hair dryer that feels comfortable in your hand. High-quality brushes include boar bristles for shine and wide-tooth combs to detangle without breakage. Choose irons with ceramic or tourmaline plates for even heating and less damage.
Different tools give different results depending on your hair type. Thick hair needs stronger tools to get smooth styles quickly. Fine hair looks better with softer tools and gentler heat settings to boost volume without flattening.
3. How to Protect Your Hair from Heat Damage
Use the lowest heat setting that works well for your hair type. Fine or damaged hair needs temperatures around 250°F to 300°F. For thicker or healthier hair, 300°F to 375°F is usually safe.
Avoid settings above 400°F to prevent severe damage. Too much heat breaks down hair’s natural proteins, causing dryness and breakage.
Always apply heat protectant before styling. Spray or spread it evenly over dry hair, covering every strand. Wait a few minutes to let it set and form a protective layer.
This reduces damage by sealing moisture and creating a barrier from direct heat. Skip this step, and your hair can get brittle and frizzy.
Give your hair regular breaks from heat styling to recover. Do not use hot tools every day. Rest days help restore natural oils and repair minor damage.
If your scalp burns when styling the sides, tilt your head and wrap a towel around your neck. This keeps heat tools from touching your skin and avoids painful burns.
Avoid common mistakes like holding hot tools on one spot too long. Moving too slowly can overheat sections, leading to split ends. Also, never style wet hair unless your tool says it’s safe for damp hair.
Wet hair is weaker and burns faster. Use a gentle brush to detangle before applying heat, reducing pulling and breakage.
Using the right amount of protectant matters. Too little leaves parts exposed, while too much can weigh hair down. Aim for a light but full coverage.
Cost-wise, heat protectants usually run from $8 to $20 per bottle, lasting months with normal use. That’s a small price for preventing expensive damage and keeping your hair looking smooth and healthy.
4. Easy Braided Hairstyles and How to Do Them
Braids suit many hair lengths, especially medium to long hair. Braids look neat and last longer with some texture in your hair. Spray a little hairspray before styling to add grip.
Slightly textured hair holds braids better. Here are clear steps for fishtail, French, and crown braids, with tips for neatness.
Fishtail Braid Basics and Variations
The fishtail braid looks complex but uses only two sections of hair. It’s perfect for medium to long hair. You can make it tight for a polished look or loose for a casual style.
Start by dividing your hair into two equal parts. Take a small piece from the outside of the right section. Cross that piece over to the left section.
This moves the braid across. Repeat on the left side, always taking small pieces.
- Separate hair into two equal sections.
- Take a thin piece from the outer right section.
- Cross it over to join the left section.
- Take a small piece from the outer left section.
- Cross it over to join the right section.
- Repeat steps 2 to 5, keeping the pull consistent.
- Secure the end with a hair tie.
Keep even tension on each side to avoid a lopsided braid. To style silky hair, add a bit of texturizing spray first. This helps give your hair grip before braiding.
How to Create a Classic French Braid
French braids suit all hair lengths longer than short bob cuts. They keep hair off your face and add a neat, finished look. Use the roots by adding small sections as you braid downward.
Start at the crown and divide the top hair into three sections. Cross the right section over the middle, then the left over the middle. Add a small piece of hair to the right section before crossing it over.
- Gather hair at the crown and split into three sections.
- Cross right section over the middle.
- Cross left section over the middle.
- Add hair to the right section, then cross over middle.
- Add hair to the left section, then cross over middle.
- Repeat adding hair and crossing until you reach the nape.
- Finish with a regular braid and secure the end.
Use a comb to smooth each section before crossing to reduce bumps. Spray lightly before starting to help hold the braid, especially on fine hair.
Crown and Headband Braids for an Updo Look
Crown braids circle around your head, acting like a headband. Dutch braids work great here because they stand out more. Medium to long hair works best for this style.
Start by parting your hair to one side. Take a Dutch braid beginning near the part, crossing strands under rather than over. Continue around your head and pin the end behind your ear.
- Part hair slightly to the side to plan your braid line.
- Grab a section near the part for your first braid section.
- Divide into three and cross strands under (Dutch braid).
- Add small hair pieces from both sides as you braid around your head.
- Keep the braid close to the scalp and tight.
- Finish the braid at the nape or behind the ear.
- Secure with bobby pins or a small elastic band.
Pin carefully so the braid lays flat. Check your braid in the mirror and gently tug at loops to make it fuller. Use hairspray to prevent flyaways for a polished look.
5. Quick Updos That Work for Short, Medium, and Long Hair
Quick updos can save time and look neat no matter your hair length. You can pick styles that suit short, medium, or long hair easily. Securing them right means they’ll last all day without slipping.
Messy Buns for Short to Medium Hair
Messy buns work great for short to medium hair because they’re fast and flexible. They disguise awkward layers or shorter pieces that want to fall out. Using a few bobby pins helps keep everything in place comfortably.
Start with hair washed the day before for better grip. Gather your hair loosely at the crown or nape, then twist and wrap into a bun. Pin stray ends or flyaways, and finish with light hairspray if needed for hold.
- Gather hair into a loose ponytail with your hands.
- Twist the ponytail around its base to form a bun.
- Secure the bun using bobby pins around the edges.
- Pull a few strands loose around your face for softness.
- Lightly spray hairspray to set the style without stiffness.
Skip hairspray if your hair feels dry or brittle to avoid damage.
Elegant Low Rolls for Long Straight Hair
Low rolls are polished and suit long, straight hair best. They work well for the office, events, or when you want a clean look. This style keeps hair off the face and neck while staying comfortable all day.
Begin by brushing out tangles, then gather hair at the nape. Roll the ponytail upward and tuck it under itself. Use pins to hold the roll firmly in place.
Then wrap a silk scarf over it. A hair net also helps keep flyaways down.
- Brush hair smoothly to remove knots and tangles.
- Tie hair into a low ponytail near the neck.
- Roll the ponytail up toward the scalp, creating a coil.
- Secure the roll with bobby pins hidden inside the hair.
- Optionally, wrap a thin scarf or use hairspray for extra hold.
Pin tightly but gently to prevent headaches or pulling.
Half-Up Twists and Braided Updos for Versatility
Half-up twists and braids fit all hair lengths and add interest quickly. These styles feel fresh but take just minutes. You can twist just the front or braid small sections to dress up everyday looks.
Separate the top half of your hair and secure it temporarily. Twist or braid this section, then secure with a scrunchie or clip. These grips work best on hair washed the day before.
They hold well on curly hair. They also work on straight hair.
- Part hair horizontally and clip the bottom half out of the way.
- Take small strands from each side at the crown.
- Twist or braid these strands toward the back of your head.
- Secure the twisted or braided section with a scrunchie or clip.
- Release the bottom half and blend all hair smoothly.
Use a light styling product on curls before braiding to reduce frizz.
6. Styling Different Hair Textures Effectively
Different hair textures need tailored styling to look their best. Straight hair tends to get weighed down by heavy products. Choose lightweight sprays or mists instead, which help keep your hair bouncy and natural.
For wavy hair, use curl cream or sea salt spray. These add volume and define waves. They don’t leave your hair stiff.
Curly and coily hair needs extra moisture to avoid frizz and damage. Use leave-in conditioner or anti-frizz serum on damp hair.
Orlando Pita Well Behaved Anti-frizz Cream Serum smooths hair without heaviness. Dry hair fully before styling to stop puffiness and frizz.
Heat settings matter a lot for different hair thicknesses. Fine hair styles best at 250 to 300 degrees Fahrenheit. Thick hair can handle up to 350 degrees.
Apply a heat protectant before styling. Dry most of your hair with a microfiber towel.
Move the heat tools continuously to prevent harm. Limit heat styling to under three sessions per week to maintain hair health.
People with thick hair might want richer creams and oils that add moisture and tame volume. These heavier formulas can weigh down fine hair. So those with thin textures should avoid them.
Make textured, full styles with messy braids or soft waves. These add body without causing frizz. They don’t make hair stiff either.
This method also works on second-day hair needing quick refresh. Focus product use around roots and ends. It helps hair look fresh again.
Keeping curls defined and frizz-free means working with your natural texture, not against it. Use curl creams that promote shape without crunch. Avoid over-brushing, which breaks curls and causes fuzziness.
Sea salt sprays work well on wavy or straight hair. They give a textured, beachy feel.
Your hair won’t feel oily or heavy. Always protect and hydrate your hair regularly for softer, more manageable strands.
7. How Long Does Hair Styling Usually Take?
Simple updos and braids usually take between 5 to 15 minutes. A basic braid can take only 3 to 5 minutes. It gets easier with practice.
You’ll do it faster over time. More detailed styles take longer, like twisted buns.
These can last about 15 minutes. Sometimes they might take a bit more time.
You can finish some styles in under 10 minutes. Messy buns and low ponytails with a twist work well. Half-up braids also fall into this group.
These styles save time by focusing on just a few styling steps. They also work well when you’re short on time or need a quick refresh.
To speed up your routine without losing style quality, keep your tools and products ready. Use a comb, light styling cream, and hairspray nearby. Avoid rushing your heat styling; methodical sectioning protects hair from damage while saving time.
- Build a simple routine with 3 to 5 steady steps, taking 10 to 20 minutes.
- Practice key skills like simple braiding to unlock many styles quickly.
- Use a giant two-inch curling iron and clips for curls. Set for 10 to 30 minutes.
- Stick to familiar tools and products to streamline your process.
- Do braids when working out to keep hair off your face and mess-free.
- Start styling anchored to another habit, like right after brushing or before makeup.
- On no-wash days, use baseball caps or pigtail braids to save time.
Long or shoulder-length hair offers endless styling possibilities but usually takes more time. Speed depends on knowing the right pace for each step. Moving too fast causes uneven results.
Going too slow can lead to heat damage. Focus on steady, organized sections to get sleek straight or curled hair faster.
Make sure you pick styles based on your daily schedule. On busy mornings, 5 to 10-minute styles keep you looking sharp without stress. You can still look neat without a long routine.
Even short styling can appear polished. Quick styles work for busy days.
8. Common Hair Styling Mistakes and How to Fix Them
Overusing heat tools like straighteners and curling irons can cause damage and frizz. Heat above 350°F can dry out your hair, leading to brittle strands.
Only use heat styling on fully dry hair. Apply a heat protectant spray to avoid damage.
Improper sectioning makes styling harder and results looser. Divide your hair into small, manageable parts before curling or straightening. This helps your style last longer and looks more polished.
Neglecting styling products can leave your hair flat or frizzy after styling. Use a smoothing serum on damp hair to fight frizz. For volume, try a lightweight mousse at your roots before blow-drying.
- Don’t brush dry hair too much to avoid adding frizz.
- Let your hair air-dry or blow-dry completely before styling.
- Slick down front hair with ultra-hold cream for a neat look.
- Secure ponytails with tight elastics at the nape for durability.
- Use scrunchies or clips to keep styles in place all day.
- Apply product evenly to avoid greasy spots or stiffness.
Flat, lifeless hair often happens when you skip volumizing products. Boost your roots with mousse or root-lifting spray. Flip your head upside down while blow-drying to add natural bounce.
Styles fall apart quickly when hair isn’t clean or the wrong products are used. Dirty hair holds styles better but not too greasy. Use texturizing spray or dry shampoo to renew the style on day two.
Always finish with a light hairspray or gel to lock your style and reduce flyaways.
9. How to Style Second-Day or Dirty Hair
Second-day hair often feels oily or flat. But you don’t need to wash it again. Styles like messy buns, loose ponytails, or textured braids work well.
These look great when your hair isn’t freshly washed. They help hide oil and add volume. These styles hide buildup and add some casual volume without showing too much oil.
To add volume without washing, use dry shampoo on your roots. Spray or sprinkle a small amount, wait a minute, then gently massage it in. This helps absorb oil and gives your roots a fresh, lifted look.
For extra texture, lightly tousle your hair with your fingers. Use a wide-tooth comb instead of brushing hard. This avoids flattening your hair.
Products like texturizing sprays or sea salt sprays also work well on dirty hair. Spray a bit onto your strands, then scrunch or twist sections.
This creates movement and volume while keeping oiliness hidden. Avoid heavy conditioners or oils because they can make second-day hair look greasier.
Your hair feels oily and heavy. Try rinsing with water only. Avoid using shampoo to keep your style fresh.
After rinsing, apply a small amount of lightweight leave-in conditioner. Or use a bit of styling cream to tame frizz.
This helps rebuild your hair’s texture. This method refreshes hair without stripping natural oils or drying it out.
For fine or straight hair, use a curling iron set to medium heat. Aim for around 300°F to protect your hair. Curl your ends gently for natural-looking waves.
This adds bounce and volume to otherwise limp second-day strands. Wrap small hair sections around the curling barrel.
Hold each section for 5 to 10 seconds. Then finger comb curls for a soft, natural look.
In the case of wavy or curly hair, work with your natural texture instead of straightening. Use a curl-improving cream to revive waves and reduce frizz. Twist damp hair sections around your fingers.
Pin curls up overnight to keep shape. This refreshes your style without washing.
Managing buildup on dirty hair starts with identifying your hair type. For thick or coarse hair, a stronger dry shampoo with starches or clay might be better.
For thinner hair, use lighter formulas to avoid weighing hair down. Keeping your scalp clean by not overusing products helps, too.
Stretching time between washes saves effort and prevents damage from overwashing. It usually takes a few trials to find products and styles that suit your hair. Try these styling tricks over several days.
Find what keeps your hair fresh and styled best. This helps you skip washing while looking good.
10. How to Maintain Styled Hair Throughout the Day
Use a strong hold hairspray to lock your style in place all day. FOXYBAE HAIR Strong Hold Hairspray works well to keep spikes or curls intact without stiffness.
Spray a light layer evenly from 8 to 10 inches away. Wait, then apply a second mist if you need extra hold.
Flyaways and frizz happen fast, but you can tame them quickly. Dab a small amount of smoothing serum on your fingertips and gently smooth stray hairs.
Avoid smearing too much to keep hair natural. Finish with a quick spritz of hairspray to set the look.
Touch up your style mid-day if you notice volume loss or loose strands. Carry a travel-size hairspray and a small comb or brush in your bag.
Run the comb through your roots to add volume first. Then spray lightly to fix loose pieces or flattened spots.
Restyle only if your hair feels sticky or heavy from product buildup. Wind, humidity, or activity can cause styles to droop or frizz by afternoon. Mist your hair lightly with water to refresh it.
Use a heat tool on low if your hair can handle it. Finish with serum and a bit of hairspray.
Shoulder-length hair or longer? Try redoing a quick braid or swapping ponytails to freshen styles.
For short hair, focus on smoothing edges with serum and reapplying hairspray to tame flyaways. Make sure products match your hair type to avoid greasiness or crunchiness.
Strong hold products usually cost $10 to $20 and last for weeks with daily use. Experiment by week 5 or 6 after styling to find what suits your hair best.
These small steps take only a minute each. They make a big difference for your hairstyle’s look all day.
11. When and Why to Visit a Professional Hairstylist
Styles with intricate braids, tight curls, or updos for weddings should be done by a pro. These styles need skill and tools that most beginners don’t have. For special events, a hairstylist creates a lasting look for you.
They match it to your hair. They also fit the style to your face shape.
A hairstylist can also improve your daily routine by suggesting cuts and styles that save time. They help you choose haircare products and tools tailored to your hair type and lifestyle. This guidance makes styling easier and your hair healthier in the long run.
Get a professional trim every 6 to 8 weeks. It helps keep your ends healthy. This also keeps your style looking fresh.
Treatment services like deep conditioning or protein repair help fix damage from heat or coloring. Professionals check your hair’s needs carefully.
They choose the right care to stop breakage or dryness. This helps keep your hair strong.
Visit a stylist for a dramatic color change. They also help if you want a haircut shaping your face. Their skill makes the change safe.
Also, book an appointment if your hair feels brittle, looks dull, or tangles easily. These are signs your hair might need professional care to avoid worsening damage.
Pro styling costs vary by location. Usually, expect to pay $50 to $100 for a blowout. Fancy updos also fall in this price range.
Treatments like keratin or deep conditioning usually cost $70 to $150. These sessions take about 30 minutes to 2 hours, depending on the service.
Stylist work usually lasts longer than home styling because they use expert techniques and professional products. A bad result often means the style doesn’t hold, or damage worsens. Tell your stylist exactly what look you want.
Share your hair’s condition too. This helps get the best results.
Choose a pro hairstylist for complex styles, major cuts, or if your hair needs repair.
Step-by-Step Action Plan for Styling Your Hair
Follow these simple steps to start styling your hair confidently at home. Check each step to make sure you see the expected result.
- Before you start: Choose the right tools for your hair type. Your hair should feel smooth and not tangled.
- Day 1: Practice a basic style like a braid or ponytail. Make sure it looks neat and holds well.
- Day 2: Try protecting your hair from heat damage. Use a heat protectant spray and feel your hair’s softness afterward.
- Week 1: Experiment with updos suited to your hair length. Confirm they stay secure throughout the day.
- Week 2: Style second-day or dirty hair using dry shampoo or texturizers. Your hair should look fresh without washing.
- After 3 weeks: Notice any styling mistakes and fix them by adjusting your technique or tools. Your effort should result in better-looking hair.
- Monthly: Schedule a visit to a professional stylist for advice or trims. Your hair will keep looking healthy and styled well.
Frequently Asked Questions
What Is the Best Way to Style Hair for a Natural Look?
Use minimal heat and light products that improve your hair’s natural texture. Let your hair air dry or use a diffuser on low heat to keep it soft.
How Can I Make My Hairstyle Last Longer Throughout the Day?
Use a setting spray or light hairspray after styling. Avoid touching your hair too much, which can cause frizz and loss of shape.
What Is the Easiest Hairstyle for Beginners to Learn Quickly?
A twisted ponytail or simple braid is easy and fast to do. These styles work well for all hair types and occasions.
How Do I Style My Hair Without Causing Damage?
Always apply heat protectant before using hot tools and use the right temperature. Also, avoid styling damp hair with heat as it can cause breakage.
Can I Style My Hair While It’s Still Damp?
Yes, but damp should be about 60-80% moist, not soaking wet. This makes hair more flexible and easier to shape without damage.
How Can I Add Volume to Fine or Flat Hair When Styling?
Use a lightweight volumizing product and blow-dry hair with your head upside down. Avoid heavy products that weigh hair down and cause limpness.
The Bottom Line
Styling your hair at home gets easier with practice and the right steps. Start with one hairstyle and build from there. Try a simple braid today to see how much you can do yourself.