How to Prepare Natural Shampoo: Simple, Effective Recipes and Expert Tips
Wondering how to prepare natural shampoo that works for your hair? You can make it at home using simple ingredients like baking soda and natural oils. These help clean and nourish your scalp without harsh chemicals.
Begin with a mild liquid base such as distilled water. You can also use herbal tea to make your shampoo. These liquids work well for gentle cleaning.
Add natural moisturizers like aloe vera or honey to keep hair soft and hydrated. These ingredients also soothe dry or irritated scalps. Use around one cup of liquid base per batch to create enough shampoo for several washes.
Adding essential oils improves your shampoo’s scent and targets specific hair issues. Always test each ingredient on your skin for 24 hours to avoid reactions.
Using fresh ingredients means your homemade shampoo won’t last long. So plan to use or refrigerate it within a month.
Key Takeaways
- Gently rub the baking soda shampoo into your scalp. Keep massaging for two minutes to clean thoroughly. This helps remove buildup and oils effectively.
- Simmer water with dried herbs for 10 minutes to create a natural shampoo base.
- Test new ingredients on skin for 24 hours before adding to your shampoo mix.
- Use lemon or sweet orange essential oil to control oily scalp naturally.
- Store homemade shampoo in the fridge to keep it fresh up to one month.
- Pour shampoo mixture into a mold and let it sit for 24 hours to thicken.
How to Prepare Natural Shampoo at Home Step-by-Step

Making your own natural shampoo at home is easy and budget-friendly. You only need a few simple ingredients like liquid castile soap, water, and a nourishing oil. These ingredients clean your hair without stripping its natural oils or adding harsh chemicals.
Use a container with a lid for mixing and storing your shampoo. A funnel helps when pouring liquids, and a measuring cup ensures accuracy. You can add a few drops of essential oils for scent.
Some oils also bring extra benefits to your hair. Choose your favorite scents to make the shampoo smell nice.
- Measure and combine 1/4 cup liquid castile soap and 1/4 cup distilled water. This forms the gentle, cleansing base of your shampoo.
- Add 1 teaspoon jojoba or almond oil. These oils moisturize your scalp and hair.
- Mix gently to avoid too many bubbles. Stir just until the ingredients combine well.
- Add 5 to 10 drops of essential oils if you want a scent. Lavender or rosemary are good choices. Keep essential oils moderate to avoid irritation.
- Pour your mixture into a clean bottle with a lid. A squeeze or pump bottle works well for easy use.
- Shake the bottle before each use to mix the ingredients again. Natural shampoos don’t have preservatives so they can separate. Mixing helps keep the shampoo even and fresh.
- Use about a quarter to half a teaspoon per wash. Massage gently into your scalp and rinse thoroughly with lukewarm water.
This recipe takes under 10 minutes to prepare. It costs just a few dollars to make. The batch lasts for several weeks of shampoo use.
Keep it stored at room temperature and use it within two weeks to avoid spoilage. Try replacing jojoba oil with coconut oil for a different feel.
You can also add aloe vera gel to suit your hair. Adjust ingredients based on what your hair needs most.
Natural shampoo feels different than store-bought versions. It might not foam much but still cleans your hair. Give your hair one to two weeks to adjust.
Avoid adding preservatives since they need special care. Use fresh shampoo batches often for healthy scalp results.
Choosing the Best Liquid Base for Natural Shampoo
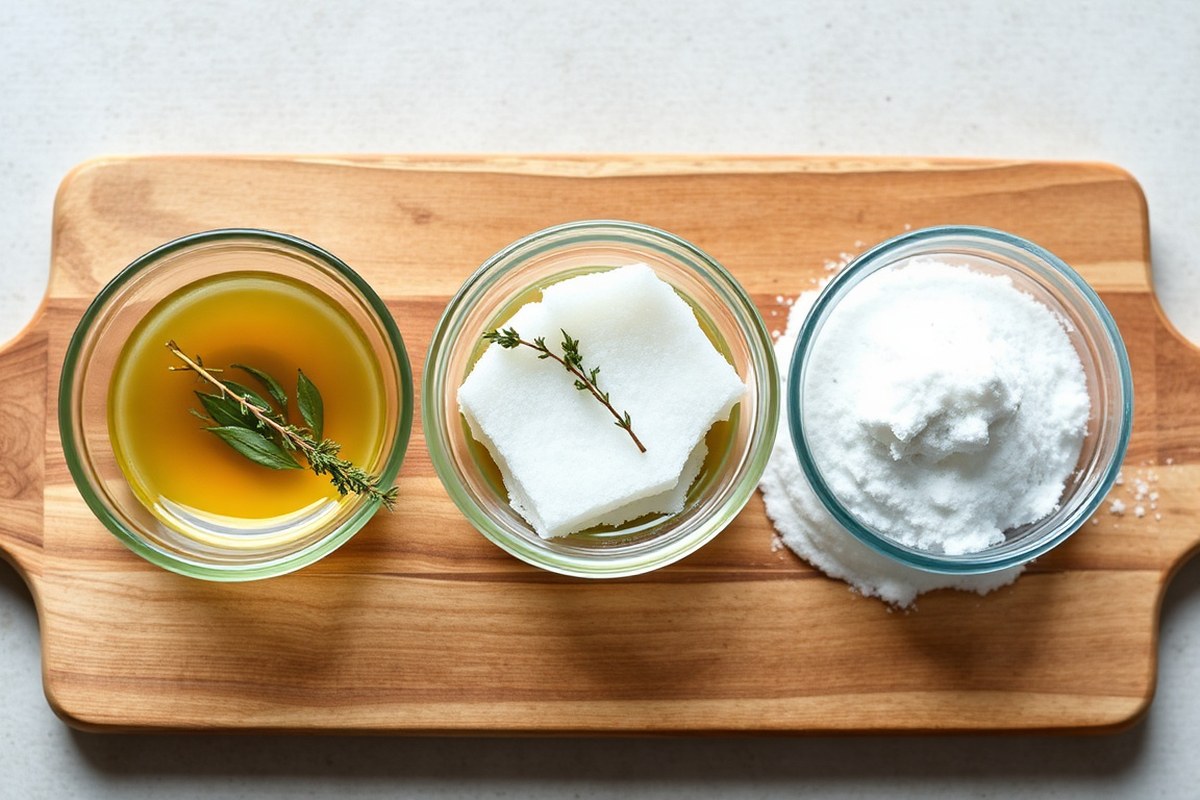
You can use several liquid bases for natural shampoo besides castile soap. Castile soap is common because it’s plant-based and made from olive oil. But it has a high pH of 8 to 10.
This pH is above your scalp’s natural 4 to 5 range. It might cause dryness or irritation for some people.
Herbal rinses made from ingredients like rosemary or chamomile offer a gentler option. They cleanse gently and add natural antioxidants. But they don’t foam well.
They also don’t remove oils like soap bases. For oily hair, an egg-based shampoo works well to cut through excess grease without harshness.
Choosing a base depends on your hair type and scalp sensitivity. Castile soap suits normal to dry hair best. Adding coconut milk or oils helps boost moisture.
For sensitive scalps, herbal rinses mixed with a mild soap or alone can reduce irritation. Oily hair benefits from stronger cleansing bases like egg or simpler blends using apple cider vinegar.
| Liquid Base | Source | PH Level | Hair Types | Benefits | Downsides |
|---|---|---|---|---|---|
| Castile Soap | Plant oils (olive) | 8, 10 | Normal, dry | Biodegradable, foams well, versatile | High pH, may dry sensitive scalp |
| Herbal Rinse | Plants like rosemary, chamomile | Close to neutral | Sensitive, normal | Gentle, adds antioxidants, scalp soothing | Does not foam, mild cleansing |
| Egg Shampoo | Egg whites | Near neutral | Oily, greasy hair | Strong oil removal, natural protein | Short shelf life, may smell |
| Apple Cider Vinegar Blend | Cider vinegar and water | Acidic, lowers pH | Oily, dandruff-prone | Balances scalp pH, reduces oil | Can sting irritated scalp, strong smell |
Mixing castile soap with coconut milk or jojoba oil softens it for dry hair. Use equal parts of soap and water for a thinner texture. Adding half a teaspoon of oil per cup helps keep hair hydrated.
Strain herbal rinses and store them in a bottle. Then mix with soap for gentle cleansing.
Oily scalps respond better to egg shampoos or apple cider vinegar rinses, which cut grease well. These bases remove buildup but need quick use. Make small batches and keep them refrigerated to avoid spoilage and bad smells.
Always dilute castile soap with water before use to prevent scalp dryness and irritation.
Essential Oils and Carrier Oils: What to Use and Why
Adding essential and carrier oils to your natural shampoo boosts scalp health and nourishes hair. Certain oils encourage growth, fight dandruff, and moisturize without greasiness. Use precise amounts to avoid irritation and get the best results.
Top Essential Oils for Hair Health
Lavender oil soothes the scalp and fights dandruff with its antibacterial effect. Tea tree oil offers strong antifungal properties, helping keep dandruff and itchiness at bay.
Rosemary oil helps blood flow on the scalp. This supports healthy hair growth over time.
Citrus oils like lemon improve hair shine and add a fresh scent. Peppermint oil provides a cooling sensation and may reduce scalp inflammation. These oils combine a pleasant aroma with scalp benefits.
- Lavender: calms scalp and reduces dandruff
- Tea tree: anti-fungal, anti-bacterial for dandruff
- Rosemary: stimulates hair growth and circulation
- Lemon or other citrus: brightens hair and adds fragrance
- Peppermint: cools scalp, may reduce inflammation
Using 10 to 15 drops of these oils per 8 ounces of shampoo works well. Blend them carefully for balanced scalp effects and scent.
Choosing Carrier Oils for Different Hair Types
Jojoba oil closely resembles natural scalp oils and moisturizes without weighing hair down. It suits oily or fine hair well. Coconut oil deeply nourishes and protects dry hair but can feel heavy if used too much.
Argan oil adds shine and smoothness, ideal for dry or damaged hair. Castor oil boosts scalp circulation but has a thick texture; use it sparingly. Pick oils based on how your hair responds to heaviness and moisture.
- Jojoba oil: lightweight, similar to skin oils, good for oily hair
- Coconut oil: deeply moisturizing, best for dry hair
- Argan oil: smooths, adds shine, good for damaged hair
- Castor oil: thick, promotes scalp circulation; use in moderation
For oily hair, use half the jojoba amount or leave it out for lighter results. Dry hair may benefit from a small amount of coconut or argan oil mixed in.
Safe Usage and Dilution Guidelines
Essential oils are potent and need proper dilution in your shampoo. Adding 15 to 20 drops per 8 ounces shampoo is common.
It keeps the mix safe and effective. This is about 0.5% to 0.75% total concentration.
Carrier oils should be used between 1 to 5% of the shampoo volume. Measure oils carefully with a dropper or small spoon. Excess oils can cause residue or scalp irritation.
- Essential oils: 15, 20 drops per 8 ounces shampoo
- Carrier oils: 1%, 5% of shampoo volume
- Mix oils thoroughly into shampoo base after it cools
- Test a small skin patch before full use
- Avoid adding oils to shampoo heated above 120°F to preserve benefits
Sticking to these limits avoids irritation and maintains shampoo quality. Adjust based on how your scalp reacts to the blend.
Tailoring Natural Shampoo to Your Hair Type and Issues
Adjusting your natural shampoo helps it tackle your hair’s unique needs. Oily hair benefits from balancing ingredients. Dry hair needs more moisture.
Dandruff and sensitive scalps require soothing, anti-fungal agents. Here’s how to tweak your shampoo recipes for each type.
Formulas for Oily Hair
Oily hair needs cleansing that controls grease without stripping your scalp. Strong oils can weigh hair down.
So use lighter carriers such as jojoba or grapeseed oil. Citrus oils like lemon or grapefruit help balance oil production.
Baking soda works as a clarifying agent to break down excess oil. Massage the baking soda shampoo gently into your scalp for two minutes.
Don’t use it too often. Baking soda can dry out your hair.
- Add 10 to 20 drops of lemon or tea tree oil to 8 ounces of shampoo base. Mix well before use.
- Replace heavy oils with 1 teaspoon of jojoba or grapeseed oil
- Add 1 teaspoon of baking soda for occasional deep cleaning
- Use a mild castile soap or gentle surfactant as base
- Limit shampoo use to every other day to avoid scalp dryness
Adjust essential oil amounts to avoid excessive scalp sensitivity. Cut back on oils when the shampoo feels heavy or greasy.
Recipes for Dry or Damaged Hair
Dry hair thrives on moisturizing ingredients to restore softness and shine. Coconut oil, glycerin, aloe vera juice, and honey lock in moisture effectively. Avoid harsh detergents that strip natural oils.
A gentle castile soap combined with aloe vera powder keeps the scalp balanced and nourished. Boost your recipe with raw shea butter or argan oil to strengthen strands and reduce breakage.
- Add 1 tablespoon natural honey for hydration
- Include 1 teaspoon coconut or argan oil for nourishment
- Use 2 tablespoons aloe vera gel or juice for soothing and moisture
- Choose mild surfactants like decyl glucoside for gentle cleansing
- Wash hair less frequently, about 2 to 3 times per week
Too much oil in your shampoo can make hair limp. Adjust amounts based on how your hair feels after washing.
Dandruff and Sensitive Scalp Solutions
To ease dandruff, add anti-fungal ingredients like tea tree or neem oil. These calm inflammation and reduce flakes. Aloe vera also helps soothe sensitive or irritated scalps.
Choose calming herbs brewed as water infusions, called decoctions, to add to your shampoo base. Avoid strong essential oils if your scalp reacts easily.
- Mix 10 to 15 drops tea tree essential oil per 8 ounces of shampoo
- Add 1 teaspoon neem oil or aloe vera extract for extra soothing
- Use gentle surfactants like sodium cocoyl glutamate
- Include herbal decoctions of chamomile or rosemary for mild cleansing
- Limit shampooing to every 2 or 3 days to avoid irritation
Watch for itching or redness after adding new ingredients. Stop use if irritation worsens.
How to Test and Adjust the pH of Homemade Shampoo
Keeping your homemade shampoo’s pH in the right range protects your hair and scalp. Shampoos usually work best between pH 4.5 and 6. This slightly acidic range matches what your scalp prefers.
Your shampoo’s pH can dry hair or irritate skin if too high. You can test pH at home with simple tools. Use natural acids like lemon juice or apple cider vinegar.
Testing shampoo pH requires pH test strips or a digital pH meter. Strips cost around $5 to $10 and are easier for beginners. A pH meter costs more but gives more precise results.
Test your shampoo when it’s fully mixed. Dip the strip or probe in shampoo. Wait 15 seconds.
Then read the result. Aim for a number from 4.5 to 6.
- Get pH test strips or a digital meter. Also gather lemon juice or apple cider vinegar and a clean container.
- Mix one teaspoon shampoo with two tablespoons water to test easier.
- Dip the pH test strip or meter probe into the diluted sample and wait 15 seconds.
- Match strip color to the chart or read the meter number for pH.
- Decide if the pH is in the 4.5 to 6 range. Add a few drops of lemon juice or apple cider vinegar if pH is above 6.
- Mix the shampoo well and test the pH again after 5 minutes to check the adjustment.
- Repeat adding natural acid in small amounts until the pH falls between 4.5 and 6.
- Store the adjusted shampoo in a clean container, tightly closed and labeled with the pH level.
Adding too much acid can irritate your scalp. Add slowly and test often.
Preservation and Storage Tips to Keep Shampoo Fresh
Natural shampoo made at home usually lasts about two weeks without preservatives. You should store it in a cool, dark place to slow down bacteria growth. Refrigerate the shampoo to keep it fresh for up to one month.
Label each bottle with the date you made it. This helps you track how long it’s been sitting there. Avoid storing your shampoo near heat or sunlight, since both speed up spoilage.
You can add preservatives like Geogard 221 or linatural cosmetic preservative. Both are designed for natural products and help extend the shelf life by weeks.
Follow the manufacturer’s instructions for how much to add. Too little won’t protect, too much could irritate your scalp.
Essential oils also give your shampoo scent and a small amount might help fight bacteria. Still, they don’t replace proper preservatives. Use just a few drops per batch to avoid skin reactions.
Water-based shampoos are more prone to bacteria and mold growth. Use clean containers and avoid introducing water repeatedly into your batch. After about one month, toss any unused shampoo to prevent scalp irritation or infections.
To extend your shampoo’s lifespan without preservatives, make a small batch. Make just enough for one to two weeks. This way, you always use fresh product and reduce waste.
Track the date of each batch. Store shampoo in a cool, dark place.
Adding a natural preservative can also help keep it safe and effective. Skipping these steps risks skin irritation and ruined shampoo faster than you might expect.
Common Mistakes and How to Fix Them When Making Shampoo
The most common mistake is using too much surfactant, which causes dryness and irritation. A gentle cleanser like Perlastan SC25 works best when kept under 15% of the total mix.
Adding essential oils without testing can trigger allergic reactions. Start with 1% or less and do a patch test for 24 hours before regular use.
Shampoo separation or thickness issues usually come from wrong ingredient ratios. Natural shampoos lack commercial thickeners, so they are thinner and separate more easily.
To fix thickness, add small amounts of xanthan gum, about 0.3% to 0.5% of the mix dissolved in water. Shake well before each use to remix separated layers.
Residue buildup often happens when you add too many oils or harsh additives. Oils like castor or coconut work fine but use just 1 to 3% of total ingredients.
Avoid sulfates and parabens, which strip hair oils and harm scalp health. Ingredients like lemon peel or soap nut clean gently without buildup.
- Use 10% to 15% mild surfactant for balanced cleansing.
- Add no more than 1% essential oils; patch test first.
- Include 0.3% to 0.5% xanthan gum to thicken shampoo.
- Limit carrier oils to 1%, 3% to prevent residue.
- Shake shampoo before use to remix any separation.
- Skip harsh sulfates and parabens for scalp safety.
Check the pH regularly to avoid scalp problems. A natural shampoo should stay around 5 to 6. Using acid like a few drops of apple cider vinegar adjusts pH safely.
Making fresh coconut milk as a base ensures no added preservatives. But use it quickly or freeze to keep it fresh.
Switching from Commercial to Natural Shampoo Without Problems
Expect to spend about two to three weeks adjusting to natural shampoo. Your scalp and hair might act differently as they shift from commercial products. Watch for changes like dryness or oiliness, and adjust your care routine as needed.
Initial Transition Weeks
During the first two to three weeks, your scalp starts balancing its oil production. Hair might feel oily or dry at times because commercial shampoo often strips oils away. This natural oil reset is why your scalp reacts during this period.
You can still use your new natural shampoo daily if needed. But pay attention to how hair feels.
Some find rinsing with cool water helps close the hair shaft and reduce frizz. Keep massaging the shampoo into your scalp gently to avoid irritation.
Managing Scalp Detox Symptoms
Oiliness or flakes can appear as your scalp clears buildup from harsh chemicals. Try using a DIY dry shampoo spray or powder between washes to absorb extra oil. These help extend time between washes while your scalp adjusts.
Itching or mild redness may happen but should not persist. Rinsing your scalp thoroughly and avoiding hot water can reduce irritation. Adding a natural scalp rinse like diluted apple cider vinegar can balance pH and soothe itch.
Rinsing with cool water after shampooing helps reduce dryness and smooth hair cuticles.
When to Consult a Dermatologist
If your scalp shows persistent severe itching, redness, or painful sores, see a doctor. Ongoing dandruff that flakes heavily or causes discomfort also needs professional advice. These signs could indicate scalp conditions beyond typical detox adjustment.
Stop using new products and switch back to a gentle shampoo if severe symptoms continue. A dermatologist can help you find safe alternatives that won’t worsen your scalp issues. Quick action prevents lasting damage or infection.
Step-by-Step Action Plan to Make Your Natural Shampoo
This plan helps you prepare your natural shampoo and test it easily. Follow these steps to get the shampoo just right for your hair.
- Day 1: Choose your liquid base and mix with gentle cleanser. The shampoo should feel smooth, not thick or watery.
- Day 2: Add carrier and essential oils tailored to your hair type. Check the scent and oil feel to avoid heaviness.
- Day 3: Test the pH using strips; adjust with baking soda or lemon juice. Aim for a pH between 4.5 and 5.5 for scalp comfort.
- Day 4: Make a small batch and wash your hair with it. Note how clean and soft your hair feels after rinsing.
- Week 1: Store your shampoo in a cool, dark place. Use within two weeks to prevent spoilage and keep freshness.
- Week 2: Observe any scalp or hair reaction. Stop or adjust ingredients if you notice irritation or dryness.
- Week 3: Slowly switch from your old shampoo to the natural one. Use the natural shampoo every other wash and then more often if it suits your hair.
Frequently Asked Questions
How Do I Choose the Right Castile Soap for Natural Shampoo?
Pick a pure, unscented Castile soap for the best results. It cleans gently and won’t dry your scalp or hair. Check that the ingredients list shows only olive or other natural oils.
Can I Add Aloe Vera to Homemade Shampoo?
Yes, aloe vera adds moisture and soothes the scalp naturally. Use fresh gel or pure juice to keep your shampoo gentle. It also helps with dandruff and scalp irritation.
What’s the Best Way to Avoid Shampoo That’s Too Harsh?
Use a mild liquid base like Castile soap and add carrier oils for balance. Avoid detergents or sulfates that strip natural oils. Testing the pH can keep shampoo safe for daily use.
Should I Rinse Natural Shampoo Out with Cold or Warm Water?
Rinse with warm water to remove shampoo without stripping oils. Warm water opens the hair cuticles, making it easier to clean. You can finish with a cold rinse to seal the hair cuticles if you want shine.
How Often Should I Wash My Hair with Homemade Shampoo?
Wash your hair 2 to 3 times a week for best results. Overwashing can dry out hair, even with natural products. Adjust frequency based on your scalp type and lifestyle.
Can I Use Natural Shampoo for Colored Hair?
Yes, natural shampoo is gentle and won’t fade color quickly. Avoid harsh chemicals that strip dye. You can add extra oils to protect and nourish color-treated hair.
Final Thoughts
Naturally made shampoo works well when you pay attention to your hair’s needs. Start creating your formula with simple tests and care. Try your first batch now and adjust for the best results.