

How to Cut Mens Hair at Home: Easy, Step-by-Step Guide for Great Results
Knowing how to cut mens hair at home saves you time and money. You can get a sharp look in just 10 minutes without a trip to the barber. Start by gathering quality tools like clippers with guards and a good pair of scissors.
Setting up your space well helps avoid costly mistakes later. Use a sturdy handheld mirror and plenty of light so you see every angle clearly.
Take your time on the first cut. It often takes 20 to 30 minutes to get it right.
Expect your first few haircuts to be rough but manageable. Using natural men’s hair products can help disguise minor errors and keep your style sharp.
Remember, you can always trim more later. You can’t add hair back once cut.
Key Takeaways
- Choose clippers with guards that cut hair between 0.5 and 6 inches long.
- Use a quality 6-inch hair shear for refining and texturizing the top.
- Set up with bright light and a durable handheld mirror for clear visibility.
- Start your cut with a longer guard size to avoid cutting too short.
- Expect your first DIY haircuts to take 20 to 30 minutes.
- Touch up your haircut every few weeks in 5 to 10 minutes to maintain style.
Essential Tools and Home Setup for Cutting Men’s Hair

Start with clippers that have multiple guard sizes. Clippers handle most men’s haircuts easily and speed up the process. Guard lengths show how short your hair will get.
They range from a close buzz to longer styles. You pick the length you want.
Next, get a pair of quality scissors. Look for sharp blades and a comfortable grip.
Scissors cost between $15 and $50; heavier, sharp ones give cleaner cuts. Avoid dull or cheap scissors that pull hair and cause uneven lines.
A comb and a hand mirror are also must-haves. The comb helps lift and section hair for cutting.
A hand mirror lets you check the back and sides without twisting your neck too much. These tools keep the cut even and neat.
Optional tools can make the job easier, especially for beginners. A neck duster brush clears stray hair from your neck and shoulders.
A cape or old towel saves your clothes. You might also want a trimmer for detail work on around ears and the neckline.
- Clippers with multiple guards for cutting different lengths
- Sharp hair-cutting scissors for trimming and shaping
- Comb for sectioning and aligning hair
- Hand mirror to view hard-to-see areas
- Neck duster brush to remove cut hair
- Cape or towel to protect clothing
- Trimmer for precise edging and clean lines
Set up your cutting station in a well-lit room with a large mirror. Good lighting helps you see hair length clearly and avoid mistakes. Use a sturdy chair without armrests to avoid interference when moving your arms around your head.
Lay out all your tools on a clean surface nearby. Having everything ready prevents interruptions.
Lay newspaper or an old sheet on the floor. It catches cut hair and makes cleanup easier.
Before cutting, wash and dry your hair. This makes hair easier to section and cuts cleaner. Comb hair to remove tangles so scissors or clippers glide smoothly through loops.
| Tool | Purpose | Price Range |
|---|---|---|
| Clippers w/ guards | Main cutting tool for length and shaping | $30, $100 |
| Quality scissors | Detailed trimming and scissor-over-comb cuts | $15, $50 |
| Comb | Sectioning and guiding cuts | $5, $10 |
| Hand mirror | Check sides and back | $10, $20 |
| Neck duster brush | Remove loose hair from skin and clothes | $5, $15 |
| Trimmer (optional) | Clean up edges and hard-to-reach spots | $20, $50 |
Step-By-Step Haircut Techniques for Men’s Styles
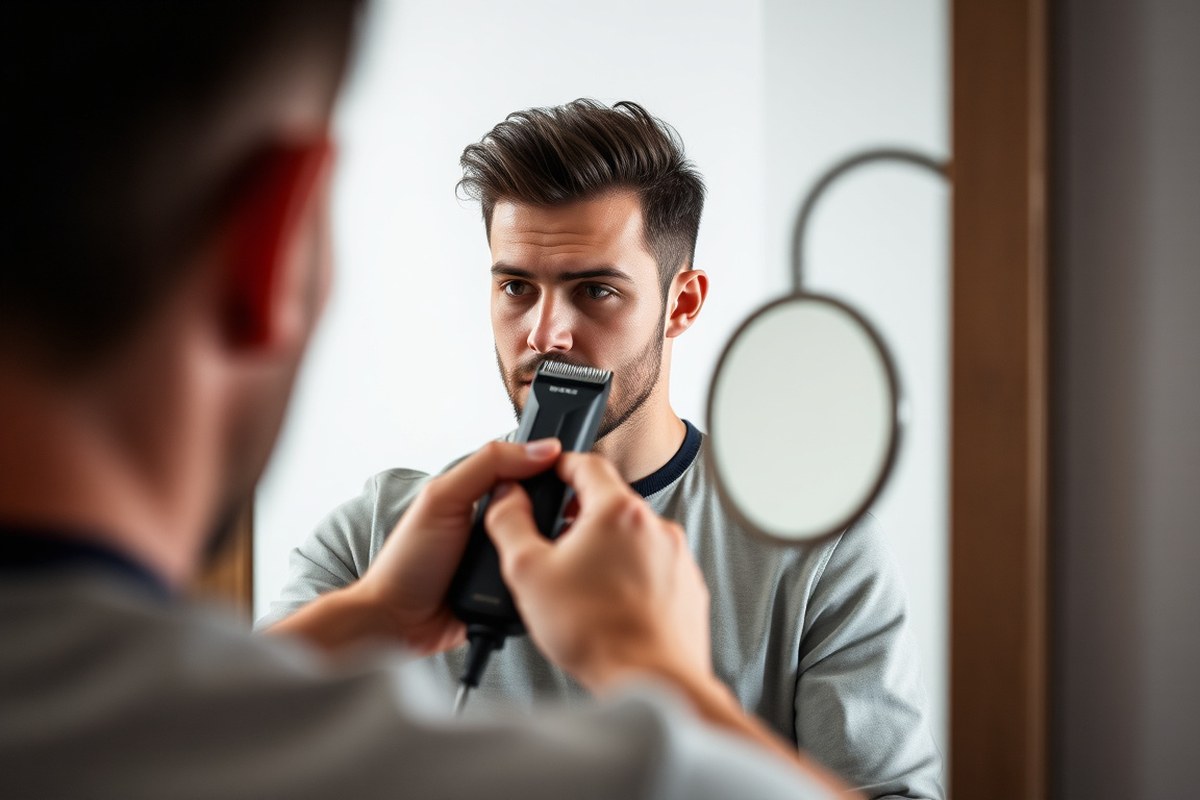
Cutting men’s hair at home works well with clippers for buzz cuts and fades. Scissors come in handy for trims and detailing. You can get a clean, styled look by following a few clear steps.
Uniform Buzz Cut Basics
A buzz cut uses one clipper guard length all over for a neat look. Choose a guard size based on how short you want your hair.
Common sizes are #2 or #3 guards. These cut hair to about 1/4 inch or 3/8 inch.
Here’s how to cut a uniform buzz cut:
- Start with clean, dry hair and detangle with a comb.
- Attach your chosen guard to the clippers.
- Begin at the back of your head, moving clippers upward from the neck.
- Cut the sides by moving the clippers from bottom to top.
- Run the clippers over the top uniformly, keeping strokes against hair growth.
- Check for missed spots and blend if needed by lightly going over those areas.
- Remove the guard and carefully clean up around the ears and neckline.
Cutting too fast or pressing clippers hard can cause uneven patches.
Clippers with Multiple Lengths
For a clipper cut with different lengths on top and sides, use various guards. The top often stays longer, while the sides are shorter. Follow these steps to get a simple fade look:
- Cut the top hair first with a longer guard like a #4 (about 1/2 inch).
- Switch to a shorter guard (#2 or #3) for the sides, cutting upward in strokes.
- Start blending by using an intermediate guard, like #3. Use it around the transition zone between top and sides.
- Use the clipper’s edge or a guard-free setting to carefully taper around sideburns and neckline.
- Comb the hair regularly to check for smooth blending.
- Trim over the ears with scissors or a small trimmer to get clean lines.
Take your time switching guards to avoid harsh lines between lengths.
Neckline and Sideburn Cleanup
Cleaning up necklines and sideburns finishes the haircut and sharpens your look. Use the clippers without a guard or a trimmer for precision. Here’s how to do it right:
- Position yourself in front of two mirrors to see the back clearly.
- Use the clipper or trimmer to outline the natural neckline just above the shirt collar.
- Trim sideburns to match the haircut length and shape them for neatness.
- Check both sides for symmetry by comparing them in the mirrors.
- Clean loose hairs with a brush or damp towel after finishing.
Keeping the neckline natural avoids a harsh, unnatural look after trimming.
How Hair Types Change Your Cutting Approach
Different hair types need different cutting methods to get the best look. Straight hair is easier to manage. Curly and thick hair needs more care.
You also use special techniques on dense hair. Use the right tools for your hair type.
This helps you cut cleaner and even. It also makes your style fit better.
Cutting Straight and Fine Hair
Straight hair lies flat and feeds smoothly through clipper guards. This makes it easier to cut evenly and see any uneven spots. You can use the same guard length all over for a solid, clean look.
Use a cutting comb to hold hair straight between your fingers. Cut straight across using sharp hair scissors to achieve neat lines. Keep your scissors thin to control hair thickness and prevent bending while cutting.
Handling Curly and Coily Hair
Curly hair shrinks a lot after cutting. So clipper guards cut it shorter than on straight hair.
You need a curl-by-curl approach, cutting in layers to avoid a pyramid shape. This keeps the curl pattern natural and balanced.
Work with dry hair and detangle gently before cutting. Cut each curl individually with sharp scissors, following the natural curve. Avoid straight cuts across curls since that leads to uneven length and odd shapes.
Managing Thick and Dense Hair
Thick hair can clog scissors and clipper blades. Clean your tools often during cutting to prevent sticking and pulling. Use thinning shears to reduce bulk evenly without changing the overall length.
Comb hair patiently and cut in smaller sections. This helps you manage the density and see where blending is needed. Blending is key to softening hard lines between different lengths in dense hair.
Here is a quick comparison of cutting approaches by hair type:
| Hair Type | Best Tools | Cutting Technique | Common Issues |
|---|---|---|---|
| Straight & Fine | Clipper guards, thin scissors, cutting comb | Even clipper length, straight scissor cuts | Uneven cuts visible if not careful |
| Wavy | Guards, scissors, comb | Layered cuts, cut when dry for accuracy | Pyramid shapes if cut flat |
| Curly & Coily | Sharp scissors, comb, thinning shears | Curl-by-curl snipping, layers for volume control | Shorter cut length appearance, uneven shapes |
| Thick & Dense | Heavy-duty clippers, thinning shears, comb | Section cuts, blending with thinning shears | Clogged tools, hard cut lines |
This table shows you which tools and methods match each hair type. Know that curly hair appears shorter than straight hair. This happens even with the same guard size.
Remember this when you cut. Thick hair needs extra blending to avoid stiff lines. Adjusting your approach leads to faster, smoother cuts.
Common Mistakes When Cutting Men’s Hair (and How to Fix Them)
One big mistake beginners make is rushing. Cutting too fast often leads to uneven cuts and going shorter than planned. Take your time and work in front of a mirror where you see every angle clearly.
Another common error is trimming the neckline too high. This makes the haircut look sharp and unnatural.
To fix this, start trimming the neckline a little lower than you think is right. Adjust carefully by checking from the back with a handheld mirror.
Uneven hair length is also a top frustration. This happens when you don’t keep your clippers or scissors steady. You might also forget to use the right guard.
Both cause uneven cuts. Use clipper guards that match the length you want.
Move the clippers slowly over small sections. This approach helps you cut evenly.
Blending errors cause patches of shorter hair that stand out. Without a smooth transition between lengths, the haircut looks sloppy. Use the clipper-over-comb method or blend with scissors.
Work slowly, starting from the shortest hair. Move toward the longer areas.
- Trim less at first, cut more later if needed
- Use multiple mirrors for full view
- Choose clipper guards carefully and change as needed
- Hold scissors steady, cutting small sections
- Check your work in natural light
- Blend hair gradually between lengths
- Keep hair dry or slightly damp, not soaking wet
Patience is the best tool. Errors happen but give small fixes a chance before cutting again. Grow your hair out for a few weeks if you cut too much.
Then, try cutting again carefully. Trimming the neckline too high can be fixed by shaving or blending lower.
Check your progress often instead of cutting too much at once. Small, slow adjustments make a haircut better. Good lighting, steady hands, and clean tools also make a big difference in results.
Expect your first few cuts to need some trial and error. That’s normal and part of learning.
When to Skip DIY and See a Professional Barber
Some haircuts demand a professional’s skill and tools. Complex styles like fades, pompadours, or quiffs require steady hands and experience. These styles need precise blending and shaping that’s hard to achieve at home.
Skip cutting your hair if you want a sharp fade. Styles with volume on top need more skill. A barber can do these better.
Professionals know how to create smooth transitions and avoid uneven patches. Home cuts often look rough or uneven when trying these styles.
Special events call for a fresh, polished look. Weddings, interviews, or important dates are moments when a professional cut offers confidence. Mistakes from a DIY trim get worse near a big day.
Fixing them fast is tricky. Seeing a barber is worth it then.
Recognize a bad cut by uneven lengths, harsh lines, or a choppy finish. You spot bald spots or uneven layers on your head. This is usually too hard for a quick fix at home.
Waiting to see a professional is safer in these cases. They can fix or reshape your haircut well. Trying yourself may worsen it.
A good rule is to choose DIY for simple cuts like buzz cuts or basic trims. These styles only require sharp clippers and a steady hand, without blending skills. More complex fades, layered styles, or longer looks are best handled by a barber.
Don’t attempt fades or layered styles at home unless you’ve practiced a lot. Otherwise, you risk unevenness that’s tough to fix.
Maintaining Your Haircut and Tools Between Cuts
Touching up your neckline and sideburns every 1 to 2 weeks keeps your haircut sharp. This prevents overly grown edges and keeps your shape clean. Use clippers without a guard or scissors for precision trims around the hairline.
Cleaning and oiling your clippers after each use protects their blades and motor. Run the clipper briefly to remove loose hair. Then brush out debris with a small clipper brush.
You can also use a toothbrush for this step. Put a few drops of clipper oil on the blades before storing.
This helps reduce friction. It also prevents rust from forming.
- Trim necklines and sideburns every 7-14 days
- Use scissors for longer hair on top between cuts
- Brush clipper blades after each use to clear hair
- Apply clipper oil once a week or after every cleaning
- Store tools in a dry case or pouch to prevent damage
- Test scissors sharpness on paper or hair before cutting
- Sharpen scissors professionally or replace every 1-2 years
Store clippers and scissors in a dry, padded case to avoid damage. Avoid leaving them in humid bathrooms, which can cause rust. Keep scissors separate from other tools to protect their edges.
Checking scissor sharpness before cutting avoids pulling or uneven cuts. You can sharpen scissors with a whetstone or send them to a sharpening service. Blunt scissors cost more by damaging hair and causing frustration.
Replacing scissors depends on use. But many last 1 to 2 years with proper care.
Routine haircut upkeep only takes 5 to 10 minutes every couple of weeks. Use scissors to trim longer hairs on top, combing hair upwards first. Small, careful snips prevent overcutting and keep your style consistent.
Regular trimming between major haircuts delays the need for full recuts. Maintenance payoffs show in a sharp, fresh look without spending much time.
Using the Two-Mirror Technique for Accurate Haircuts
Using two mirrors helps you check the back and sides well. A big mirror on the wall works with a small mirror in your hand. This setup keeps your haircut even and stops you from missing spots.
Setting Up Your Mirrors
Place a large mirror on the wall at eye level. Stand in front of it facing straight ahead. Grab a handheld mirror about 8 inches wide or bigger.
Put the small mirror behind your head. Look at it in the big mirror.
This shows the back of your head clearly. This shows the back of your head to yourself.
Tilt the small mirror to show the back of your scalp. Make sure it doesn’t block your view.
Adjust it until you see all the areas you want. This setup can take a few tries to get right.
- Stand about 6 to 12 inches from a large wall mirror.
- Hold a handheld mirror behind your head at a low angle.
- Adjust the handheld mirror until you see the back of your head in the wall mirror.
- Hold both mirrors steady with both hands or lean your arms on a stable surface.
- Make sure the lighting is bright and even on both mirrors.
- Practice moving your head to see sides and crown clearly in the reflections.
- Keep a towel or barber cape around your shoulders to catch clippings.
Using Mirrors While Cutting
Using the two mirrors lets you see every angle while you cut. You’ll see the back hairline and sides clearly. It stops guesswork and helps avoid uneven spots.
Move the handheld mirror slightly to check different areas. Watch the reflection often to confirm you’re cutting the same length on each side.
Keep your comb and clippers ready. Pull hair straight out with your fingers or comb. Cut small amounts, about ¼ inch at a time, checking angles in the mirrors.
Common Mirror Technique Challenges
Your hands may shake or get tired holding two mirrors. Rest your elbows on a counter or table to stay steady. Take breaks frequently.
Lighting matters a lot. Poor lighting creates shadows that hide uneven spots. Use a bright light source behind or above your large mirror.
Sometimes your mirrors slip or fog up, especially if you sweat. Using a fog-free shower mirror as your handheld one can help with this issue.
Choosing Clipper Guards and Scissors Based on Style and Budget
You pick clipper guards to control the hair length left after cutting. The guard number tells you how short hair will be. A lower number means the clipper cuts closer to your scalp.
For example, a #1 guard leaves about 3 mm of hair. A #4 leaves roughly 13 mm.
Fades and blends need several guard sizes. Start with the longest guard on the top or sides.
Then switch to shorter guards about 1 cm lower each pass. This step-down approach makes smooth transitions between lengths.
| Clipper Guard Number | Hair Length (mm) | Hair Length (inch) |
|---|---|---|
| 0 | 1.5 | 1/16 |
| 1 | 3 | 1/8 |
| 2 | 6 | 1/4 |
| 3 | 10 | 3/8 |
| 4 | 13 | 1/2 |
| 5 | 16 | 5/8 |
| 6 | 19 | 3/4 |
| 7 | 22 | 7/8 |
| 8 | 25 | 1 |
Scissors around 6 to 7 inches work best for men’s cuts. They offer good control without feeling bulky.
Choose scissors with sharp, stainless steel blades. Avoid cheap open-style scissors that don’t close cleanly.
Budget clipper sets usually cost $20-$40 and include a few guards. They do the job for simple cuts but might not last. Premium kits run $80 to $150.
They feature multiple guards, sharper blades, and stronger motors. Pick based on how often you cut your hair and the style complexity.
One mismatched guard size can ruin a fade, so check before each use.
Step-by-Step Action Plan for Cutting Your Own Hair
Follow these steps to get comfortable cutting your hair at home. Check each step by how your hair looks after you finish.
- Before You Start: Gather your tools and set up your mirrors. Make sure the lighting is bright and you can see all angles clearly.
- Day 1: Trim a small section to test your technique. When the haircut is even and fits your style, move on.
- Week 1: Use the two-mirror technique to trim the back and sides carefully. Check your work in both mirrors to catch uneven spots.
- Week 2: Experiment with different clipper guards to adjust length. You’ll know it worked when your style feels balanced and looks neat.
- After 3 Weeks: Maintain your cut by trimming regrowth slightly. When it keeps your hair fresh and neat, you’re doing well.
- Monthly: Clean and oil your scissors and clippers. Sharp tools prevent uneven cuts and make the job easier.
- Every Time You Cut: Avoid common mistakes like cutting too much at once. Stop if you see uneven spots and fix them before moving on.
Frequently Asked Questions
How Long Does It Take to Get Good at Cutting Your Own Hair?
Expect your first few haircuts to look rough. It usually takes several attempts to get comfortable and neat with scissors and clippers. Patience helps you improve with each cut.
Can Hair Color Affect How I Should Cut My Hair?
Hair color doesn’t change cutting technique much. However, if gray strands show after cutting, blending them with a root touch-up kit can help. This product covers roots quickly at home.
What Is the Best Way to Keep Hair Even When Cutting at Home?
Pull your hair straight out from the scalp and cut little at a time. Cutting small sections (about 1/4 to 1/2 inch) helps avoid uneven spots. This method improves control and accuracy.
How Often Should I Sharpen or Replace My Barber Scissors?
Sharpen your scissors every 6 to 12 months, depending on use. Dull scissors tug hair and give a rough cut. Proper maintenance keeps your haircuts smooth and professional-looking.
Are Cordless or Corded Clippers Better for a Beginner?
Corded clippers provide more consistent power, but cordless offer easy movement. For beginners, a cordless model is more flexible and easier to handle around the head. Both can deliver good results.
Can I Use Regular Household Scissors to Trim My Hair?
No, avoid household scissors because they often bend hair instead of cutting it cleanly. Use hair-cutting scissors with sharp, thin blades for precise cuts. This prevents split ends and uneven lines.
Key Points to Remember
Cutting your own hair takes practice and patience. But it’s doable with the right steps.
Start small, check your progress often, and keep your tools sharp. Now, set a day to try your first trim with your new skills and tools.


