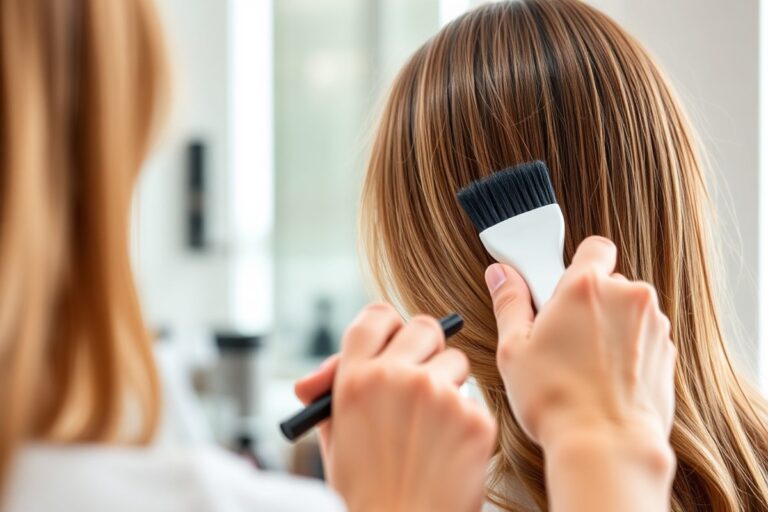
How to Cut Long Layers at Home: 8 Proven Methods for Perfect Volume
How to cut long layers at home is easier than you think. Start by washing and drying your hair completely. This helps you see the true length and texture before you cut.
Decide how much you want to trim off your hair. Start with just 1 to 2 inches. This helps avoid cutting too much at once.
Use sharp, professional scissors for a clean cut, dull blades cause split ends. Section your hair into manageable parts to work evenly. Take your time and cut little by little to keep the layers subtle and natural-looking.
Point cutting is key for blending layers smoothly and avoiding harsh lines. Grab the next section and use your freshly cut layers as a guide. Repeat until all the layers are done, then trim any uneven ends for a polished finish.
Key Takeaways
- Wash and dry your hair before cutting long layers at home.
- Trim only 1 to 2 inches at first to avoid big mistakes.
- Use sharp, professional-grade scissors for cleaner cuts.
- Section hair into parts to cut layers evenly.
- Point cut to blend layers and soften edges.
- Use freshly cut layers as a guide for the next sections.
1. How to Cut Long Layers at Home Step-by-Step

Cutting long layers at home is easiest with the ponytail method. This way, you avoid choppy layers and save time. You’ll section your hair into a ponytail, cut carefully, and check your work as you go.
Before you start, gather sharp hair scissors, a comb, and a mirror. Work on dry hair so you see the real length. Keep small amounts of hair to avoid cutting too short.
- Comb your hair thoroughly to remove all tangles.
- Gather all your hair into a low ponytail at the front, just below your chin.
- Use a comb to smooth and even out the ponytail, then hold it tightly.
- Decide how much length to cut. For long layers, trim about 1 to 2 inches.
- Cut the ponytail straight across, keeping the scissors horizontal for even layers.
- Release the hair and gently comb through to check the shape of the layers.
- Repeat the ponytail cutting step if you want more layers, loosening the ponytail slightly each time.
- Use two mirrors to see the back of your hair clearly. Check for any uneven spots. Trim those spots carefully to make your cut even.
Cutting about 1 inch per section gives you soft, natural long layers. Cutting more than 2 inches can make layers too short and choppy. Checking after each cut helps catch mistakes early.
The ponytail method works well for straight or slightly wavy hair. It spreads the layers softly and keeps much of your length. Using sharp scissors and cutting slowly prevent split ends and uneven lines.
2. Which DIY Methods Work Best for Long Layered Hair?

For cutting long layers at home, you have a few solid choices. The ponytail method suits beginners with long, straight or wavy hair. Section-by-section cutting works best if you want precise, graduated layers.
Twist and snip is perfect for soft texture. Curl-by-curl finger cutting fits curly hair.
The Ponytail Method
Beginners with long, straight or wavy hair find this method simple. Gather all your hair into a front ponytail. Cut straight across it, trimming no more than an inch with sharp scissors.
It works well on dry hair for straight types and wet hair for wavy hair. Since the whole head is treated as one section, the cut is fast and even. But it can make curly hair look uneven because curls shrink differently once dry.
Section-by-Section Cutting
This is better for medium skill levels and those wanting control over each layer. You divide your hair into sections using clips. Then cut each section gradually, checking length and angle as you go.
It needs more time and patience but gives more natural, flowing layers. This method suits all hair types but takes more practice to do neatly. It’s easier to adjust layer length and angle than the ponytail method.
Twist and Snip Technique
Great for subtle texture, this method works best on fine or already layered hair. You twist small sections of hair and snip the ends lightly. This creates soft, feathered ends and light layers.
It adds volume and works well for adding subtle detail after a basic cut. Only remove around half an inch per twist to avoid choppy results. This technique requires a bit more skill and a steady hand.
Finger Cutting for Curly Hair
Curly hair needs a different approach because curls shrink when dry. Cut your hair dry, curl by curl, instead of pulling it into a wet ponytail. Use your fingers to hold each curl and trim small amounts at the ends.
Finger cutting helps keep natural curl patterns and volume. This method takes patience and time but reduces the risk of uneven, too-short curls. It is safer than traditional straight hair techniques for curly or coily textures.
Match your hair type and skill level using the table below. This will show you the best layering method.
Use it to pick what suits you best. This helps you decide which technique fits your needs and comfort level.
| Method | Best Hair Types | Skill Level | Key Benefits | Risks |
|---|---|---|---|---|
| Ponytail Method | Long, straight, or wavy | Beginner | Quick, even layers | Not for curly hair; shrinkage issues |
| Section-by-Section | All types, including thick or colored | Intermediate | Precise layers; adjustable length | Time-consuming; needs patience |
| Twist and Snip | Fine, layered, or thin hair | Intermediate | Soft texture; volume boost | Can look choppy if overdone |
| Finger Cutting | Curly and coily hair | Intermediate to advanced | Maintains curl shape; natural volume | Needs time and accuracy |
Always use sharp hair cutting shears, not household scissors, for clean cuts.
Choosing the right method saves frustration and uneven layers. Start simple with the ponytail method if new. Move to sectioning or twisting only when comfortable shaping hair length carefully.
3. Best Tools and Preparation for Cutting Long Layers at Home
To cut long layers at home, you need the right tools and preparation. Using sharp professional hair scissors matters because dull scissors cause split ends and uneven cuts.
Aim for hair cutting scissors labeled 5.5 to 6.5 inches long, designed for precision. Avoid regular household scissors, as they crush strands and damage hair.
Before cutting, wash your hair with shampoo and conditioner, then dry it until slightly damp. Damp hair stays in place and makes cutting easier. Comb through your hair thoroughly to remove tangles and knots.
For thick or curly hair, divide your hair into sections. Use clips or hair ties to separate 4 to 6 parts. This helps keep your hair easier to manage.
- Sharp hair cutting scissors, about 6 inches long
- Fine-tooth comb for sectioning and smoothing hair
- Hair clips or elastics to separate hair into sections
- Spray bottle with water to keep hair damp
- Mirror or two mirrors to check angles and balance
- Towel or cape to catch trimmed hair
Point cutting is a popular technique for layers. Hold your scissors vertically and make small snips at the ends using the tips. This softens the edges and prevents a blunt, heavy look.
Start cutting at an angle near your cheekbone and work downward. This avoids a blunt line that looks like bangs and adds natural volume and texture.
Be patient and cut a little at a time. Small adjustments give you more control and better results. Good layers hold their shape and movement even between washes.
Avoid cutting hair completely dry if you want smoother layers, except when trimming split ends. Well-prepped, clean, slightly damp hair lets your scissors glide smoothly and cut evenly every time.
4. How to Cut Long Layers on Different Hair Textures
Long layers add movement and dimension to all hair types but cutting techniques differ by texture. Straight and wavy hair cuts smoother, softer layers when wet or slightly damp. Curly and coily hair needs dry cutting to avoid shrinkage and preserve natural curl patterns.
Cutting Straight and Wavy Hair
Straight and wavy hair works best when sectioned into ponytails or smaller parts. Start by clipping up the top sections and trimming the bottom layer first. This keeps the layers smooth and helps you control the length and shape.
Cut sections while your hair is damp for precision. Wet hair lays flat, making it easier to create gradual, blended layers. Use point cutting at the ends to soften the layers for a feathered look.
Wavy hair can be cut similarly but allow it to air dry a bit first. This keeps natural waves under control.
It stops layers from being too short. Too-short layers can look choppy when the hair is dry.
Cutting Curly and Coily Hair
Cut curls dry, one strand or section at a time. Wet curls stretch out and shrink once dry. Cutting wet curls may lead to uneven layers.
Dry cutting reveals the hair’s true length and shape. It stops layers from getting much shorter than expected. This method helps avoid unpleasant surprises.
Use finger cutting to manage curls easily. Twist or hold curls with your fingers while trimming. Snip small amounts for better control.
This technique helps preserve curl definition and avoids poofy or uneven layers. Take your time and cut small pieces, checking often how curls fall naturally. Avoid cutting too many curls at once since each one can behave differently once dry.
Curly layers are best where you want movement. So don’t remove too much weight at once.
You want to keep the natural bounce without cutting into the curl structure or causing frizz. So be gentle and patient with the process.
Adjusting Cutting Angles
Cutting angles affect how hair moves after the cut and how layers fall. For straight hair, cut at a slight diagonal. This softens edges and adds smooth flow.
The hair looks more natural with this method. Vertical or angled snips avoid blunt horizontal lines that look too harsh.
For curly and coily hair, avoid blunt cuts that cause poofiness. Instead, use point cutting and vertical slicing to blend layers gently. Hold hair at about a 45-degree angle.
This makes softer edges that match natural curls. It improves how the layers blend in.
Working with your hair’s natural behavior means checking how it falls when dry. Cut small sections and adjust angles as needed to avoid choppy results. Layer angles that work well on straight hair may need softening techniques for curly textures.
5. How to Add Face-Framing Layers at Home
Cutting face-framing layers at home adds volume and softens your features. You shape these layers by trimming front sections shorter than the rest. The goal is smooth blending to avoid harsh lines.
Choosing the Right Length for Face Frames
Pick shortest layers that fall around your chin or cheekbones. This length helps highlight your face shape and adds movement. For example, chin-length suits most face shapes for a natural look.
The length depends on your face shape too. Round faces soften with layers around the cheekbones. Longer faces benefit from chin-length layers to add width.
Pulling Sections Forward to Cut
Start by parting your hair down the middle. Pull front sections of hair forward along your hairline. This isolates the pieces you’ll cut to frame your face.
Hold the sections straight down and keep fingers steady. Cutting at a slight angle following the hairline shapes a soft frame. Avoid cutting too much at once to prevent uneven results.
Blending Front Layers with Longer Hair
Use point cutting to blend layers smoothly into the longer hair. Hold vertical sections naturally and trim with scissors angled slightly inward. This breaks up thick edges for a soft finish.
Take the shortest layer as a guide and trim the surrounding hair to match. Lightly slide cut the lower front pieces for extra face framing. Dry your hair and make small adjustments to blend any uneven spots.
- Part your hair down the middle and comb the front sections forward.
- Decide the length for face framing, usually around chin or cheekbones.
- Hold a vertical section straight down and cut at a slight angle following your hairline.
- Use point cutting by snipping upward into the ends for softer edges.
- Pull adjacent hair sections forward and trim them, blending to the shortest piece.
- Slide cut lower front strands to add subtle framing movement.
- Dry your hair and check for uneven spots.
- Point cut again to even out layers and ensure a natural transition.
Always cut less hair first; you can trim more if needed. But you can’t add hair back.
6. Common DIY Layering Mistakes and How to Fix Them
One common mistake when cutting long layers yourself is skipping regular length checks. This usually causes uneven layers that look blunt or stacked, rather than soft and blended. To fix this, comb hair back to its natural position every time.
Do this after finishing each section you cut. This keeps layers even and neat. This helps to see if the layers blend well or if one section is too short.
Another problem is cutting too much at once. A good rule is to start small, like trimming 1 to 2 inches at a time. Avoid cutting again right after making a layer too short.
Give your hair some time before fixing mistakes. Waiting a few days helps you fix uneven cuts better.
Use light point cutting then to soften choppy edges. This also blends overcuts more naturally.
Uneven front layers are especially tricky. You can fix too short or uneven layers by cutting bangs. This works well if you’re cutting bangs for the first time.
This reshapes the front and creates a fresh, intentional look. Cutting bangs hides uneven lengths by covering them up. It also creates a new style for your hair.
- Check lengths often by combing hair back after each section
- Cut slowly, no more than 1-2 inches at once
- Use light point cutting to soften blunt or choppy ends
- For uneven front layers, consider cutting bangs
- Work from crown downward, making each lower section slightly longer
- Don’t re-cut immediately if a mistake is small; wait and blend later
When layers look choppy, holding scissors vertically and snipping lightly at the ends helps. This point cutting softens the line and avoids harsh cuts. Keep your angle consistent to avoid creating stacked layers.
Cutting yourself makes it harder to see the back. So use mirrors to check both sides during the process.
For a worked example, imagine you trimmed one side 1 inch shorter by mistake. Don’t cut more on the other side right away. Instead, comb the hair down and snip the longer side gently with point cutting.
Give this blend a day or two and recheck the lengths before trimming again. Patience prevents chopping too much hair off.
7. Tips for Maintaining and Styling Long Layers After Cutting
Trim your long layers every 6 to 8 weeks to keep the shape fresh. Regular trims stop ends from looking frayed and prevent layers from losing their form. Focus on cutting only the top layers; keep the underneath thick to hold volume.
To maintain the layers’ shape between cuts, avoid heavy brushing that flattens your hair. Use a wide-tooth comb to gently detangle your layers without breaking the style. Also, sleep on a satin pillowcase to reduce frizz and keep layers smooth.
For styling, blow-dry your hair with a round brush, lifting sections at the roots. This adds volume right where layers need it most. To keep your natural texture, use light mousse or volumizing spray before drying.
Curly or wavy hair benefits from curl cream or leave-in conditioner to refresh layers. Scrunch your hair lightly after applying these products to define layers without losing bounce. Avoid heavy oils that can flatten curls and hide the layering effect.
Maintaining long layers doesn’t require fancy tools, but sharp shears help a lot. You don’t need a full salon kit.
A good pair of hair-cutting scissors costs $10 to $30 at beauty stores. Use them only for trims to avoid dulling the blades.
Check your layers monthly by pinching small sections and trimming split ends. Do this in good light with clean, dry hair for best results.
Top layers looking flat or uneven? Try a quick trim and some root lift product.
8. When to Stop DIY and Call a Professional Hairdresser
Stop cutting your layers yourself if you notice uneven lengths that look jagged or patchy. This happens when you cut more than an inch at once. You might also forget to blend edges by point cutting.
Skipping blending can make your hair look choppy or bulky. Fixing this is hard to do alone. Trying to fix major mistakes at home often makes things worse and may cause more damage.
Call a professional if you want face-framing layers or a dramatic new style. Stylists are trained to shape layers around your face. It’s tricky to get this right by yourself.
A stylist adds subtle layers just inches from the ends. This creates a natural look for your face and hair texture. Prices usually range from $40 to $100 depending on the salon and location.
Don’t panic if you cut too much hair off or made uneven layers. Avoid further trimming or chopping as it may worsen the cut. Book a consultation with a professional who can reshape your haircut or fix layering mistakes safely.
Fixing cuts may need a small trim or blending point cuts. Usually, this happens in one salon visit.
Cut layers slowly, only trimming about half to one inch at a time. This helps avoid cutting too much.
Stop cutting by yourself if your hair feels damaged or breaks. This shows your hair texture is suffering. Professionals use the right scissors and techniques to minimize damage.
Home scissors or rushed cuts might stress your hair, making it frizzy or uneven. Scheduling an appointment helps you get a clean, healthy finish instead.
A professional haircut is safer for trendy layered styles like bouncy ’90s layers. These require precise angles and blending to avoid messy edges.
Getting it professionally done ensures your layers flow well and look polished. Professional cuts take 30 to 60 minutes and maintain hair health better than DIY attempts.
Step-by-Step Action Plan for Cutting Long Layers at Home
Follow these steps to cut long layers safely and see smooth results fast. This plan sets you up for success on your first try.
- Before you start: Gather sharp scissors, a spray bottle, clips, and a comb. Check that your tools feel comfortable in your hand.
- Day 1: Wash and lightly dampen your hair. Wet hair lies flat and makes cutting even layers easier.
- Day 2: Section your hair into three parts: left, right, and back. Secure with clips to keep your work neat and organized.
- Day 3: Begin cutting the back section first, starting with small vertical point cuts. This shows if your layering technique works well.
- Day 4: Move to the sides, matching the back’s layer length. Compare sections closely to avoid unevenness.
- Day 5: Add face-framing layers by pulling thin strands forward and cutting in small increments. Check your look daily to adjust as needed.
- After 1 week: Style your hair as usual. Notice how your layers fall to decide if you want minor trims or adjustments.
- After 2 weeks: Assess your layers for balance and smoothness. If unsure, ask a friend or stylist for a second opinion.
Frequently Asked Questions
What Is the Easiest Way to Cut Long Layers at Home?
The easiest way is the ponytail method. It works well for straight or wavy hair.
This method is beginner-friendly. It creates soft, natural layers with low mistake risk.
How Do I Avoid Uneven Layers When Cutting My Own Hair?
Use sharp scissors and take your time sectioning hair. Cut small amounts and check symmetry in natural light.
Can I Cut Long Layers on Curly Hair Without Ruining My Curls?
Yes, but finger cutting dry works best for curls. It shapes each curl individually, preserving natural bounce and avoiding choppy lines.
How Often Should I Trim My Long Layers to Keep Them Healthy?
Trim every 8 to 12 weeks to remove split ends. Regular trims keep layers fresh and prevent damage buildup.
What’s a Quick Fix If I Cut My Layers Too Short or Uneven?
Use texturizing scissors to blend harsh edges or soak hair and re-cut slightly when dry. This helps soften mistakes.
Can I Cut Layers Thicker or Thinner Depending on My Preference?
Layering thickness depends on where you cut. It also depends on how much hair you remove each pass. Thinner layers add lightness, thicker add fullness.
Before You Go
Cutting long layers at home works best when you stay calm and take it slow. Start small, observe your hair’s shape, and tweak as needed. Keep practicing and you’ll gain confidence before you know it.