How to Cut Male Hair with Clippers: Step-by-Step Guide for Perfect Results
Figuring out how to cut male hair with clippers is easier than it seems. Start with dry hair and pick the right guard size for your desired length. Cutting the sides and back first helps you control the shape.
Use smooth, upward strokes against the hair growth to avoid uneven spots. Hold your comb at a 90° angle with your non-dominant hand to lift the hair. This method helps guide your clippers for a clean, even cut.
Choose clippers priced between $35 and $60 for good quality without overspending. Avoid cheap models under $20, as they usually don’t offer a consistent cut. Taking your time, expect about 10 to 15 minutes for a neat haircut.
Key Takeaways
- Always start with dry hair to get an accurate cut length.
- Use a longer guard first, like #3 or #4, to avoid mistakes.
- Cut sides and back before the top for better control.
- Lift hair with a comb held at 90 degrees for even trimming.
- Use slow, upward strokes against hair growth for smooth results.
- Spend $35 to $60 on clippers for quality suited to home use.
How to Cut Male Hair with Clippers: Step-By-Step Process
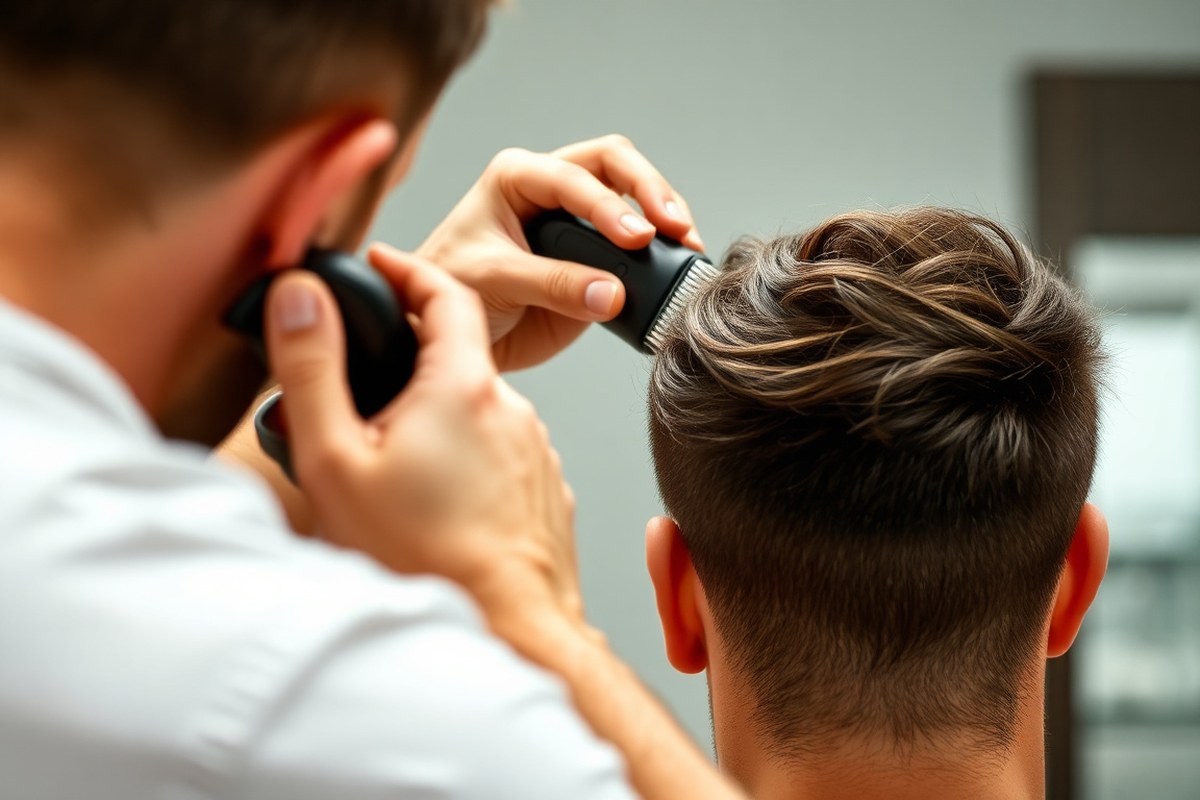
Cutting male hair with clippers works best step-by-step. Start on the sides and back. Then cut the top and blend for a smooth look.
Use longer guards first, then switch to shorter ones as needed. Work slowly upward against hair growth, and adjust guards carefully for each area.
Starting with the Sides and Back
Begin with a longer guard, like #4 or #6, on clean, dry hair. Move the clippers upward in smooth passes against the hair’s growth. This technique helps prevent uneven patches and gives a clean, even cut.
Hold the clipper flat against the scalp and use a C-stroke at the head’s natural ridge. Start at the bottom near the neckline and work your way up toward the crown. Keep your strokes slow and steady for better control.
Cutting the Top Hair
Switch to a longer guard for the top section. Use a #6 or #8 guard to keep length.
Cut the hair carefully by moving the clippers in the opposite direction of hair growth. This keeps the hair looking natural and avoids cutting too short.
Work in small sections from front to back. Use smooth, gentle strokes. Adjust your guard to make the top shorter or longer.
Always start with a longer guard. You can trim more later but can’t add length back.
Blending Transitions and Checking for Evenness
Use intermediate guards between the lengths on the sides/back and the top. This smooths the transition and avoids a harsh line. The clipper-over-comb technique also helps blend uneven spots.
Check your work often with a hand mirror or in natural light. Move the clippers lightly over the blending areas and watch for any sudden length changes. Take your time to get a smooth, gradual fade for a professional look.
Follow these steps for a good clipper haircut at home:
- Begin with dry, clean hair. Use a longer guard, like #4 to #6, on sides and back.
- Cut upward against hair growth in smooth, steady strokes from neckline to crown.
- Switch to a longer guard (#6 or #8) for the top, cutting front to back carefully.
- Use intermediate guards to blend the sides and top, smoothing any harsh lines.
- Apply the clipper-over-comb technique on blending areas for extra control.
- Check evenness often with a mirror and adjust guards as needed.
- Trim sideburns and neckline last, starting from bottom to top for clean edges.
Choosing the Right Tools and Clipper Guards

You need good clippers and a full set of guard sizes. Some basic tools also help you cut hair well at home. These tools make the process easier and cleaner.
Choose the guard based on your desired style and hair length. The guard size controls how short the hair gets. Pick one that fits your look.
Corded and cordless clippers both work. But each has pros and cons for home use.
Essential Clipper Tools for Home Haircutting
Good haircut tools have clippers with guard sizes from 0 to 8. This range lets you cut hair short or longer. It suits many haircut styles.
You’ll also want barber scissors. A wide-tooth comb helps you manage hair between clipper passes. These tools keep hair even and neat.
Cleaning your clippers with a brush and adding oil keeps blades sharp. Sharp blades cut smoothly and don’t pull hair. This care prevents uneven cutting.
A handheld mirror is useful to check your back and sides. A towel or hair-cutting cape keeps hair off your clothes and skin. For neat edges on sideburns or neckline, a trimmer or razor works best alongside the clippers.
Understanding Guard Numbers and Lengths
Each clip guard trims hair to a certain length for precise styling. Smaller guard numbers mean a closer cut, larger numbers leave hair longer. Pick the guard length based on your haircut goal.
Start with a longer guard to prevent cutting too short accidentally. Switch guards as needed to get the right length.
| Guard Number | Length | Style Example |
|---|---|---|
| No guard (bare blade) | 0.5, 1.5 mm (very close) | Very short, almost shaved |
| #1 | 3 mm (1/8 inch) | Very short, scalp visible |
| #2 | 6 mm (1/4 inch) | Short buzz cut |
| #3 | 9, 10 mm (3/8 inch) | Medium short |
| #4 | 13 mm (1/2 inch) | Crew cut |
| #5, 6 | 16, 19 mm (5/8 to 3/4 inch) | Longer, styleable length |
| #7, 8 | 22, 25 mm (7/8 to 1 inch) | Maximum clipper length |
Start at a longer guard number to avoid cutting hair too short. Hair grows out unevenly if you pick guards that are too low early on. Switch guards to blend lengths and create styles like fades or crew cuts.
Use a longer guard than you expect at first. You can always cut more off for a shorter look. This method reduces the chance of cutting hair too short.
Comparing Corded and Cordless Clippers
Corded clippers deliver steady, powerful cutting without worrying about battery life. Brands like WAHL’s 5 Star series offer reliable power for long cutting sessions. Corded models work well if you have easy access to outlets and don’t mind limited mobility.
Cordless clippers let you move freely while cutting in hard spots. No cord gets in the way or restricts your motions. This makes cutting easier.
Their run time depends on battery size, which can last 40 minutes to an hour. Some models include quick-charge features to reduce downtime.
For beginners, corded clippers often avoid the frustration of losing power mid-cut. Cordless clippers are great for convenience and travel. You will need to recharge and watch battery life during longer cuts.
Plan accordingly for smooth use. Choose based on your haircutting space and style.
Preparing Hair and Workspace for the Best Cut
Start your haircut with clean hair that’s mostly dry. Washing first removes oils and dirt that make cutting hard. Prepare a bright, clean space with helpful tools laid out before you begin.
Washing and Drying the Hair
Dry hair cuts best with clippers because it moves smoothly and evenly. Wet hair can clump and cause uneven cutting. If you wash first, towel-dry the hair until it’s just slightly damp.
Cutting damp hair works, but avoid soaking wet hair. Damp hair can stick to blades, making smooth lines tricky. Let hair air-dry for 10 to 15 minutes after towel drying, if possible.
Choosing the Right Workspace and Lighting
Work in a room with bright, white lighting or natural daylight. This helps you see hair lengths and fades clearly. Dim or yellow lights make it tough to spot uneven spots.
Mirrors are a must-have for checking all angles. Use a large wall mirror plus a small handheld one. The hand mirror helps check the back of your head while cutting.
Tools and Accessories Setup
Set up a comfortable chair near a mirror with enough space for your tools. Cover your shoulders with a cape or an old towel to catch hair.
Good airflow keeps you cool and sweat-free during the process. Hair falling on the floor can itch or cause irritation. So use an easy-to-clean surface like tile or wood.
- Clippers with several guard sizes
- Comb for lifting hair and checking lengths
- Cleaning brush to clear clipper blades
- Cape or old towel to catch loose hair
- Hand mirror to view the back of your head
- Soft neck duster or brush to remove cut hair
- Bright light source placed well above or in front
Laying out everything beforehand saves stops and awkward searches. Keep water nearby for cleaning your comb or rinsing hair if needed. Proper setup lowers chances of irritation or missed spots.
Techniques for Creating Fades and Blending Lengths
Start your fade by choosing a guard size for the top section. Use a longer guard, like a #4 or #5, to cut that area first. Then switch to a shorter guard for the lower sections to create the fade effect.
Move down the head in steps, going down one or two guard sizes at a time. This step-by-step guard change creates a smooth transition between lengths. Avoid big jumps in guard sizes because they make harsh, visible lines.
Hold your clippers at a consistent 45-degree angle while cutting. Use a gentle, flicking motion with steady pressure to blend the lengths evenly. Keep your strokes light to avoid cutting too much hair too fast.
For extra smoothing, use the clipper-over-comb technique on any visible lines between lengths. Hold a comb where two hair lengths meet. Glide clippers over the comb’s teeth.
This blends the hair smoothly. This cuts the hair gradually and blends the edges naturally.
Angle the clippers slightly against the comb while using short, controlled strokes. Keep the comb slightly tilted away from the scalp to avoid cutting too short. This method works well around tricky spots like the temples and the back of the head.
Work slowly and check your progress often in the mirror or with a handheld mirror. A line stands out? Go back over it with the comb method.
Or use a guard one size shorter. Patience and small adjustments lead to the best fade results.
Remember to cut dry hair, since wet hair lies flat and may cut unevenly. Clean and oil your clippers after each use to keep blades sharp and protect your skin. Proper clipper care lets you get a smoother fade every time.
Trimming Sideburns, Neckline, and Detailing Edges
Cleaning up edges around sideburns, ears, and the neckline gives a haircut a sharp, professional finish. Use a trimmer without a guard for precise lines in these sensitive areas. Clippers with adjustable blades or small detailing trimmers work best for edging.
Take time to steady your hand and keep the skin taut where you trim. This helps avoid uneven lines and cuts. You want clean edges that match your natural hairline shape.
Avoid jagged spots or stray hairs. Keep the edges sharp and neat. Pay close attention near the ears and neckline because those areas are tricky to reach.
Follow these detailed steps to trim clean edges with confidence:
- Remove the clipper guard to expose the bare blade for detailed edging.
- Comb down the hair around sideburns and ears to clear the cutting path.
- Hold the skin gently tight with your free hand to avoid snagging hair.
- Use the bare blade to carefully trim the hairline along sideburn edges and around the ears.
- Tilt your head forward to find the neckline’s curve. Trim carefully along the natural hairline. Work from one side to the other.
- Check your work from different angles using a mirror or handheld mirror.
- Fix any spots where hair is uneven or too long with small, precise strokes.
- Apply a light pomade or gel to style the hairline. This holds the edges in place. It also shows sharp lines clearly.
Trim slowly around the ears and neckline; rushing often causes uneven lines.
Detailing edges usually takes 5 to 10 minutes after cutting. It’s worth this extra time to get clean, balanced lines. Avoid heavy-handed moves that cut too much hair, especially around sideburns.
Use a professional trimmer for intricate or tricky hairlines. It gives you better control and comfort. It makes styling easier and cleaner.
Maintaining and Caring for Your Clippers
Keep your clippers in top shape by cleaning and oiling them often. Clean blades remove hair buildup that can make clippers pull or snag.
Oil keeps the blades sharp and running smoothly. So cutting feels easy and looks clean.
After every two to three haircuts, wipe off the blades with a dry cloth. Use a small brush to clear out trapped hair between the teeth. Avoid using water or soaking blades, which can cause rust and damage.
Apply a few drops of clipper oil on the blades before and after each use. This prevents friction and heat buildup that dulls blades quickly.
You only need one drop per blade edge. Turn on the clippers for 20 seconds to spread the oil evenly.
- Turn off and unplug clippers before cleaning
- Use a brush to remove hair from blades
- Wipe blades with a dry cloth after every 2, 3 cuts
- Apply 1 drop of clipper oil per blade edge each use
- Run clippers briefly to distribute oil evenly
- Store clippers in a dry, dust-free place
- Check for blade damage and replace if dull or chipped
Store your clippers in a cool, dry area to avoid rust and grime buildup. Keep them in a case or pouch to protect blades from bumps and dust. Avoid leaving clippers where moisture or heat exposure is possible.
If your clippers pull or snag hair, check if blades are clean and oiled. Dry hair cuts better, so make sure the hair is fully dry before trimming. Dull or damaged blades need replacing to keep cuts smooth and snag-free.
Common Mistakes and How to Fix Them
Common mistakes when cutting hair include cutting too much at once, missing spots, and uneven lengths. Cutting wet hair often leads to surprise short spots because it shrinks as it dries. Using the wrong guard or rushing without checking can cause harsh lines or uneven transitions.
Fix uneven spots by going back over them with the same guard you originally used. Move the clippers in short, gentle strokes to avoid cutting too much.
Always comb your hair before using a handheld mirror. Check carefully for loose or missed hairs, especially in the back.
- Cuting too short: avoid by starting with a longer guard first
- Uneven spots: fix by blending adjacent areas shorter
- Missed hairs: find and trim with clipper or scissors
- Harsh fade lines: soften by using intermediate guard sizes
- Rushing: slows good results; take steady, measured strokes
- Wet hair cuts: wait until dry for final check
Your cut looks too short or patchy? Buzz all hair shorter for an even look.
A short buzz will hide rough transitions better than uneven longer hair. This may cost a little hair length but looks cleaner and requires less fixing.
Checking your work throughout saves time and stress. Comb hair regularly to reveal uneven spots.
Stand in natural light or use a handheld mirror to check angles others miss. Fix problems immediately; it’s easier while hair hasn’t settled yet.
Adjusting Techniques for Different Hair Types and Styles
Thick, curly hair needs slower, careful clipper work to avoid pulling. Use a longer guard first, like a #6 or #7, to trim without cutting too short. Hold clippers at a slight angle to follow curls.
Comb through hair between passes. This prevents snagging.
Use shorter guards like #2 or #3 for thin hair. Cut less aggressively to avoid showing scalp. Applying a thickening conditioner daily helps hair appear fuller.
Use clippers steadily without going over twice. This keeps hair natural. Avoid patchy spots.
Buzzcuts are straightforward with clippers alone. Choose one guard size for all hair. Use #1 for close shave or #3 for more length.
It usually takes just 3 to 5 minutes. Crew cuts need more blending on the sides and slightly longer length on top. Use mid-length guard (#4 or #5) on top.
Use shorter guards (#2 or #3) on sides. Trim uneven top spots with scissors.
Combining scissors with clippers works well for styles with texture. After clipping sides, use sharp scissors for top or edges. Cut carefully.
Scissors help with thin hair that needs shaping without thinning or with thick curls needing detail. Don’t use household scissors, they aren’t sharp enough. They cause uneven cuts or damage.
Cut thick or curly hair slowly. Use a comb to stop pulling or uneven cuts.
When to Seek Professional Help Instead
Cutting your hair at home works fine for simple short cuts. You should visit a barber for styles like a skin fade. These look sharp and need skill.
Barbers handle these cuts well. These styles require steady hands and special clipper guards.
Beginners usually don’t have these skills yet. Blending takes practice too.
A professional also handles curly or thick hair better, avoiding uneven patches. For detailed beard trims, barbers use small trimmers and straight razors. This helps make clean, sharp edges.
You get precise lines this way. Those tools and the right technique keep the cut looking sharp.
Here are signs to get professional help instead of cutting yourself:
- You want a multi-length fade with smooth blending
- Your hair is curly or very thick and hard to manage
- The style needs exact lines, sharp edges, or patterns
- You need a quick fix after a home cut gone wrong
- You plan a drastic change from long to very short
- You’re dealing with hair loss or patchy spots
- You want advice on styles that fit your face shape
DIY cuts risk uneven lengths, harsh lines, or missed spots. A bad fade can show thick lines instead of smooth blends, making hair look patchy.
Overcutting takes off too much hair, which takes weeks to grow back. Sometimes, scalp irritation happens if you press clippers too hard or use dull blades.
Barber visits usually cost $15 to $50 depending on your area and style. They take 15 to 45 minutes. You get a haircut tailored for your hair type and face.
Professionals catch mistakes early and fix them before uneven spots appear. For complex cuts, it often saves time and money instead of trying to re-cut at home.
In short, simple cuts with one or two clipper sizes suit home tries. Detailed fades, sharp edges, and tough hair types need pros. They do cleaner work faster.
This saves you time and hassle. Watching some tutorial videos helps. But knowing your limits keeps your hair and scalp safe from damage.
Step-by-Step Action Plan for Your First Home Haircut
Follow these steps to get a clean, sharp haircut at home with clippers. Each step helps you build confidence and check your progress.
- Before you start: Gather your clippers, guards, comb, and a mirror. Make sure the clipper blades are clean and oiled for a smooth cut.
- Day 1: Wash and dry your hair to remove oils and dirt. Dry hair cuts more evenly and shows the true length.
- Minute 10: Start cutting with a longer guard on top to trim length evenly. This sets your base and shows if the clipper runs smoothly.
- Minute 20: Switch guards to blend the sides and back with the top. Check in the mirror for any uneven spots or harsh lines.
- Minute 30: Use no guard or a short guard now. Clean the neckline carefully. Trim around the ears next. This defines your edges for a neat finish.
- Minute 40: Trim your sideburns carefully with a small guard or scissors. Look closely to keep both sides matching.
- After 2 weeks: Assess your hair growth to plan your next cut. Regular trims every 2-3 weeks help maintain the style.
Frequently Asked Questions
How Often Should I Replace Clipper Blades?
Replace clipper blades when they feel dull or pull hair. Sharp blades cut cleanly and avoid skin irritation. Check every few months if you use clippers often.
Can I Cut Male Hair with Clippers While It’s Wet?
Avoid cutting hair with clippers when it’s wet. Wet hair clumps and lies flat, causing uneven cuts. Always dry hair thoroughly before you start.
What’s the Best Clipper Guard Size for a Military Cut?
Use a #2 or #3 guard for a classic military cut. These sizes leave hair short but not skin-close. Start longer and go shorter if needed.
How Do I Prevent Clipper Lines or Harsh Edges?
Blend lines by using a guard between your two clipper lengths. Move your clippers upward and slightly away from skin to soften edges. Use a comb to blend finer areas.
Can I Use Regular Scissors to Help with Clipper Cuts?
Yes, scissors can trim longer top hair or fix uneven spots. Use them after clipping for detail work. Be careful to trim small amounts at a time.
Is It Okay to Share Clippers with Family Members?
Sharing clippers risks spreading germs and scalp infections. Clean and disinfect blades and guards between users to stay safe. Personal clippers are best for hygiene.
Before You Go
Cutting your hair with clippers at home takes practice, but it gets easier fast. Try the first cut with simple guard sizes and light strokes. Once you feel ready, experiment with fades and detailing for a sharper look.