How Do You Make Waves with a Straightener? A Complete Guide for Beginners
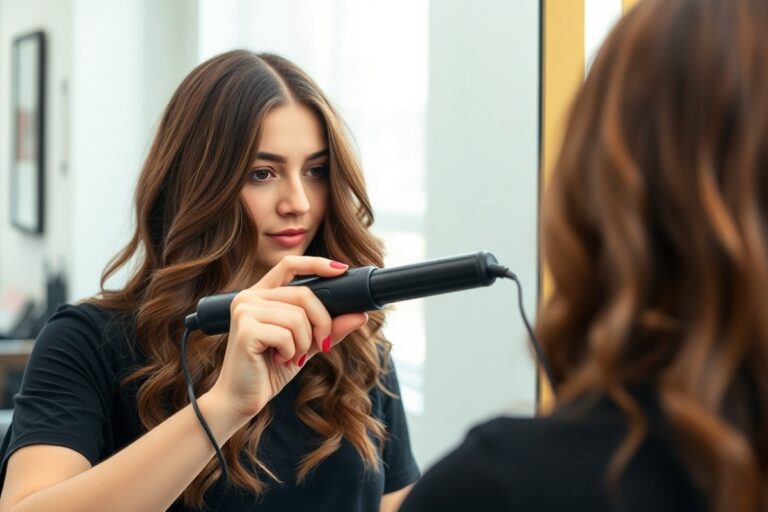
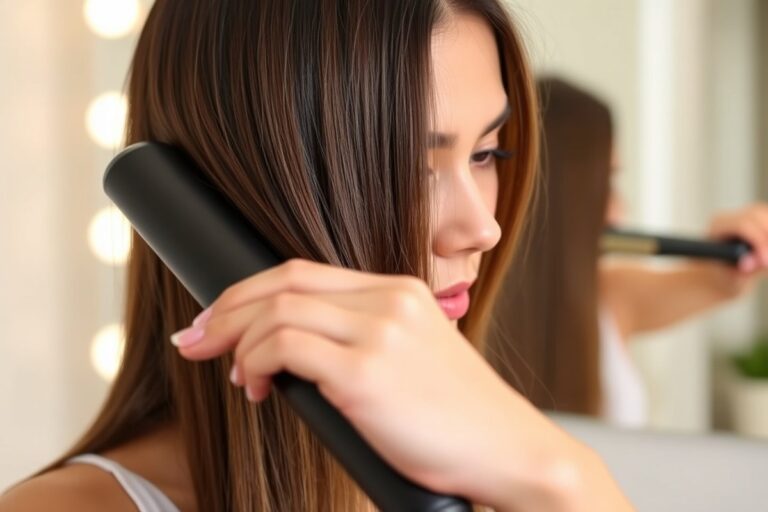
How do you make waves with a straightener? You twist small sections of hair with the flat iron.
Clamping a 1-inch section, then turning the iron 180 degrees creates soft bends and waves. Using a medium heat setting helps protect your hair while styling effectively.
Start by pinching your hair into a gentle S-shape before clamping. Move down the strand slowly to set deeper waves, which makes your style last longer.
Leaving the last 1 or 2 inches straight gives you a relaxed, beachy look. For better hold, work on dry hair without heavy products.
Be sure to prep hair with heat protection to avoid damage. Cool the waves for about 10 minutes before touching them to help them hold.
Alternating the curl direction every section adds natural volume and movement. Finger comb the waves gently to avoid frizz and maintain definition.
Key Takeaways
- Pinch 1-inch hair sections into an S-shape before clamping with your straightener.
- Move the iron down the strand slowly for waves that last longer.
- Keep the last couple of inches straight for a natural beach wave effect.
- Let your hair cool for about 10 minutes to help set the waves.
- Alternate the curl direction in each section for more natural-looking waves.
- Use a heat protectant spray before styling to prevent damage.
How to Make Waves with a Straightener Step-by-Step
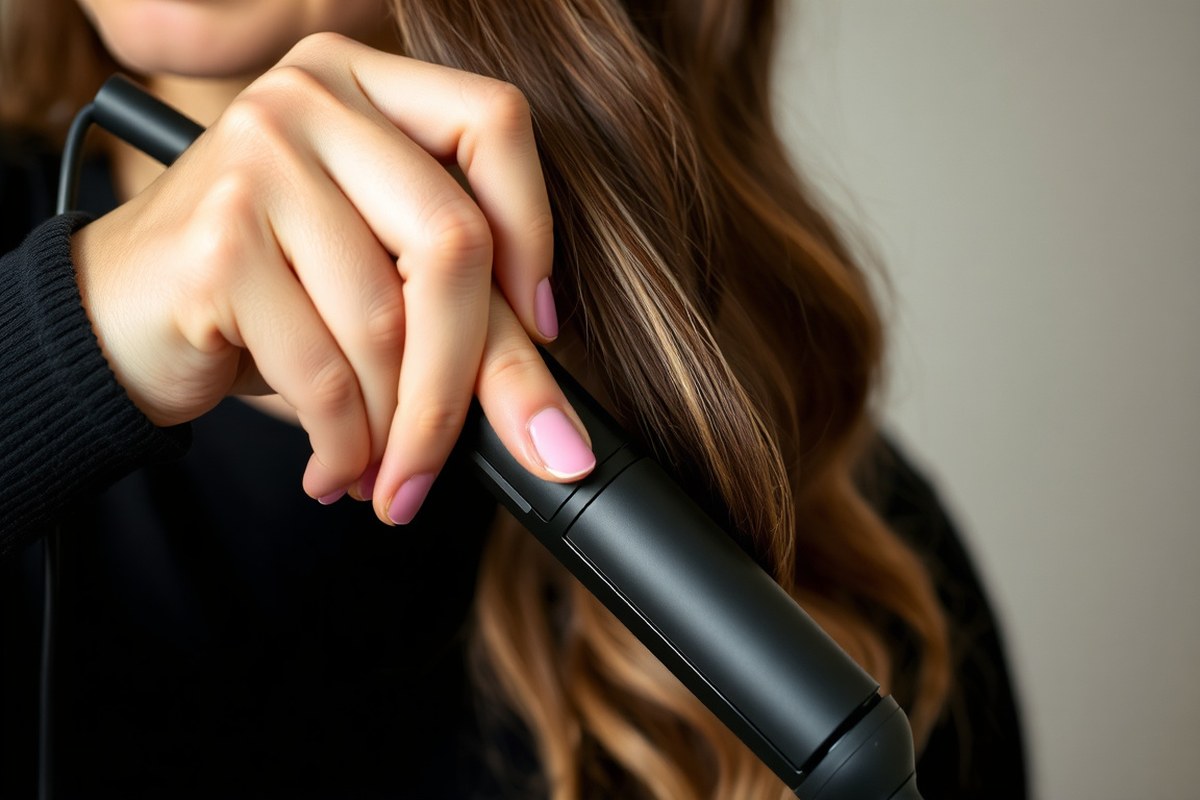
Making waves with a straightener is easier than you might think. It uses twisting and gliding motions to shape the hair into soft curves. You’ll need a flat iron, a comb, and something to protect your hair from heat.
Start by sectioning your hair in manageable parts, usually about 1 inch wide. Smaller sections give better waves but take more time. Hold the straightener horizontally at eye level for control.
- Comb through each section to remove tangles before clamping your flat iron close to the roots.
- Clamp the hair and twist the straightener away from your face. Turn your wrist to create a half turn or “S” shape.
- Slowly glide the straightener down the hair about 1 to 2 inches. Moving slower deepens the wave.
- Release the clamp and move down 1 to 2 inches. Then repeat the twisting and gliding motion along the hair.
- Alternate the direction of the twist as you move down the strand to make natural-looking waves.
- Continue down each section, finishing with all your hair waved in soft bends.
- Use your fingers to loosen the waves for a gentle, flowing look instead of tight bends.
You can vary the size of sections for different wave styles. Larger sections give relaxed waves, while smaller ones create more defined bends. Be sure your hair is completely dry and protected before you start.
Stretch out each wave by moving the iron slower. Twist the tool less for softer waves.
Essential Tools and Products for Straightener Waves

You need a hair straightener with double plates for even heat on your waves. This design heats both the top and bottom of each hair section. It helps create shiny, frizz-free waves that last longer.
Heat protection is essential before using any hot tool. A heat protectant spray forms a barrier on your hair strands. It lowers damage while you style, especially when working on small sections.
You don’t need special brushes, but a wide-tooth comb helps separate waves after styling. Using your fingers adds natural volume and definition.
It doesn’t break the wave pattern. This method works well for a soft look.
- Hair straightener with double plates
- Heat protectant spray or serum
- Wide-tooth comb or fingers for styling
- Sectioning clips to divide hair into 1-2 inch parts
- Optional: salt spray for texture and hold
Sectioning clips make it easier to work on small pieces and control the heat’s effect. Salt sprays add grit to your waves, great for refreshing second-day styles or improving beachy texture.
Always apply heat protectant on dry hair before using your straightener to prevent damage.
Working with smaller hair sections allows heat to distribute evenly. This results in better-defined, uniform waves. Using the right tools and products saves time and keeps your hair healthier.
How to Prepare Hair for Straightener Waves by Hair Type
Preparing your hair right helps waves hold better and keeps hair healthy. Different hair types need tailored care before using a straightener to create waves. This ensures your style lasts without damage or frizz.
Prepping Fine and Straight Hair
Fine hair can struggle to hold waves. So it needs light products and low heat.
Avoid weighing it down with heavy creams or oils, which make waves fall flat. Using less heat also prevents breakage on delicate strands.
Wash your hair with a gentle shampoo and conditioner to avoid buildup. Dry your hair until it’s just damp before styling. Too much or too little moisture can hurt the wave’s hold.
Preparing Thick or Coarse Hair
Thick or coarse hair usually needs more moisture and stronger heat to shape waves. Without proper hydration, waves can look frizzy or fail to form. Use richer conditioners and allow your hair to dry fully to prevent steam damage.
Detangle thoroughly before styling to avoid snagging and uneven waves. This hair type holds heat longer. So keep the straightener moving steadily but not too fast.
Special Care for Curly and Color-Treated Hair
Curly hair needs gentle prepping to keep curls healthy and waves smooth. Use a hydrating shampoo and conditioner designed for curls and avoid over-washing. Let your hair air dry partially before blow-drying on low heat.
Color-treated hair requires extra moisture and heat protection to avoid fading and damage. Use products made for color-treated hair. Keep styling heat under 350°F. Freshly washed hair with light styling products helps waves stay defined.
Using Heat Protection Correctly
Heat protection keeps your hair safe and helps waves last longer. Pick a spray that has a fine mist.
For example, the Oribe Gold Lust Dry Heat Protection Spray won’t weigh your hair down. Apply it evenly to dry hair before styling, covering roots to ends.
Don’t skip this step, even if you use low heat settings. Reapply on fresh styles or after washing. This extra shield reduces breakage and keeps hair looking shiny and healthy.
- Wash hair with a shampoo suited to your hair type to remove buildup.
- Apply conditioner focusing on mid-lengths to ends to moisturize without weight.
- Comb through hair gently to detangle and avoid knots.
- Towel dry then air dry or blow-dry until hair is about 80% dry.
- Spray heat protectant evenly on dry hair before using any heat tool.
- Adjust straightener heat based on your hair type and thickness.
- Create waves while moving the straightener smoothly, avoiding prolonged heat on one spot.
Different Wave Styles You Can Create with a Straightener
You can create several wave styles with a straightener, like S-waves, beach waves, and twisted waves. Each one has a unique look and suits different hair lengths and types. The right wave style depends on your hair texture.
Also, think about how much time you want to spend styling. Your choice should match both your hair and schedule.
S-waves are shaped like a smooth letter “S” and look more polished. Clamp your straightener near the roots. Twist your wrist to curve the hair one way.
Then twist it the other way for a wave. This style fits medium to long hair best. It gives a sleek, vintage feel without too much volume at the roots.
Don’t start the bends too close to your part. This avoids extra height at the top. Keep the bends a little below the part.
Beach waves look messy and loose, with a relaxed, natural vibe. To make beach waves, clamp sections of hair then twist the straightener away from your face. Pull it down slowly while twisting to form soft bends instead of tight curls.
This style works well on all hair lengths. It looks especially natural on long hair.
The waves appear more relaxed on longer hair. Hair that’s too short may not show the loose waves as clearly.
Twisted waves start by twisting two strands of hair together. Then you pull the flat iron down the twisted strands. This creates a spiral wave effect.
It adds texture and looks great on both straight and wavy hair. This style suits short to medium hair best since the twists keep short layers controlled. It takes a bit longer than S-waves or beach waves but gives a unique, defined pattern.
Short hair works well with S-waves and twists. Long hair takes more time and skill for even waves. Short styles handle uniform waves more easily.
Beach waves usually shine on longer hair because the larger waves show off better over length. The table below compares these wave styles by hair length and type:
| Wave Style | Best Hair Length | Hair Types | Key Technique | Look |
|---|---|---|---|---|
| S-waves | Medium to Long | Straight to Slightly Wavy | Clamp & twist in alternating directions | Polished, smooth waves |
| Beach waves | Long mainly, some medium | All except very curly, works best on fine to medium | Twist & slowly pull iron down | Loose, messy waves |
| Twisted waves | Short to Medium | Straight and Wavy | Twist strands, run iron down | Defined spiral texture |
Each style requires patience, especially on longer or thicker hair. The S-waves give a cleaner finish but take a bit more precision in wrist movement.
Beach waves take less effort but need longer hair to achieve the full effect. Twists are a good choice if your hair is shorter or you want a standout texture.
How Long Does It Take and How to Make Waves Last Longer
Making waves with a straightener usually takes about 20 to 40 minutes. The exact time depends on your hair length and thickness. To keep waves fresh all day, set them well.
Use the right products to hold the style. This makes your waves last longer without fading.
Ideal Timing for Each Section
Work with small sections of hair to create well-defined waves. Each section should take about 5 to 10 seconds under the straightener. Rushing this step can lead to uneven waves and shorter hold.
Thick or long hair takes more time to style. You’ll need patience for good waves that hold. Plan extra time when working with these hair types.
Using clips to separate your hair speeds up the process. Avoid clamping down too long, or you risk damaging your hair.
Cooling Hair to Set Waves
After shaping each wave, hold it in your hand until it cools completely. Cooling locks the wave’s pattern into place. You can also pin up each wave while it cools to boost its hold.
Skip touching your hair while it’s still warm. This can cause the waves to fall out faster. Letting your hair fully cool helps the style last longer, especially in humid weather.
Always wait until each section is cool before brushing or styling further.
Best Products for Longevity
Using the right products helps your waves stay for hours. Start with a heat protectant spray before straightening. Then, finish with a flexible hold hairspray to avoid stiffness.
For extra grip, try a texture spray or sea salt spray after styling. These products boost wave definition and prevent limpness. Choose lightweight formulas to avoid weighing down your hair.
- Heat protectant spray before styling
- Flexible hold hairspray after creating waves
- Texturizing or sea salt spray for beachy texture
- Lightweight mousse for extra volume
- Dry shampoo on roots to absorb oil
- Hair clips to set waves while cooling
Don’t overload your hair with too much product. That can make waves greasy or flat. Use light layers and build up only if you need more hold.
Refreshing Waves on Day Two
Days after you create waves, start by misting hair lightly with water or a leave-in conditioner. This awakens the waves without making your hair wet. Then, run your fingers through the waves to reshape them.
Dry shampoo helps absorb oils and adds volume to flat roots. Waves too loose? Quickly reheat small sections with your straightener.
This tightens the waves without starting over. Work on just the parts that need fixing. Braiding damp hair overnight is another easy way to bring back texture.
Do not overuse heat tools on day two to avoid damaging hair.
Common Mistakes When Making Waves with a Straightener and How to Fix Them
Waves fall flat fast if you don’t use enough heat. You also need styling products to help hold the shape. Low heat won’t set the wave shape well.
So aim for 300°F to 350°F on your straightener. Use a light hold spray or mousse before waving.
It helps curls last longer. It won’t weigh your hair down.
Damage and breakage happen when you hold the straightener too long or use too high heat. Clamp your hair section for only 5 to 8 seconds, then release and move on.
Don’t push past 375°F unless your hair is very thick or coarse. Also, invest in a quality heat protectant and apply it every time to reduce damage risk.
Too much product can make waves stiff or crunchy. Clamping hair too tightly also causes this effect. Use just a small amount of product.
Gently glide the straightener through your hair. Don’t clamp too hard. Avoid twisting the tool too much.
Run your fingers through stiff waves. Or apply a light serum to soften them up.
Uneven heat can cause patchy curls or inconsistent texture. Check your tool’s plates for even heating before use. Choose a straightener with ceramic or tourmaline plates for better heat spread.
Comb each section before styling. This stops rough spots. It helps create smooth waves.
Heavy, stiff waves come from tight wrapping or re-clamping hair too often. Clamp near roots once. Slowly twist the straightener away from your face.
Let go gently. This method gives natural, soft waves without crunchiness or stiffness.
Waves can fade mid-day if hair isn’t cooled or set right. After waving each section, hold your hair in a loose clip to cool down. This helps hair keep its new shape.
Spray a light hold finish after styling. This locks waves without weighing them down.
Some forget to prep hair before using a straightener, which affects final wave quality. Start with clean, dry hair and apply heat protectant evenly.
Blow-dry hair completely to avoid damage and uneven curling. This prep saves time and protects strands while giving waves a smooth base to form.
Thicker or curlier hair needs more heat. Always test your straightener settings first. Raise heat gradually and don’t stay too long on one spot.
Use low heat for fine hair. Style small sections to avoid damage and stiffness. Adjust your method based on your hair texture for the best outcome.
How Hair Type and Length Affect Wave Creation and Styling
Short hair can definitely hold waves, but you’ll work with smaller sections. Pick thin layers of hair to curl with your straightener. This method creates fewer waves because the hair simply isn’t long enough for many bends.
For thick, coarse, or curly hair, raise the straightener temperature a bit. Between 350°F and 400°F usually helps smooth and shape waves better.
Use smaller sections and slower passes. That way, the heat can reach every strand evenly without extra damage.
Straight, fine hair tends to take heat quickly. So keep your temperature around 300°F to 350°F. Fine hair also needs lighter product to avoid weighing down the waves. Use mousse or a light styling spray instead of heavy creams or oils.
Curly or wavy hair usually holds styled waves best because of its natural texture. These hair types need more moisture before styling. Product choices like leave-in conditioners or curl creams help keep waves defined without frizz.
For loosely waved hair, use bigger sections and a quick pass with the straightener. Moving faster prevents losing natural movement. Tighter curls need more sections.
Wrap your hair slower around the straightener. It’s like curling a ribbon with scissors.
Healthy hair makes a huge difference in wave results. Dry or damaged hair can look frizzy or break when heated.
Use a deep conditioner regularly and apply heat protectant spray before every straightening session. That keeps hair smooth and helps waves last longer.
Try breaking your hair into 1-inch sections for medium hair length. For thick hair, go as small as half an inch to ensure curls form well.
Hair shorter than shoulder length will get two or three waves per section. Don’t expect many more waves.
After styling, use light hold hairspray to keep waves in place without stiffening them. Heavy sprays can weigh down fine hair and make thick hair crunchy. Pick a spray that matches your hair’s natural feel.
Heat Protection and Safety Tips for Using a Straightener
Protecting your hair from heat damage is key when making waves with a straightener. Using the right temperature and a heat protectant keeps your hair healthy. Regularly checking your tool and knowing when to pause styling can save your strands.
Choosing the Right Temperature
Set your straightener temperature based on your hair type. Fine or damaged hair needs lower heat, usually between 250°F to 300°F. Thick or coarse hair can handle higher heat, around 350°F to 400°F.
Starting at a lower temperature is safer and lets you avoid too much heat at once. Adjust upward only if your waves don’t hold. Avoid going above 450°F, as that risks serious damage to any hair type.
Applying Heat Protectant Correctly
Heat protectant sprays or creams form a barrier against damage. Spray evenly on dry hair before styling, not wet. Let it dry for a minute before you use your straightener.
Apply enough to cover all strands but don’t overload. You want hair to feel coated, not sticky or heavy. Heat protectants usually cost between $10 and $25, which is worth it for preventing breakage.
Signs of Heat Damage to Watch For
Look for dry, brittle hair that breaks easily. Split ends become more common and waves may look dull or frizzy instead of shiny. Hair that feels rough when you run your fingers through it needs a break from heat.
Scalp irritation or redness after styling can mean your temperature is too high. If you see these signs, stop heat styling for a while. Deep conditioning treatments can help hair recover.
Tool Safety and Maintenance
Keep your straightener clean by wiping plates with a damp cloth after use. This removes product buildup that can burn hair. Check the cord regularly for damage to avoid electrical hazards.
Use your straightener on a heat-resistant mat and never leave it on unattended. Replace the tool if it no longer heats evenly or the plates crack. A good straightener usually lasts several years, so invest in quality.
- Air dry hair fully before using the straightener
- Use a heat protectant before every styling session
- Start with a low temperature and increase only if needed
- Check for signs of damage and stop if hair looks unhealthy
- Clean your tool plates regularly
- Avoid using the straightener daily; give hair breaks
- Seek professional advice if hair breaks or scalp burns occur
Never use a straightener on wet hair; it causes breakage and damage.
Step-by-Step Action Plan to Make Waves with a Straightener
Follow these steps to get beautiful waves with your straightener. Check each result to see your progress.
- Before You Start: Wash and dry your hair completely. Your hair should feel clean and dry to avoid damage.
- 15 Minutes Before Styling: Apply heat protectant evenly. Your hair will feel less stiff and smell fresh.
- Right Before Styling: Divide your hair into sections. Each section should be about 1 to 2 inches wide for even waves.
- Styling Time: Use a straightener set to 300-350°F. Clamp a section near the roots. Twist the straightener away from your face. Slowly pull it down.
- After Styling Each Section: Let the waves cool briefly. Gentle finger comb or use a wide-tooth comb to loosen waves if needed.
- Finishing Touches: Apply light hairspray or texturizing spray. Your waves should hold but still feel soft to touch.
- Daily Maintenance: Refresh waves with dry shampoo or touch your hair lightly. This keeps waves alive between washes.
Frequently Asked Questions
Can You Make Waves with a Straightener on Short Hair?
Yes, you can make waves on short hair with a straightener. Use smaller sections and hold the iron for less time for the best results.
What Is the Best Straightener Plate Material for Making Waves?
Ceramic plates work best for making waves because they provide even heat. They reduce damage and help create smooth, natural-looking waves.
How Do You Get Beach Waves with a Straightener Without Frizz?
Use a heat protectant spray before styling to prevent frizz. Finish with a light hairspray or pomade for added smoothness and hold.
Can You Make Waves with a Straightener on Thick, Coarse Hair?
Yes, but you might need higher heat settings and smaller sections. Work slowly to let the heat properly shape the waves.
Should You Twist Your Wrist or Move the Straightener Differently for Waves?
Twist your wrist slightly as you glide down each section to create natural waves. The slower you move, the deeper your waves will be.
Can You Make “S” Waves with Any Straightener?
Most straighteners can create “S” waves with the proper technique. Aim for a smooth S-shape motion while passing the tool down the hair.
Before You Go
Waves from a straightener can look natural. They last longer with the right prep. Make sure to prepare your hair.
Keep practicing the twisting motion to get the waves you want. Try styling your next look using the steps today for easy, fun waves.