How Do I Color My Hair at Home: 9 Essential Steps for Perfect Results
How do I color my hair at home without messing it up? First, pick the right dye type and shade that suits your hair and skin tone. Preparing your hair and workspace well makes the process smoother and gives better results.
The fastest way is to shampoo your hair twice about 24 to 48 hours before dyeing. This clears dirt and buildup, so color sticks better. Also, gather everything before you start to avoid interruptions.
Set aside 1 to 1.5 hours for the whole coloring process from mixing to rinsing. Check your hair color every 5 to 7 minutes during development. This helps you catch the perfect shade as it changes.
Watch closely to avoid over-processing or uneven color. These simple steps can make coloring at home less stressful and more successful.
Key Takeaways
- Shampoo twice 1-2 days before dyeing to remove buildup for better color.
- Choose semi-permanent or permanent dye based on how long you want color.
- Pick a hair color that complements your skin tone and natural hair shade.
- Set up your workspace with gloves, towels, and a timer before starting.
- Allow 1 to 1.5 hours to complete the full hair dye process.
- Check your hair color every 5-7 minutes during dye development.
1. How to Choose the Right Hair Dye Type for You
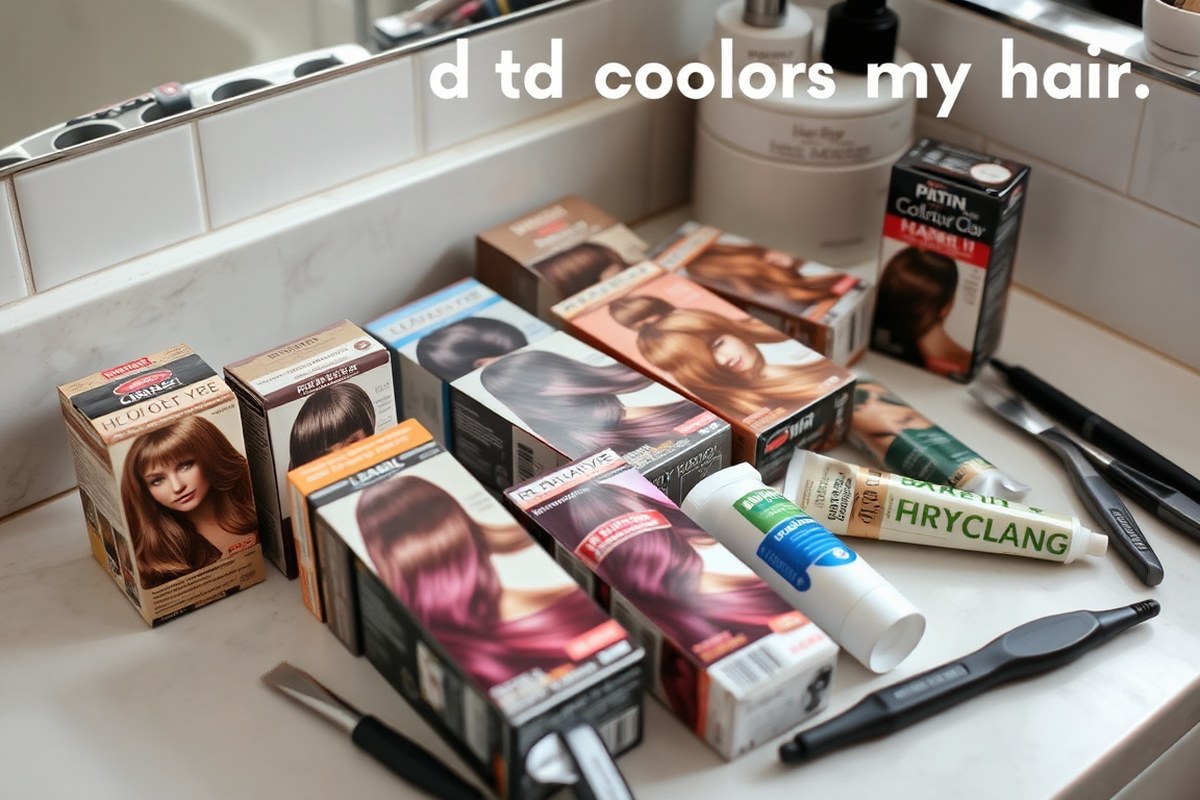
Pick your hair dye type based on what color change you want and your hair’s condition. Permanent dye is best if you want to cover gray hair or go lighter. Semi-permanent dyes coat your hair’s surface, so they fade faster but are gentler.
Temporary dyes wash out in one shampoo, mostly for fun or short events. Demi-permanent dyes last longer than semi but don’t lighten hair. They’re a middle ground for subtle changes without harsh chemicals.
| Type | How it Works | Best For | Expected Result Duration | Cost (Approx.) |
|---|---|---|---|---|
| Permanent | Uses developer to open cuticle and change natural pigment | Gray coverage, lightening, or big color change | Lasts until hair grows out or is cut | $30 (e.g., Madison Reed kit) |
| Semi-Permanent | Coats outside of hair shaft without opening cuticle | Adding or changing color slightly, no gray coverage | 4 to 6 weeks fading with washes | $19 (e.g., Good Dye Young) |
| Demi-Permanent | Penetrates slightly inside hair without full cuticle damage | Refreshing color, subtle tone shifts, no lightening | About 20 to 28 washes | Varies, usually between semi and permanent prices |
| Temporary | Coats hair surface, washes out in one shampoo | Short-term color for fun or events | One wash | Less than $15 |
| Henna | Plant-based, coats and slightly dyes hair naturally | Natural, chemical-free color and conditioning | Varies, can last weeks to months | Varies |
Choose permanent dye if you have more than 25% gray hair or want to go lighter. Use semi-permanent if you want to try color without long-term commitment. Temporary dyes suit quick, fun changes but won’t hide gray or last.
Consider your hair’s condition before dyeing. Damaged hair won’t handle permanent dye well, and semi-permanent is gentler. Highlights often use more precise application and sometimes demi-permanent formulas for a natural look.
Costs vary, with permanent kits around $30 and semi-permanent about $19. Results differ: permanent dyes dramatically alter color and length.
Semi and demi fade gradually. Temporary costs less but lasts just one wash.
2. How to Prepare Your Hair and Workspace Before Dyeing

Preparing your hair and workspace is key for even color and scalp safety. Use clarifying shampoo 24 hours before dyeing to remove buildup without stripping oils. Set aside towels, gloves, and a cape to protect skin and clothing from stains.
Washing Hair Before Dyeing
Wash your hair with a clarifying shampoo about 24 hours before coloring. This removes styling residue and hard water minerals that block dye from soaking in. Avoid washing hair right before dyeing to keep natural oils that protect your scalp.
Do a second shampoo wash 24 to 48 hours before dyeing. Do this only if your hair feels very dirty. This helps the dye stick better.
Clean hair lets color cover evenly without patchiness. Skip shampooing on dye day.
Protecting Skin and Clothes
Wear an old shirt or a hairdresser’s cape to protect your clothes from stains. Cover your workspace with newspaper or plastic to catch spills. Keep paper towels nearby for quick cleanups.
Apply a clear lip balm or petroleum jelly along your hairline and behind ears. This creates a barrier that stops color from staining your skin. Avoid thick creams, which are messy and hard to apply precisely.
Essential Tools and Supplies Checklist
Having the right equipment on hand makes the dye process smoother and less messy. Gather everything before starting to avoid rushing.
- Clarifying shampoo for pre-wash
- Old towel and hairdresser’s cape or old shirt
- Newspaper or plastic sheets to cover surfaces
- Gloves to protect your hands from stains
- Clear lip balm or petroleum jelly for skin barrier
- Plastic or glass bowl for mixing dye (unless using a kit)
- Wide-tooth comb and hair clips for sectioning
Why Clarifying Shampoo Matters
Clarifying shampoo removes up to 84% of product buildup, making hair ready to absorb color evenly. It also helps reduce chemical irritation by keeping scalp oils intact for up to 48 hours. These oils shield your scalp and protect hair protein during the dyeing process.
Use it exactly 24 hours before dyeing; not earlier or on dye day. This timing balances hair cleanliness and scalp oil protection, preventing patchy color and irritation.
Put clear lip balm carefully along your hairline. It stops dye from staining. Avoid thick creams because they spread too much.
3. Step-by-Step Guide to Applying Hair Dye at Home
To color your hair evenly at home, divide it into four parts. Start applying dye at the roots. Work through each section carefully.
Roots go first because your scalp heat makes color develop faster there. Timing depends on your hair type and dye type. Rinsing needs to be gentle to protect your new shade.
Preparing and Sectioning Your Hair
Start by detangling your hair carefully to avoid knots during dyeing. Use clips to split your hair into four parts. Place two clips at the front.
Put two clips at the back. This split helps you reach all areas without missing spots.
Sectioning is essential because it prevents uneven color and patchy results. It also makes applying dye easier and more organized, reducing stress during the process. Skipping this step may cause uneven color in nearly 40% of DIY attempts.
Applying Dye to Roots and Lengths
Apply dye to the roots first. Then spread it down to mid-lengths. Finish by coloring the ends.
The roots get dye first because your scalp’s heat speeds up processing. This helps avoid “hot roots.”” Applying dye all at once can cause uneven color.
For new color, leave dye on roots for 30 minutes if no grey. If grey hair is present, leave it for 40 minutes. Apply dye to roots for 20 minutes during a touch-up with no grey.
Then pull dye through the ends for 10 minutes more. This ensures even coverage and avoids warm roots.
Timing and Checking Color Development
Keep the dye on as your product instructs. Usually, this is 20 to 40 minutes. Follow the timing exactly.
Check hair color every 5 to 10 minutes. Wipe a small section to see how the color looks. Avoid leaving dye on longer than recommended to prevent damage or brassiness.
Thicker or coarser hair may need the full or near-full processing time. Fine or damaged hair might require less.
Timed checks help prevent overprocessing, which can cause uneven color and dryness. Follow the dye’s box directions carefully for your hair type.
Rinsing and Conditioning Properly
Rinse your hair under lukewarm water until the water runs clear to wash out excess dye. Avoid hot water since it can strip color and dryness your hair.
After rinsing, use the conditioner from your dye kit. Or apply a deep conditioner to seal in color.
Leave conditioner on your hair for 3 to 5 minutes. Rinse with cool water to close the hair cuticle.
This step locks in moisture and color while adding shine. Gently towel dry without rubbing to prevent hair damage and maintain softness.
- Detangle hair thoroughly and split into four sections using clips.
- Apply dye starting at the roots first, section by section.
- Work dye down to mid-lengths and ends for even coverage.
- For full color, time 30 minutes from roots to ends. If you have grey hair, leave dye on for 40 minutes.
- For touch-ups, leave dye on roots 20 minutes, then on ends 10 more minutes.
- Check color every 5 to 10 minutes by wiping a small section.
- Rinse with lukewarm water until clear, then apply conditioner.
- Leave conditioner 3 to 5 minutes, rinse with cool water, and towel dry gently.
4. How to Pick the Best Hair Color for Your Skin Tone and Natural Hair
Choose a hair color that matches your skin tone. Also, consider your natural hair color. This helps the color look more natural.
Warm skin tones suit warm hair colors. Cool skin tones look best with ashy shades. Neutral skin tones can wear most colors.
Stay within two shades of your natural hair color. This keeps your look natural. It also makes at-home coloring easier to manage.
Identify Your Skin Undertone
Look at your veins in natural light. Your undertones are cool if your veins look blue or purple. Greenish veins suggest warm undertones.
You likely have neutral undertones if your vein color is hard to tell. This check helps find a hair color that brightens your face.
It avoids washing out your features. This is handy for picking a flattering shade.
For warm undertones, choose colors like golden blondes, honey browns, or rich caramel. They add warmth and make your skin glow.
Cool undertones do better with ashy blondes, cool browns, or even silver tones. Neutral undertones are lucky, you can try almost any color that fits your style.
Match Shades to Your Natural Hair Color
Choose a color close to your natural shade. Change by one or two shades lighter or darker. For dark brown hair, medium brown or warm chestnut looks natural.
Darkening your hair at home is safer if it’s one or two shades deeper. Darker shades also cover grays better and usually last longer.
Fine hair doesn’t suit very dark colors well. Dark colors can look harsh and weigh hair down.
Lightening Hair at Home: What to Expect
Lightening your hair more than two shades is tricky and might require bleach or salon-grade products. To get a subtle sun-kissed look, pick one shade lighter than your natural color.
Kits like Revlon ColorSilk offer good results for gentle lightening. But strong lifting should be left to pros.
At-home lightening takes about 1 to 1.5 hours total, including application and rinse. Overprocessing leads to dryness and breakage, so don’t leave the dye on too long.
Natural oils help protect hair, reducing protein damage during coloring by about 30%. So deep condition after dyeing.
Avoiding Unnatural Colors and Looks
Hair that’s colored too far from your natural tone may look fake. It can also make your hair appear washed out.
Look for shades that complement your undertone, not clash with it. For example, icy blond won’t flatter warm golden undertones as well as a rich honey blonde.
Stay away from extreme or vivid shades without professional help. Bright colors often need pre-bleaching and special care. At home, subtle changes are safer and blend well with your skin tone and hair texture.
Your hair’s condition also affects how the dye absorbs. So damaged hair can result in patchy color.
5. Essential Safety Tips and Allergy Testing Before Hair Dyeing
Doing an allergy patch test is key to avoid reactions. Apply a small amount of mixed dye behind your ear or inner elbow.
Leave it on for 48 hours without washing the area. Avoid washing or rubbing it to get clear results.
Watch for redness, itching, swelling, or burning during the test. If any occur, don’t use the dye on your hair. These signs mean you could have a sensitivity or allergy to the product.
This test usually costs nothing extra. You just use a tiny part of your dye mix.
Protecting your skin during dyeing helps prevent irritation or stains. Wear an old button-up shirt or a salon cape to cover your neck and shoulders.
Apply a thin layer of petroleum jelly around your hairline and ears. This creates a barrier to stop dye from staining your skin.
Never skip the patch test even if you’ve dyed before. Allergies can develop at any time.
Stop immediately during dyeing if you feel burning, severe itching, or notice swelling. Rinse your hair and skin with cool water right away. Seek medical help if symptoms worsen or you feel dizzy or have trouble breathing.
People with sensitive skin or pregnant women need extra caution. Choose ammonia-free or demipermanent dyes to reduce irritation risk.
Also, avoid shampooing 24 to 48 hours before dyeing. The scalp’s natural oils help protect against irritation and chemical damage.
- Mix the dye exactly as instructions say
- Apply a small patch behind ear or elbow
- Leave 48 hours without washing the test spot
- Wear protective clothing and use petroleum jelly on skin
- Stop dyeing immediately if burning or swelling occurs
- Rinse thoroughly if irritation starts during application
- Consult a doctor if allergic symptoms get worse
Following these safety steps helps you avoid skin irritation or allergic reactions. They also protect your scalp and keep the dye job looking good without damage. Taking a little extra time up front saves stress and discomfort later on.
6. Common Mistakes When Dyeing Hair at Home and How to Fix Them
Patching or uneven color happens when dye isn’t spread well. Also, it occurs if your hair isn’t dry before you apply dye. These are common causes for uneven results.
You can fix this by applying dye to the patchy spots only. Use a small brush to be careful and precise. Take your time to cover uneven areas well.
Focus on roots and areas where the color looks lighter. But don’t overlap too much to avoid damage.
Try mixing clarifying shampoo with your regular shampoo to fix dark or brassy dye. Wash your hair with this mix a few times. This helps tone down unwanted colors.
This lightens some of the color gently without harsh chemicals. A quick lemon juice rinse can also help fade brassiness. Avoid shampooing too often, as that dries out your hair more.
Dry or damaged hair after dyeing means it needs extra moisture. Apply a deep conditioner or hair mask made for colored hair.
Leave it on at least 10 minutes, or overnight with a shower cap for better repair. Avoid heat styling tools until hair feels stronger again.
You can fix most color mistakes at home without going to a salon. But don’t try bleach or color removers if your hair is very damaged. Start with gentle fixes like patching roots, clarifying shampoos, or conditioning treatments.
Call a professional if problems don’t go away or you want a big color change. Professionals use safer methods and get better results with major fixes. Trust them for tricky situations.
7. How to Maintain and Prolong Your New Hair Color
Wait at least 48 hours before washing your hair after dyeing it. This pause helps the color set deeply and last longer. Use lukewarm or cold water when you do wash to avoid stripping the color.
Choose shampoos and conditioners made specifically for color-treated hair. These products gently clean without fading your new shade.
Avoid daily washing because water is hair color’s enemy. Aim for every 3 to 4 days if your hair and lifestyle allow.
Dry shampoo is your best friend between washes. It refreshes roots and absorbs oil without needing water. Sprays or powders for root touch-ups help cover gray regrowth.
Use them from week three onward to freshen your color. They work well before your next dye.
Touch up your roots every 6 to 8 weeks for a full head color. Over-processing can damage hair, so focus dye only on the roots next time. Use a lower strength developer on your hair lengths, like level 10.
Apply a stronger one, like 20 to 40, only on the roots. This helps avoid fading your ends.
Limit heat styling to keep dyed hair healthy. When blow-drying or straightening, use a heat protectant spray to shield strands.
Also, avoid sprays or mousse before dyeing because they block color absorption. But once dyed, light styling products designed for color hair are safe.
Investing in a good color care routine costs more time but saves your style. Expect to spend a few extra minutes washing and conditioning with special products each session. This habit keeps your color vibrant and your hair feeling soft, lasting weeks instead of days.
8. How Hair Type and Natural Color Affect Coloring Results
The texture of your hair influences how it absorbs color. Fine hair tends to lighten more quickly.
It might only need 5 to 10 minutes less than the instructions suggest. Thick or dry hair usually needs the entire recommended time to fully take the dye.
Your natural hair color affects how long it takes to lighten. Darker hair takes longer to lift. So expect extra time if you start with deep brown or black hair.
Light hair needs less time to dye. It has less pigment to lift. That lets the new color show more clearly.
Some hair types are tricky to dye evenly. Curly, coarse, or dry hair tends to absorb dye unevenly, causing spotty or patchy color. To avoid this, apply dye in thin, even layers and work methodically from roots to ends.
Change your timing based on hair type for the best results. With fine hair, check the color 5 minutes before the box time ends.
Your coarse hair or ends might not look fully covered. Leave the dye on for the full time or a few extra minutes.
Do a strand test if you’re unsure how your hair reacts to the dye timing.
When lightening hair, patience is key. Rushing the process on coarse or dark hair can cause uneven color or damage. Let the dye develop fully with your hair down for consistent coverage.
Applying dye evenly and timing it right takes practice. Fine hair might show color quickly but can also fade faster.
So use color-safe shampoo afterward. Coarse or thick hair may hold color longer but needs thorough saturation during application.
9. When to Seek Professional Help Instead of DIY Hair Coloring
Complex hair issues like uneven color, severe damage, or bleach damage usually need a pro. These situations require precise techniques and products that you might not find at home. For example, changing from dark brown to platinum blonde often takes several steps pros handle best.
Hair damage beyond dryness or split ends needs salon treatment. Your hair feels brittle, breaks easily, or has uneven texture.
A professional can suggest strengthening treatments or trims. Home dyes can worsen damage, especially if left on too long.
Big color shifts are safer with a colorist. Bleaching, toning, and layering colors cause more damage risk. These big changes raise chances of patchy results.
You need to be careful. A pro plans steps to avoid over-processing your hair.
This service costs more than at-home kits. But it helps keep hair healthier.
Be honest with your colorist about past dye attempts. Tell them the dye brands and shades you used. Mention how long you left the dye on.
Also report any reactions you had. You can say, “I used a copper box dye and left it on for 45 minutes.”
This helps the pro understand your past dye job.” This helps them choose the right products and avoid mistakes.
Use this rule: damaged hair, dramatic color, or patchy changes? Book a consultation before dyeing your hair at home.
Expect to spend $80 to $200 for a session, depending on your area and hair length. Professionals can fix or improve home dye mistakes and plan safe color changes.
Your Step-by-Step Hair Coloring Action Plan
Follow these key steps to dye your hair at home successfully. Each step tells you what to do and how to check your progress.
- Before you start: Do a patch test 48 hours before coloring. No itching or redness means you’re safe to proceed.
- Day of coloring: Prepare your workspace with towels and gloves. Set a timer for the dye application time on the package.
- During application: Apply dye evenly, starting at the roots if you’re touching up. Check coverage under natural light.
- After dyeing: Rinse with cool water until it runs clear. Your hair should feel clean but not harsh.
- First wash post-dye: Use a color-safe shampoo and conditioner. Healthy-looking hair means you did it right.
- Week 1: Avoid heat styling daily to protect your new color. Notice if your color stays vibrant.
- After 2 weeks: Apply a deep conditioning treatment once a week. Your hair should feel soft and moisturized.
- Monthly maintenance: Touch up roots or fade areas as needed. Keep products designed for colored hair on hand.
Frequently Asked Questions
How Long Does It Usually Take to Color My Hair at Home?
Coloring your hair at home takes about 1 to 1.5 hours. This time covers prep, applying dye, waiting, and rinsing. Plan ahead so you won’t feel rushed.
Can I Color My Hair Without Washing It First?
Slightly dirty hair helps protect your scalp and reduces chemical burns. Clean hair helps the dye stick better to your strands.
Natural oils on your scalp protect it while coloring. Oil cushions your skin from irritation during dyeing.
What Should I Do If My Hair Dye Causes an Allergic Reaction?
Stop using the dye immediately and rinse your hair well with water. See a doctor if you notice swelling or bad itching.
Don’t dye your hair without doing a patch test first. A patch test helps avoid allergic reactions.
Is It Necessary to Apply Dye to the Ends Every Time?
Not always; roots need more frequent dyeing, but ends often keep color longer. For touch-ups, start by applying dye only to your roots.
Then spread the dye through the ends for less time. This method saves you effort and product.
How Can I Prevent Uneven Color When Dyeing at Home?
Section your hair and apply dye evenly to each part to avoid patchy spots. Using your fingers and a comb can help spread color better for full coverage.
Can I Mix Two Different Hair Dye Colors?
Mixing dyes risks unexpected color results and chemical reactions, so avoid it. Stick to one product and shade for the safest, most predictable color outcome.
Key Points to Remember
Dyeing your hair at home can work well when done carefully. Start with a patch test to avoid surprises. Next, gather your supplies and follow the steps to enjoy your new color safely.